Tasks
GBTEC Work Orchestrator offers you a variety of functions to help you manage the tasks that result from your processes. When using these functions, the following questions may arise.
Where do I see my tasks?
Use the menu to switch to the Tasks section.
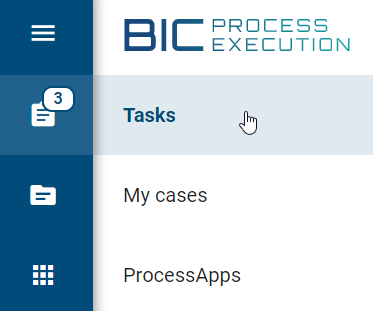
On the right side of the menu entry you can already see how many of your tasks are still open. As soon as you select the menu entry, you will be directed to the My tasks area.
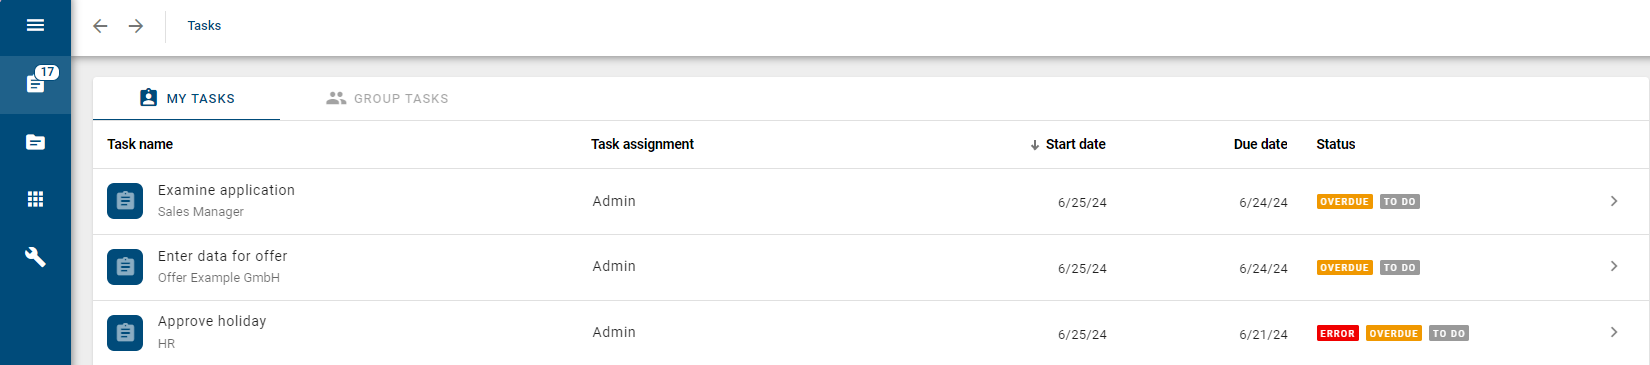
In the main area you will see all tasks assigned to you. Any new task, whether you started it, it was started for you, or an existing task was delegated to you, is displayed at the top of the task list. Below the name of each task you will see the name of the corresponding case. On the same line of each entry, you will see the start date of the case, the status and the due date of the task, if the latter has been defined in GBTEC Process Design. When the status of a task changes, the entry will be updated. The status of each task is displayed with the corresponding labels Error (red), Overdue (orange), To do (gray) and Done (green). Further explanations of the status can be found here.
The chip of a task is based on the icon of the underlying ProcessApp. You can directly navigate to the case list of the ProcessApp by a click on the chip.

A click on the list entry itself leads you to a pop-up window of the task. Alternatively, you can select Navigate to case flow to see the full process flow view.

Your personal task list contains all started tasks assigned to you during a case creation process. This list also contains tasks that have been delegated to you or group tasks which you have claimed. If you created a case and did not specify a responsible for a role, the corresponding tasks will appear in your task list (one by one) as soon as they are started. Moreover, if you have created a case which includes a task without a responsible role, that task will be delegated to you as soon as it is started. This also applies to failed script tasks.
Personal tasks remain part of your task list until they are completed.
Your task list may contain tasks that require manual decisions. These tasks are created by the system if a gateway is not modeled with an automation. Decision tasks are assigned to the case owner.
Note
If you are working on your task list and the status of a task has been changed, it will automatically be displayed in your task list.
Tip
When you open a task from the task list, the URL is automatically updated with the ID of the selected task. You can use this URL to access a specific task directly or share it with others. If the task list is opened using a URL that contains a task ID and the task is available and visible, the corresponding task window opens automatically. Please note that only the task list will be displayed if the linked task is no longer available.
How can I filter and sort the task list?
Filter and Search:
To the right of the main area of the task list, for both your own task list and a ProcessApp’s task list, you will find the filter that allows you to search for and filter specific tasks.
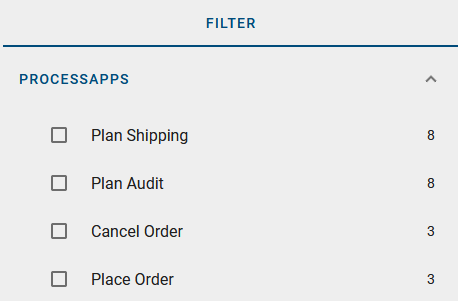
You can filter your own task list by ProcessApps. When you select the ProcessApps filter facet in the right sidebar, all existing ProcessApps are displayed for filtering. Once you select a specific ProcessApp, only its tasks are displayed in the task list.
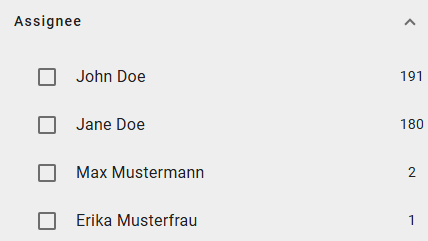
If you are viewing a task list for a specific ProcessApp, you have the option to filter by assigned users. To do so, use the Assignee filter facet available in the right sidebar. Once an assigned user is selected, the task list will display only the tasks assigned to that user.
Additionally, you can filter tasks using predefined date range options. To do so, select the Due Date filter facet in the right sidebar to display the available date ranges. Once a date range is selected, the task list will automatically update to show only those tasks that are due within the specified date range.
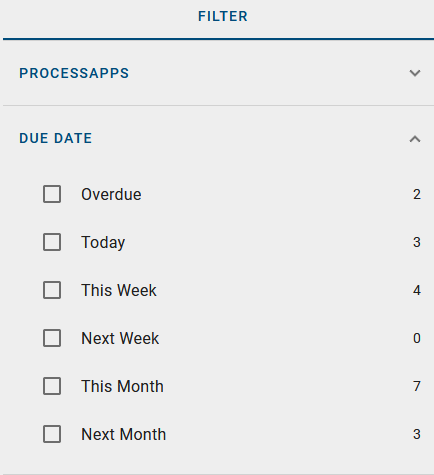
In the Filter panel in the right sidebar, you can also enter a search term in the input field to search for specific tasks.
When you search for a task name, the task list will be updated and you will see all the results of this search. If there are no search results, you will see a corresponding message in the main area. You also have the option to use both “a AND b” and “a OR b” to display all results that contain either “a” and/or “b”.
Note
If you have applied a filter, the search will include the search term and any selected filter options. If you reset the search, you will get results that match the previously selected filter options.
Sort:
When you view the task list in the main area, whether you have applied a filter or not, you have the option to sort the tasks by a specific column. To do this, click on the column header.

If no sorting was applied before, the tasks are sorted in ascending order based on the selected column. At the same time, you will be scrolled to the top of the task list.
If you have already sorted by a column and the tasks are displayed in ascending order, you can change the sorting direction by clicking on the same column heading again. This will reverse the sorting and take you back to the top of the task list.
Hint
Please note that when entering the task list, tasks are sorted by default according to their creation date in ascending order. This serves as the starting point if no specific column sorting has been selected.
Note
Sorting is done for one column at a time.
What does the status of my task mean?
In your personal task list, each task has an entry in the Status column. This status gives you at least one of the following details:
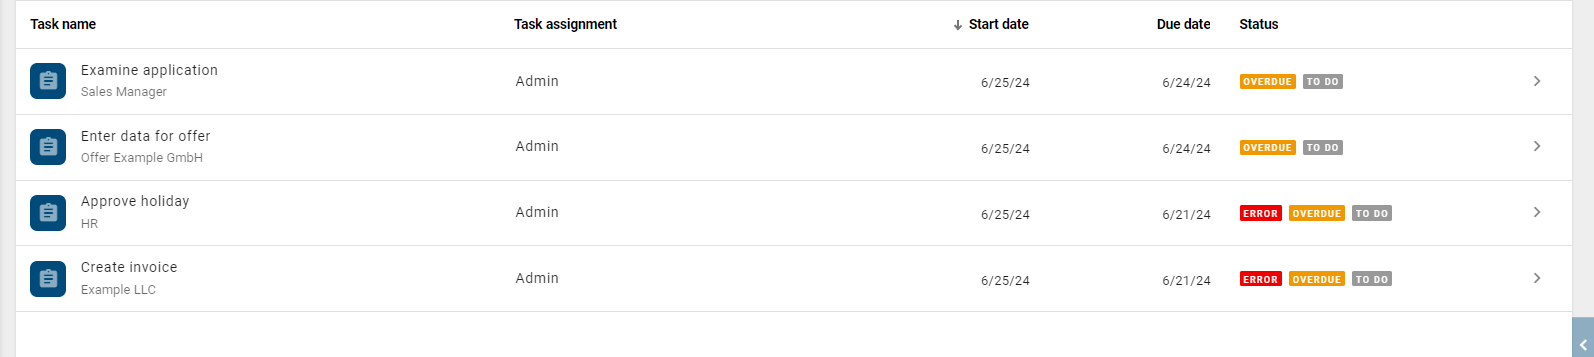
To Do: This task has been started and you have to work on it or delegate it to another user.
In progress: This task has been started and you have started to work on its task form. But the task has not been completed yet.
Done: If the task has been completed by you or another user, the task name is displayed crossed out. The completed task disappears from the list as soon as you leave the task list.
Overdue: The task is past its due date. The urgency is highlighted in red.
Error: The task has an error.
When you are currently in your personal task list and the status of a task changes, the change is automatically displayed. This way you will always have a good overview of which tasks you need to work on.
If there is an error in your task, the entry will be marked with a red error icon on the right side. Next to the error icon, you can navigate to the corresponding case to receive further information about the error (if available).

Hint
If you are in the pop-up window of your task and someone else completes the task, the Complete button will be hidden and you will receive a notification about the completion of the task.
When is my task due?
The due date of a task is displayed in the task list. When the due date has been exceeded, the status becomes Overdue.

Moreover, you can see the due date in the process flow view.

If your task is overdue the due date will be shown in red.

Note
If you want your tasks to have a due date, you have to model it in GBTEC Process Design first. An explanation of how to do this can be found here.
Hint
If you are assigned to a task that is due within one day, you will receive an email notification immediately. Please note that if you are assigned an urgent task that is due within one day and is not completed within one hour of being assigned, you will receive an email reminder of the unfinished task.
How am I notified about my tasks?
GBTEC Work Orchestrator notifies you of upcoming tasks via email. The notification cycle described below includes your personal tasks as well as open group tasks if you are a member of the group and no member has claimed the respective task yet. You will also receive an email notification about which group is responsible for a group task.
As the owner of a task in your case, you will receive a notification in your overdue task reminder emails if the task is overdue. Even if you do not have any overdue tasks, but there are overdue tasks in your cases that are assigned or not assigned to other users or groups, you will still receive the email notification.
Notification cycle
Weekdays:
At the beginning of each week, you will receive an email informing you of tasks that are Overdue, Due today, Upcoming, and New tasks. Upcoming indicates tasks that are due within the current week. Open tasks without a due date are listed separately at the end of the email notifications in the Tasks without due date section. The email also contains a link to GBTEC Work Orchestrator which takes you directly to the corresponding tasks.
On the other weekdays, you will receive an email notifying you of tasks that are Overdue, Due today or New tasks. Tasks that are longer overdue than others are displayed at the top of the list.
Note
If a new task has been assigned to one of your group members or to you within the last 24 hours and has not yet been completed, that task will appear in the New tasks section. However, if the task has been assigned to multiple users, only the most recently assigned user will receive a notification.
Weekends:
You will not receive any task reminder emails on weekends. However, the Friday email will include any tasks that are due on the weekend or Monday.
In the default configuration, if you receive a reminder email regarding the due date or a new task on Monday, you will not receive information about Friday and Saturday.
Note
In order to receive daily reminders also on weekends, you need to update the default configuration. This means that on Saturday and Sunday you can receive reminders for the previous days (Friday and Saturday).
Hint
You are immediately notified by email when a new task is assigned to you that is overdue or due in the next 24 hours.
How are external users informed about due tasks?
GBTEC Work Orchestrator helps you stay on track with your deadlines by sending automated email reminders. This requires that a task with a due date has been assigned to you as an external user. If you do not complete a task on time, you will receive an email reminder containing the details of the task. You will also receive a notification when the due date of a task is approaching, for example at the beginning of the week or on the day it is due, provided the task has not yet been completed.
As long as a task is not marked as completed, email notifications are sent in the following scenarios:
Reminder when the deadline is approaching: You will receive a friendly reminder at the beginning of the week and once more on the due date.
Notification when overdue: As soon as the due date has passed, you will be informed immediately to avoid delays in the process.
Both notification types contain the following details:
Case and task name: For clear assignment of the process.
Due date: The exact deadline for the task.
Direct link: A link that takes you directly to the task form.
Contact person: The responsible case owner for any queries.
Note
Please note that if you have already completed the tasks in the meantime, you may ignore these automatically generated emails.
What is a task form and what is it used for?
In GBTEC Work Orchestrator, a form is generated for each task when the corresponding case is created. This serves as a source of information for a specific task, but also provides you with many options for performing the necessary steps to complete the corresponding task. The information is derived from the information provided in the corresponding diagram in GBTEC Process Design for that task. However, be aware that the task form is not the same as the profile that you know from GBTEC Process Design. The form gives you much more. For example, you can see the responsible users and the attributes of the task, or you can access its input and output documents. To give you a better idea of what the task form is, the following explains a few of the options available and how you can access the form.
You can access your own task form in your task list once the task has been started. Simply select the desired task there and the form will open as a pop-up window.
To access the form of any task, you must first navigate to the corresponding ProcessApp and select the desired case. The task form will open in the right sidebar. If you are using the mobile view of the application, the task form is automatically displayed after selecting the task.
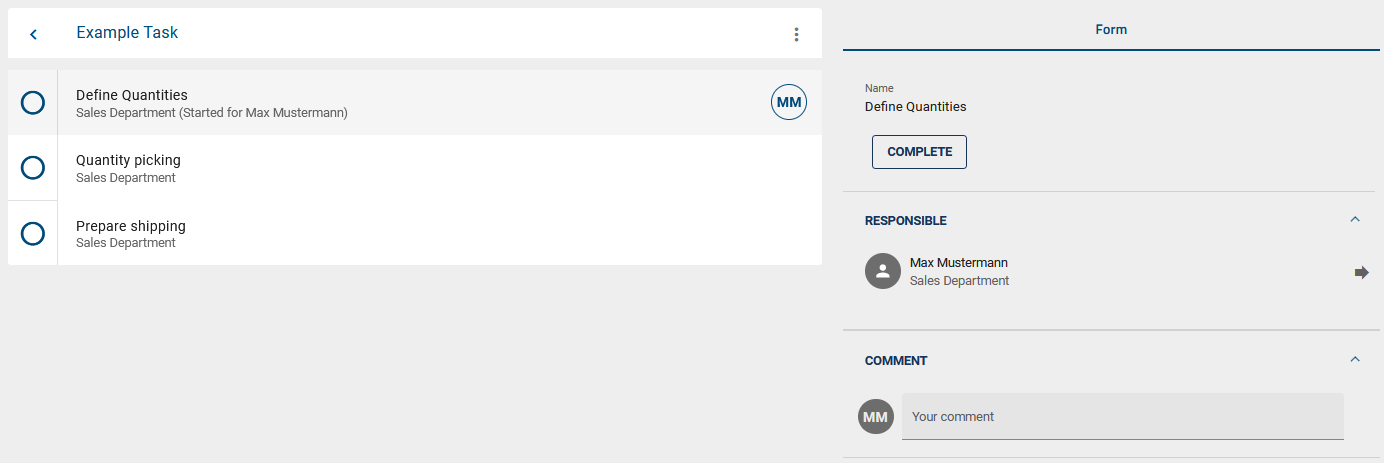
Here you will find the name of the task, the responsible user or the responsible roles, a description and other attributes of the task. This information is based on the modeled task and its properties in the respective diagram of GBTEC Process Design.
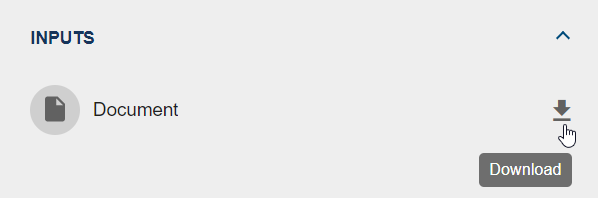
In addition to the information that you can get, it also provides you with some functions. For example, you can download input documents or upload output documents for the task.
You can also access document services and other web applications or websites by selecting individual attachments. For example, depending on the hyperlink, if it is a link to a document service, the download of a document will be started automatically. If a hyperlink is activated which contains a URL to a website, the website will automatically open in a new browser window.

You can also make use of decision tables within the form. This provides your users with the decision making support they need to complete their task.
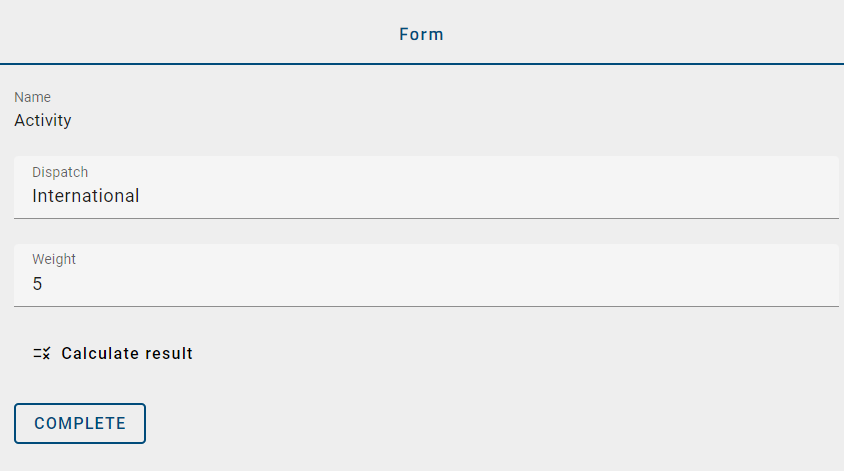
You have the option of saving the decision table data entered in order to check the result before completing the task. To do this, click on the Calculate result button. If the result is “null”, you will receive a message indicating that the result is empty.
In addition to these functions and information, you can also make decisions and (if you have the permission) delegate tasks within a task form.

Most of the form fields in the task form are automatically obtained from the information derived from your diagram in GBTEC Process Design. In addition, additional form fields can be added to a user task form using the form editor. The responsible for the task can fill in these form fields when executing the case.
Note
When you edit a task form and your session is about to expire, your inputs are automatically saved as a draft. For more information, see here.
How can I view the input and output values of a task?
As a user with the ProcessApp Administrator role, you can view the input and output values of a task. This applies to all tasks, not just your own.
To do this, open the ProcessApps menu item in the left menu bar and open a process. A list of all running cases of this process then opens. Click a running case to navigate to the process execution view.
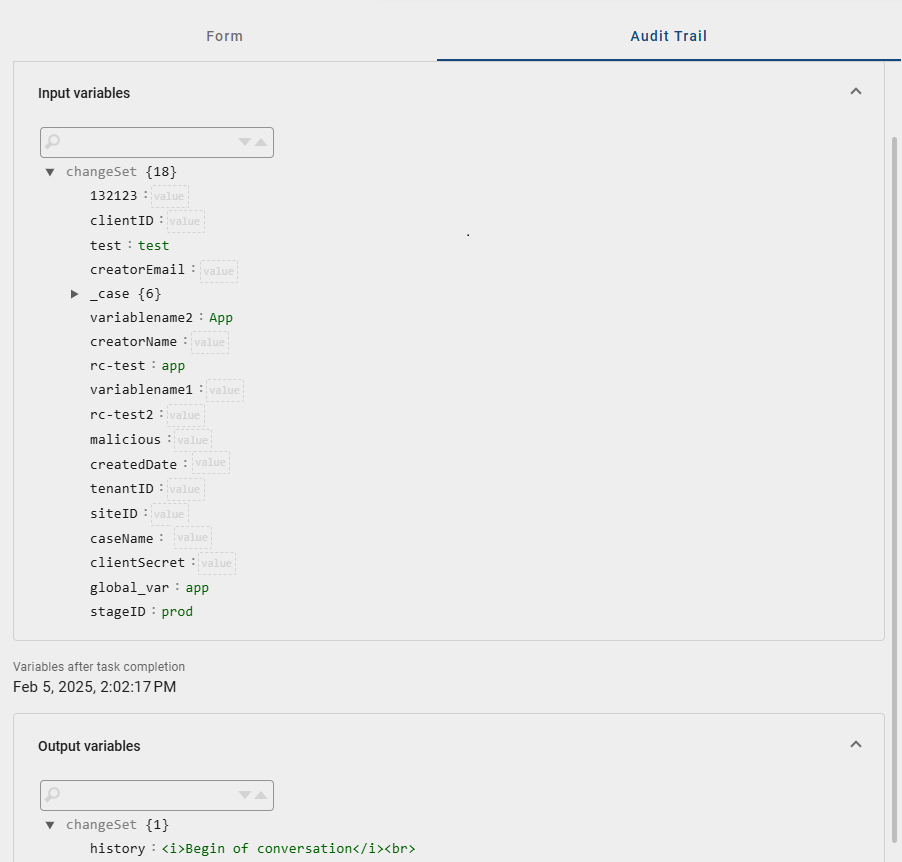
Switch to the Audit Trail panel in the right sidebar. There you see which input values were used for the task and which output values were created or updated by the task.
Hint
You can search for specific variables in the Input variables and Output variables sections using the search fields.
The displayed values depend on the status of the task. If the task has already been started or executed, the used input values are displayed. For the output values, you see the current state of the available variables or the values that were created or updated by the task.
If the task has not yet been executed or no input or output values are configured, no values are displayed.
Note
When a manual task is being edited, the original input values in the Audit Trail panel remain unchanged. Changes made during editing do not affect these values. The original input mapping is also retained after the task is completed.
How do I start a task?
In GBTEC Work Orchestrator, tasks are usually started automatically as soon as the corresponding step in the process flow is reached. This means that if a task is in the first place in the process flow, it will be automatically started as soon as the case is created.
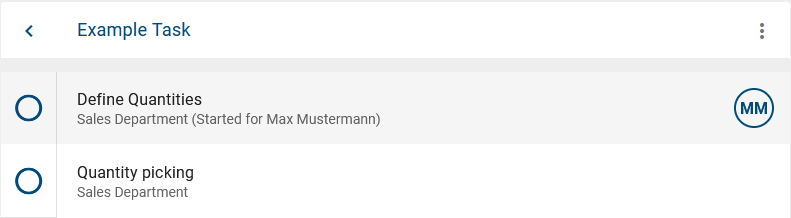
All subsequent tasks are automatically started as soon as the direct predecessor task in the sequence is completed.
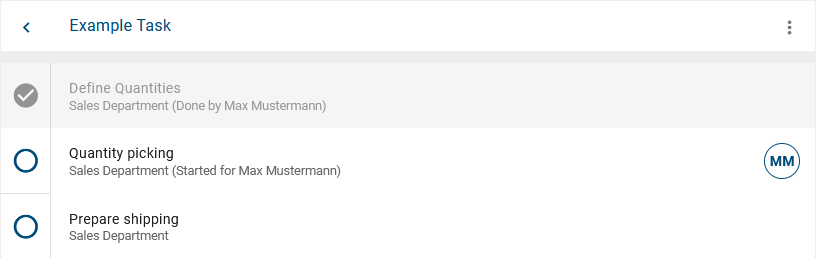
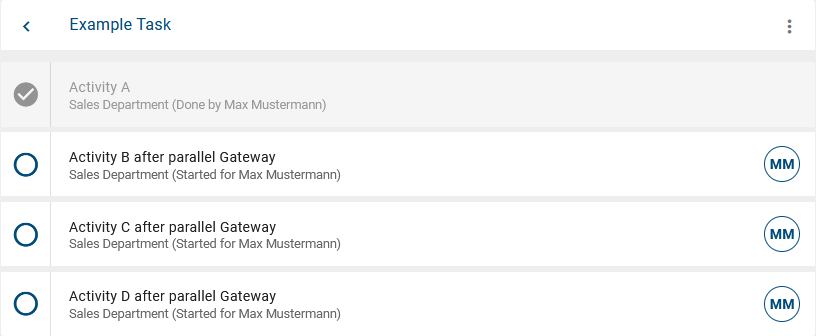
In this way, multiple tasks can be started automatically at the same time, for example, by using a parallel gateway. When the task in front of this gateway is completed, all tasks directly following it are started at the same time.
Depending on the definition of your process, the first task of a process may have to be started manually because the user can decide which task to start first. Note, however, that this is only possible if the Allow users to start tasks manually checkbox is selected. As a ProcessApp Administrator, you can start any task manually. Tasks are displayed and can be started in the process flow view of a case as soon as the first task of its segment is started, which means, when the segment is active.
Note
A segment of the process flow is defined by its corresponding diagram and consists of a sequence of activities (the tasks) between gateways and events.
To start a task manually, navigate in the process flow view to a task for which you or another user has role responsibility. You can identify this by the user name displayed in small letters below the task. If you select the task entry and the task segment is active, you will see the option Start task manually in the task form.
In this example, in the case “A new offer”, you cannot manually start the “Verify order” task until the case has progressed to the corresponding segment:
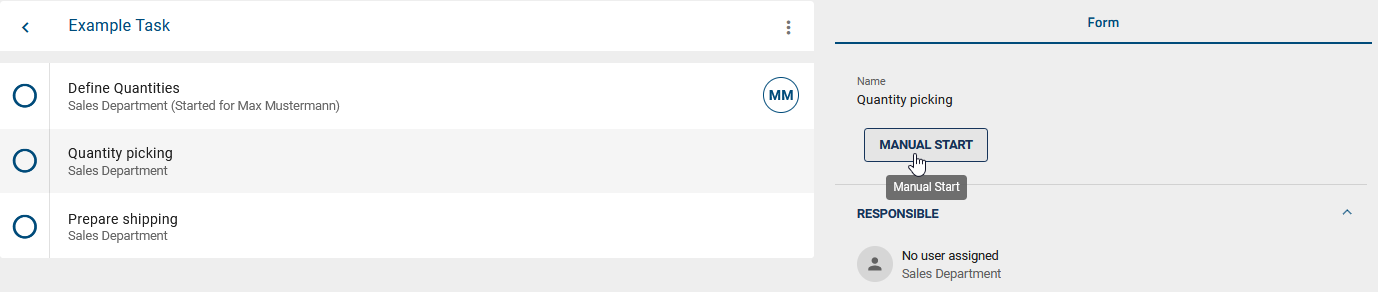
The task is started manually as soon as this function is activated. After the manual start, the chip is filled with the user’s initials.
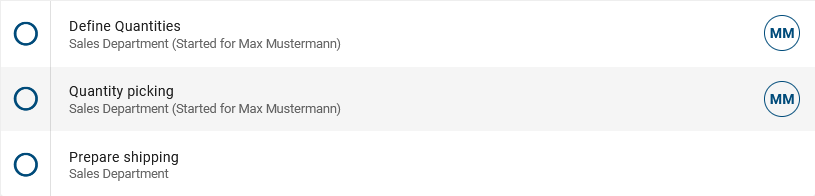
Now all users can directly see that this task in this case has been started. The task also appears in the task list of the responsible user, who can now work on it.
Hint
When a group is assigned to a role and the first task of that role is started, the group task must be claimed by a group member. Subsequent tasks of that role are automatically assigned to that member (as soon as they are started). Further information about this rule can be found here.
How can I delegate a task?
If a task is assigned to you and has already been started, you can delegate it to another user. As a ProcessApp Administrator or as a case owner, you can delegate all started tasks, whether they are owned by you or by other users. The delegation option is also displayed to ProcessApp Administrators and case owners when a task is started but not yet assigned to a user. A delegation only affects the respective task. All other tasks keep the assignment that was defined when the case was created.
In your task list, navigate to the pending task that you want to delegate. When you click on the task, the task form opens as a pop-up window. Within the form, you will find the Responsible section. Next to your username, you can select the Delegate task function on the right side.
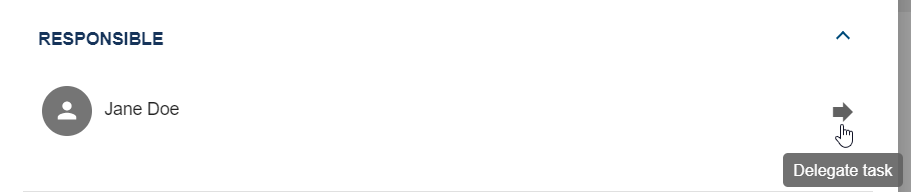
Alternatively, you can find this function in the form of the started task in the process flow view. ProcessApp Administrators and case owners can delegate the tasks of other users this way.
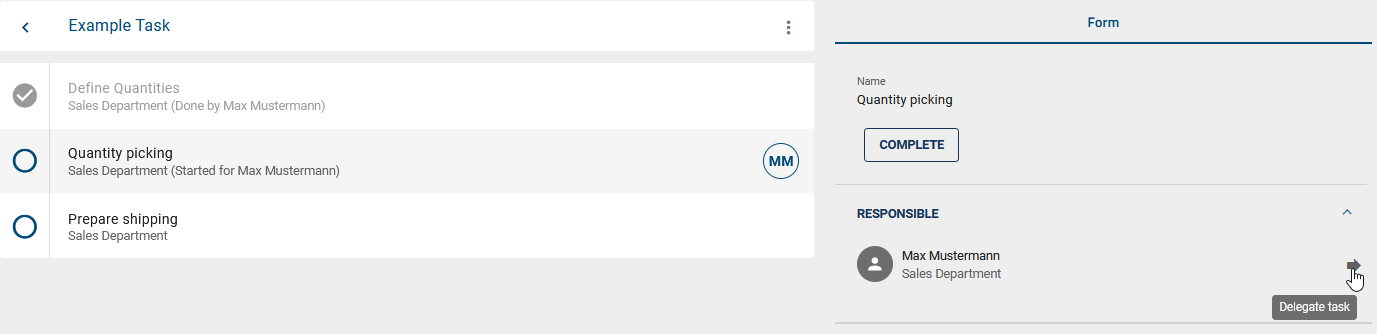
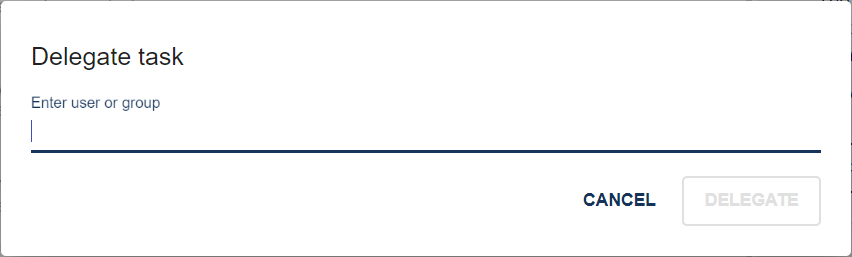
When you use this function, a window appears where you can then search for a user (group) using the input field. You can then select a search result from the list of suggestions.
Your selection will be displayed as a chip. If you have accidentally not made the desired selection, you can remove the chip via the x, or select and delete it on the desktop with the backspace key. In general, you can select all users and user groups for delegation. If you want to Cancel the delegation, select the corresponding option.
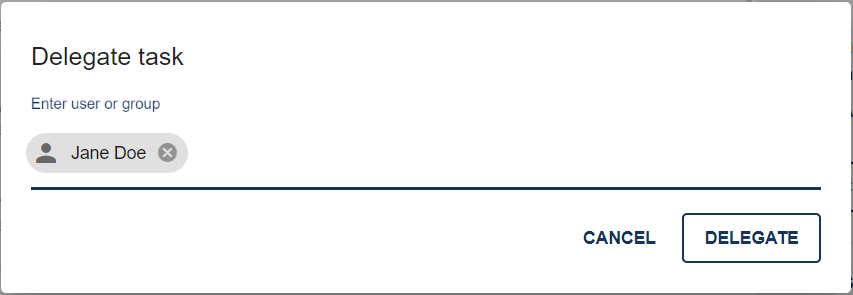
Otherwise, click Delegate to complete the delegation. The window closes and the task no longer appears in your task list. The initials of the newly assigned user (group) will now appear in the process flow view of the relevant case. In addition, the task appears in the task list of the affected users.
How do I complete a task?
In general, a task can be completed after it has been started and assigned to a user. You can see your own started tasks in “Tasks”. In GBTEC Work Orchestrator, tasks are completed using the task form. The form provides more information and links to applications relevant to your task. You may also be able to upload or download files or enter other data in a user task. There are two ways to find the task form. The pop-up window allows you to complete single tasks more quickly because you do not need to open the corresponding process flow view of each task.
In a pop-up window:
Navigate to your tasks. There you will find your own tasks that are already started. Click on the name of a task to open it in a pop-up window and see the task form. At the top of the form you see an overview of the task. This helps you check that you are working on the correct task. The header shows the case name and ProcessApp, the responsible user, the start date, the due date, and the current status. At the bottom of the form you will find a comment field. There you can enter a note before you complete the task using the complete button.
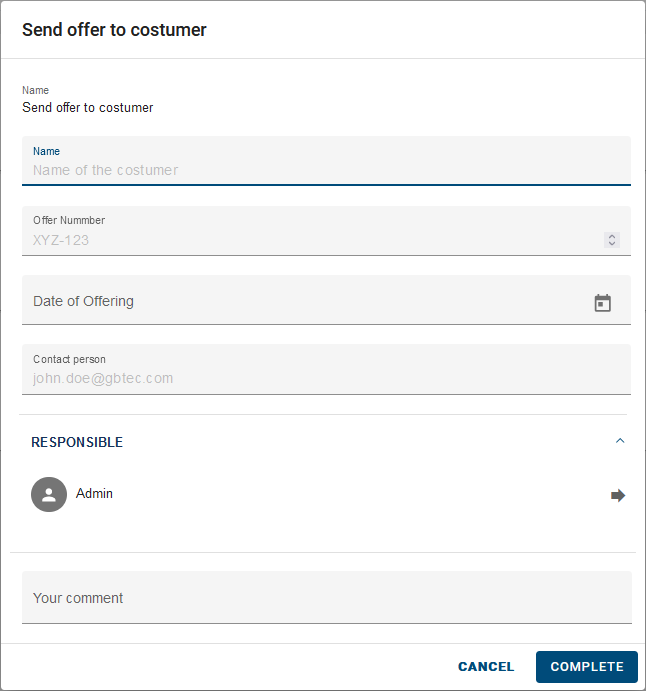
When you complete a task in the pop-up window, the pop-up window stays open. You are automatically redirected to the next task in the same case. If the next task is not yet available, a waiting screen is briefly displayed. As soon as the next task is ready, it is displayed directly in the pop-up window. If the next task is assigned to a different user or user group, the pop-up window is closed after completing the current task.
Hint
The possibility to complete a call activity is only available to the user who has the role of the ProcessApp Administrator. If you are the owner of a task but do not have the ProcessApp Administrator role, you cannot complete the task manually.
In a process flow view:
Alternatively, you have the possibility to open the process flow view. To do so, select the Navigate to case flow button. The affected task will be highlighted in the process flow with a filled chip with your initials. If you are using the mobile view of GBTEC Work Orchestrator, the form will open when you select the task. In the desktop view, the form is located in the right sidebar.
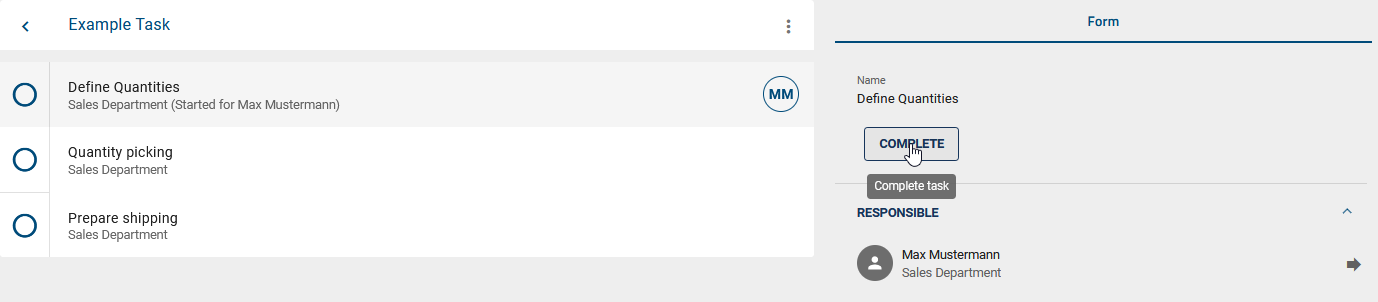
In the form of your task, you will find a comment field where you can enter a comment before completing the task via the Complete button.
Hint
Please note that an interactive error banner appears as soon as the task form is incomplete or contains invalid entries. It checks both the standard validation rules and your custom defined validation rules. This error banner will automatically disappear once all fields are filled in correctly and the Complete button is clicked again.
After completing the task, a check mark will appear in the chip of the task and the task’s text will turn gray, which will be directly visible to all users. In the form, you can see the comment that may have been submitted. The task is no longer listed in your tasks. This cannot be undone.
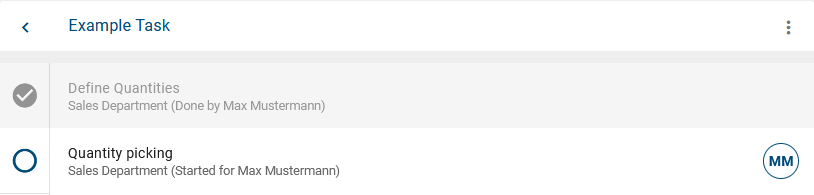
If a task is started but no user is assigned, it cannot be completed. The hint No user assigned will be shown in the Responsible section of the form. In this case, ProcessApp Administrators can delegate the task to a user (group). This user (group) can then complete the task as described above.
When a task is completed, the next task in the sequence is automatically started and thus appears in the task list of the responsible user. This happens if the next task is a clear successor or the following activity. If the following task has already been completed, the next task in the sequence is started. When the last task of a case has been completed, the case will be finished.
Hint
Please note the difference between a role being responsible for a task and an explicit user being assigned to the task. A user can be assigned to a role during the case creation or later in the case details. In this case, the user is automatically assigned to a task of the role when the task is started. If the responsible role of a task cannot be assigned to a user when the task is started, the task cannot be completed.
Tip
As a ProcessApp Administrator, you can complete every task by delegating it to yourself and then completing it as described above.
Note
A task started without an assigned user can occur in cases started by the system. These cases have no owner who would be responsible if no other role responsibility has been defined.
Warning
Please note that only users with the roles ProcessApp User or ProcessApp Participant can work on tasks. If a task is assigned to you and you do not have one of these roles, you will not be able to perform any actions for this task. You will then receive a notification stating that you do not have the required role. If you open GBTEC Work Orchestrator without the user role ProcessApp User or ProcessApp Participant and you have been assigned tasks, you can view them in your task list. In this case, however, you will be informed in the task forms that you do not have the necessary role for processing. If no tasks are assigned to you, the menu item Tasks will not be available.
Tip
When you open a task from the task list, the URL is automatically updated with the ID of the selected task. You can use this URL to access a specific task directly or share it with others. If the task list is opened using a URL that contains a task ID and the task is available and visible, the corresponding task window opens automatically. Please note that only the task list will be displayed if the linked task is no longer available.
How are inputs in a task form saved when the session expires?
As a user with the ProcessApp Creator, ProcessApp User, or ProcessApp Participant user role, you can edit tasks. If your session is about to expire while doing so, your inputs in the task form are automatically saved as a draft. This is useful, for example, if you leave your desk briefly and your session expires in the meantime.
The most recently entered values of all fields are saved. The task remains uncompleted. You can continue editing the task after logging in again.
When you log in again after the session has expired and open the same task form, the latest auto-saved draft is loaded. You can then continue your inputs.
Hint
Please note that the automatic saving is only triggered if you are actively working on the form and have already entered data. Otherwise, no inputs are automatically saved.
How can I add comments to tasks?
If a task has been assigned to you, you can add comments to it once it has been started or completed. Comments help you document additional information, notes, or questions directly within a task.
Open the Tasks menu item in the left menu bar and select the task you want to comment on. Then open the Comments tab in the right sidebar.

Enter your comment in the input field and click the button to the right of the input field to send the comment. The comment is then saved and displayed directly in the Comments tab. The author and creation time are displayed for each comment.
Alternatively, you can open a task through a ProcessApp. To do this, select the ProcessApps menu item in the left menu bar and open the desired ProcessApp. Then switch to the Tasks tab and select the desired task. In the opened task, click the Comments tab to view existing comments and add new ones.

Note
Comments can only be added to started or completed tasks. For tasks that have not been started yet, the Comments tab is disabled. Once the task has been started, comments can be added.
Note
Comments are displayed in chronological order. Older comments are displayed before newer comments.
If a task contains comments, a comment icon with the number of existing comments is displayed on the task. If you select the comment icon, the Comments tab is displayed.

If no comments exist for the task, no comment icon is displayed.
Where can I see comments of completed tasks?
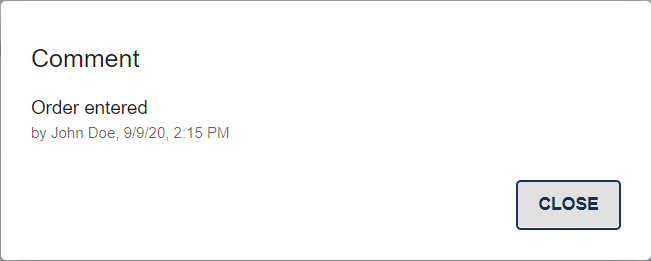
When completing a task, users can add additional comments. These comments are then visible to all users. To view a comment, first navigate to the process flow view of a running case. When a task is completed, you will see a Show comments icon to the right of the entry.

Clicking on this button opens the comment window. In addition to the comment itself, this window displays the author of the comment and the comment timestamp. The comment is in read-only mode and cannot be edited. Click on Close to return to the original view.
Where can I find my group tasks?
Open GBTEC Work Orchestrator and select the Tasks menu item in the left menu bar. Then switch to the Group tasks tab. There, you can find all tasks that are assigned to a user group you are a member of.

The list shows all started group tasks. Under the name of each task, you can see the corresponding case, the creation time, and the due date of the task, if it has been maintained in GBTEC Process Design. You can also see whether a group task has already been claimed. In this case, the chip to the right of the entry shows the initials of the person who claimed the task.
Hint
Group tasks can also be created by multiple instance activities. If a user group is used as an assignment, either a group task or a separate task for each group member can be created, depending on the configuration.

After a group task has been completed, it is removed from the task lists of all involved users.
How can I claim a group task?
To claim a group task, either open your group tasks via the Tasks menu item, or navigate directly to the corresponding case.
If a group task has already been claimed by a group member, this person is displayed as the responsible user of the task in the process flow view of the case. In the list of your group tasks, a chip at the task shows the initials of this person.

Hint
Group tasks from multiple instance activities can only be claimed if the corresponding user group has not been split into individual group members.
Group tasks that can still be claimed have a context menu to the right of the entry.

Open the context menu and select the Claim task option. After you have claimed the task, your initials are displayed next to the entry and the context menu disappears. From this point on, you can also find the task in your personal task list.
If the group task has not yet been claimed by any member, you can also claim the task directly in the corresponding case. To do this, open the task form in the process flow view and click the Claim task button.

If you complete a group task and another group task with the same role responsibility is started later in the same case, this task is assigned to you automatically. You do not have to claim the task manually again.
The following example shows how additional group tasks are assigned automatically. The group “Team Development” is responsible for the roles “Software developer” and “Software tester” in a case. You claim and complete a group task for the “Software developer” role. If another group task with the same role is started later, this task is assigned to you automatically. If, however, a group task for the “Software tester” role is started, this task still has to be claimed or is assigned to the user who previously completed a group task as a software tester.
Alternatively, you can assign group tasks to yourself. To do this, open the Tasks menu item in the left menu bar to access your task list. Switch to the Group tasks tab. There, you can view the available group tasks and assign a suitable task to yourself. Users with the ProcessApp Administrator or ProcessApp Analyst user role can also assign group tasks to themselves in the corresponding task list of a case.
Tasks that have not yet been assigned to a user contain the Assign to me link. If you select this link, the task is assigned to you and the list is updated. If you cannot assign a task to yourself, the Assign to me link is either not displayed or shown as disabled. In that case, move the mouse pointer over the button to see the Self-assignment not possible message.

Note
If you claim a group task and delegate it to another user, this can affect later group tasks. If this user completes the delegated task, the next task of your group in this case is also assigned to this user when it is started.
How can I edit a task as an external user?
If you have the role of an external user, you can edit a task assigned to you in the task form to provide the required information.
Once a task is started and your email address is stored in the process as an external user identifier, you will receive an email notifying you of the pending task.
This email will contain a link to a task form where you should complete all mandatory and/or optional fields. By clicking on Submit, the task form will be successfully submitted and you should receive a confirmation message. Once the task form has been submitted, you will no longer be able to edit the task. If you click the link again, you will only be able to view the task form in read-only mode.
Hint
Please note that the link is only valid as long as the task is assigned to you as an external user.
Hint
It is not possible to delegate the task to another external user.
Hint
Please note that signing tasks cannot be performed by external users.
Hint
To be able to edit a task as an external user, a task must first be created for an external user.
How can I make a manual decision task for a gateway?
If a gateway is not modeled with an automation, the case owner receives a task to decide which path to execute.
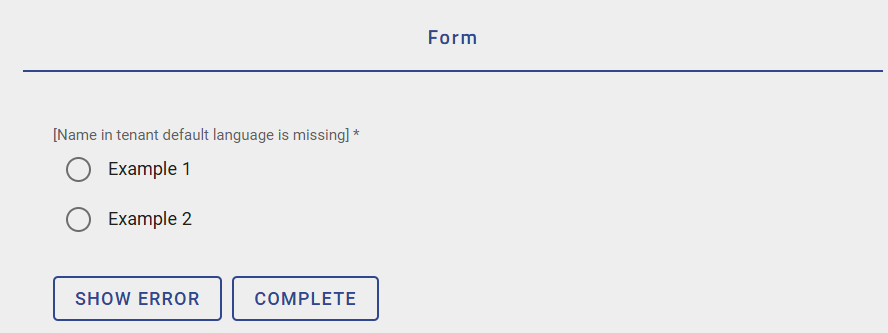
As a case owner, you will find the manual decision task in your task list once the previous task has been completed. Select this task to open its pop-up window. Based on the options displayed in the window, you can see whether your decision is based on an Exclusive Or or an Inclusive Or gateway. Exclusive Or gateways only allow you to select one decision option.
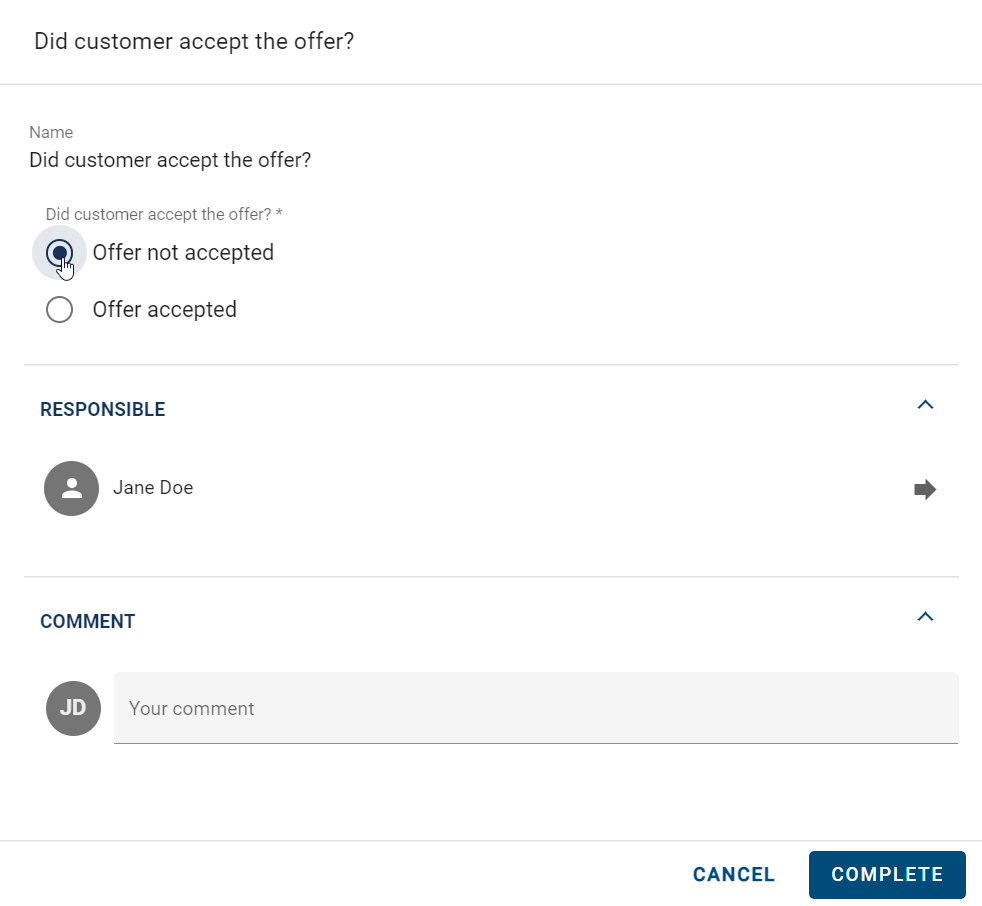
If you use the Exclusive Gateway and do not define a fixed value to determine which path in the diagram is taken, the decision will be made manually. In this case, you can choose which of the available paths to follow.
A manual decision can also be made if a fixed value is specified but an alternative or unanticipated value is provided during execution.
Note
Please note that continuing with an unexpected or invalid value may result in unpredictable behavior or errors during execution.
Note
Please note that manual selection of a path for deviating or missing values is only possible from version 8.1.0 onwards.
Inclusive Or gateways, on the other hand, have checkboxes for the decision options that allow multiple selections.

Select one or more options (depending on the type of gateway) and confirm your selection with the Complete button.
Warning
If an activity is modeled with one or more outgoing sequence flows without a gateway, the decision must be automated via expressions. Otherwise, undesired behavior may occur. Please find an example here.
How can I use attachments in GBTEC Work Orchestrator?
In GBTEC Work Orchestrator, you can use attachments that have been defined on the corresponding objects in GBTEC Process Design. You can use all attachment types that are available for the “Attachment (URL)” attribute in GBTEC Process Design. In GBTEC Work Orchestrator, these are displayed in various places in the corresponding task form.
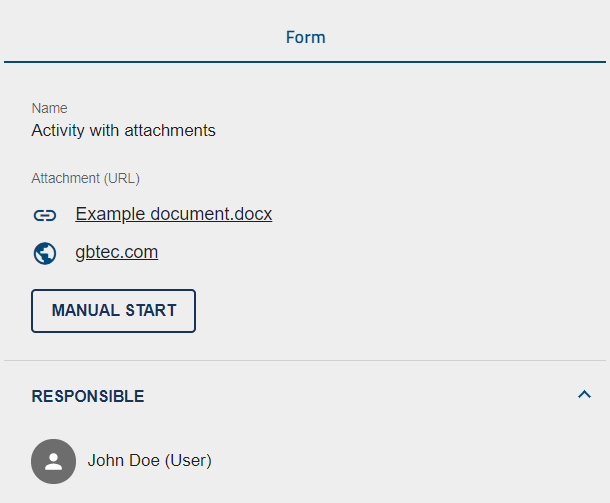
If the Attachment (URL) attribute has been defined for an activity, you will find these attachments in GBTEC Work Orchestrator in the corresponding task form under Attachment (URL).
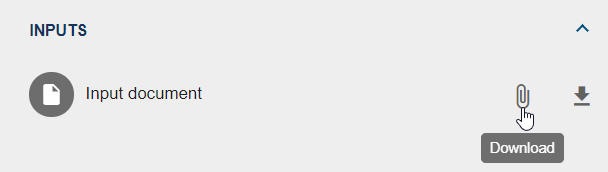
If you have defined an attachment in the attributes of a document object that represents an input or output of an activity, you will find the attachment in the Inputs or Outputs section of the corresponding task form. The attachment is represented by a paperclip icon. You can access the attachment by clicking the paperclip icon.
How can I upload or download files to my tasks?
If files have been modeled in your diagram in GBTEC Process Design, you can make use of them in GBTEC Work Orchestrator to upload or download documents in the tasks of your case. This allows you to provide important documents for the process flow. You can also use these files for a REST call. They are always assigned to individual tasks in your case. The following section explains in more detail how to use these functions.
Outputs
If an output document has been modeled for an activity in GBTEC Process Design, you will find a corresponding entry in your task form in GBTEC Work Orchestrator. In order to upload a document, you have to be the responsible of the relevant task and the task must already be started. If this is the case, you can use the Upload file function to select and upload the desired document via a corresponding dialog.
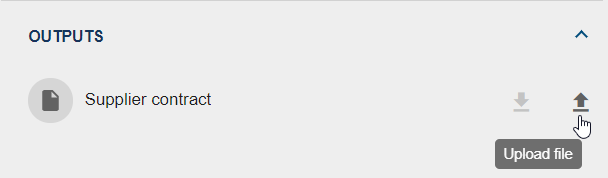
Once you have successfully uploaded a document, the document icon on the left side of the entry will turn white to indicate that the upload process is complete. Documents that have been uploaded as output can be downloaded at any time using the Download function.
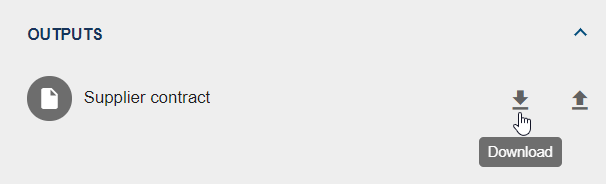
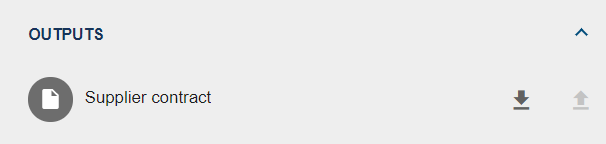
If the Upload file function is used when a document has already been uploaded, that document will be replaced by the newly selected document. This means that only one file can be provided per output entry. Once the corresponding task is completed, the Upload file function is grayed out and no more files can be uploaded for the relevant output.
Inputs
As with outputs, you will find inputs in the corresponding task form. If an input exists for a task, you can access the relevant document by using the Download function.
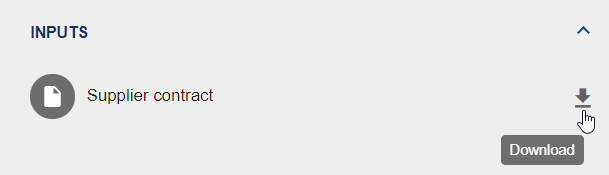
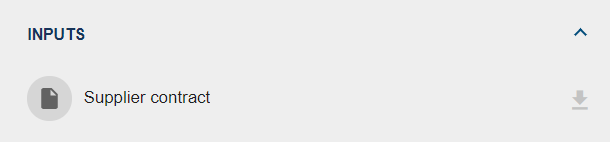
All inputs are the result of outputs from previously processed tasks in the process flow. You can only download the document if the task containing the output has been successfully completed and the task containing the input has been started. If this is not the case, or if no file has been uploaded for the input, the Download function is grayed out and cannot be used.
Note
You can use the following objects to upload or download files: Document, Business object, Norm, and Data store.
Tip
Attachments that have already been added to the document object in GBTEC Process Design can also be accessed via the corresponding input/output entries.
How can I delete an output document for a task?
When an output document has been modeled for an activity in GBTEC Process Design, you will find a corresponding entry in the task form in GBTEC Work Orchestrator. To be able to upload a document, you must be responsible for the corresponding task and it must have already been started. Once a document has been successfully uploaded, you will have the option to delete the output document directly from the task form in GBTEC Work Orchestrator.
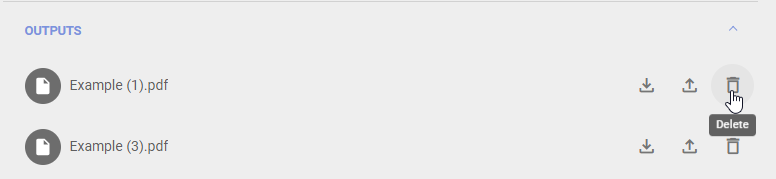
If you are in a task form in GBTEC Work Orchestrator and a corresponding output field for a file is configured, you can delete the previously uploaded output document using the delete icon on the right side of the field. To do so, simply click the displayed icon.
Hint
Please note that the file is removed immediately after clicking on the delete icon and no additional confirmation dialog is displayed.
How do I work with decision tables?
If a task in GBTEC Process Design is of the type “Business Rule”, the defined decision table will also be found in the task form in GBTEC Work Orchestrator.
In the processes, you will see the Input variables in the form of input fields in the form of the corresponding task. To use the input fields within the decision table, the task must be started. Once you have filled in all the input fields with valid data, you can click on the Calculate result button and check the result before completing the task. If the result is “null”, you will receive a message indicating that the result is empty.
For each of your input fields, there is a process variable that contains the value of your input. In addition to the information you can get from the table, you can use the individual data in other ways, such as automated decisions.
If the value of the process variable is defined before the Business Rule task is reached, the corresponding input field is automatically filled with the value of the process variable. For example, REST calls can be used to automatically provide information that is then used in a decision table. If you manually change the input fields in such a case, the corresponding value of the case’s process variable is also changed.
For Business Rule tasks where all input fields are automatically filled in, the output of the decision table is determined and the task is then automatically completed.
Tip
Within the default case, you can also make use of the decision tables without starting the corresponding tasks. This allows you to access these tables without the need for a specific case.
Note
Be aware that the output value may be different if you use the COLLECT hit policy. This depends on whether the hit policy was selected with or without aggregation. In case the COLLECT hit policy was selected with aggregation, the output value is equal to the result out of the matching rules’ output values. The result can be the greatest matching value (MAX), the minimum (MIN), the number of matching rules (COUNT), or all the matching values combined (SUM). Otherwise, the value of the output variable is a comma-separated string with all the results for the matching rules if the COLLECT hit policy was selected without aggregation.
How can I be notified when one of my tasks is started independently of me?
In GBTEC Work Orchestrator, you have the option to be notified every time one of your tasks is started independently of you. This means that if one of your tasks is started automatically or by another user, you will receive a push notification.

When you then select this, you will be taken directly to the corresponding case and the corresponding task will be highlighted with a short visual animation. In order to use this function, you must first configure some settings on your device. Since these settings differ depending on whether you are using a mobile device or the desktop version, both types are discussed separately below.
Desktop version:
If you are using the desktop version, you will need to allow push notifications in your browser when using the GBTEC Work Orchestrator Application. Depending on the browser you are using, you will find this setting in a different location in your browser. The documentation on how to find this setting is linked below for the three most common browsers.
Microsoft Edge (Privacy -> Change website permissions)
Mobile version:
If you have a mobile device and you are using the application through your device’s browser, you will also need to allow notifications. Please refer to the help of your respective application/browser to find out how you can activate the notifications.
In case you have GBTEC Work Orchestrator installed on your mobile device, you will receive notifications about your started tasks even if your application is not open. In this case, your application may need to be authorized first to send notifications. The documentation on how to find this setting is linked below for the two most common operating systems.
Hint
If you are using a desktop computer and the PWA has been installed, you will only receive the messages when the application is open.
How do I identify signature tasks in my task list?
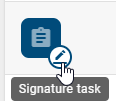
If you check your task list and a task is configured as a signature task, you can see this directly in the task list. This is indicated by a tooltip that appears when you hover over the task icon.
How do I work with a signature task?
There are tasks that are marked as signature tasks. To successfully complete these tasks, you need to authenticate yourself. To authenticate, you will need to log in again. After a successful login, you will be redirected back to your task.
Until authentication is successful, the task cannot be marked as completed. If you are assigned to more than one signature task, you need to authenticate for each task individually.
Note
If you are working on a signature task while being in the pop-up window, the pop-up will automatically close after you authenticate.
How can I send the email of a send task?
In GBTEC Process Design, tasks typed as Send can be linked to sending an email in GBTEC Work Orchestrator. This section explains how to create a template for these tasks.
When a send task is assigned to you, navigate to the process flow view of the case by a click on the task. The task form for that step contains an email preview provided by template you created. If you have specified a user group as the recipient, it will be displayed as the recipient.
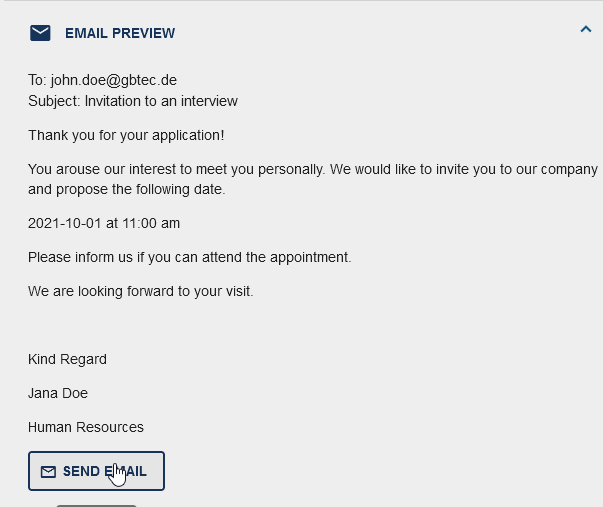
If process variables have been included in the template, they will be replaced with the actual values defined in the case. The form can display an Input section. Here you can upload a file that will be automatically attached to the email.
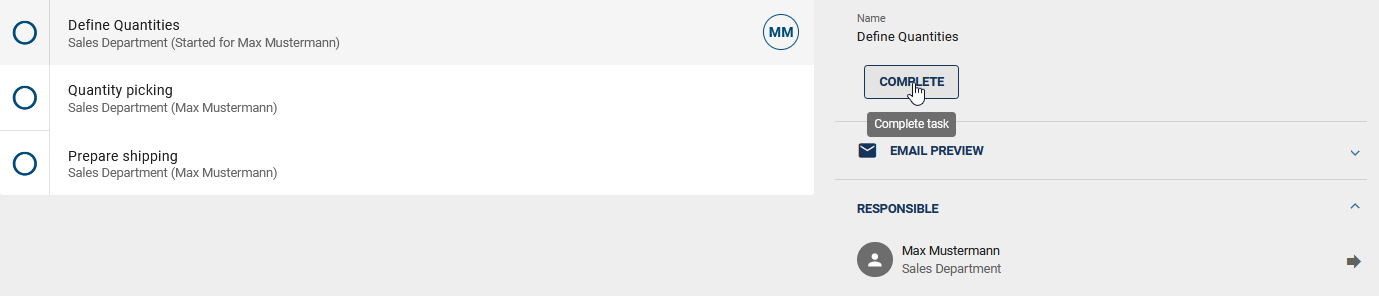
Click Send Email to open a new email in your email client that looks like the preview. You can edit the email (if necessary) and send it from there. You can then complete your task by clicking Complete in the form.
Note
If the Send mail automatically option is activated, the task will start automatically. The email is sent and the task is set to done. If an error occurs during automatic sending you will receive an error message in the process flow view. Here you have the option to send the email manually.
Note
If an automatic send task is defined in the development or test environment of a process, only the creator of the case receives an automatic email when it is executed. However, the configured recipients are displayed in the email preview. When the case is executed in a production environment, all configured recipients receive the automatically sent email.
Hint
If you send an email manually as described above, you should check the formatting in your email client. The preview in GBTEC Work Orchestrator will show the email formatted as defined in the editor, but some settings may be lost when it is converted to the text in your client. Indentations and tables will be lost and bulleted lists will be marked with the character “*” instead. Automatically sent emails do not lose their formatting. They are formatted according to the html definition in the template editor.
How can I execute a script task?
Script tasks are automated and completed by the system when the process is executed. If an error occurs during execution, the task is marked with an error. You can recognize this by a red chip containing an exclamation mark to the right of the task. In such cases, the task is assigned to the responsible role and appears in the task list of the corresponding user. If the role has not been modeled or set, the task is assigned to the case owner and appears in their task list.

In the process flow view, you can click the Show error button in the right sidebar after selecting the failed task to display the system’s error message.

A dialog will then open displaying the system error message. Both the error and the complete execution sequence are displayed. This allows you to determine exactly where and why the error occurred. You can also copy the execution sequence to the clipboard using the button in the top right corner.
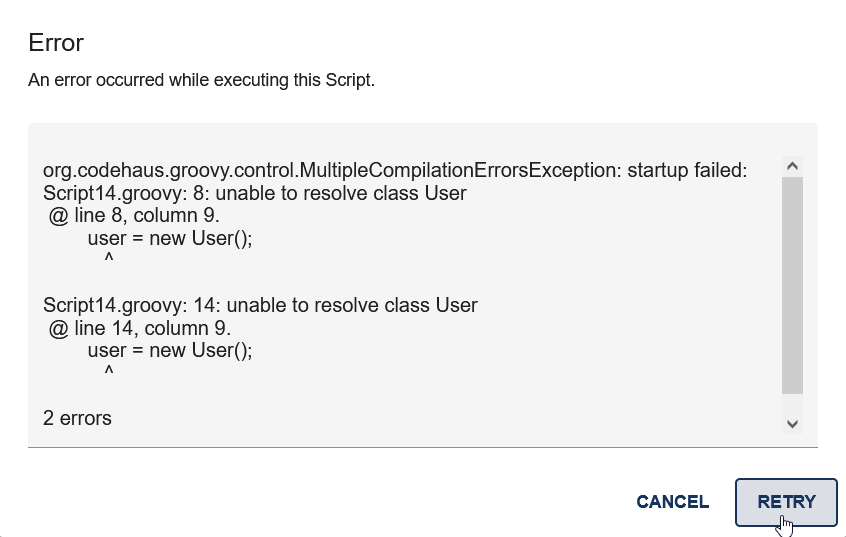
Failed script tasks can be manually restarted or completed at any time. To restart a failed script task, click the Retry button in the error dialog of the respective task. To close the dialog without taking any action, click the Cancel button.
As a ProcessApp Creator, you also have the option of saving the data entered in order to check the result before completing the task. To do this, click on the Test your script button.

If the script has been executed successfully you will receive the result as key-value pairs in JSON format.
Note
Please note that outputs larger than 64 KB will not be displayed.
Alternatively, you can manually complete the task by clicking the equivalent button.
Warning
Please note that automated script tasks are automatically terminated after a specified period of time to ensure the stability and performance of the system. In multi-tenant cloud environments, this time limit is 30 seconds by default. In private cloud installations and on-premise systems, the time limit is 2 minutes. If the permitted runtime is exceeded, the task in question is stopped immediately. In this case, an error message appears stating that the maximum runtime has been exceeded. As with other errors, the task is then assigned to the next responsible user and can be restarted by authorized users.
Note
If an automatically executed task in GBTEC Work Orchestrator fails and receives the status Error, the assigned user is immediately notified by e-mail. The e-mail informs the user that the automatic task could not be completed successfully. If the task is assigned to a group, the first group member in the priority order receives the notification. If another execution attempt is made and the task fails again, no further e-mail is sent, instead an error notification appears at the lower right of the screen.
How do I work with a call activity task?
If a task in your case is a call activity, a new case is created automatically for the called process. As the responsible user of the call activity, you become the case owner of the sub case. If a group is responsible for the task, the case owner of the main case becomes the case owner of the sub case instead. The sub case is named after the call activity with the addition “- name of the main case”.
If the call activity is synchronous, the main case is blocked. It remains blocked while you are working on the called case.
If the call activity is asynchronous, the main case is not blocked. Therefore, both cases can be worked on independently and in parallel. The call activity is marked as completed directly in the main case.
The process variables of the main case are copied to the sub case and can be edited there like case-specific variables. Roles are also assigned as in the main case if they are involved in the sub case. New roles are assigned to the default user or group if the attribute has been maintained, and can be changed as usual in the details. If a role assignment is changed later in the main case, this does not affect the sub case.
If the call activity is synchronous, the process variables of the called case are transferred back to the main case. This means that the process variables of the main case are up to date again if changes were made. Variables that are only defined in the called case are not copied to the main case. The sub case is also archived automatically when it is completed.
If the call activity is asynchronous, the process variables are not transferred again.
Note
As a ProcessApp Administrator and case owner, you can complete the called process manually at any time. In this case, you receive a warning that a task with a call activity has not yet been completed.
How do I work with a parallel multiple instance activity?
As a user with the ProcessApp Creator user role, you can model parallel multiple instance activities. A parallel multiple instance activity is an activity that is executed for several entries at the same time. If you are currently in GBTEC Work Orchestrator, you can switch directly to GBTEC Process Design by using the Process Design focus in the focus drop-down menu in the header.
Open GBTEC Process Design and go to the Diagrams menu item in the left menu bar. There, you can either create a new diagram or check out an existing diagram. Select an activity and open the Typing attribute group in the Details tab in the right sidebar. In the Multiple instance type field, select the Parallel option.
You can then define a process variable as input. To do this, switch to the Options tab and click Process Execution Editor. There, you can define the input variable, the output variable, the variable name, and the assignment variable. In addition, you can define whether a separate task should be created for each member of a user group.
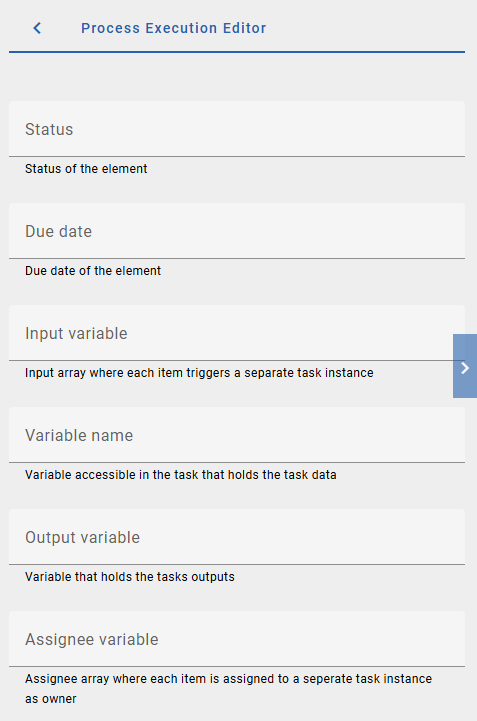
When the multiple instance activity is reached in a case, GBTEC Work Orchestrator creates multiple tasks or sub cases. If an input variable is defined, a separate task or sub case is created for each entry in the list of input values. The data of each entry can be accessed using the defined variable name. In addition, the smart variable _loopCounter stores the position of the corresponding task or sub case.
After all tasks are completed, the next step in the process is activated automatically. If the list of input values is empty, the multiple instance activity is completed immediately.
You can also assign users or user groups to a multiple instance activity using the assignment variable. The assignment variable can contain individual users, email addresses, identities, or user groups. If no input variable is defined, the number of created tasks or sub cases is based on the assignment variable.
If the Create one task per group member option is enabled, user groups in the assignment variable are split into individual members. A separate task is created for each member of the user group. For a multiple instance call activity, a separate sub case is created for each group member instead. The corresponding user becomes the case owner of this sub case.
If the Create one task per group member option is not enabled, a user group is not split into individual members. The corresponding task is created as a group task and can be claimed by an authorized group member.
If an input variable and an assignment variable are used, both lists must have the same length. The length of the assignment variable depends on whether user groups are split into individual members.
If the Create one task per group member option is enabled, the individual group members are counted. If the option is not enabled, the user group counts as one assignment. If the lists do not have the same length, the multiple instance activity enters the error state.
An output variable can also be configured for a multiple instance activity. After each task is completed, the result is available as an object in the output variable. If an output variable is defined, each output object also contains information about the corresponding assignment. For external multiple instance tasks, the email address is used for this information. In other cases, identity objects are used.
If the output variable has the same name as the input variable, the original content is overwritten. If no output is defined, the corresponding entry is stored as null.
Warning
If no output variable is defined, the task results are not saved.
Hint
Please note that you must not use the same name for the output variable in different multiple instance activities that can run in parallel.
Hint
If a user group is empty, no task is created for this user group. If a user group or user is not found, the corresponding task is created without an assignment.
Hint
If the same user is included in multiple user groups, only one task or sub case is created for this user where possible.
Hint
Please note that DMN tasks are currently not supported.
How will my REST calls be executed?
If you have defined REST calls and published the corresponding diagram in your GBTEC Process Design, they can be executed automatically in GBTEC Work Orchestrator. This means that tasks that execute REST calls do not need to be started manually, but are started automatically as soon as the previous task is completed or if they are the first tasks in sequence.
You can identify tasks which are executed automatically by the Automated task label below the corresponding entry and the robot icon inside the task chip.

The REST call will be executed once the task is started. If the status code of the REST call matches the status code defined for this task in your GBTEC Process Design, the task is marked as completed, analogous to the manual execution. The data, which is resulting from this REST call is stored in process variables in the corresponding case. They can then be used for further processing, for example, in other REST calls.
If the transmitted status code does not match the expected status code, the task is marked as incorrect. This is indicated by a red chip with an exclamation mark to the right of the entry.

You can manually restart failed executed tasks at any time. This means that you can execute your REST call at a later time. To do so, click the Show error button for the task in question in the process flow view in the right sidebar.
A dialog will appear showing an error message about the initial failed attempt. It displays both the error and the complete execution sequence, helping you identify exactly where and why the error occurred. You can copy the execution sequence to the clipboard using the button in the top right corner. To restart the task, click the Retry button in the dialog. This will trigger the REST call again.
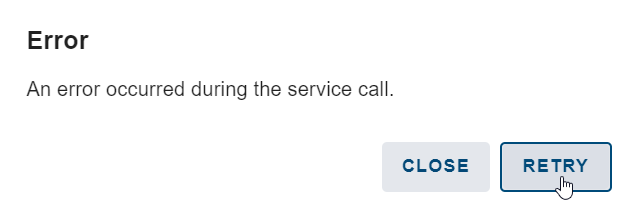
If the automated service task is a task that has not been configured, it can also be completed manually by the responsible user (the linked role or the case owner) after the first failed attempt to execute it automatically. To do this, use the Complete button in the right sidebar, as usual. For more information about completing tasks manually can be found here.
Note
If an automatically executed task in GBTEC Work Orchestrator fails and receives the status Error, the assigned user is immediately notified by e-mail. The e-mail informs the user that the automatic task could not be completed successfully. If the task is assigned to a group, the first group member in the priority order receives the notification. If another execution attempt is made and the task fails again, no further e-mail is sent, instead an error notification appears at the lower right of the screen.
How can I automatically activate a task after receiving a message from an intermediate event in a task?
There is a possibility that the subsequent task is automatically activated when an intermediate event intercepts a message in a case. In this context, the event contains an attribute called “correlation key”.
If your process contains an intercepting intermediate event, and that event has an identifier reached in a case, the sequence is automatically paused at that event.
When an event that triggers a message is executed in any process, the message is received if the message event has the same identifier and the same correlation key. The entry is then marked as complete and the process flow continues.
Additionally, you can trigger a signal event by sending an HTTP POST request to resume a waiting process. See here for how to configure the REST call.