Catalog
What is the catalog?
Every user can view the catalog. The catalog contains all master data from your diagrams that can be reused. These can be, for example, roles or applications. Users with the Administrator or Editor user role can edit and quality-assure catalog items.
Suggested catalog items also appear in the catalog list and can still be changed in the diagram. Once a user with the Administrator or Editor user role has accepted a catalog item, it continues to appear in the catalog list. Modelers can no longer change it. This prevents accidental changes to reused objects.
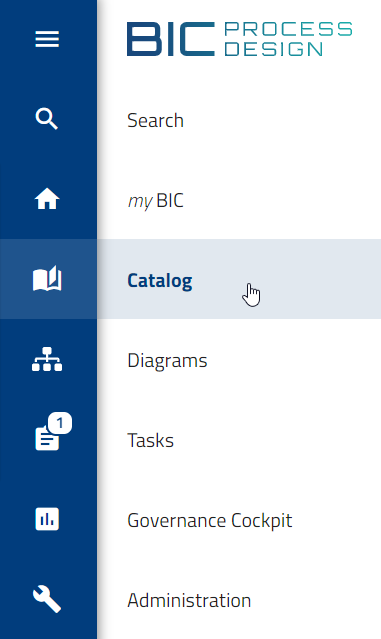
To open the catalog, click the Catalog menu item in the left menu bar.
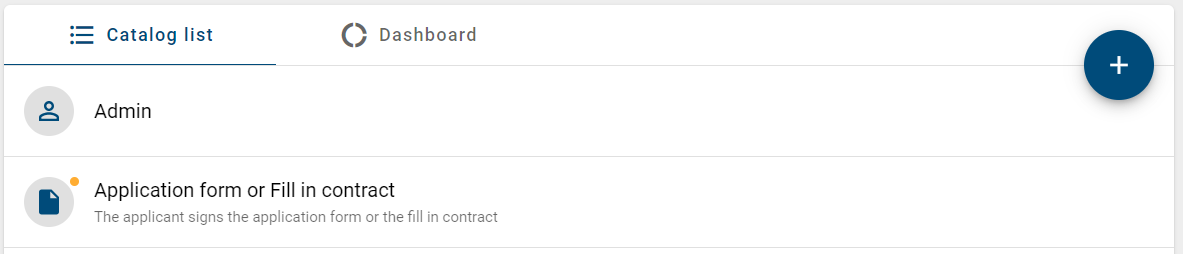
The catalog opens and shows a list of all catalog items that you can access. Each item shows the type symbol and its name. You can also show the associated attributes and occurrences.
In the Public workspace stage, the catalog shows both accepted catalog items and master data that has not yet been accepted. You can recognize catalog suggestions (unaccepted catalog items) by an orange dot at the icon.
Next to the list, you can open the dashboard as an alternative view. The dashboard also displays data from your catalog in graphical form.
Tip
You can adjust the sidebar width by moving the mouse to its left edge until the cursor changes, then dragging it left or right. You can also close the sidebar using the Collapse button next to the tabs, and reopen it using the Expand button. When reopened, the previously set width is restored automatically.
Create and edit catalog items
How do I create new catalog items?
Users with the Administrator, Editor, or Author user role can create new catalog items. New catalog items are first created as catalog suggestions. Before publishing a diagram, you must accept all catalog suggestions it contains. The three ways to create a catalog item are described below.
Create catalog items directly in the catalog
Users with the Administrator, Editor, or Author user role can create catalog items directly in the catalog. Open the Catalog menu item in the left menu bar and switch to the Public workspace stage. At the lower right of the catalog view, click the New catalog item button.

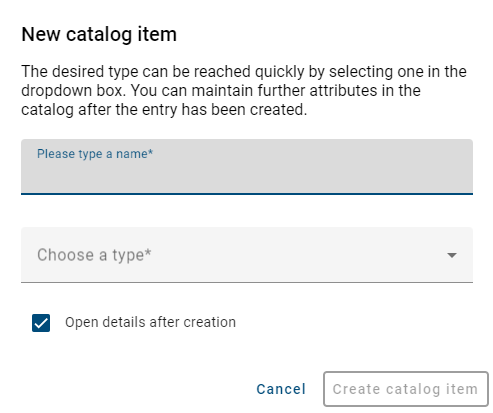
A dialog opens. Enter a name and select the catalog object type. Click the Choose a type field to see all available types in a drop-down list. The Open details after creation checkbox is activated by default. Deactivate the checkbox if you do not want to be redirected to the details after creation.
If you have previously filtered the catalog list, the filtered object type is automatically shown in the Choose a type field.
Click the Create catalog item button to create the item. Click the Cancel button to cancel.
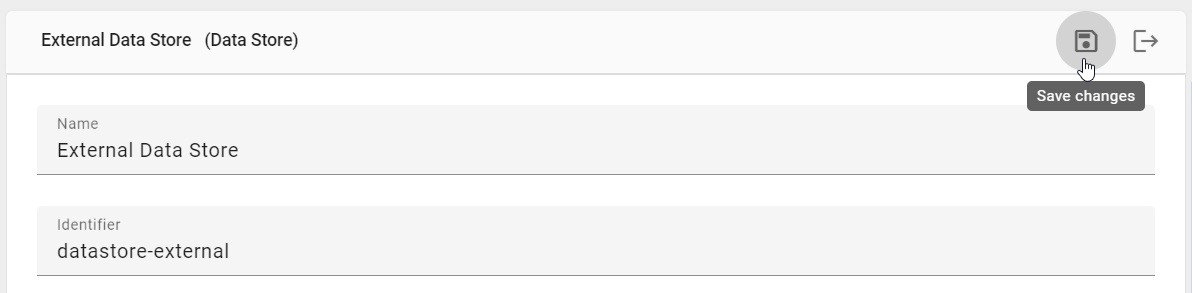
If the Open details after creation checkbox was activated, edit mode opens in the details view of the new catalog item. There you can define attributes such as name, identifier, or description. Click the Save changes button in the upper right corner to save and exit. Click the Exit edit mode button to exit without saving.
Note
A newly created catalog item appears at the top of the catalog list. When you reload the page, it appears in alphabetical order.
Adding catalog items by modeling
Users with the Administrator, Editor, or Author user role can add catalog items by modeling a diagram. Open the Diagrams menu item in the left menu bar and switch to the Public workspace stage if you are not already there. Click on a diagram and check it out using the Check out button in the upper right corner.
For new objects to be created as a catalog suggestion, the Generate catalog suggestions for this object type during modeling option must be enabled in the administration area for the relevant object type.
Model a new reusable object in the diagram, for example a role or a risk. By default, activities and events are not available in the catalog, as these objects are usually specific to a single diagram.
As soon as you check in the diagram, a catalog suggestion is created in the catalog for the object.
Suggesting existing objects as catalog items
Users with the Administrator, Editor, or Author user role can suggest existing objects from a diagram as catalog items. Open the Diagrams menu item in the left menu bar and switch to the Public workspace stage. Open a diagram.
If the Type section of the Details panel in the right sidebar does not show a label such as “Catalog suggestion” or “Catalog item”, then there is no catalog item for this object yet. You can create a new catalog suggestion for this object directly from the diagram.
Open the context menu of the object in the checked-in diagram and click the Suggest to catalog option.
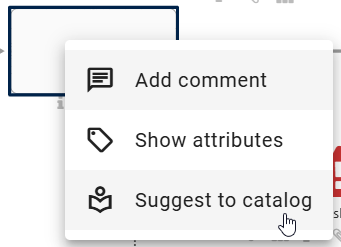
A confirmation appears that a catalog suggestion has been added. When you refresh the page, the Type section of the Details panel in the right sidebar shows the label “Catalog suggestion”. If a catalog suggestion or accepted catalog item already exists for this object, the context menu shows the Open in catalog option instead.
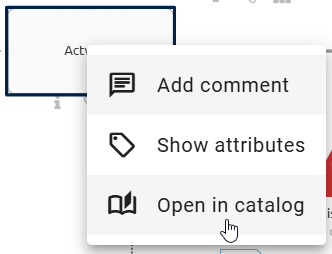
Clicking the Open in catalog option takes you to the details view of the corresponding catalog item. There you can make further changes and accept the catalog item.
How do I create new catalog items using AI?
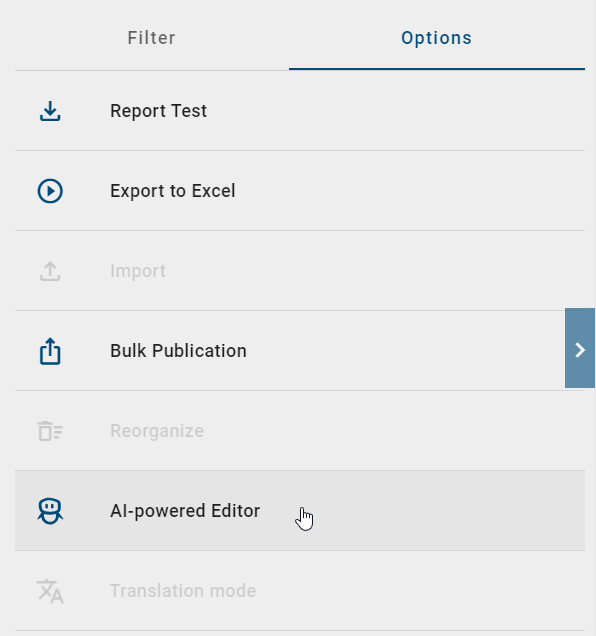
Users with the Administrator or Editor user role can generate catalog items using AI. Open the Catalog menu item in the left menu bar and switch to the Public workspace stage. Click the AI-powered Editor option in the Options panel in the right sidebar.
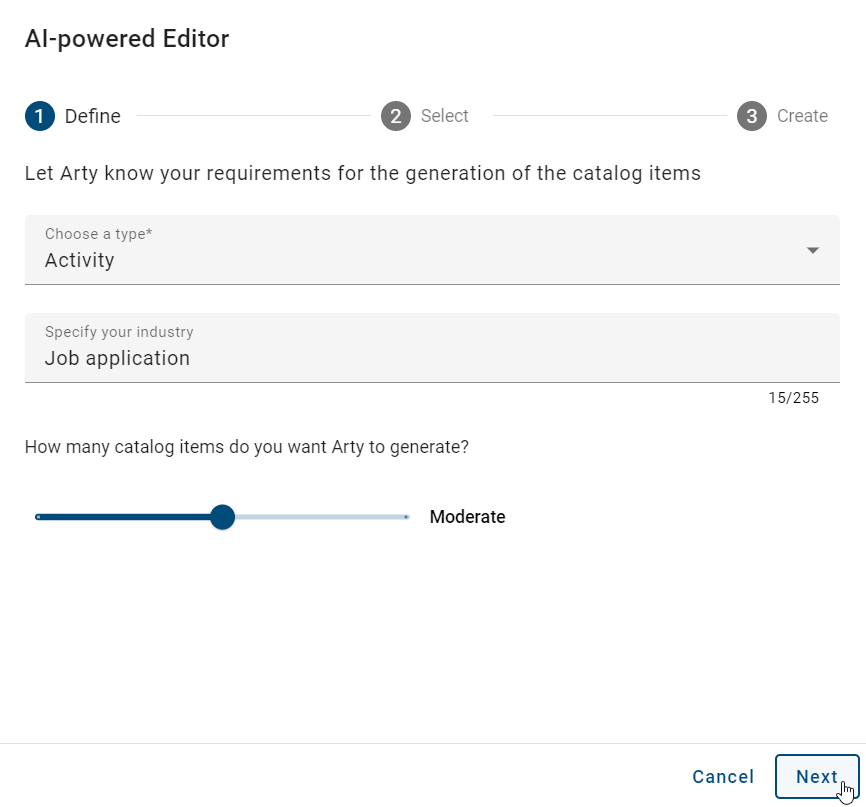
A dialog opens and guides you through three steps. In the first step, specify the desired type of AI-generated catalog items. Use the slider to define how many catalog items Arty should generate. Optionally, you can enter additional details in the Enter additional details (optional) input field to further refine the generated catalog items. Click the Next button to proceed.
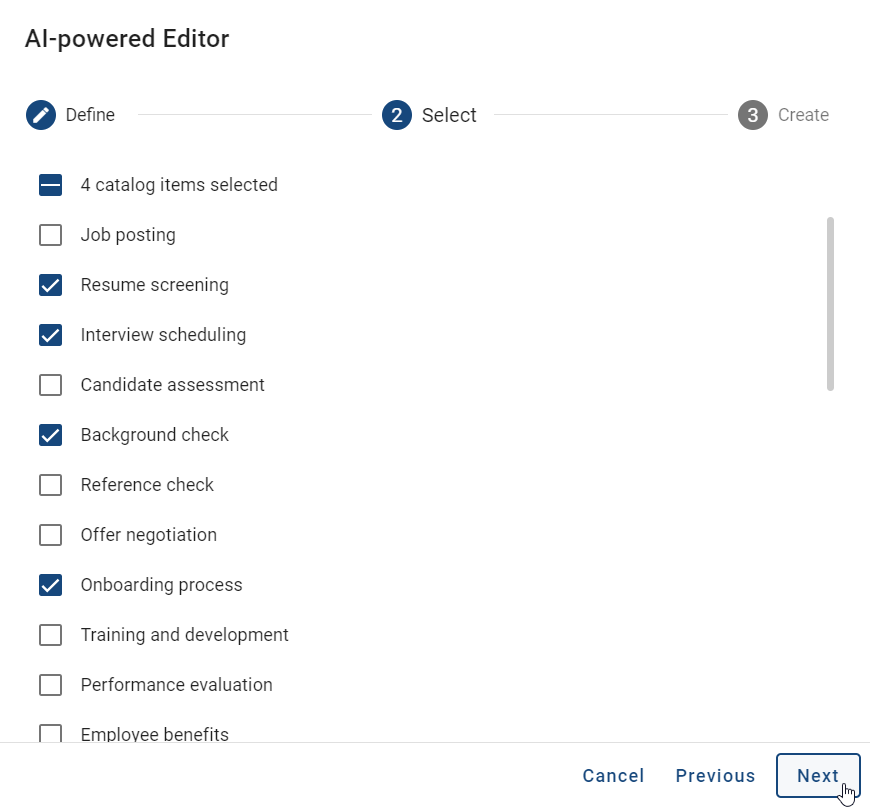
In the second step, Arty generates a range of catalog suggestions. Select the items that meet your requirements. Click the top entry Catalog items selected to select all suggestions at once. If you are not satisfied with the suggestions, click the Previous button and adjust your input.
Once you have selected at least one suggestion, click the Next button.
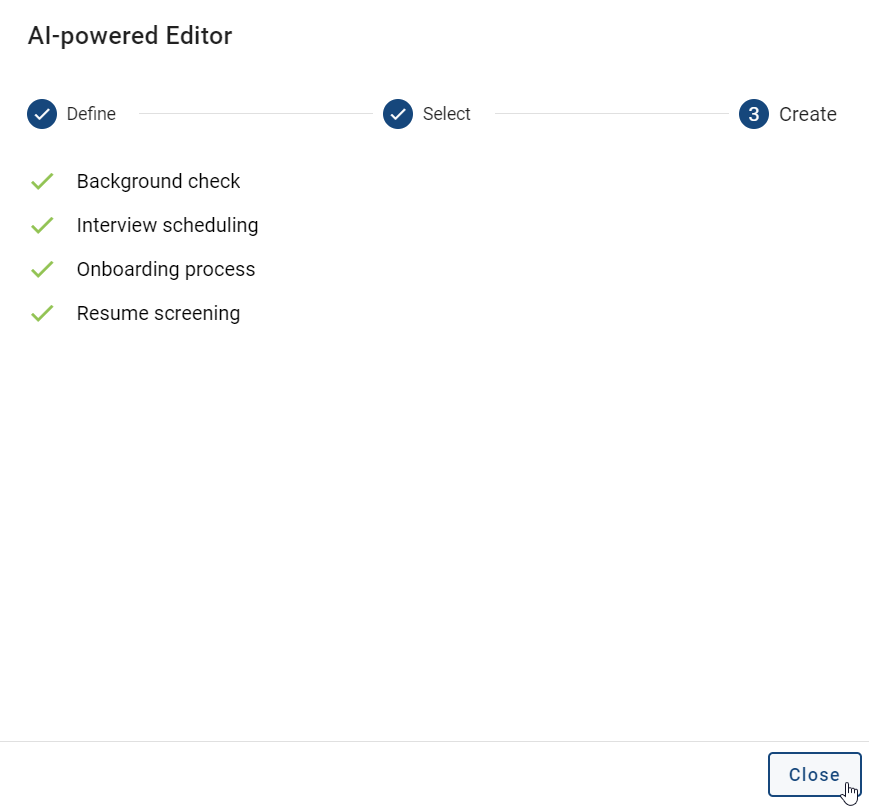
In the third step, you see an overview of all catalog items generated by Arty. If no errors occurred, you see a green checkmark to the left of each suggestion. Click the Close button to view the suggestions in the catalog list.
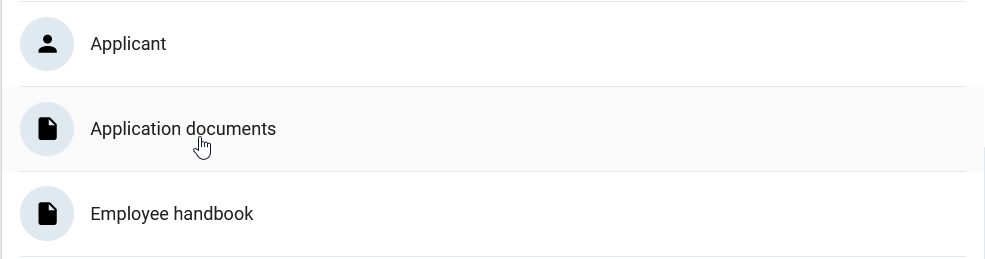
The items generated by Arty appear at the top of the catalog list. After you reload the page, they appear in alphabetical order. You can find information on how to edit catalog items here.
Note
AI-generated catalog items are generated only in the current content language.
Note
The AI-powered Editor option is not available in the mobile view.
Hint
This option is provided by Arty, our AI Editor. A separate license is required. See also the notes on using the AI feature.
Hint
Arty automatically takes into account the company information you have provided in the “Arty” tile of the Administration, for example your industry or your main products and services, when generating catalog items.
How do I edit attributes of catalog items?
Users with the Administrator, Editor, or Author user role can edit catalog items in the Public workspace stage. Users with the Author user role can only edit items in which they are listed as “Author” in the governance attribute.
Open the Catalog menu item in the left menu bar and make sure you are in the Public workspace stage. Click the catalog item you want to edit to go to its details.
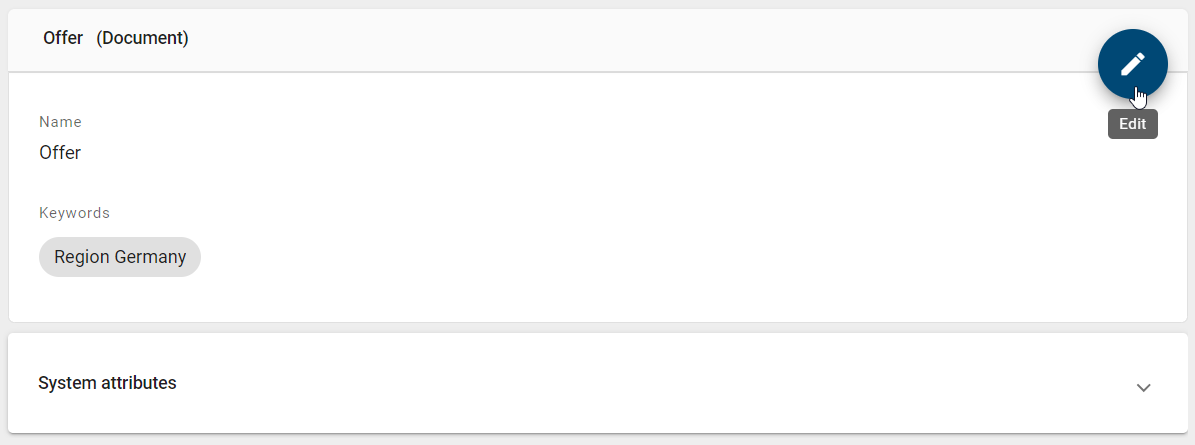
Click the Edit button to enter edit mode.
If the catalog item is still a suggestion, a banner at the top informs you about this.

Edit the attributes by changing, inserting, or deleting values. System and read-only attributes cannot be edited. You can add links and files in the Attachment (URL) field. Attachments are sorted alphabetically. For permanent links to work permanently, the attachment title must not be changed. If it is changed, the link becomes invalid. Attachments can also be provided in a language-dependent way. See the chapter about the attribute “Attachment” in modeling for more details. Also note the options for the attribute “Description”.
Hint
The Attachment (URL) attribute may be restricted by the individual method configuration. In this case, only links or URLs can be stored.
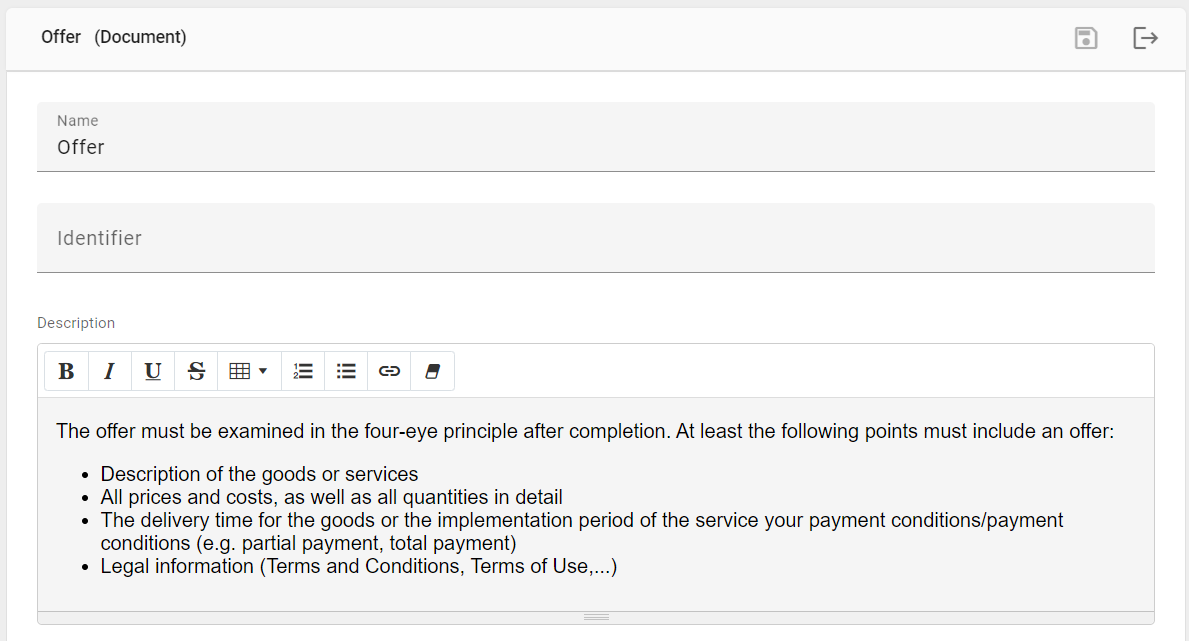
Organizational units, documents, and norms can be created while editing attributes that reference other catalog items. Click the attribute field to activate it. After you type the first letter, suggestions for existing catalog items appear.
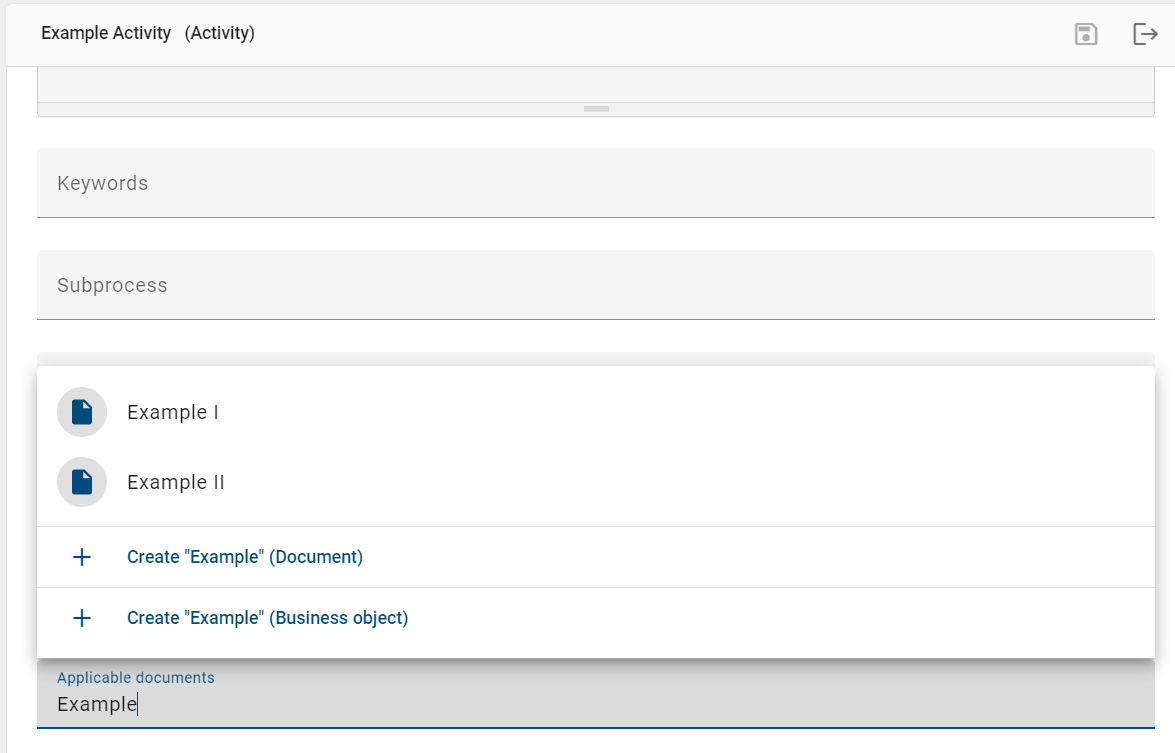
You create new catalog items by entering the complete desired name in the field and clicking the Create option.

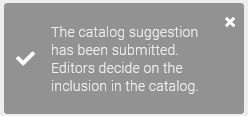
A notification informs you that the catalog item has been submitted and added to the publishing workflow.
Click the Save changes button to save your changes. You are taken back to the details view of the catalog item. Click the Exit edit mode button to leave edit mode without saving.

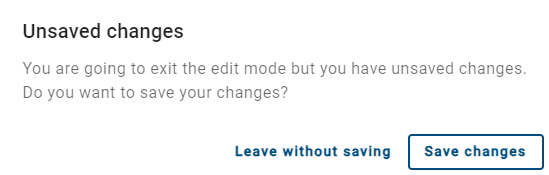
If you leave edit mode with unsaved changes, a notification appears. You can save your changes or leave edit mode without saving. Click outside the dialog to cancel the process and stay in edit mode.
You can also edit attributes of referenced catalog items directly from a diagram. To do this, use the Details panel in the right sidebar in edit mode.
Note
In edit mode, only values maintained in the selected content language are displayed. Outside edit mode, values maintained only in the alternative language are also visible. In edit mode, you therefore set values exclusively for the current content language.
Hint
In edit mode, most options are deactivated. For example, you cannot approve or reject a catalog suggestion while editing.
Tip
If a diagram or object has been added to the details of a catalog item, you can navigate to it by clicking the chip.
How can I change catalog items and their attributes?
Catalog items can be changed in two ways. You can change a symbol in a diagram that exists in the catalog, or you can edit the related catalog item directly in the Catalog menu item. Depending on where you make the change, the system behaves differently.
Option 1: Change linked symbols in a diagram
Users with the Administrator, Editor, or Author user role can change symbols in diagrams that exist in the catalog and have been accepted. A new catalog item is created for the changed symbol. This prevents accidental changes to other occurrences of the same symbol. Changes can be managed centrally in the catalog.
Open the Diagrams menu item in the left menu bar and click on a diagram. Check it out using the Check out button. Alternatively, create a new diagram.
Create a new symbol, for example, a role, and select a catalog item from the suggestion list. The symbol gets the same attributes as the selected catalog item. If you then change the attributes of this symbol, for example by renaming it, what happens next depends on whether the catalog item has already been accepted or is still a suggestion.
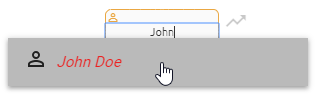
Accepted catalog item
Checking in the diagram creates a new catalog item with the changed attributes. Other symbols in the same diagram that referred to the same catalog item are also updated to point to the new item. Symbols in other diagrams are not changed and still refer to the original catalog item. To replace the original item for those symbols as well, use the Delete option.
Proposed catalog item
Check in the diagram and the changes are applied to the existing catalog item without creating a new one. These changes also affect all other diagrams in which the proposed catalog item is used.
Note
Note that the suggestion list of the modeler is also only updated after checking in. If a suggested catalog item is renamed, this item is still shown under its old name in the suggestion list until you have checked in the diagram once.
Option 2: Change catalog items directly in the catalog
As a user with the Administrator or Editor user role, you can also edit catalog items directly in the Catalog menu item. This allows you to manage changes centrally.
Open the Catalog menu item in the left menu bar. A list of all catalog items is displayed. Click the desired catalog item to open the catalog details.
In the catalog details, you can edit the attributes of the catalog entry. Click the Edit button and adjust the required attributes. Then click the Save changes button to save your changes. If you do not want to save your changes, click the Exit edit mode button.

When you change a catalog item directly in the catalog, the changes are automatically applied to all checked-in diagrams that contain objects of the changed catalog item. This updates the changed attributes in these diagrams.
Note
Please note that if a diagram was already checked out before the catalog item was changed, the change only becomes visible after the diagram has been checked in. If you edit an object in the diagram that is linked to this catalog item before checking it in, a new catalog item is created for it. The catalog item that was previously changed in the catalog remains unchanged. If you change the attributes of a symbol that has been accepted in the catalog, a new catalog item is created for that symbol. This prevents unwanted changes to other occurrences of the same symbol. You can manage the new catalog item centrally in the catalog. There you can decide whether the changes should also apply to other symbols.
Quality assurance in the catalog
How do I change the state of an accepted catalog item?
Users with the Administrator or Editor user role can set accepted catalog items back to the status catalog suggestion.
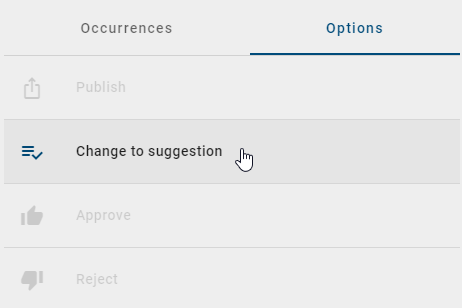
Open the Catalog menu item in the left menu bar and switch to the Public workspace stage. Open the details of the corresponding catalog item and open the Options panel in the right sidebar. Click the Change to suggestion option to set the catalog item back to the status of a catalog suggestion.
How can I accept a catalog suggestion?
Users with the Administrator or Editor user role can accept catalog suggestions to include them in the catalog.
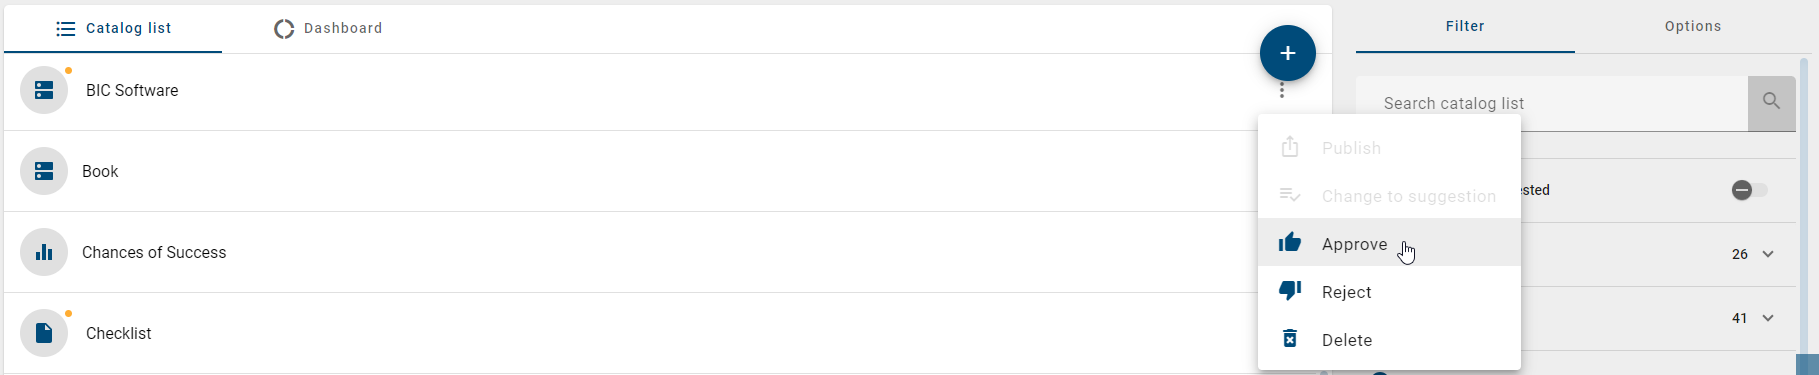
Open the Catalog menu item in the left menu bar and switch to the Public workspace stage if you are not already there. Find an existing catalog item in the list that has not yet been accepted. You can recognize a catalog suggestion by an orange dot at the icon of the item.
You can accept the suggestion directly in the list. Open the context menu (three dots) of the item and select the Approve option.
Alternatively, open the catalog suggestion by clicking on it and switch to the Options panel in the right sidebar. Select the Approve option there.
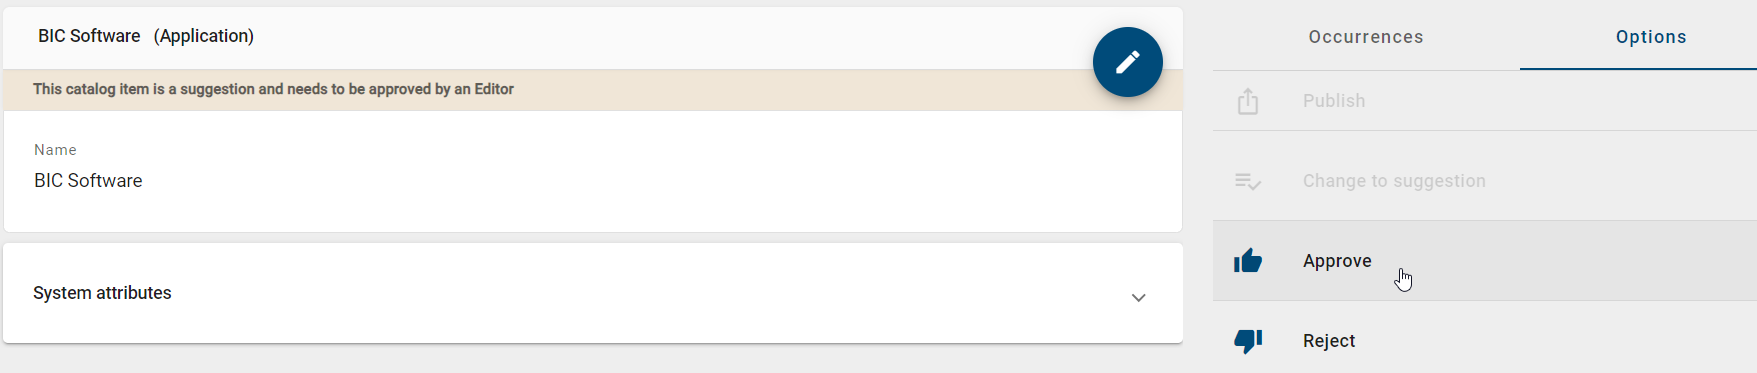
Once you accept the catalog suggestion, it becomes a permanent catalog item in your repository.
If an object of an accepted catalog item is changed in a diagram, the existing catalog item is not changed. Instead, a new catalog item is created. Changes to the accepted item can only be made directly in the catalog.
Tip
You can filter suggested catalog items in the catalog.
How can I reject a catalog suggestion?
Users with the Administrator or Editor user role can reject catalog suggestions from the catalog. Rejected catalog items are removed and are no longer available for reuse in any diagrams.
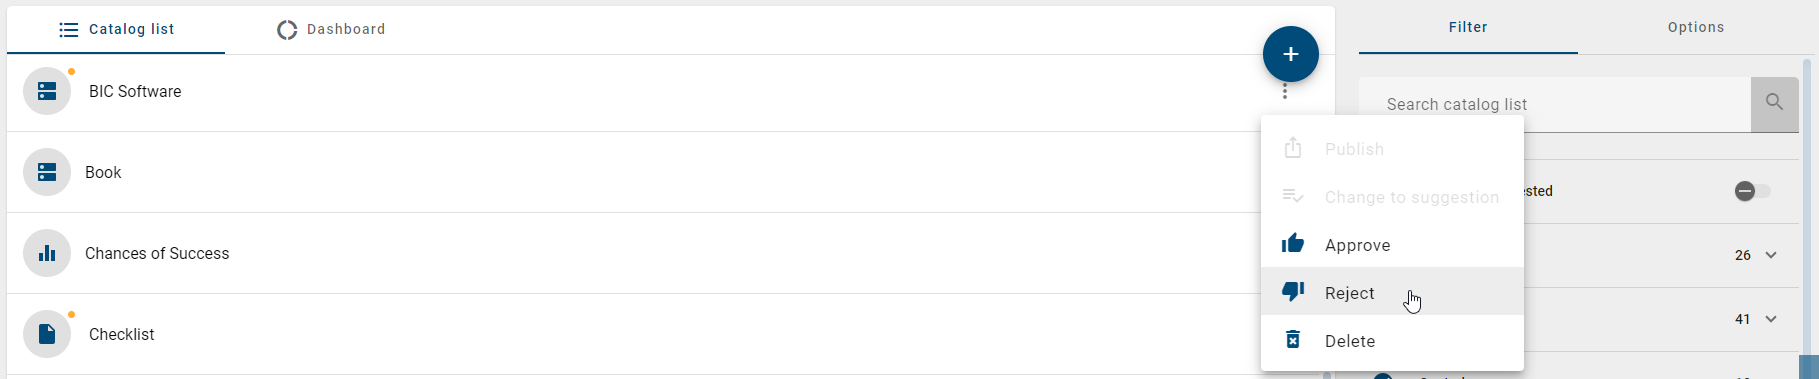
Open the Catalog menu item in the left menu bar and switch to the Public workspace stage if you are not already there. Find an existing catalog item in the list that has not yet been accepted. You can recognize a catalog suggestion by an orange dot at the icon of the item.
You can reject the suggestion directly in the list. Open the context menu (three dots) of the item and select the Reject option.
Alternatively, open the detail view of the catalog suggestion. Click the item, switch to the Options panel in the right sidebar, and select the Reject option.
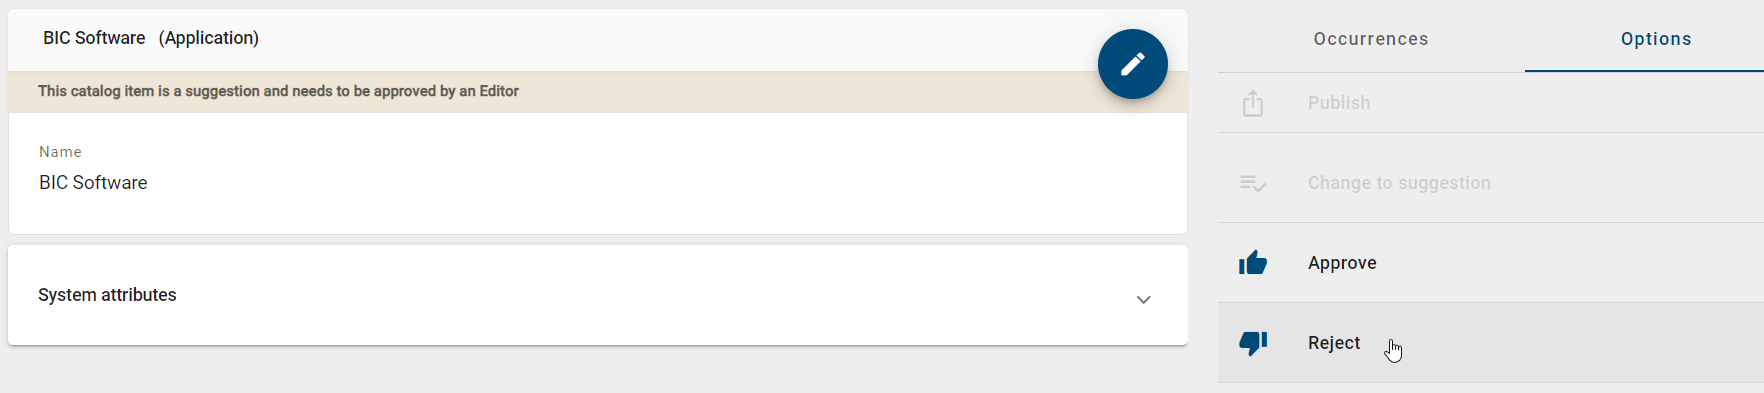
Once you reject the catalog suggestion, it is removed from the catalog. Until the page is updated, the item is displayed with strikethrough text. This action cannot be undone.
How can I contact the creator of a catalog item?
Users with the Administrator or Editor user role can contact the creator of a catalog item. Click on the Catalog menu item in the left menu bar and select a catalog item. You can select both catalog suggestions and accepted catalog items.
You are taken to the details view of the catalog item. Switch to the Options panel in the right sidebar and click the Contact creator option.
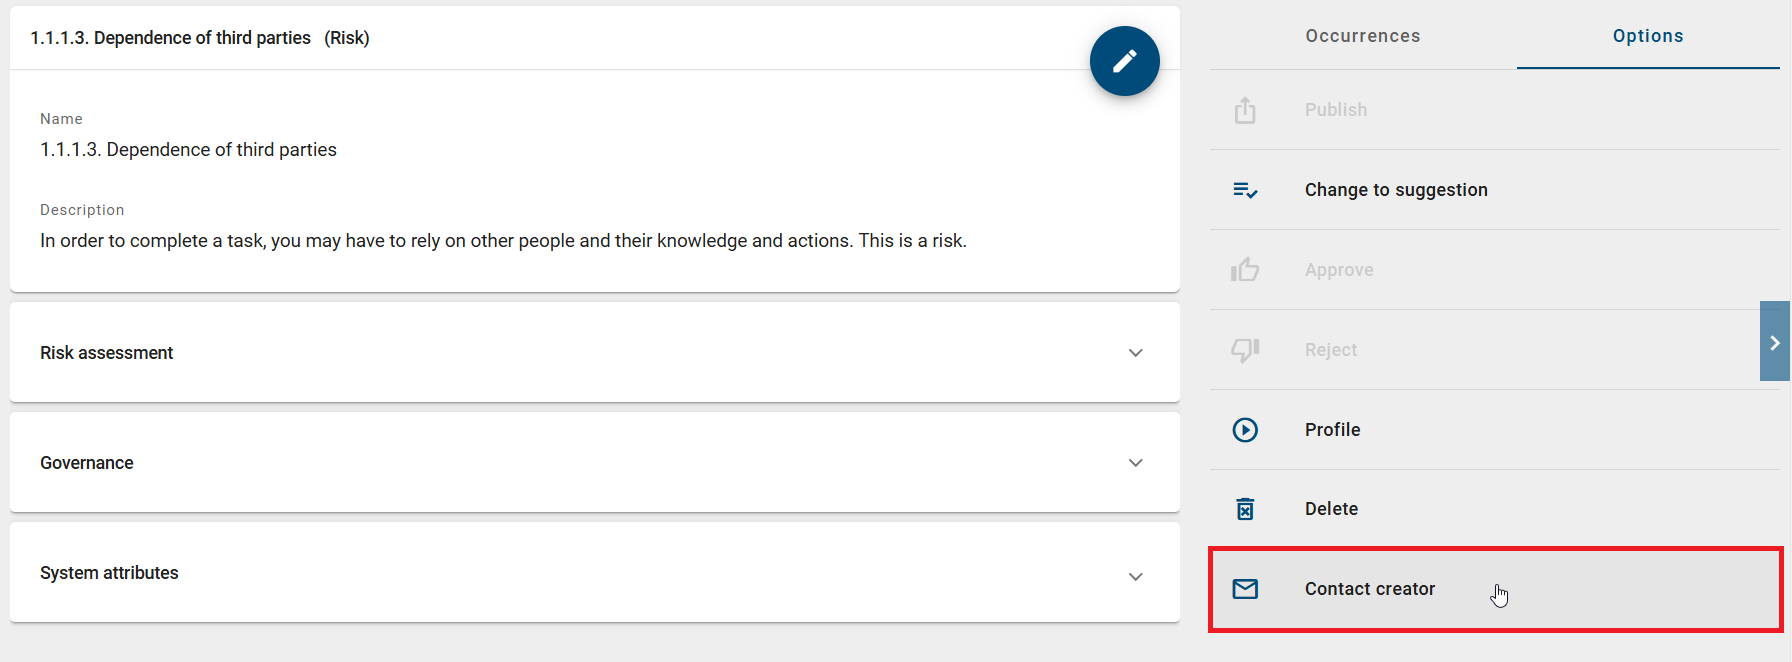
Your email program opens with a new email. The creator’s email address is entered in the “To” field automatically. If no valid email address is available for the creator, you receive an error message. You can only contact the creator if a valid email address is provided.
Search and filter catalog items
How do I search for catalog items in the catalog?
Every user can search for catalog items in the catalog. Open the Catalog menu item in the left menu bar. All catalog items of the current repository are displayed in the main area. Click the Search catalog field in the Filter panel in the right sidebar.
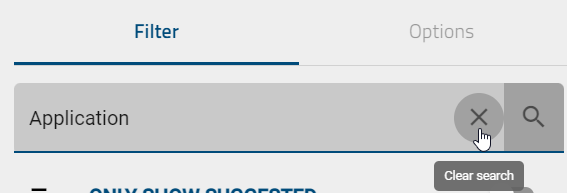
Enter the name of the desired catalog item and confirm with the Enter key or by clicking the magnifying glass icon.
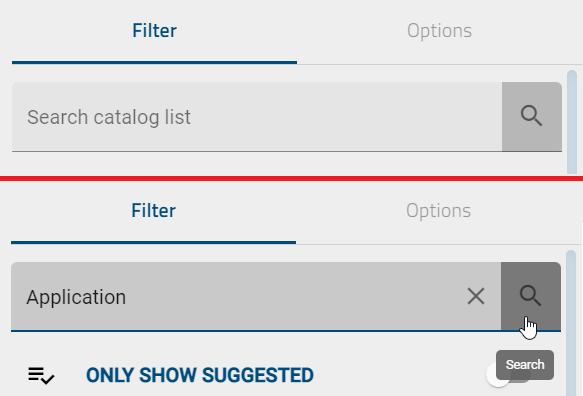
All search results containing the entered name are displayed. If no results are found, a corresponding hint appears. In addition, the Toggle language & search again button appears. Click it to set the alternative language as content language and repeat the search in the new content language.
To show the entire catalog list again, click the Reset search and filters button next to the magnifying glass icon.
Hint
Here you can find an overview of the different search term options.
Note
Search results are sorted by relevance by default. However, you can also arrange the results using a sortable column.
Warning
Searching for catalog items in access-restricted diagrams is only possible for their governance participants. This also applies to users with the Administrator user role. Changes to users or user groups in the Administration may cause access restrictions to stop working correctly. Make sure that user and user group information is maintained consistently in both the administration and the catalog.
How can I filter catalog items?
Every user can filter catalog items in the catalog. Open the Catalog menu item in the left menu bar. Switch to the Filter panel in the right sidebar. On mobile devices, you can find the filters in the three-dot menu in the upper right corner.
The panel lists all available object types. When you click a filter, it is expanded and automatically applied. An active filter is marked with a checkmark.
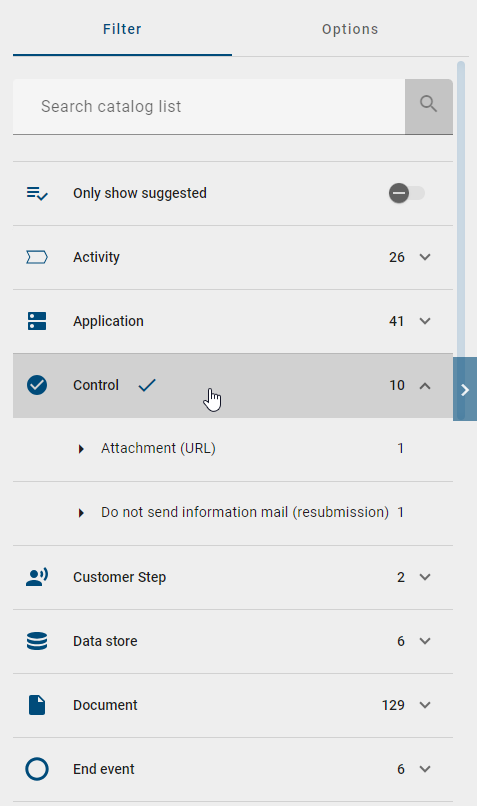
The catalog then shows only items of the selected type. After expanding, facets for the selected object type appear. A facet corresponds to an attribute type. It is displayed as soon as the attribute type has been maintained on an object and activated in the administration area. The order is alphabetical. Click a facet to expand it. Each displayed attribute value can be selected or deselected using a checkbox to narrow the search.
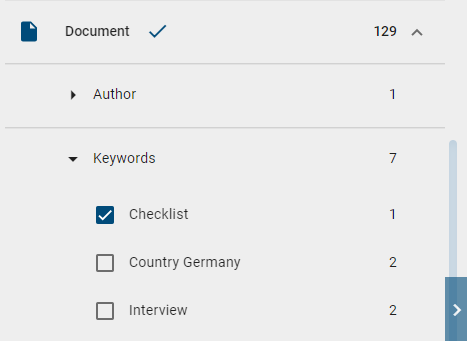
You can select more facets, search within the filter, or remove the filter. Collapsing a filter or facet resets all settings. Only one filter can be active at a time.
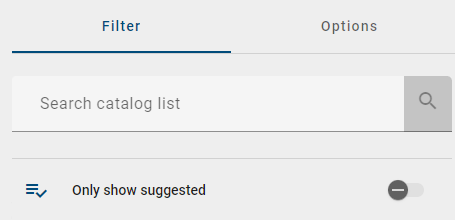
Users with the Administrator, Editor, or Author user role can also show exclusively non-approved catalog items. Use the toggle in the right sidebar. In the Public workspace stage, the option is called Only show suggested. In the preview, items with pending approval are shown. This filter can be combined with other filters.
In the administration area, users with the Administrator user role can hide filters for object types without catalog items. Use the Automatically generate catalog items when checking in option. If this option is deactivated, the filter for the relevant object type is hidden. It only appears if catalog items for this type already exist or have been created manually.
How can I filter catalog items by their current state?
Every user can filter catalog items by their current state using the Governance Lifecycle filter. The Governance Lifecycle filter lets you filter catalog items by their currently active workflow, their publication status, or their revision status. This gives you a better overview of the status of your catalog items.
Open the Catalog menu item in the left menu bar and switch to the Public workspace stage. In the Filter panel in the right sidebar, open the Governance Lifecycle filter.
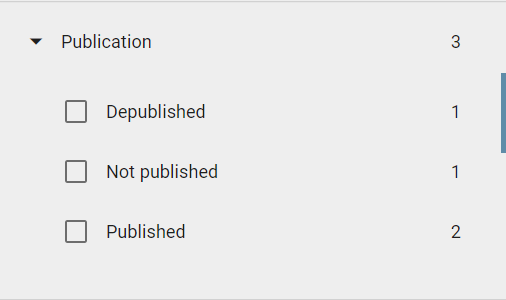
Publication
Open the Publication subfilter. If at least one catalog item has been published, you can filter by Depublished, Not published, or Published.
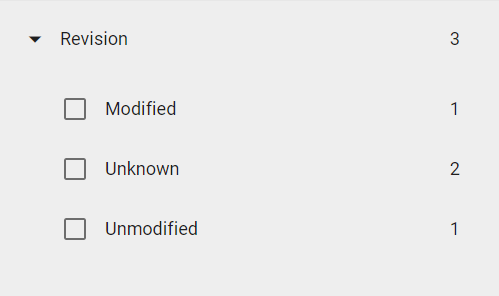
Revision
Expand the Revision subfilter. You can filter by the revision statuses Modified, Unmodified, and Unknown, provided at least one catalog item has a revision status. Changes to a catalog item are not shown until it has been republished. Until then, its revision status is Unknown.
Workflow
Open the Workflow subfilter. You can filter whether a workflow is active for the catalog item. A distinction is made between Depublication, Publication, and Resubmission for example.
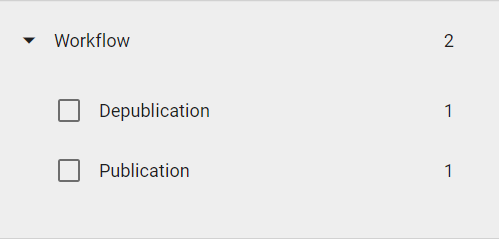
The filtered list then shows all catalog items in the corresponding stage, together with the total count.
Hint
The Governance Lifecycle filter is available from version 7.14.0. To display all published catalog items in the filter, you must check each catalog item out and back in at least once.
Note
All filtered results are sorted alphabetically by browser language.
Hint
The Governance Lifecycle filter is also available to filter diagrams by their Workflow, Publication, or Revision.
How can I add attributes to the catalog list view and get a table view?
Every user can add attributes to the catalog list view to create a table view.
Open the Catalog menu item in the left menu bar and switch to the Options panel in the right sidebar. Click the Adjust table option.

A list of all available attributes appears, sorted by attribute type. A selected attribute is marked with a checkmark. If you cannot find a specific attribute, use the search bar to search for it. The search is not case-sensitive.
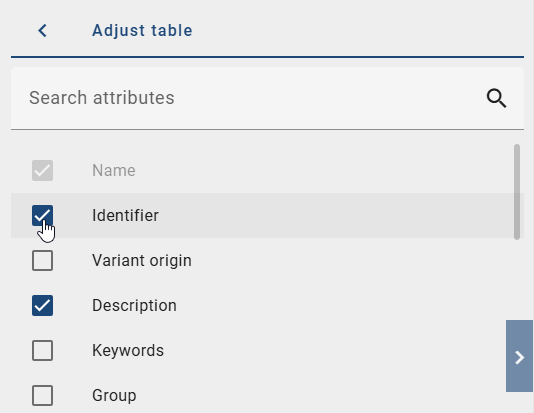
Once you select at least one attribute, it appears immediately as a new column heading. Each catalog item shows its content in the active content language. If a value is only maintained in the alternative language, that language’s content is shown. If no value is maintained in any language, or the attribute type is not assigned to the object type, the field is empty. Hover the mouse over an empty field to see the reason.
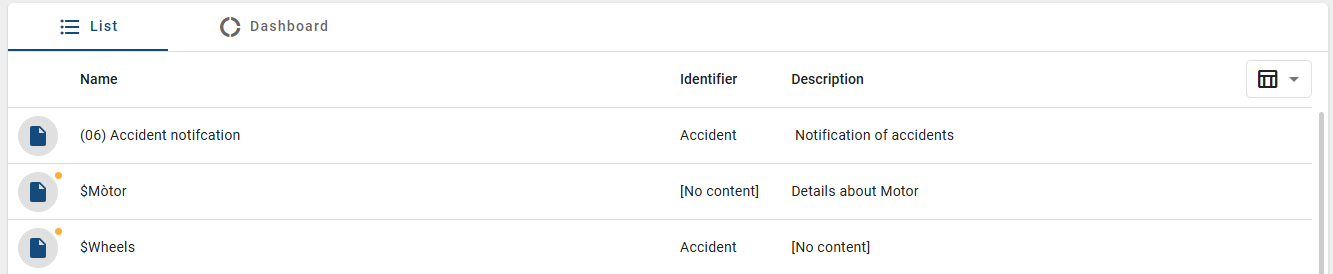
If more attributes are displayed than fit on the screen, a horizontal scroll bar appears. Your table view is saved automatically and restored the next time you open the catalog.
Note
The Name attribute is always displayed and cannot be changed. Columns containing relationships or links cannot currently be sorted.
How can I sort the catalog list?
Every user can sort the catalog list. Click the Catalog menu item in the left menu bar. The main area displays the catalog list, in which every catalog item is shown with its icon and its name. You can sort the catalog list using these column headers. By default, catalog items are sorted by the Name column in ascending order.
Move the mouse pointer over a column header that is not yet sorted. An arrow icon for sorting is displayed there.

Click the Name column header to switch between ascending and descending order. The first click on a column header sorts the values in ascending order, and the second click sorts them in descending order. A third click removes the sorting, so that the default sorting by the Name column in ascending order is used again. Only one column can be used for sorting at a time.
If you display additional columns in the catalog list, you can also sort these using their header. This is possible provided that the respective column is sortable.
If you also perform a search in the catalog, the search results are sorted by relevance by default. If you then click a column header, the results are sorted by that column instead.
Note
The Name attribute is always displayed and cannot be changed. Columns containing relationships or links cannot currently be sorted.
Hint
Your selected sorting is not saved permanently. If you reload the page, or leave and reopen the catalog, the default sorting by the Name column in ascending order is displayed again.
Tip
To learn how to display further attributes as additional columns in the catalog list, see the chapter How can I add attributes to the catalog list view and get a table view?.
Bulk Update
Users with the Administrator or Editor user role can edit identical attributes across multiple catalog items at the same time. The Bulk Update option is available for the Editor user role in the Public workspace stage and for the Administrator user role in all stages.
Open the Catalog menu item in the left menu bar. Open the Filter panel and filter for the desired object type. The catalog list then shows only the filtered items. Then switch to the Options panel in the right sidebar and click the Bulk update option.
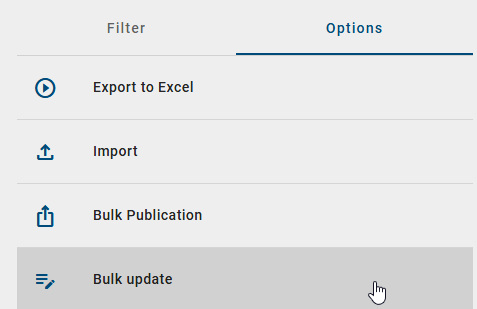
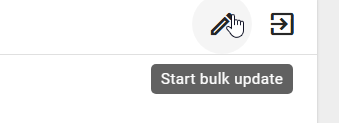
You are now in the Bulk Update view. Select the items you want to edit and click the Start bulk update button in the upper right corner.
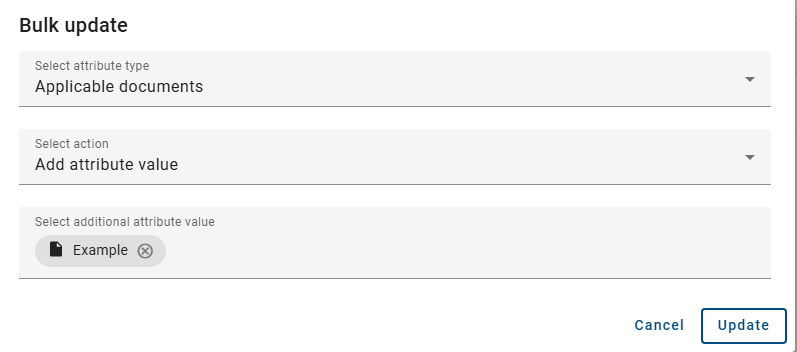
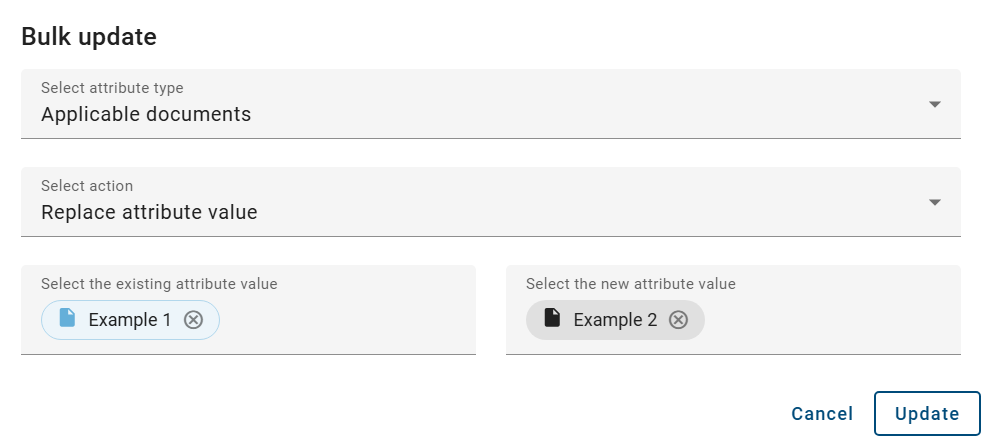
A dialog opens. First, select the attribute type you want to edit. Then set the action, for example Add attribute value, Replace attribute value, or Remove attribute value. Depending on the selected action, one or more input fields appear. For the selected attribute type, the system shows matching results from your current area as suggestions.
Add attribute value:
If you have selected a multi-value attribute, specify the attribute value you want to add.
Hint
Please note that if you add another attribute to a single value attribute type, even though a value already exists, the affected catalog item will be skipped during the update. After the update, you can download a JSON file from the lower right corner of the screen. In the downloaded JSON file, the affected catalog item appears under Catalog objects not updated, including the corresponding entity ID, the name in the content language you selected, and the specified reason.
Replace an attribute value:
To replace an attribute value, enter both the existing value and the new value.
Note
The attribute value is only replaced in the current content language.
Remove attribute value:
To remove an attribute value, specify the value you want to delete.
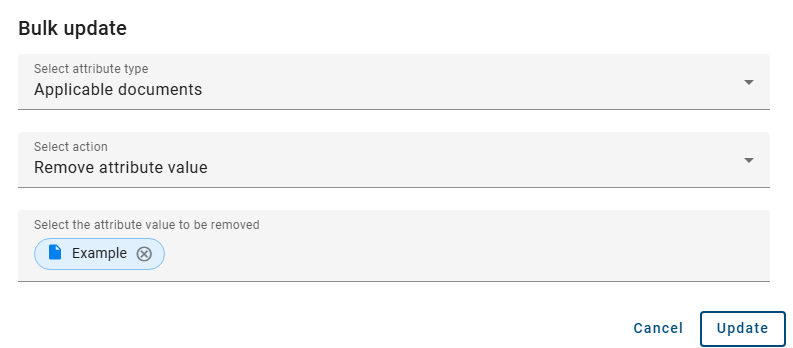
Click the Update button to apply the changes or the Cancel button to discard them. To remove a selected attribute value from your input, click the X icon on the chip.
After clicking Update, a confirmation window opens. Enter the word update in the text field to confirm the bulk update.
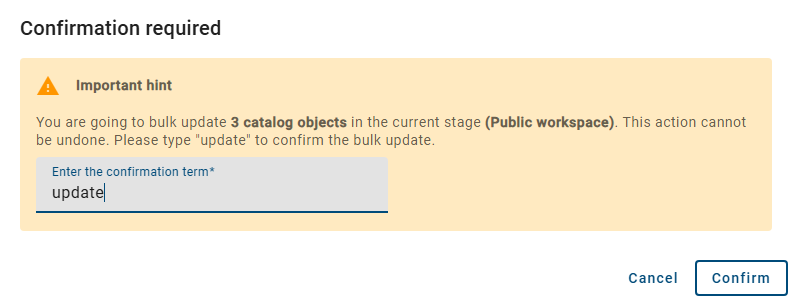
After the update, a message shows how many of the selected catalog items were updated successfully.
To exit bulk update mode, click the Exit bulk update button.
Hint
After the update, you can download a JSON file from the lower right corner of the screen. Successfully updated catalog items are listed under Catalog objects updated. Items that could not be updated appear under Catalog objects not updated, along with the catalog ID, the name in the selected content language, and the reason for the failure.
Note
You must have selected at least one object type before starting the bulk update.
Note
Only one attribute value can be added per bulk update.
Translate catalog items
Users with the Administrator, Editor, or Author user role can make catalog items available in other languages and receive automatic translation suggestions.
How can I make catalog items available in other languages?
Users with the Administrator or Editor user role can translate all catalog items. A catalog filter must be active before you start. Users with the Author user role can only translate the filtered items if they are maintained in the “Author” governance attribute.
Open the Catalog menu item in the left menu bar and switch to the Public workspace stage. Filter the catalog list first. Then open the Options panel in the right sidebar and click the Translation Mode option.
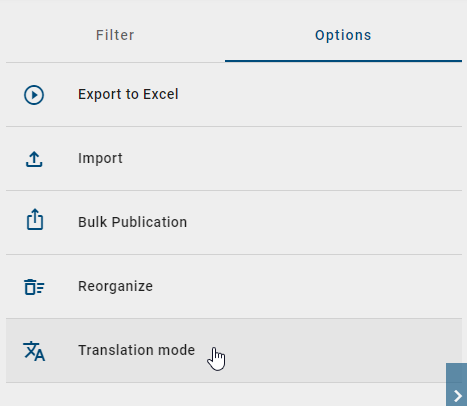
After entering Translation Mode, the catalog items are displayed in your content language. Click a catalog item to add a translation for the alternative language.
A list of filtered catalog items appears. Click a catalog item to see text input fields for name, description, keywords, and attachments (URL) in other languages. Language codes (two-letter codes following ISO 639-1) indicate which field corresponds to which language. Use the horizontal scrollbar to see all languages supported by GBTEC Process Design.
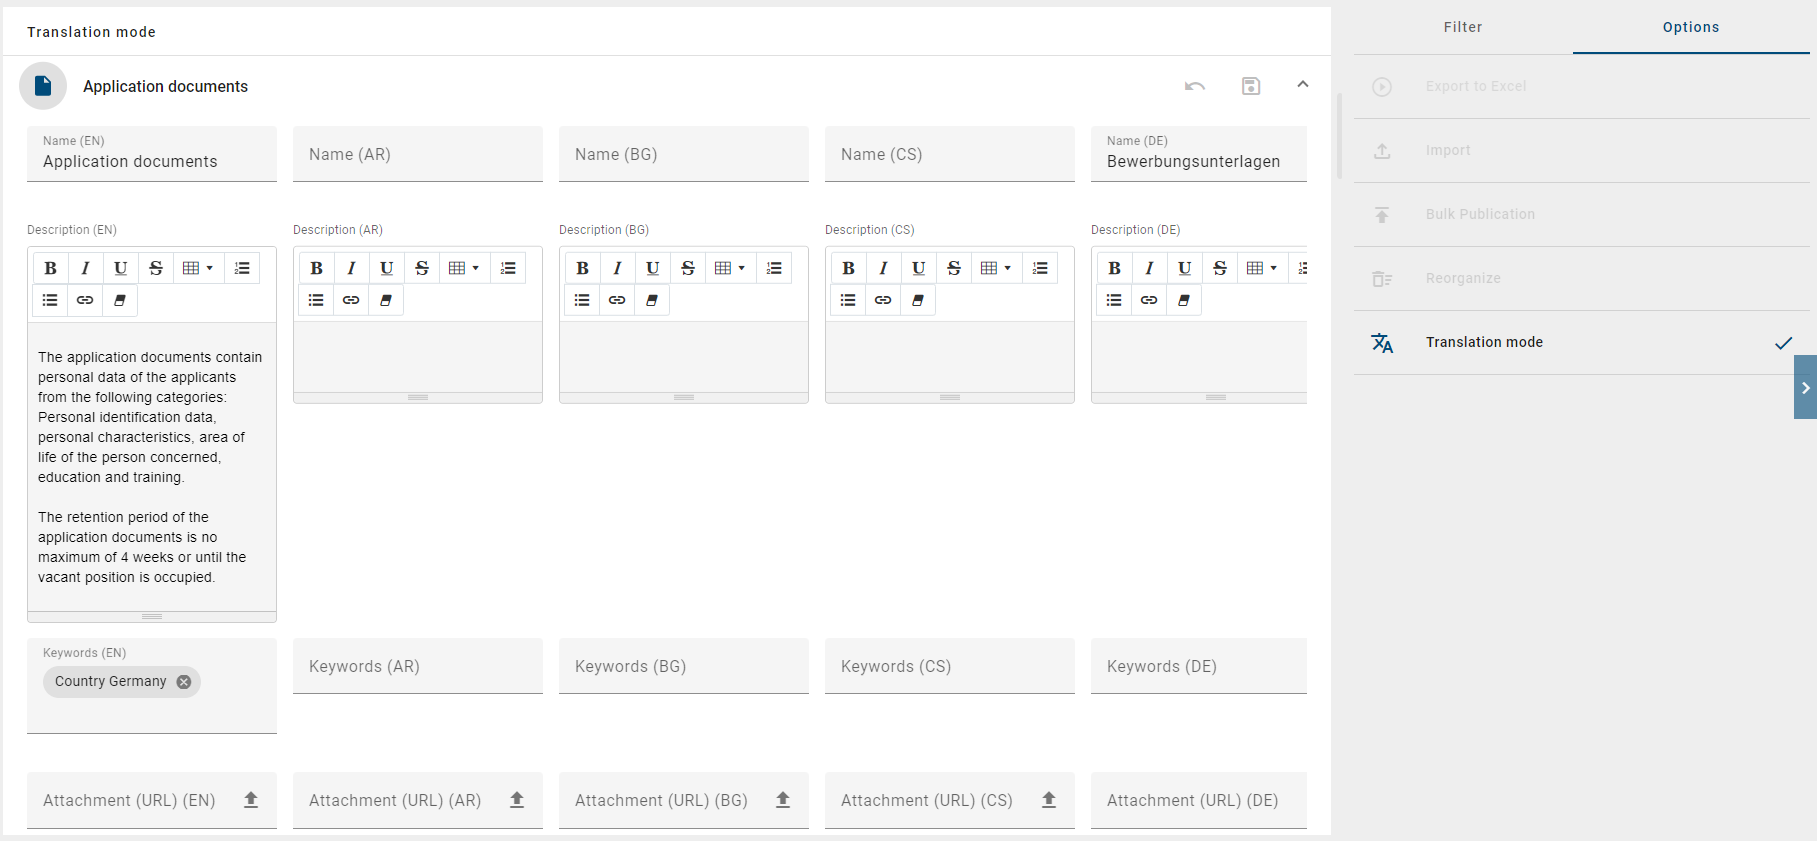
After entering the translations, click the Save icon to save your changes or the Discard icon to discard them.
Hint
You can only save changes per item, not for all items at once.

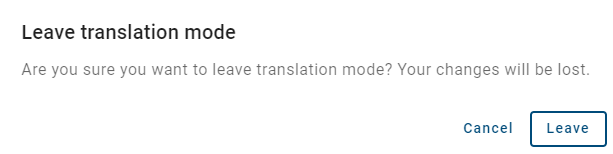
To leave Translation Mode, click the Translation Mode option again or navigate to another part of the application. If you have unsaved changes, a dialog opens. Click the Leave button to discard your changes, or click the Cancel button to go back and save your translations.
Note
The Translation Mode option is not available on small screen sizes, for example in the mobile view.
How can I automatically receive translation suggestions in the catalog?
Users with the Administrator or Editor user role can get automatic translation suggestions for all catalog items. A catalog filter must be active before you start. Users with the Author user role can only translate the filtered items if they are maintained in the “Author” governance attribute.
Open the Catalog menu item in the left menu bar and switch to the Public workspace stage. Open the Options panel in the right sidebar and click the Translation Mode option.
If the DeepL translation service is enabled, you can generate translation suggestions for the Name, Description, and Keywords attributes. The attribute must be maintained in the active content language to serve as the basis for the suggestion.
To request a translation for a language-dependent attribute, click the Translate option in the respective input field. This sends a request to the DeepL API, which generates translation suggestions automatically.

The translation suggestion option is disabled automatically if an input field already contains text. When you remove existing text from an input field, the option is activated again.
Dashboard
What is the dashboard and what options does it offer to display the data?
Every user can display catalog data in a donut chart using the dashboard. Open the Catalog menu item in the left menu bar. Click the Dashboard tab in the header.
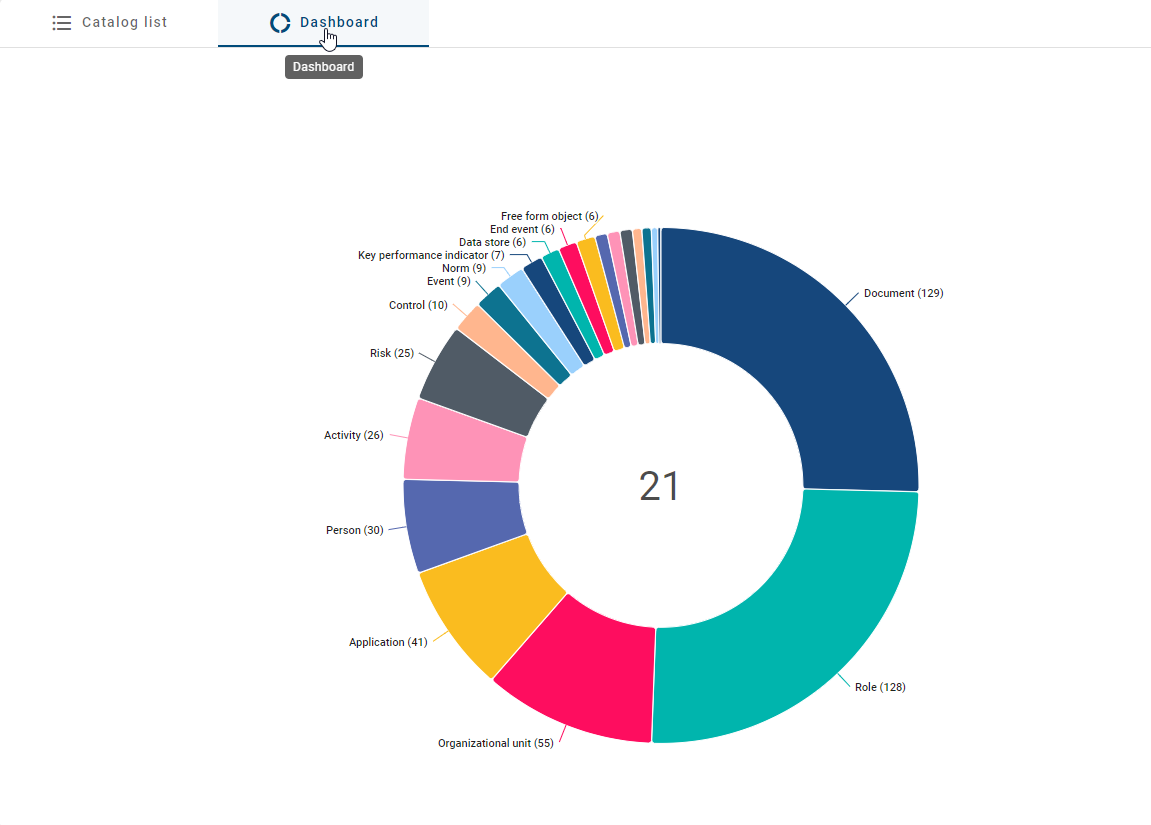
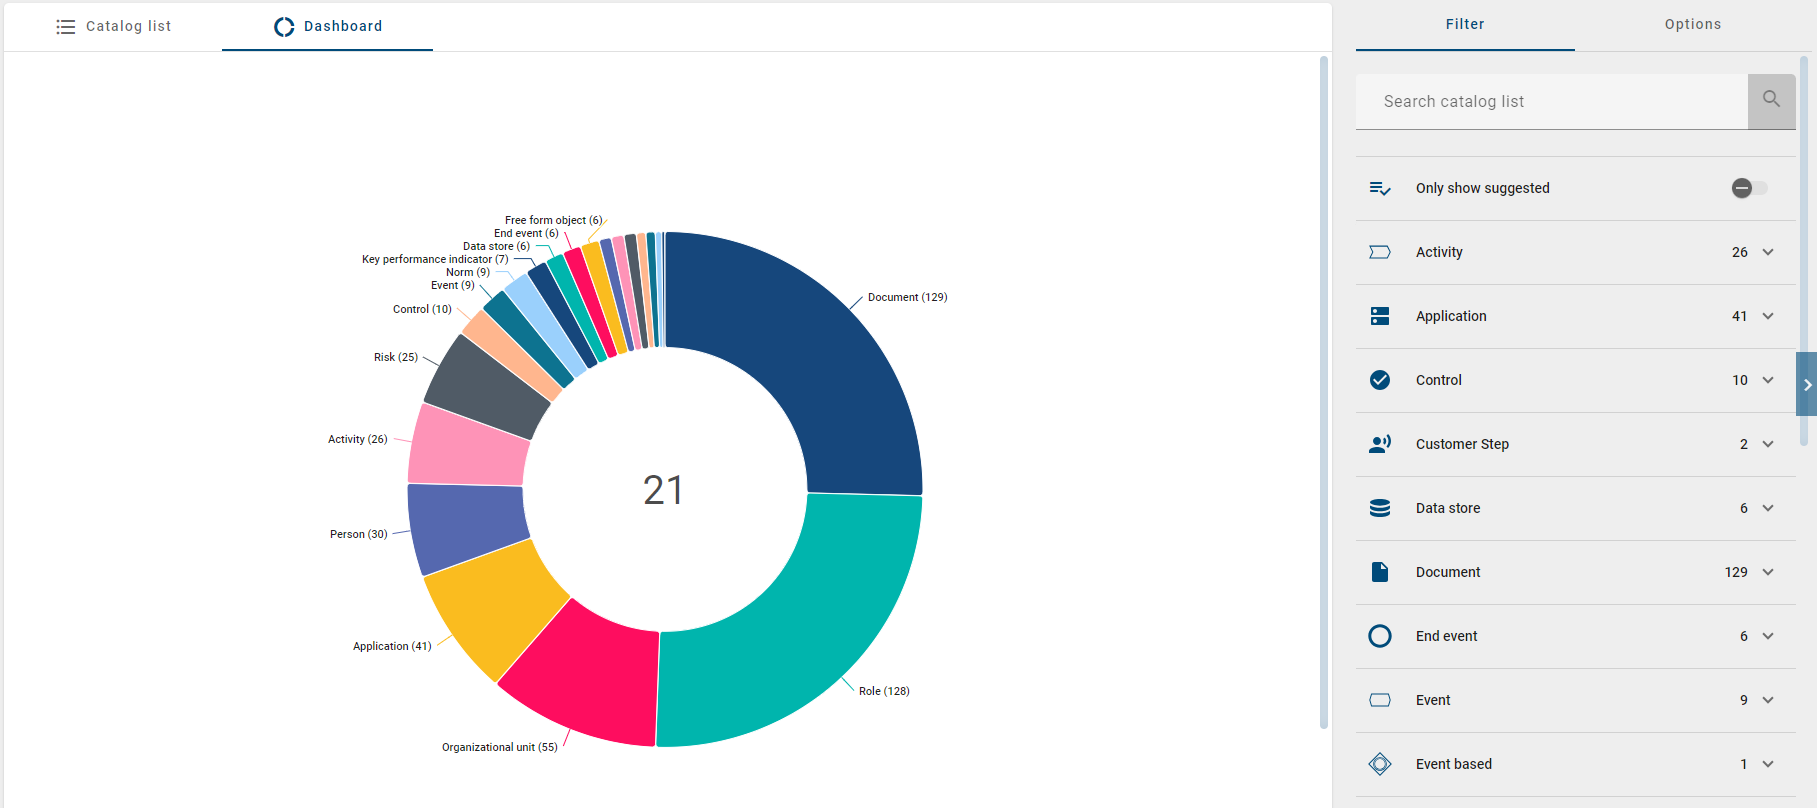
The dashboard opens with a donut chart in which all catalog items are sorted by object type. You can highlight individual segments by moving the cursor over them in the chart.
To return to the list view, click the List tab next to the Dashboard tab.

Tip
The number displayed in the center of the donut chart shows the number of different object types in the catalog.
Which data is offered by the dashboard?
Every user can choose between an overview of all catalog items by object type or a facet-based view for a specific object type.
Open the Catalog menu item in the left menu bar and click the Dashboard tab. If no filter is selected, all catalog items are displayed and sorted by object type. The number of catalog items for each type is shown in parentheses after the name of the object type.
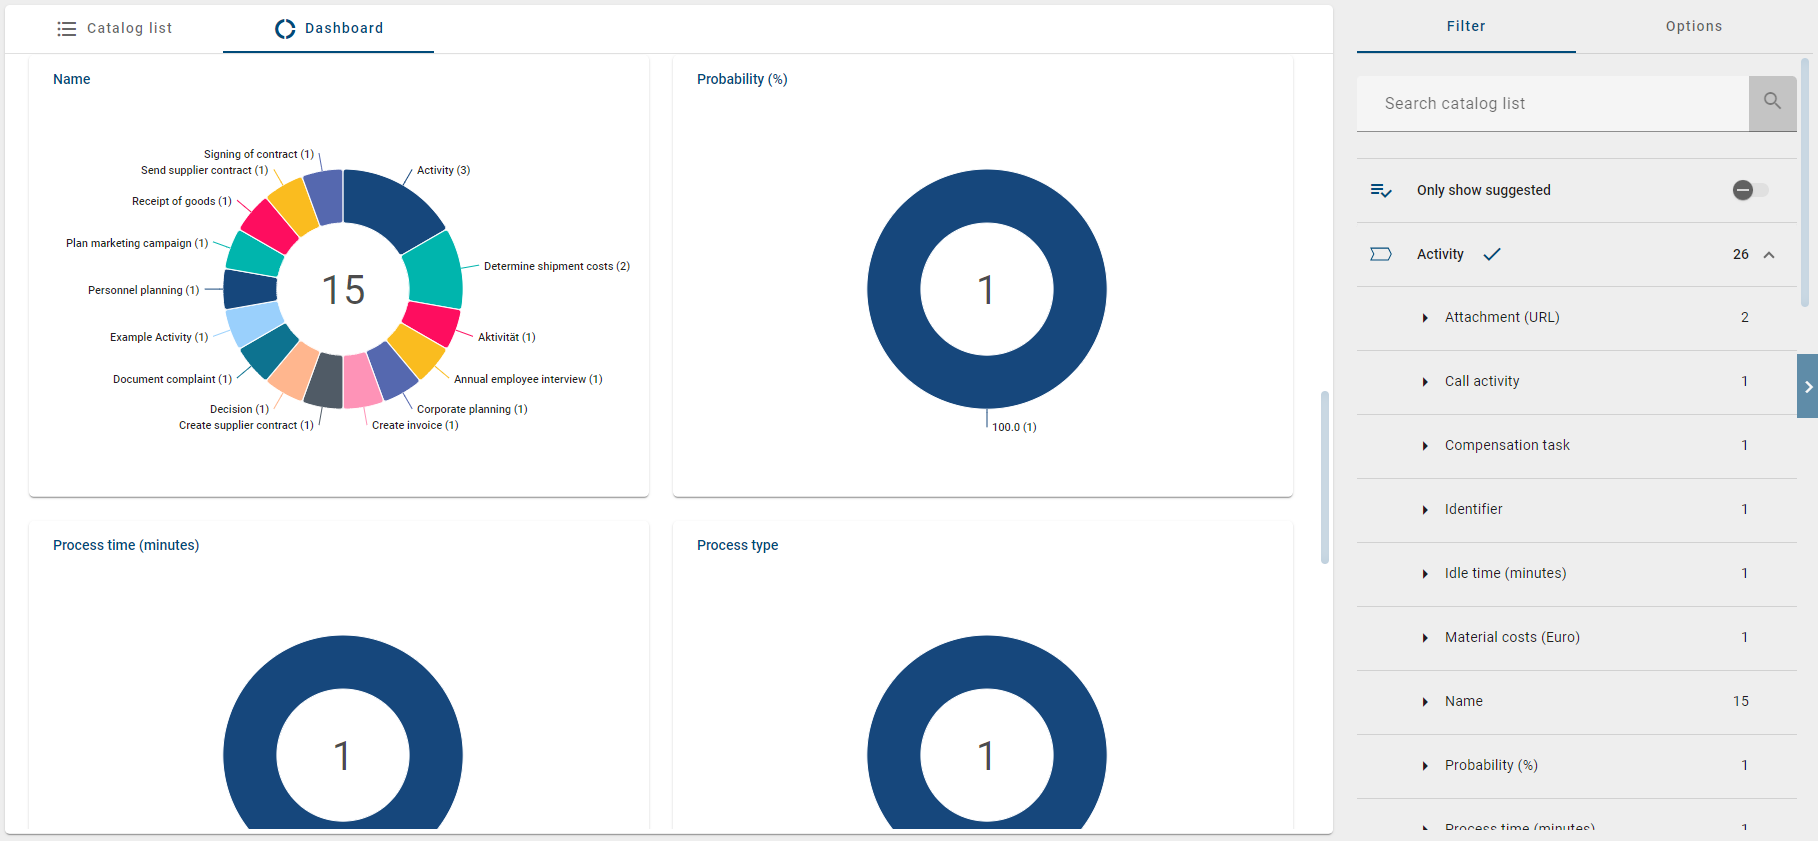
If a filter is selected, facets and their values are displayed for the selected object type. A separate chart is shown for each facet. Each chart shows the different values for that facet, with the number of occurrences in parentheses.
How can I change the chart type in the dashboard?
Every user can adjust the chart type in the dashboard. Open the Catalog menu item in the left menu bar and click the Dashboard tab. An overview of all catalog items sorted by object type is shown as a donut chart.
If you select at least one filter in the Filter panel in the right sidebar, a separate donut chart is shown by default for each facet. To change the chart type, open the context menu of a chart and select the Switch chart type option. You can choose between three types: line chart, donut chart, and column chart. The currently selected type is marked with a checkmark.
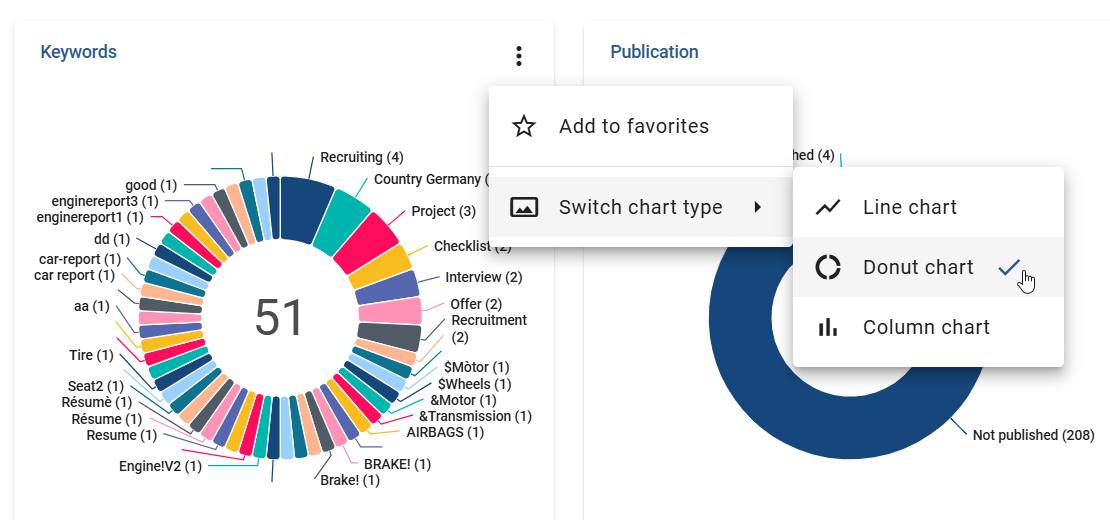
Once you select a chart type, the chart updates immediately and the selection is saved automatically. When you reopen the dashboard, the previously selected chart type is shown for each tile.
If you mark the dashboard as a favorite, the currently selected chart type is always shown on your MyGBTEC page. If you change the chart type later, the display on your MyGBTEC page is also updated.
Integrations
How can I view configured integrations in the catalog?
Users with the Administrator user role can add integrations to the catalog. Integrations display external websites for specific catalog object types in a new tab. They also enable references to other content within GBTEC Platform. To learn how to configure integrations, see here.
Every user can view configured integrations in the catalog. Open the Catalog menu item in the left menu bar. If integrations have been configured for specific catalog object types, filter by the desired catalog object type first. The filter option is in the Filter panel in the right sidebar. The configured integrations are then displayed as new tabs next to the standard tabs List and Dashboard.
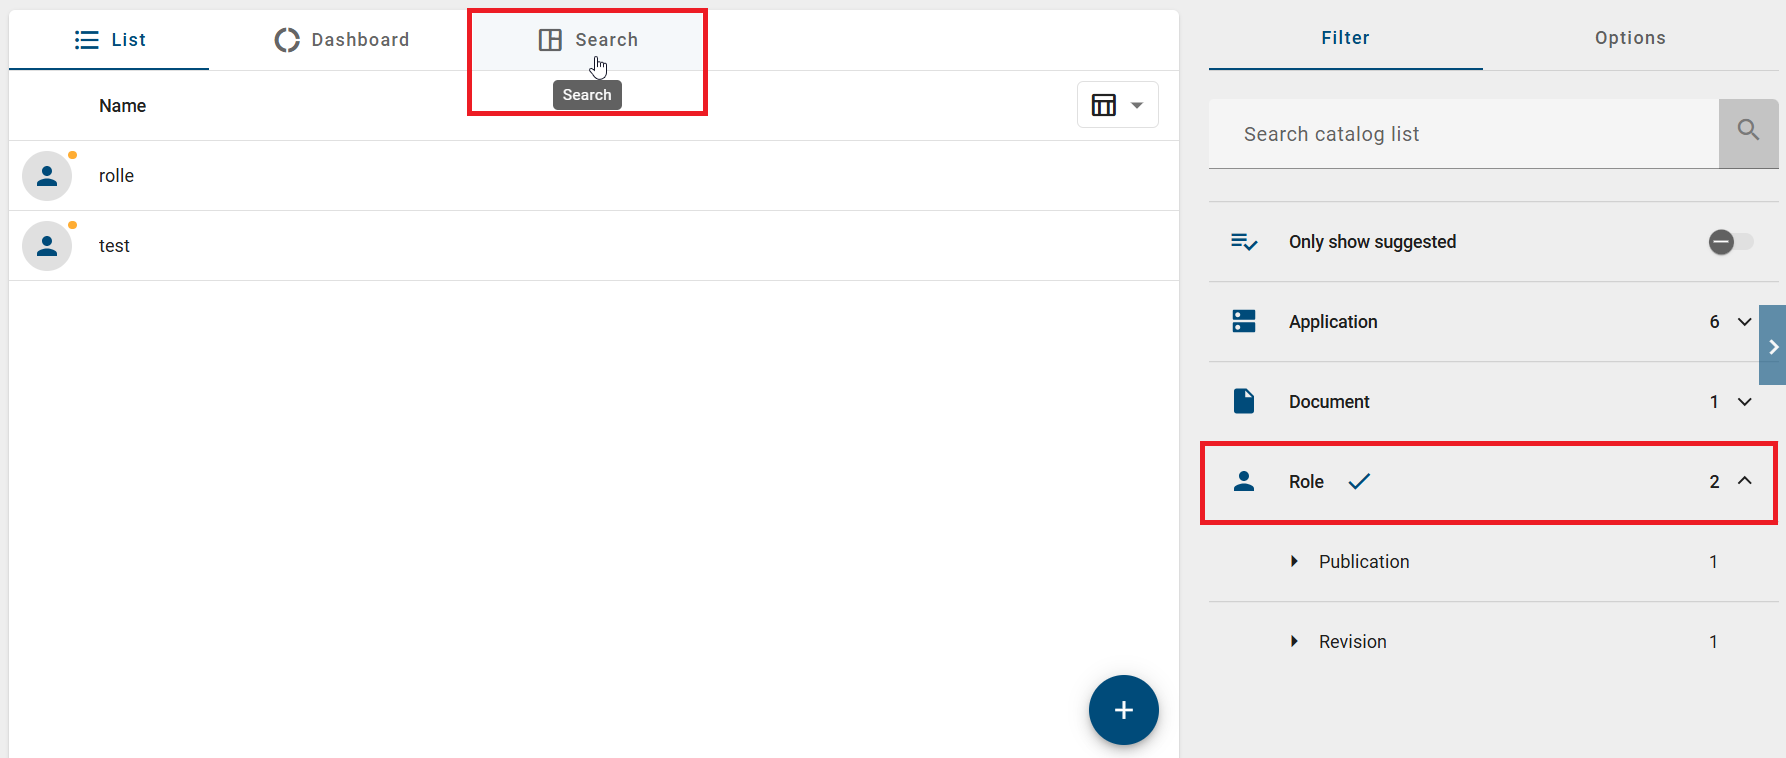
Integration titles are displayed in your browser language. If a title is not available in your selected language, it is shown in English.
Hint
You can only see configured integrations if they are not restricted to specific user groups or if you are a member of the assigned user group.
Click the configured integration. The stored URL is displayed within GBTEC Platform and is interactive.
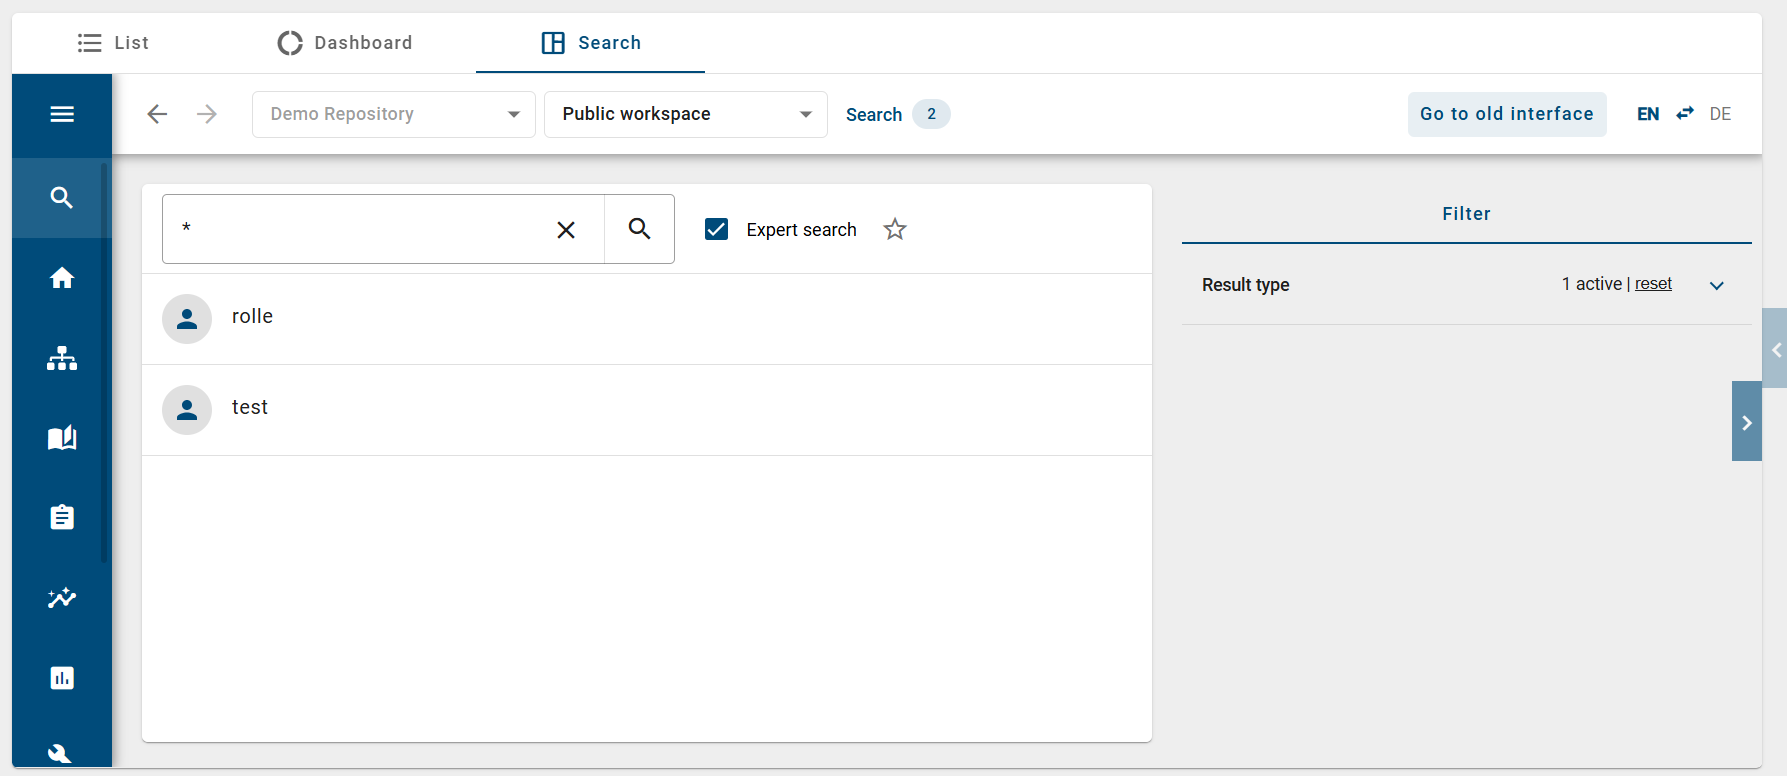
In this example, the search was linked to all entries in the Public workspace stage with the filtered result type “Role”.
Hint
Please note that the use of integrations requires a separate license, which you must purchase.
Occurrences
How can I view the relationship of a catalog item to other catalog items?
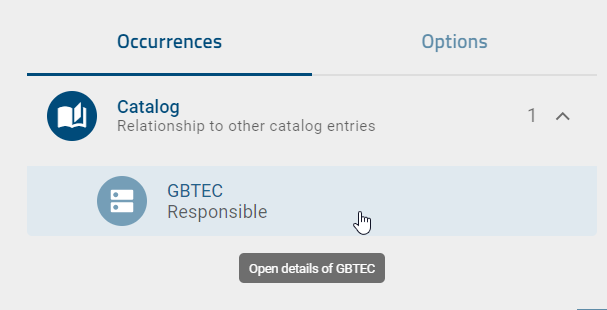
Every user can view in the details of a catalog item whether it has a relationship to other catalog items. Open the Catalog menu item in the left menu bar. Open a catalog item and switch to the Occurrences panel in the right sidebar. Expand the Catalog facet to view the relationships to other catalog items.
Click an item in the list to view its details.
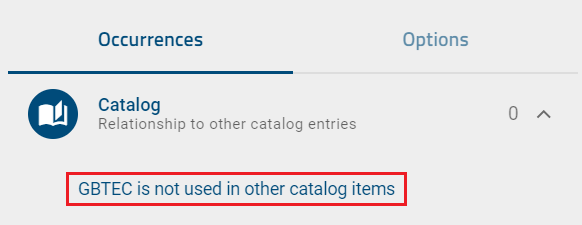
If the catalog item is not related to any other catalog items, a corresponding information message is shown.
How can I graphically display the relationships of a catalog item to other objects?
Every user can graphically display the relationships of a catalog item to other objects as a tree diagram. Open the Catalog menu item in the left menu bar and select a catalog item. You are taken to the details view. Click the Object relations tab in the header of the details view.

If there are no relationships, a notice appears. Otherwise, a tree diagram is displayed. The selected catalog item forms the node at level 0 (left). All relationships are displayed sorted by object type at level 1 (center) and colored with the object type colors from GBTEC Platform.
Click on an object type at level 1 to display the individual objects of that type. All objects of that type that have a relationship to the selected catalog item are displayed at level 2 (right).
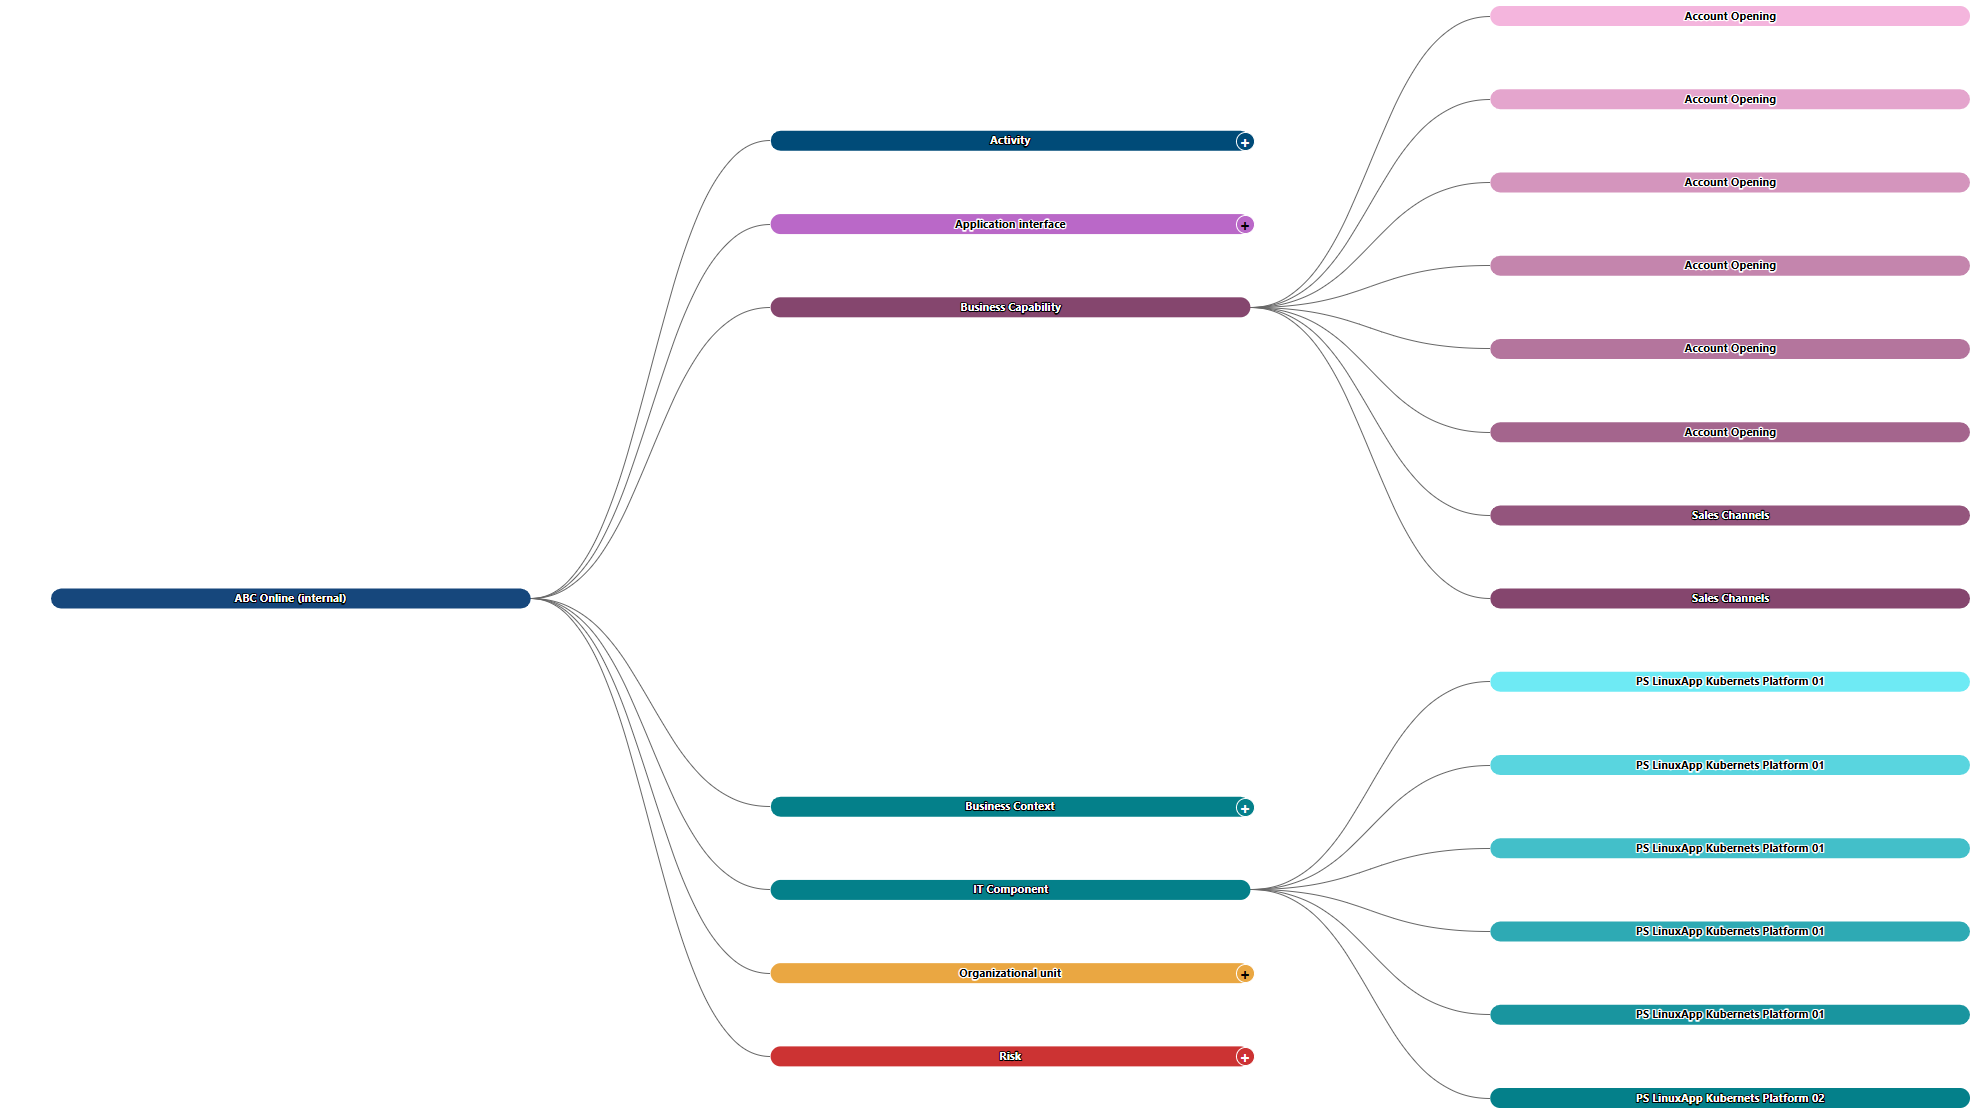
Hover the mouse over a node at level 2 to view basic information about the object. You can see whether it is a relationship to a diagram or a catalog item, the name, and if applicable the relationship type.
Right-click an object at level 2 and select the Go to occurrence option to navigate directly to the object in the diagram or catalog.
How can I view occurrences of catalog items in diagrams?
Every user can view the occurrences of catalog items in diagrams. In the catalog, you can see in which diagrams occurrences of a catalog item exist and what relationships these occurrences have to other objects.
Open the Catalog menu item in the left menu bar. Click a catalog item to go to its details. Switch to the Occurrences panel in the right sidebar. A list of the occurrences of the selected catalog item is displayed.
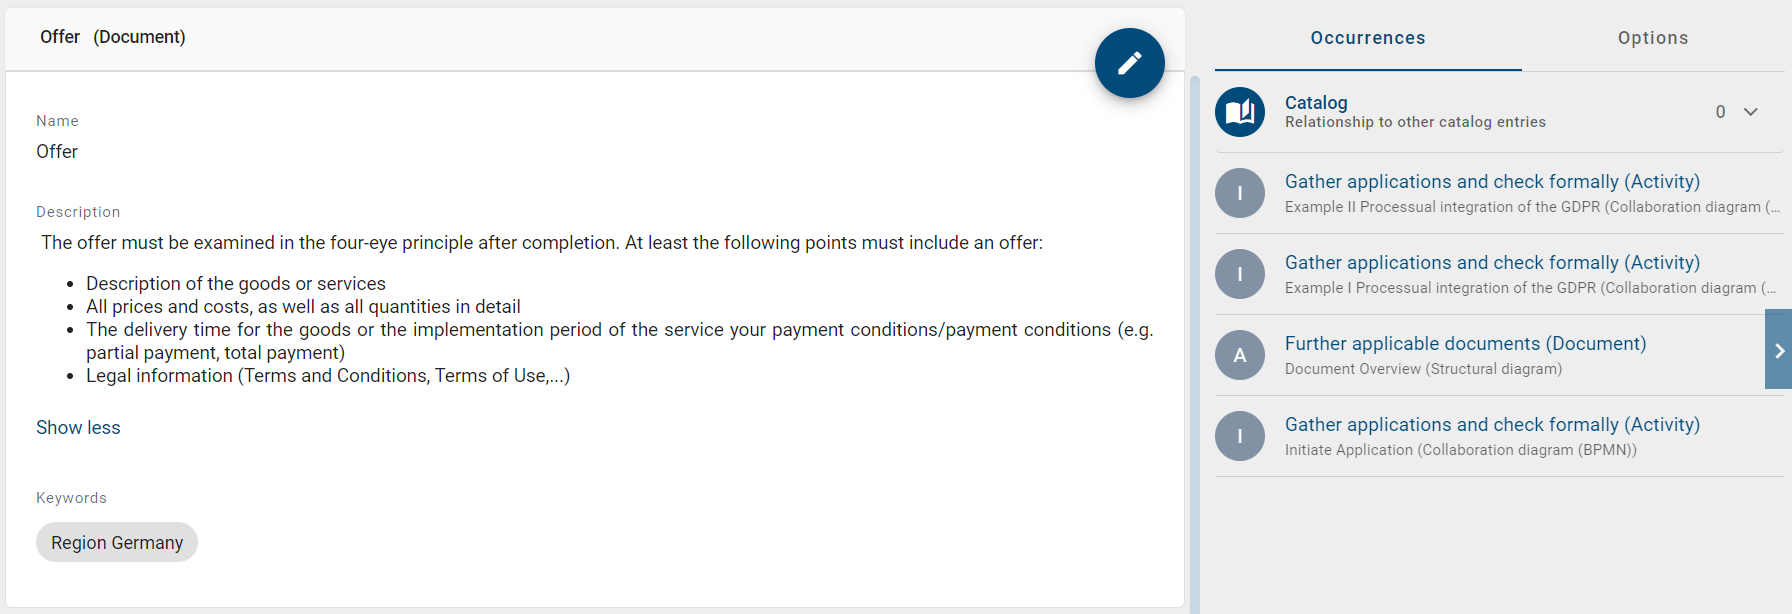
For occurrences with connections to other symbols, the name of the connected symbol and the name of the diagram are shown. For objects without connections to other objects, only the diagram name is shown.

Click an occurrence from the list. The diagram opens and the occurrence is selected.
You can also display the occurrences of an object in diagrams.
How can I see how a catalog item is used in a diagram?
Every user can see how a catalog item is used in a diagram.
Open the Catalog menu item in the left menu bar and select a catalog item. Switch to the Occurrences panel in the right sidebar. There you can see the relationships to other catalog items and diagrams.
If the catalog item is used in a diagram, that diagram is listed in the occurrences list. The list is sorted alphabetically. Expand a diagram entry to display all occurrences in that diagram. These are displayed in labeled groups.
Hint
To navigate to a specific occurrence, click on that occurrence in the list.
How do I reuse catalog items in multiple diagrams?
Users with the Administrator, Editor, or Author user role can reuse catalog items in multiple diagrams. Use the suggestion list for this. It does not matter whether the catalog items have already been accepted or are still suggested.
Open the Diagrams menu item in the left menu bar and click on a diagram. Check it out using the Check out button. Alternatively, create a new diagram.
Create an object whose type exists in the catalog. Open the name by double-clicking or pressing F2 and type at least one letter of the catalog item you are looking for. Up to five matching items appear in the suggestion list. For example, the search term “manager” also finds “process manager”. In addition, the suggestion list is pre-filtered by the diagram attribute “Scope”:
Scope defined: Only catalog items whose scope is not defined or which have the same scope as the diagram appear in the suggestion list. Scopes are considered the same as soon as an organizational unit exists in both scopes.
Scope not defined: Only catalog items whose scope is not defined appear in the suggestion list.
Select the catalog item you want to reuse from the suggestion list.
Note
The suggestion list for catalog items in attributes of an object works the same way. When reusing, note the differences when editing suggested and accepted catalog items.
Catalog Export and Import
How do I create a Process warehouse export in the catalog?
Every user can create a Process warehouse export from the catalog. Users with the Administrator or Editor user role can use this export for re-import. The Process warehouse export contains all currently displayed catalog items as an Excel table. Filters, facets, or search results determine which catalog items are included in the export.
Open the Catalog menu item in the left menu bar. In the right sidebar, switch to the Options panel. Click the Export to excel option. The export is created based on the current filtering.
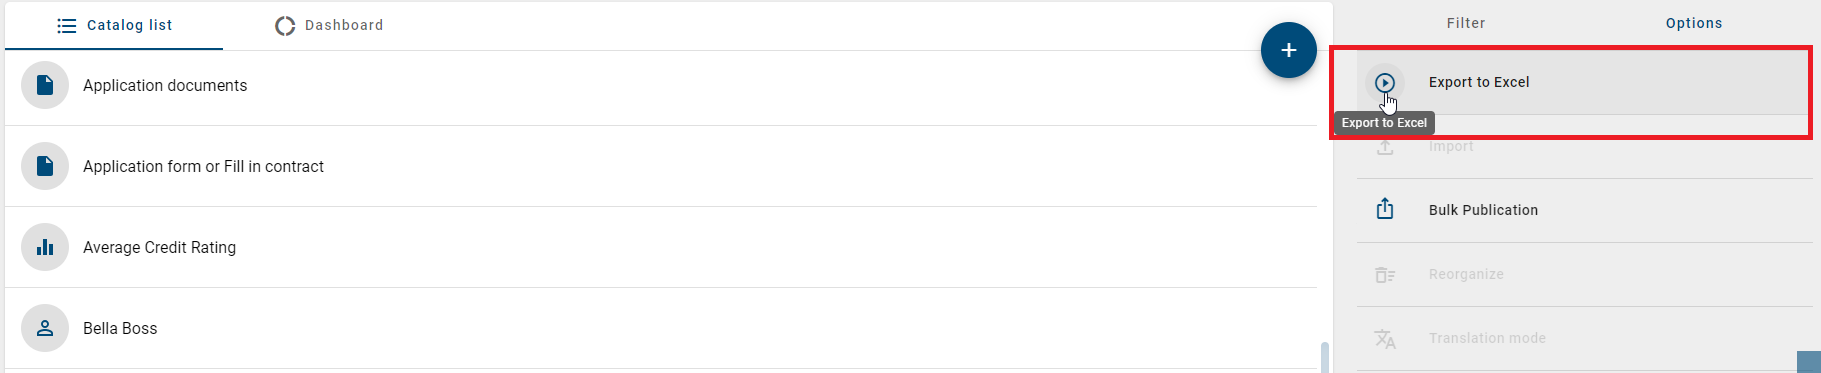
As soon as the report has been generated, a notification appears with the option to download the export directly. Additionally, the Download the report option appears next to the Export to Excel option. You can download the report via both options.

The first visible row is the header. The first column contains the unique identifiers under “Entity ID”. The following columns contain the attributes of the items, for example name, identifier, description, attachment, keywords, system attributes, and object type. The subsequent rows contain the attribute values. Multi-value attributes such as keywords are separated by a semicolon. An attribute type is only exported if it has been maintained for at least one item.
Hint
Only visible attribute types are exported. Attribute types that have been deactivated or removed in the method are not included.
Note
Attribute values exceeding 32767 characters are shortened automatically. A notification at the end of the shortened value indicates this.
Note
The attribute type IDs defined in the method are shown in the initially hidden first row. This lets you re-import the exported data and update catalog items.
Note
Each cell in the “Attachment (URL)” column contains a comma-separated list of the links maintained in the corresponding attribute field. Maintained titles are specified at the corresponding URLs via URL encoding. If you edit or add the title of a URL in the process warehouse, use URL encoding to ensure the catalog item is updated successfully.
Note
Date information in exports (for example “Valid from”, “Valid to”, “Created date”) is converted to the time zone of the currently active user.
Hint
The Attachment (URL) attribute can be restricted by the individual method configuration. In this case, only links or URLs can be stored, and other file types cannot be maintained.
How can I import data into the catalog?
Users with the Editor user role can import a (customized) process warehouse export in CSV or XLSX format into the catalog of the Public workspace stage to add or update data. Data is saved in the current content language.
Open the Catalog menu item in the left menu bar. Select the desired catalog filter. The filter specifies the object type of the items to be imported and must be active. If no items of the desired type exist yet in the list, first create an item of this type to get the filter facet. Then switch to the Options panel in the right sidebar and select Import.
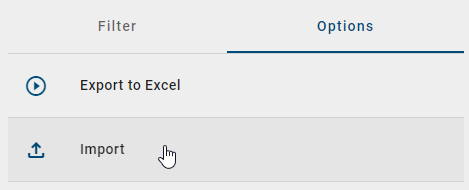
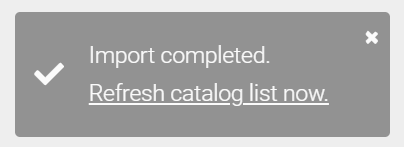
Select the desired CSV or XLSX file. The import runs according to the current filtering. A message in the lower right corner shows the progress. After a successful import, another message appears with the option to update the catalog. Click it to display the imported items. If the import fails, an error message appears.
Note
Date information in imports (for example “Valid from”, “Valid to”, “Created date”) is converted to the time zone of the currently active user.
Note
Entries in the “Attachment (URL)” column must be URL-encoded to be imported successfully. If you want to attach URLs with titles to a catalog item, the titles must be URL-encoded.
Note
Attribute values represented by checkboxes are ignored during import.
Hint
The Attachment (URL) attribute can be restricted by the individual method configuration. In this case, only links or URLs can be stored, and other file types cannot be maintained.
Functionality:
The import file is structured as follows: The initially hidden first row specifies the attribute type ID for each column. The first visible row is the header. The rows below contain the catalog items. In the following example, three catalog items are created during import in the same order as in the file.

Note
When importing in both CSV and XLSX format, catalog items are read in from the third row onwards.
Attributes listed in the import are applied to the catalog items if the attribute is defined for the corresponding object type in the method. Both the attribute type and its data type must match. If this is not the case, the attribute type is ignored. System attributes are set or adjusted automatically at the start of the import and cannot be adjusted manually.
By default, the first column of an export file contains the ENTITY_ID. If you create or customize the import file yourself, follow these rules. If the first column of the import file contains the ENTITY_ID or an attribute type ID of type Text:
This column is used as the identifying column. It is used for the case-sensitive comparison with catalog items.
A row is skipped if no Universally Unique Identifier (UUID) is used to define the ENTITY_ID. A UUID is a globally unique identifier. You can generate a new UUID using a generator (for example, the Online UUID Generator Tool).
A new catalog item is created as a suggestion if the ID or text attribute does not already exist in the catalog.
If a catalog item with the exact same ID or text attribute already exists, it is updated. The attribute types contained in the import are reset for the selected content language. Empty cells delete the attribute value. Attribute types not contained in the import remain unchanged. To update via ID, the catalog item must be available in the filtered catalog.
If this is not the case for the ENTITY_ID and the same ID already exists for a catalog item of another object type, the affected row is skipped.
The update using the attribute type ID does not consider existing objects of another object type. However, if the selected filter contains several objects with the exact same attribute text, the affected row is skipped.
If several rows contain the same identifying attribute value, the contents of the first item are updated by the subsequent items. The ENTITY_ID only makes sense in the first column. If the first column contains neither an ENTITY_ID nor a text attribute, the import is not performed.
Format:
For certain attributes, note the required format. Date values must be entered in the format of the current content language.
Note
When importing as an XLSX file, it is recommended to format date values in Excel as “Date”. When importing as a CSV file or as an XLSX file in which date values are formatted as “Text”, the following formats apply per data type.
Attribute value for data type |
Format |
|---|---|
Date |
yyyy-MM-dd |
Datetime |
yyyy-MM-dd HH:mm:ss |
Time |
HH:mm:ss |
Cell representation of numbers in scientific notation (exponential format) is not supported by the import.
Note
Date information in imports (for example “Valid from”, “Valid to”, “Created date”) is converted to the time zone of the currently active user.
HTML tags in the Description attribute are interpreted during import. The content is then displayed in the desired format after import. For example, you can specify the description of a document as shown below.
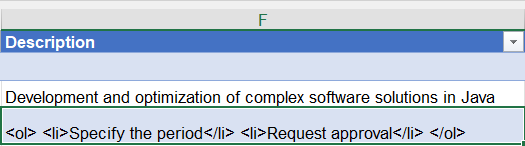
After import, the content of the attribute is displayed according to the HTML formatting. The document “Urlaubsantrag” then has the following formatted description:
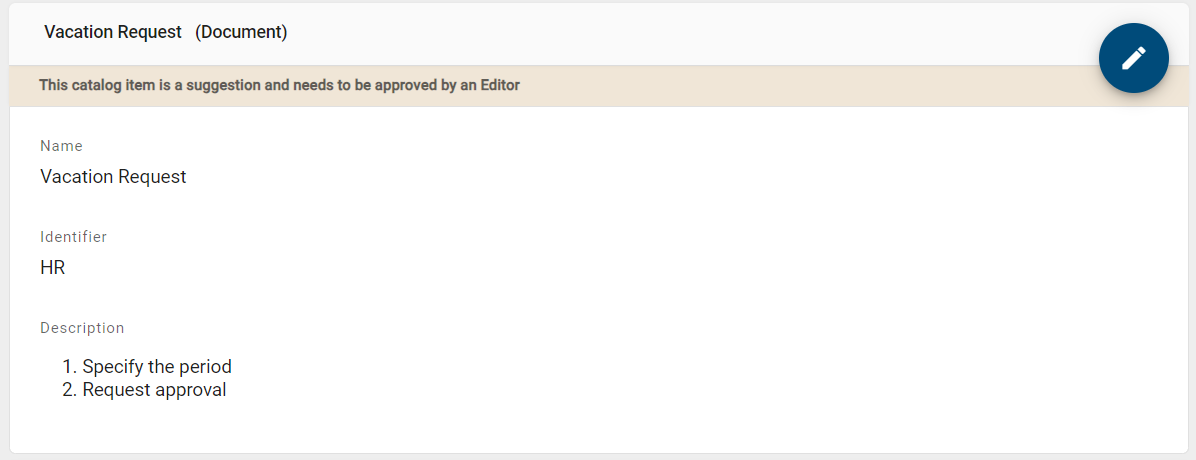
HTML tags are only converted during import. The export does not process HTML tags and does not convert formatting into HTML tags.
Multi-value text attributes such as keywords and links are also supported. Individual attribute values must be separated by a semicolon. Spaces before and after the semicolon are not included in the attribute values.
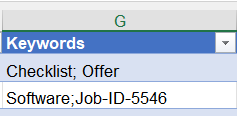
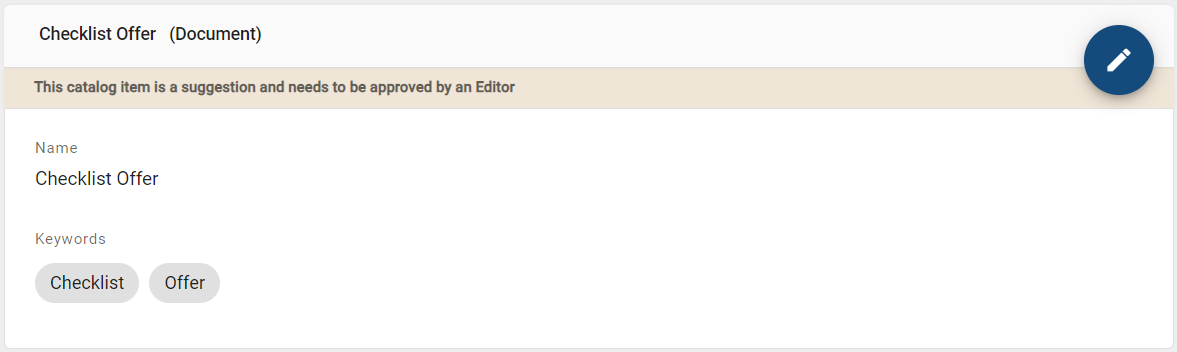
For example, the import above creates the two keywords “Checklist” and “Offer” for the “checklist for an offer” document and shows them in alphabetical order.
Note
Since all catalog items are created during import as object types of the selected filter, the imported file should only contain this object type. Files (XLSX, CSV) should be UTF-8 encoded. When importing an XLSX file, only the first spreadsheet is taken into account.
Hint
Assignment attributes such as subprocess or the governance attributes author, examiner, and responsible cannot be maintained or updated via import. When updating existing catalog items, these attributes retain the values stored in GBTEC Process Design.
How can I export the profile of a catalog item?
Users with the Administrator or Editor user role can export the profile of a catalog item. Open the Catalog menu item in the left menu bar. Select the desired item. The details view opens. Switch to the Options panel in the right sidebar and select Profile. The report is created.
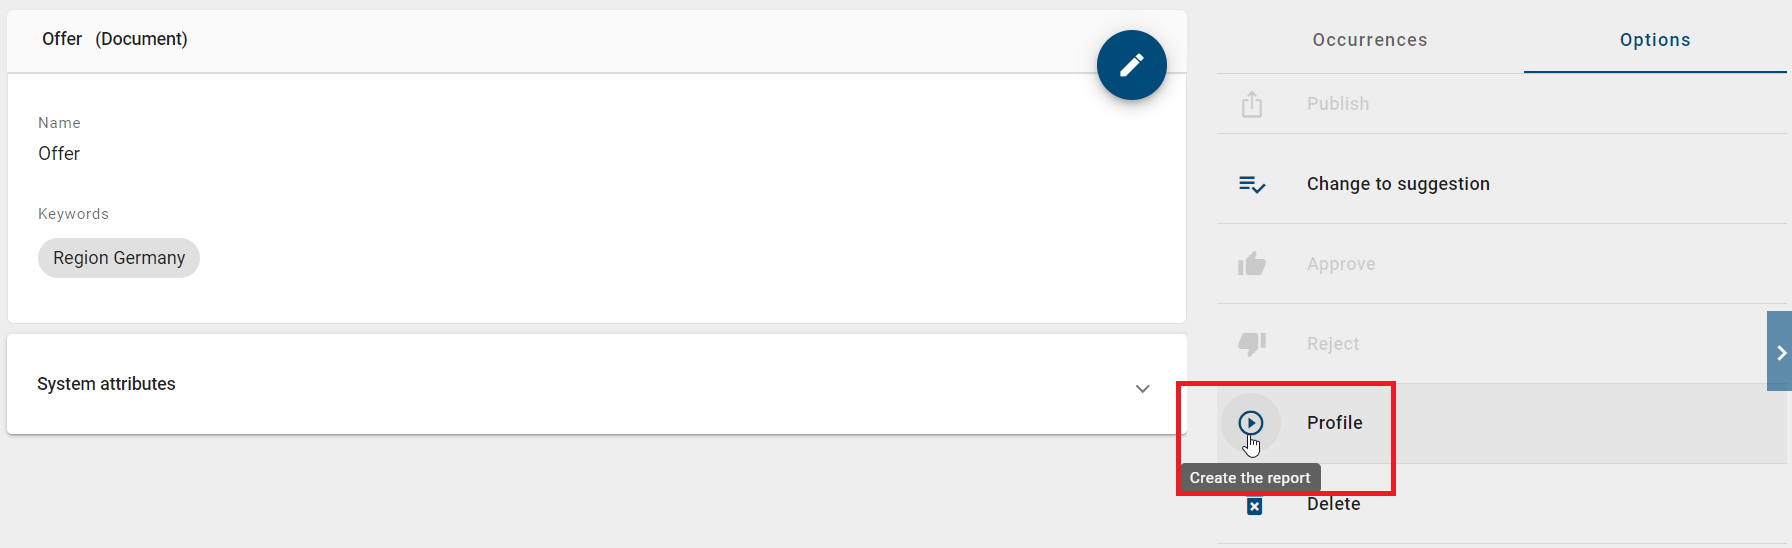
As soon as the report has been generated, a notification appears with the option to download the export directly. Additionally, the Download the report option appears next to the Profile option. You can download the DOCX file via both options.

The profile is available for the object types defined in the administration area.
Note
The availability of the profile depends on the configuration in the corresponding report descriptor.
The profile lists all attributes that have an attribute value in alphabetical order and is created in the current content language of the application. Assignment attribute values are shown not as a title but as the actual assignment, for example as a URL.
Hint
A catalog item used as an attribute is not currently evaluated in the profile report. Only occurrences and associations of a catalog item modeled in a diagram are displayed.
Hint
Date information in exports (for example “Valid from”, “Valid to”, “Created date”) is converted to the time zone of the currently active user.
Note
If the report template does not exist in the selected content language, the English template is used. The maintained attribute values remain in the content language.
Delete catalog items
How do I delete a catalog item?
Users with the Administrator or Editor user role can delete catalog items. Deleting a catalog item is irreversible. Both catalog suggestions and accepted catalog items can be deleted.
Open the Catalog menu item in the left menu bar and switch to the Public workspace stage. Navigate to the desired catalog item in the catalog list and open its context menu. Select the Delete option.
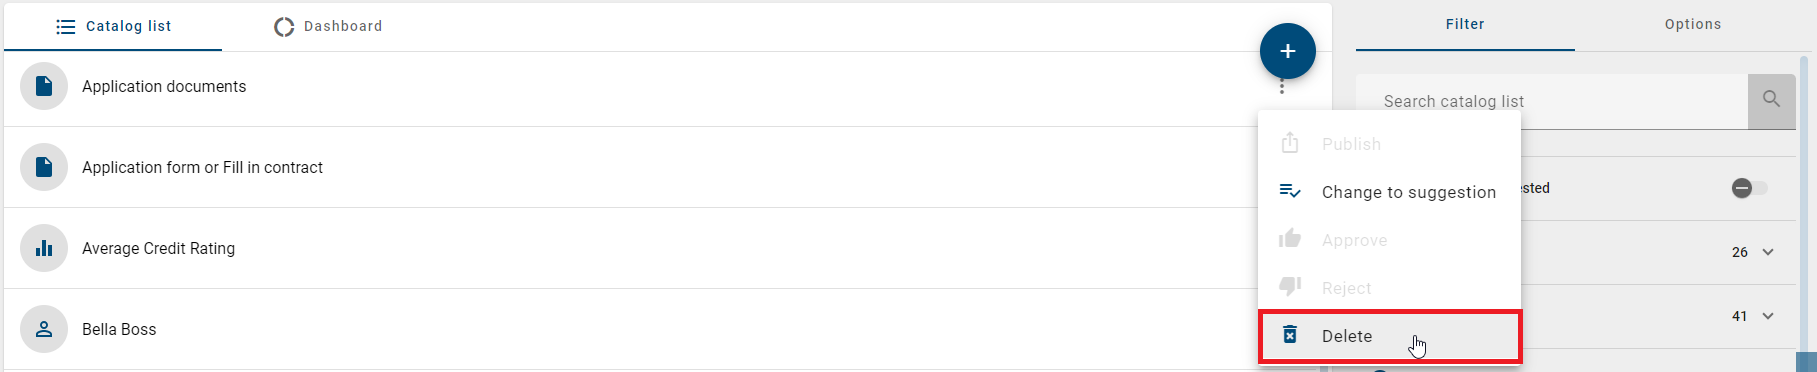
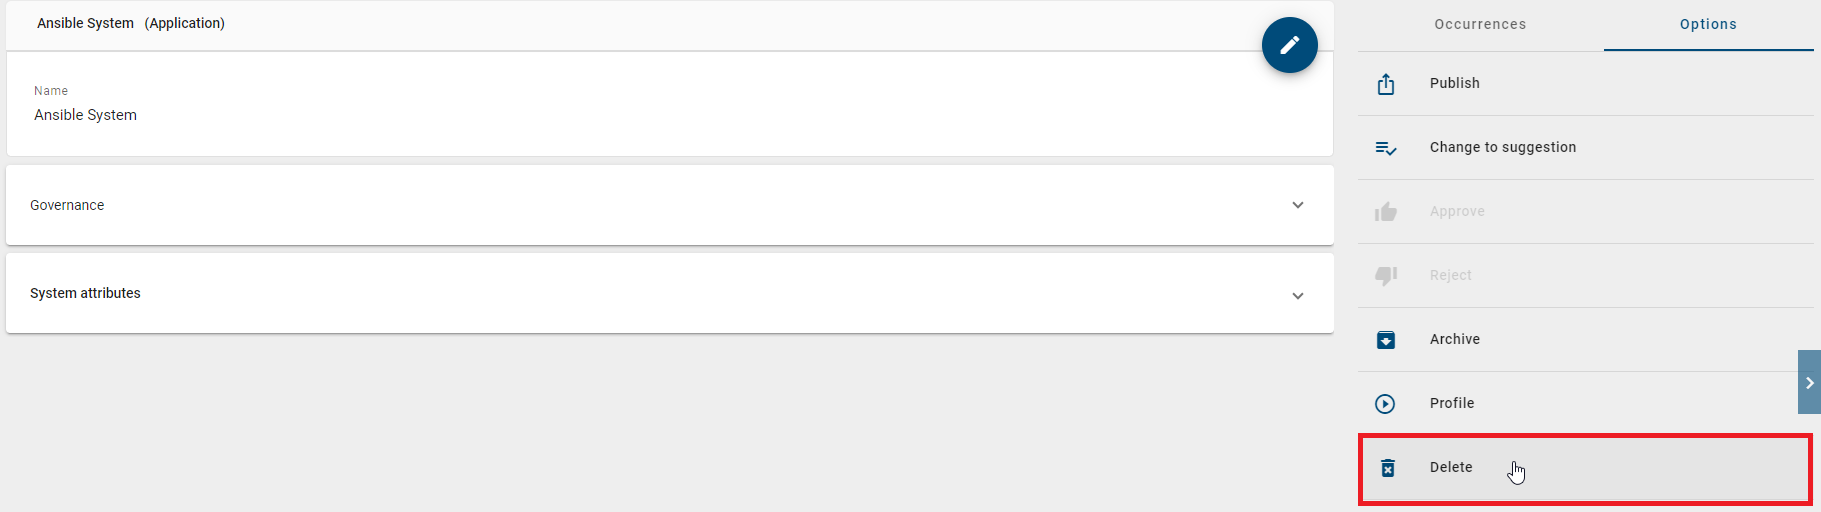
The Delete option is also available in the right sidebar when you open the detail view of a catalog item.
Hint
You can recognize catalog suggestions by an orange dot on the item’s icon. Additionally, in the Filter tab on the right sidebar, you can activate the Show suggestions only toggle to filter the list accordingly.
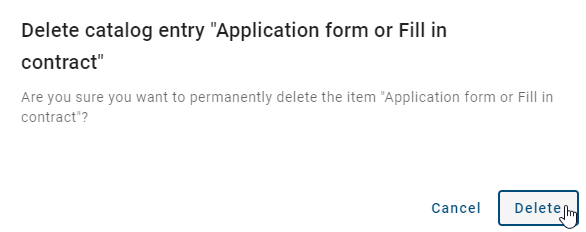
A dialog appears. Confirm or cancel the deletion. If the item is not used in a diagram and not assigned to any attribute, it is deleted directly.
Catalog item in usage:
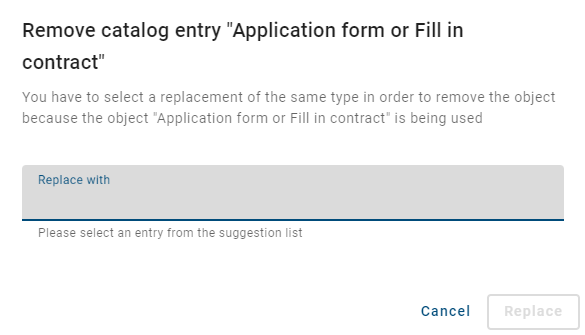
If the catalog item has at least one occurrence in a diagram, you must select a replacement. A dialog opens with an input field. Enter an existing item of the same type there and select it via the suggestion list. Click the Replace button to confirm.
Assigned catalog item:
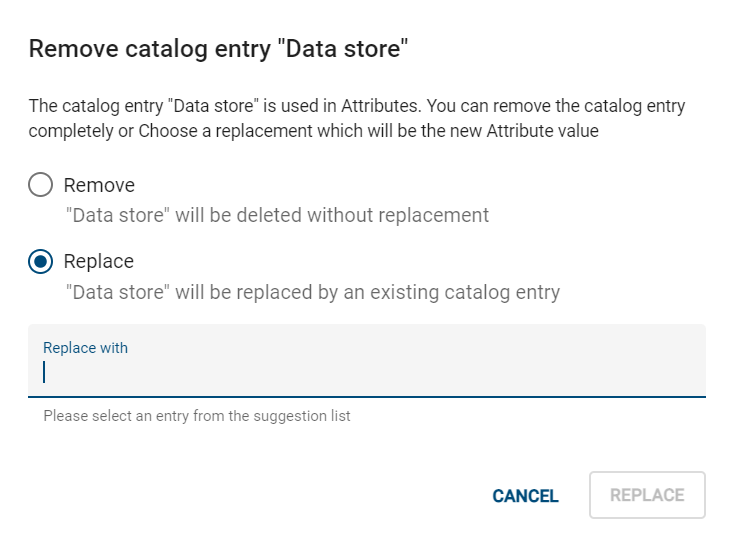
If the catalog item is only used as an assignment in attributes (for example person objects in governance attributes), a dialog opens. You can replace or remove the item. Select the Replace option to select an existing item of the same type from the suggestion list. Click the Replace button to confirm the action. Select the Remove option to permanently delete the item. This also removes all associated assignments in other objects and diagrams.
Note
Please note that when you delete a used catalog item or suggestion and select a replacement, this corresponds to a merge. In this case, the affected objects adopt the attributes of the catalog item that was selected as the replacement.
After deleting, you return to the catalog list. A deleted item is shown crossed out and grayed out. When you reload the page, the item disappears from the list.
How can all unused catalog items be deleted?
Users with the Administrator or Editor user role can delete all unused catalog items of an object type at once. The Reorganize option removes all items that neither appear in diagrams nor are used as assignments in attributes.
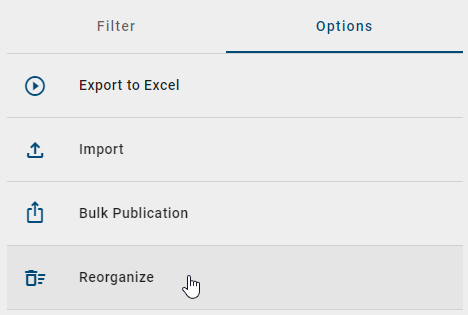
Open the Catalog menu item in the left menu bar. In the right sidebar, switch to the Filter panel and select the desired object type. Then switch to the Options panel in the right sidebar and select the Reorganize option.
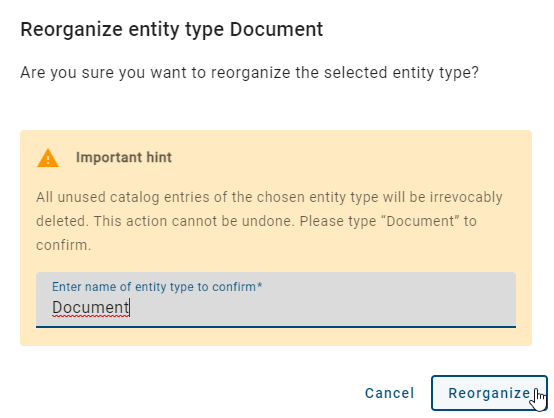
A dialog opens. Enter the name of the selected object type to confirm the reorganization. The name must match the type name from the current method in your browser language. Click the confirmation button to proceed.
Hint
The input check is case-insensitive.
All unused catalog items are permanently removed from the catalog and initially displayed with strikethrough. After reloading the page, they disappear completely from the catalog.
Warning
The Reorganize option affects all unused catalog items of an object type, regardless of which facets were additionally selected.
Note
The Reorganize option is not available on small screen sizes, for example in the mobile view.