Governance
Created, edited, and checked-in diagrams are available in the public workspace. These diagrams are only visible for users with access to this workspace, such as modelers and administrators. A diagram must be visible in the publication, so that other users, like Readers, are able to see it. This means it has to be published, which starts in the public workspace. The currently displayed version of the diagram is copied to the stages preview and publication using a release workflow. The different versions of a diagram are thus formed.
In general, you have two different releases for publishing diagrams: editorial release and publication via a multi-level publication workflow. By using the editorial release, a diagram is directly published without requiring an explicit verification by a responsible person or examiner. The publication via the multi-level release workflow requires confirmation by a responsible person. Optionally, a review by one or more examiners can be required in addition to the responsible person, before a diagram becomes visible in the “Publication” stage.
Diagrams
How can I publish a diagram?
The publication via the multi-level release workflow always requires confirmation by a responsible person. Optionally, a review by one or more examiners can also be required before a diagram becomes visible in the Publication stage.
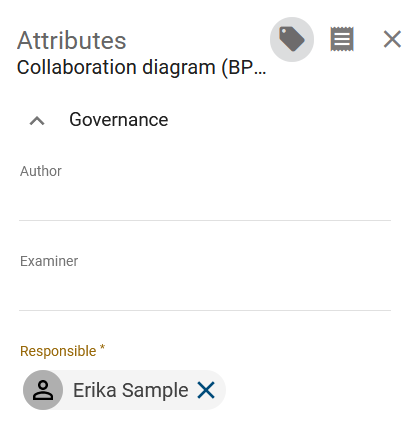
While modeling, users and user groups can be added in the attribute “Examiner”. They are selected via their catalog items person or organizational unit. For each entry, meaning each person or each organizational unit, only one approval is required in the review step.
The attribute Responsible can only be assigned once. It can be either a single person or an organizational unit. This attribute is a mandatory attribute and must be filled in for publication.
Initiation
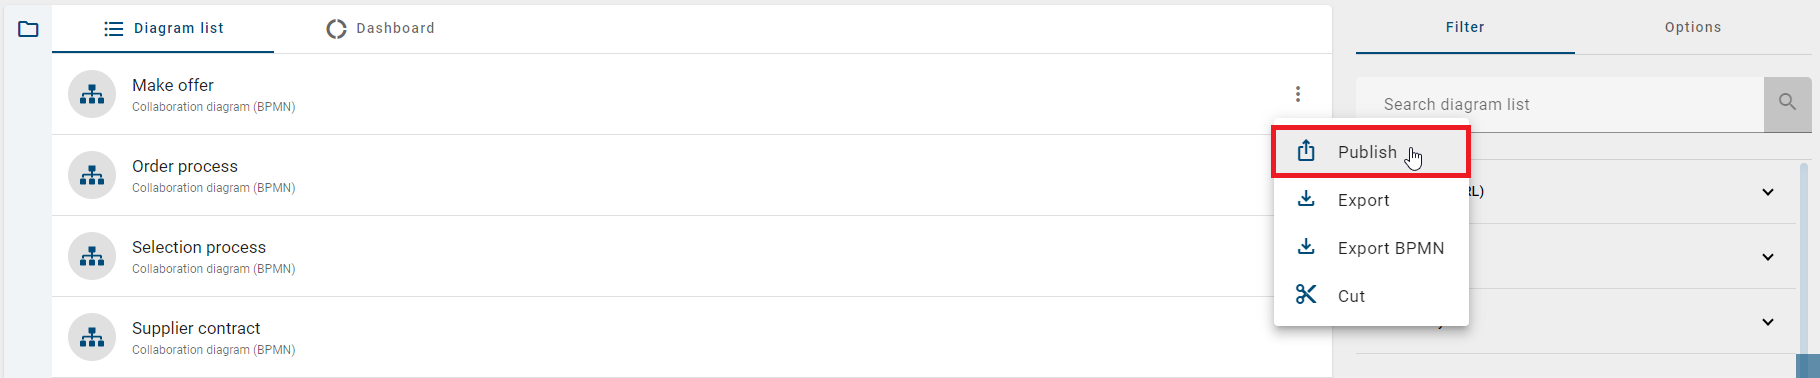
To start the publication workflow, open the context menu of the desired diagram in the diagram list and click the Publish diagram button.
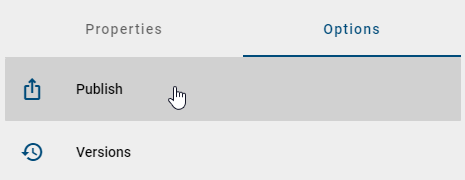
Alternatively, if a diagram is already open, you can find the same option in the Options panel in the right sidebar.
Hint
Please note that you cannot publish locked diagrams.
Hint
Please note that users with the Author role can only publish diagrams if they are listed as reviewers in the governance attributes. Alternatively, they can forward diagrams for publication by maintaining the governance attributes.
A dialog opens and asks you to enter a reason for the publication. Enter a reason and click the Publish button. For various reasons, the workflow may not start. In this case, you will see an error message.
The publication always uses the version of the diagram at the time the workflow is started. Changes made after the start are not considered. This can lead to differences between the diagram in the public workspace and the version shown in the preview.
Examine step
The optional examine step is used if at least one examiner is set. After the workflow starts, examiners receive a notification by email and in the application about the open examine task. The task can be completed in the versions tab.
The examiner can reject or approve the diagram.
If an examiner rejects the diagram, a comment must be added. The diagram is not published. The initiator receives an email and a task for Rework. The initiator can cancel the publication or edit the diagram and publish it again by clicking the Publish button in the versions tab.
If the examiners approve the diagram, the responsible user or user group is informed by email and asked to review the diagram. To complete the examine step, all listed persons must approve the diagram. For an organizational unit or user group, one member is enough to approve it.

Release step
The responsible user or user group also receives a task. The diagram can be approved or rejected. If a user group is entered, it is enough if one member processes the task.
If a responsible rejects the diagram, a comment must be added. The initiator and examiner are informed by email and the workflow ends.
If a responsible approves the diagram, for example the author and initiator are informed by email, the diagram is published (publication), and the workflow ends.
The symbols and catalog items in the diagram and in its attributes are also published. Catalog items with their own life cycle are an exception. They are not updated by the diagram publication, but only through the independent object publication.
Warning
Please note that depending on the validation scope for language-dependent mandatory attributes, conflicts may occur that prevent publication. For more information, see here.
Note
Please note that the responsible and the examiner must have at least the user role Reviewer, as they need access to the required areas. A new workflow can only be started if no other publication is currently running for the diagram.
Note
Please note that when the diagram is published by the workflow, the system attribute Last Modified By is set to Workflow in all stages.
How can I directly publish a diagram?
In the case of the editorial release, a diagram is published directly without requiring an explicit approval by a responsible person or examiner. This workflow can be started by users with the role Editor or Administrator.
In order to be able to use the editorial release, the governance attribute Responsible has to be maintained. To set a responsible user or user group, you have to ensure that a person or organizational unit was created in the catalog and filled in the attribute. Please note that the names of the persons must be entered individually in all languages used when manually created.
To start the editorial release, open the context menu of the desired diagram in the diagram list and click the entry Publish.
Alternatively (if you have opened a diagram), find the equivalent entry in the Options in the right sidebar.
Hint
Please note that you cannot publish locked diagrams.
A dialog will open and request to provide a reason for the publication. Type in a reason and select the checkbox editorial release. Then confirm via Publish. For various reasons, it is possible that a workflow cannot be started. You will be notified by an error message in this case.
The diagram is now available in preview and in publication stage, without the need for acceptance by the responsible person. The responsible person and other participants receive an optional email informing them that the diagram has been published.
Note
Editorial release can be deactivated so that each publication must pass through the defined approval and release steps. If the checkbox is selected during publishing, the application will inform you that editorial publishing is not possible. To ensure governance, editorial release cannot be disabled by administrators. Please contact our Customer Support for further information.
Note
When the diagram is published by the workflow engine, the system attribute “Last Modified By” of the diagram is set to “Workflow” in all stages.
How do I see which diagrams have already been published?
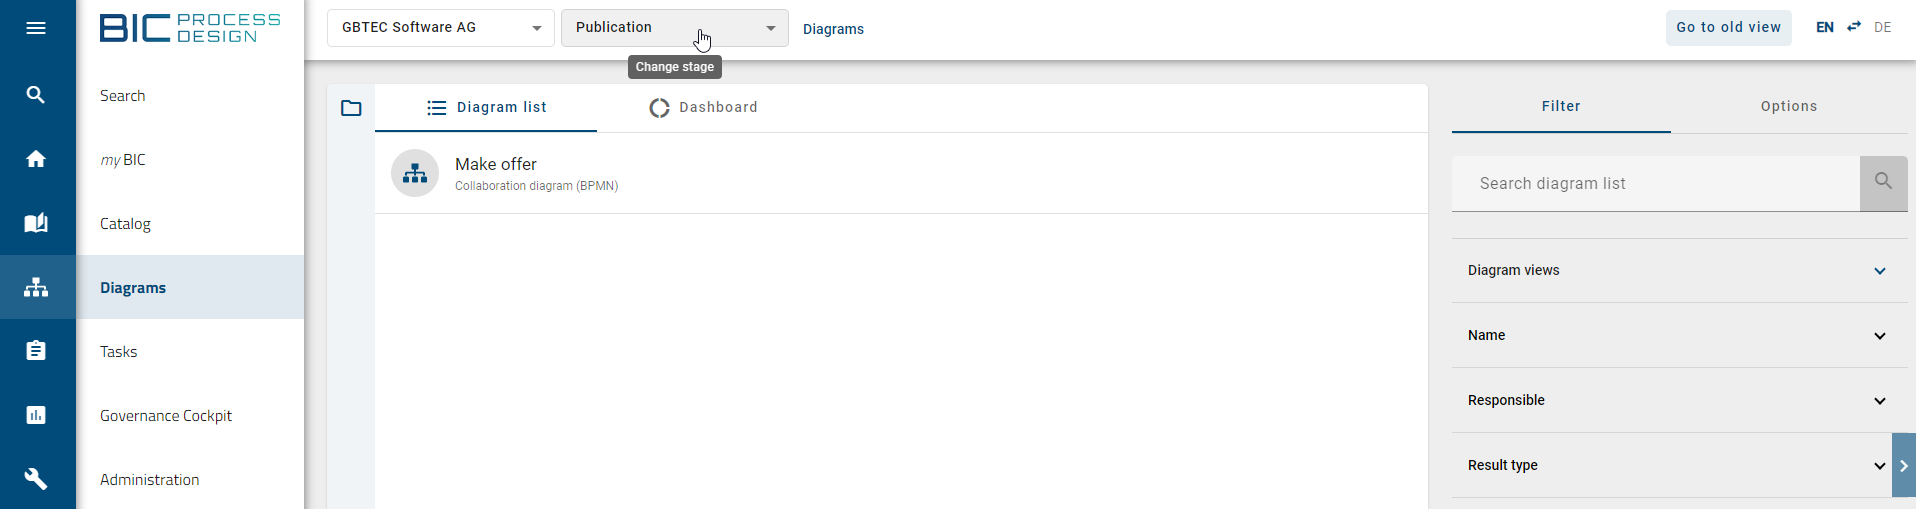
In order to view all published diagrams, navigate to the stage Publication. To do so, click the button in the header which shows the name of your current stage.
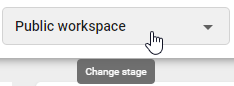
A list of available stages appears where you are directed to the stage Publication by a click. The name of the newly selected stage appears right next to the name of the repository. When you navigate to the diagrams now, you will see all diagrams and categories that have already been published.
Note
The same procedure applies to diagram versions in Preview (in Release).
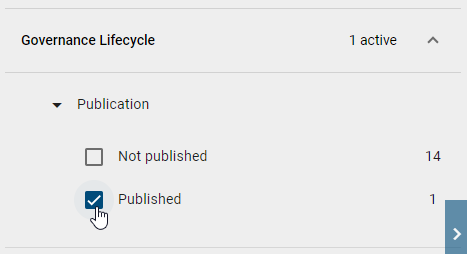
Alternatively, you can click the Governance Lifecycle attribute in the Public Workspace stage to filter by published diagrams and see all diagrams that have already been published.
Note
If the Published facet is not displayed, no diagrams are currently published.
Hint
The attribute Governance Lifecycle is available from version 7.14.0. To view all published diagrams in this attribute, you must check the diagrams out and back in at least once.
How can I check in which stages a diagram is already available?
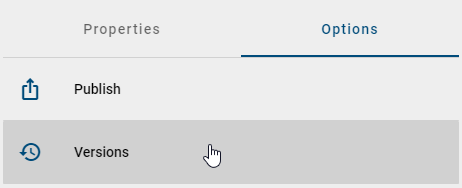
Navigate to a diagram whose published version you want to check. Afterwards open the options and click the entry Versions.
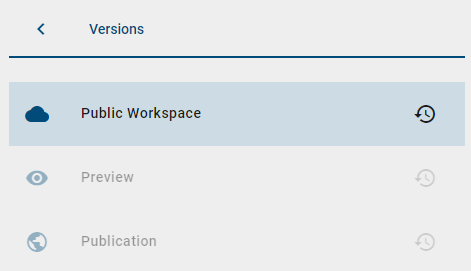
If the diagram has already been published, you can click Publication to see the published version of the diagram. If the diagram hasn’t been published yet, the corresponding entry is grayed out. In the current example, all entries are available, since all versions already exist for this diagram. The currently displayed area is also highlighted in color, as shown here for Public Workspace.
Note
The chapter “Versions and History” gives more information about the versions of a diagram.
How can I remove a diagram from the publication?
If you want to remove already published diagrams from the publication, you can use the “Depublish” function. The integrated workflow engine ensures a multi-level check. This workflow can be started by users with the role Author, Editor or Administrator. Your stage also needs to be in Publication.
Initiation
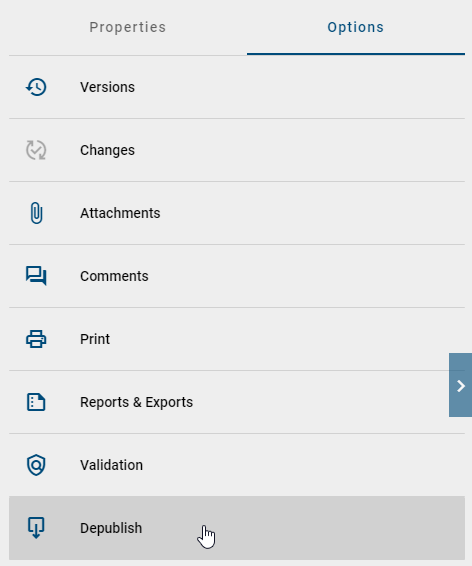
To start the publication workflow, open the context menu of the desired diagram in the diagram list and click the entry Depublish.

Alternatively (if you have opened a diagram), you can find the equivalent entry in the Options in the right sidebar.
A dialog will open and request to provide a reason for the publication. Type in a reason and click Depublish. For various reasons, it is possible that a workflow cannot be started. You will be notified by an error message in this case.
Release step
The user or user group maintained as responsible receives a task or a group task in the system and is informed by email. The responsible can arrange the final depublication.
If you are responsible for a diagram and received such a task, navigate to your tasks and select the Approve / reject button.
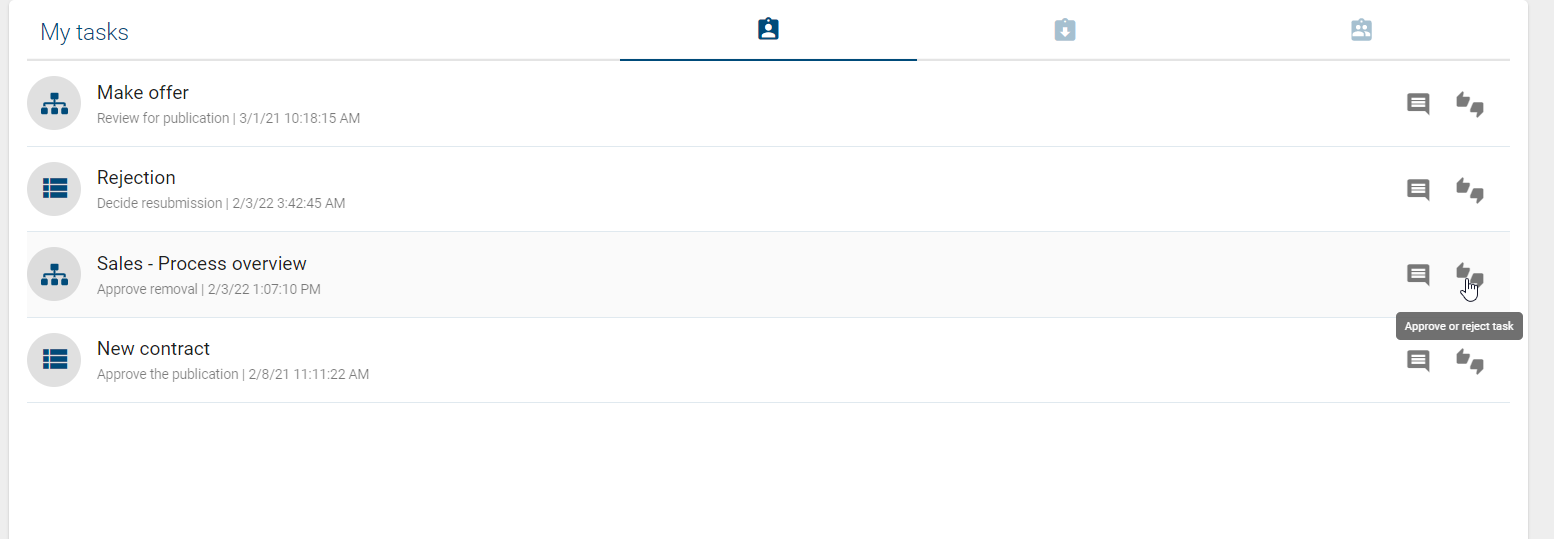
In the upcoming dialog, you can make your decision.
If a responsible rejects the depublication of the diagram, he needs to write a suitable comment. Afterwards the initiator is informed by a task and an email that the workflow is terminated.
If a responsible approves the depublication, e.g. the initiator is informed by email, the diagram is removed from publication, and the workflow is finished.
Catalog items without their own responsible person and which are only used in this diagram, are removed from catalog by depublication of the diagram. Entities with their own life cycle can be depublished using a special workflow.
How can I directly depublish a diagram?
With this editorial change, a diagram that has already been published is directly removed from the publication without explicit approval by a responsible person. This workflow can be started by users with the role Editor or Administrator.
Follow the steps of initiation from the previous chapter. Enter a reason for the depublication and activate the checkbox of the editorial change in the dialog with a mouse click.
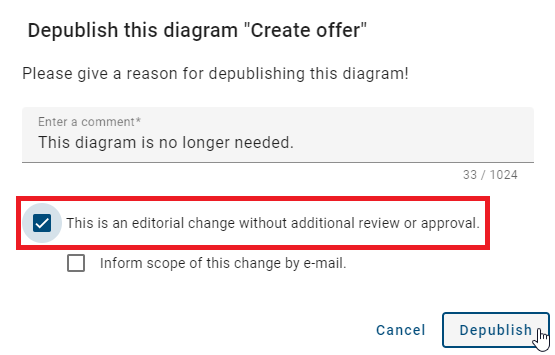
Some participants are optionally notified of this depublication by an email.
Hint
Please note that users with the Author role are only permitted to publish diagrams if they are listed as reviewers in the governance attributes. Alternatively, they can forward diagrams for publication by maintaining the relevant governance attributes accordingly.
How can I analyse the click rates of processes?
In the diagrams section, you can monitor the click rates of your published processes. As a user with reviewer rights or higher, you can find a filter facet Diagram views in the diagrams list.

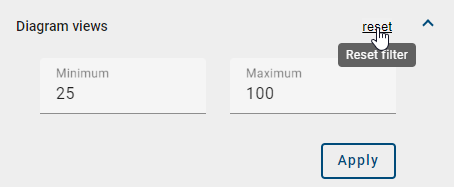
Open the facet by a click. Then you can enter a minimum and/or maximum value of click rates. After entering at least one value, you can click the Apply button. Then, the list shows all diagrams which have been viewed as frequently as specified.
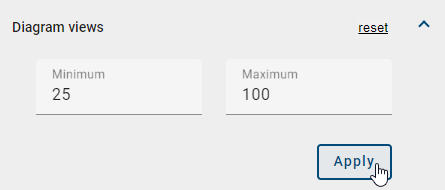
As soon as you entered a value as minimum or maximum, a reset button appears which you can use to remove the input and the filter again.
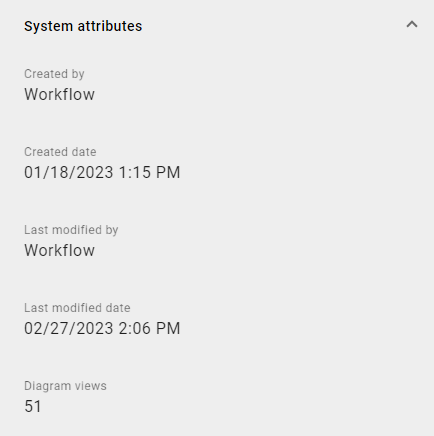
If you open a diagram in publication stage, you can find the number of views in the system attributes group. These attributes are shown in the details which is the first tab of the right sidebar. Note that this information is not available for Readers.
Note
Please note that the diagram click rates are registered continuously, but the attribute Diagram views is updated only once a day (at midnight of your server time zone). Therefore, you filter for the click rates given by the last update which is at most 24 hours ago.
Catalog items
With which requirements can I publish a catalog item?
Administrators, editors and authors have the option to publish a catalog item independently of a diagram. This is useful for items changed in the public workspace, so that individual changes are also available in the publication. There are a few points to bear in mind.
You can only publish accepted catalog items of the public workspace. Furthermore, the catalog items must have governance attributes that are assigned to a responsible person or organizational unit and optionally one or more examiners.
Only if these criteria are fulfilled, it is finally possible to Publish a catalog item in the catalog of the public workspace.
Also note the general reasons for failed publishing workflows.
How can I publish a catalog item?
If an object is published via the multilevel release workflow, at least one review is necessary. This is always done by the responsible person. Optionally, a review by one or more examiners can be required. Only after successful verification, the changed object becomes visible in the “Publication” stage. The requirements for publishing a catalog item are explained in more detail in this section.
Initiation
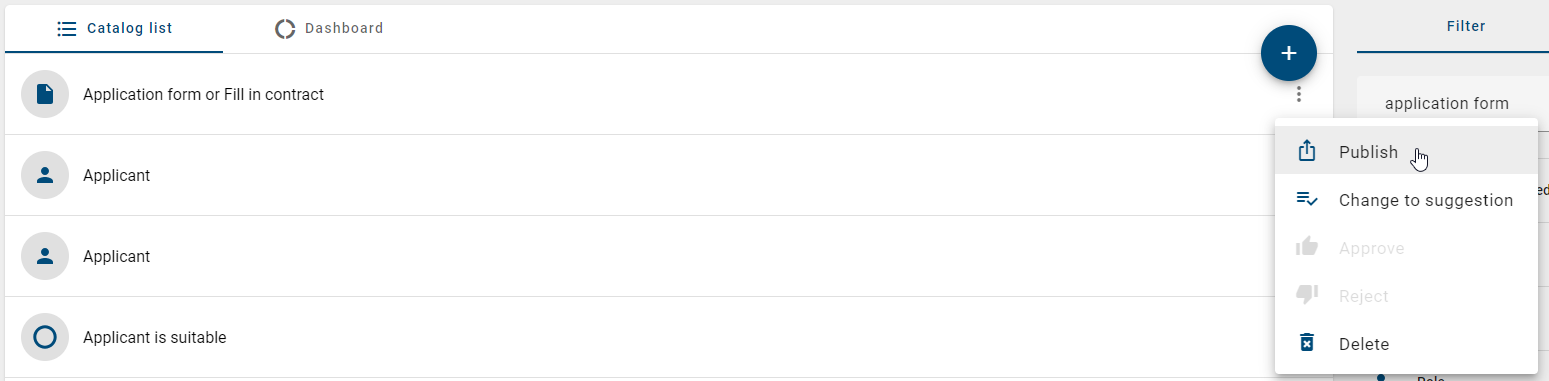
In the catalog, navigate to the item you want to publish. Select the item and open the Options panel in the right sidebar. Activate the function Publish of the catalog item to start the publication process.

Alternatively, you can start the publication via the context menu of the catalog item by selecting the option Publish. Note that the Responsible attribute needs to be set to start the publication.
Then enter a reason for publication and click Publish.
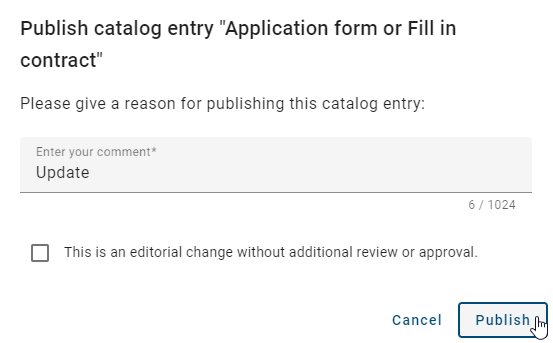
The registered examiners and the responsible are then informed about the initiation and they can carry out their examine and release steps. The time of the workflow start determines the version of the catalog item to be published. Changes made to the object after initiation are not taken into account. This can lead to differences between the catalog item in the public workspace and its version in the preview.
If you receive an error message for initiating the workflow at this point, you will find the possible reasons for this here.
Hint
If the catalog item is not assigned to an entity type and therefore does not contain a Responsible attribute, the Publish option is not visible.
Examine and release step
The optional examine step is achieved if at least one examiner is set. After the release workflow has been triggered, the responsible examiners receive a notification by email and in the application about the outstanding review task.
Responsible persons or organizational units are informed by email of the pending release step after workflow initiation or after the accepted examine step.
By clicking on the notification, users can navigate to their tasks and can see the task here or in their group tasks. The new task is displayed there and can be edited.
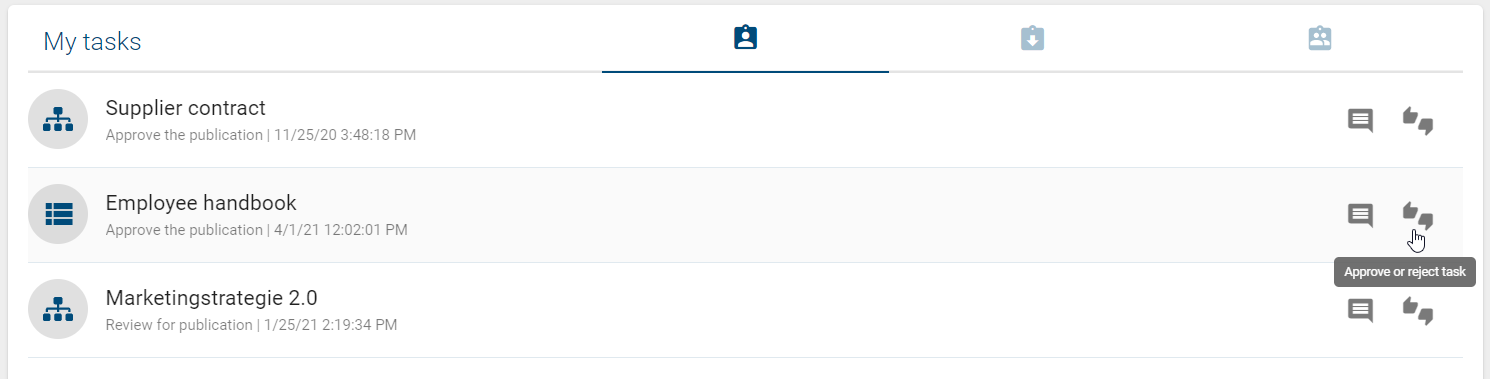
If the publication is rejected, the respective person must set an appropriate comment and the catalog item will not be published. The initiator is informed by email and the workflow is terminated.
After approval in the examine step, the responsible is requested to perform a release check by email and task. All persons registered as examiners must approve the publication. Furthermore, only the release of one member of a registered organizational unit or user group is necessary.
If the responsible person or a member of the organizational unit responsible approves the publication, for example the author and initiator will be informed by email, the catalog item will be published (publication) and the release workflow will be completed.
Warning
Depending on the validation scope defined for language-dependent mandatory attributes, conflicts may occur that prevent publication. For more information, see here.
Note
Only after publication of the catalog item, the changes are applied to all diagrams in preview and publication in which this object is modeled. Catalog items, that have their own responsible person, are not updated using diagram publication.
Tip
If you want to publish several catalog items, you can use the bulk publication to initiate the releases all at once.
Note
Please note the hints when publishing catalog items with Word file attachments.
Warning
Please note that catalog items containing a PDF file in PDF 2.0 format as an attachment cannot be published. PDF 2.0 does not support conventional document properties, but instead uses XMP metadata for user-defined properties, which are generally not displayed in standard PDF programs and therefore require advanced viewing tools.
How can I directly publish a catalog item?
In editorial release, a catalog item is published directly, without explicit release confirmation by a responsible person or examiner. This workflow can be started by users of the role Editor or Administrator. Some prerequisites for publishing a catalog item are explained in this section.
In the catalog, navigate to the item you want to publish. Select the item and open the Options panel in the right sidebar. Activate the function Publish of the catalog item to start the publication process.
Enter a reason for publication in the provided text field and activate the checkbox “Editorial change without further approval. Governance participants are automatically notified of the change by email.” below the input field. Confirm by clicking Publish.
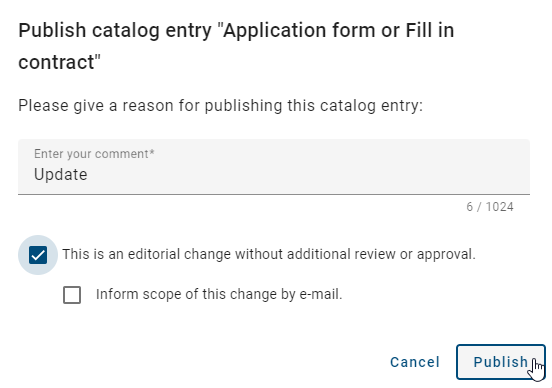
You will then receive a notification about the workflow start in the application. The catalog item is now available in the preview and in the publication stage without the approval of examiners or the responsible person. The initiator and other workflow participants receive the information by email that the catalog item has been published.
If you receive an error message for initiating the workflow instead, you will find the possible reasons for this here.
Note
Editorial release can be deactivated so that each publication must pass through the defined approval and release steps. If the checkbox is selected during publication, the application will inform you that editorial publication is not possible. To ensure governance, editorial release cannot be disabled by administrators. Please contact our Customer Support for further information.
Note
Please note the hints when publishing catalog items with Word file attachments.
How can I start a publication for multiple catalog items at once?
If you would like to publish multiple catalog items, you can use the bulk publication to speed up the process. The bulk publication starts a release workflow for each of your selected catalog items, so that you do not need to initiate the release at each single item.
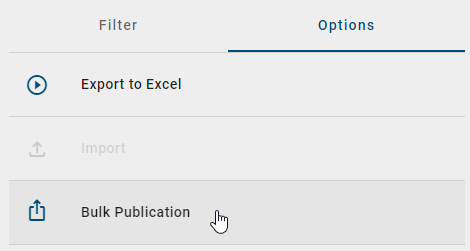
Navigate to the catalog, open the Options panel in the right sidebar and click the bulk publication option. Note that the bulk publication is performed in the catalog list. If you view the dashboard when selecting the option, the application will switch to the list automatically.
The catalog list will be filtered for all accepted items where the attribute Responsible is maintained. If you have previously extended the list view of the catalog with additional attributes, this view is included in the bulk publication. Thus, the list shows the items that fulfill the prerequisites for publication. Moreover, each list entry comes up with a checkbox. Now you can select the catalog items you want to publish. In the header, you can find the number of selected items.
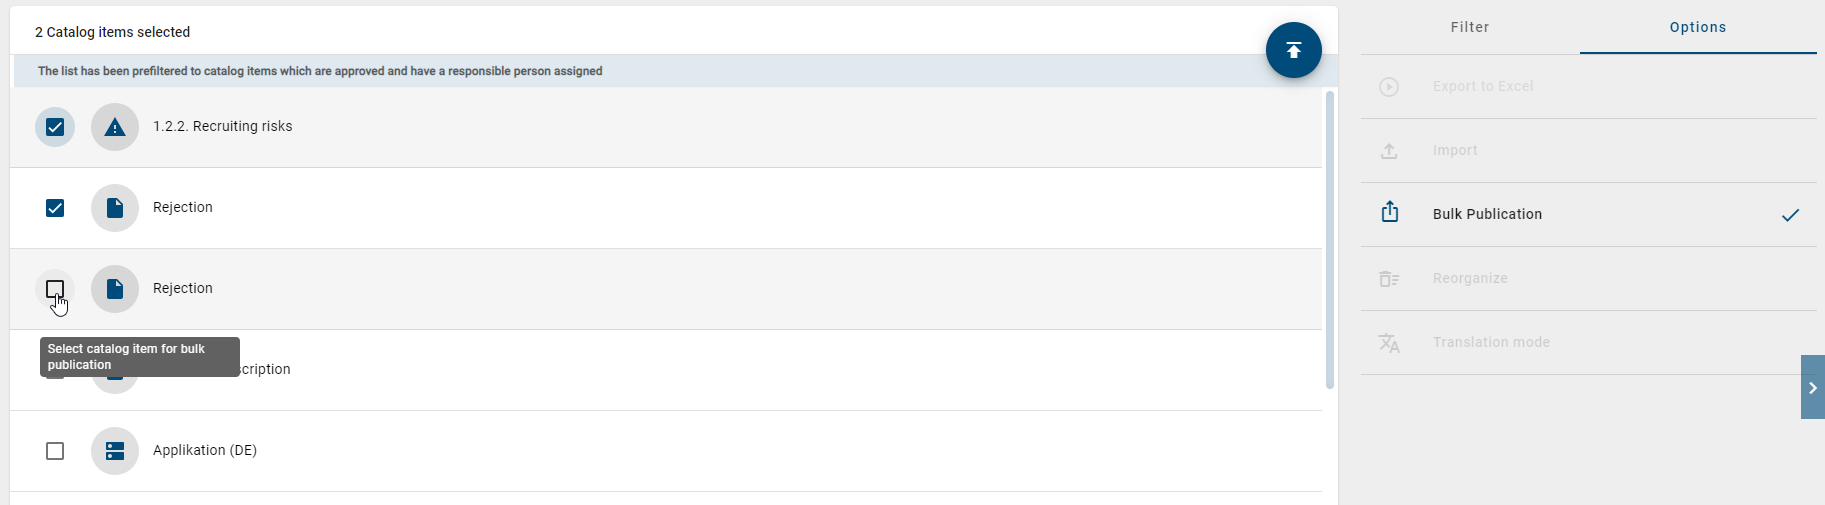
If you marked at least one catalog item, you can click the arrow button to start the multilevel (or editorial) release for your selection.

As soon as you click the button, a dialog appears. Firstly, you can enter a comment in the comment field. Secondly, you need to confirm the bulk publication by typing “Yes” in the field at the bottom and clicking publish selection afterwards.
In order to perform an editorial release for all selected catalog items, you can activate the checkbox This is an editorial change. Then, no further approval is requested from responsible or examiners and the catalog items are directly transferred to the publication stage where they are visible for all users (as far as there is no access restriction on the respective catalog items).
After confirmation, the dialog is closed automatically. If you initiated a multilevel release, a release workflow for each catalog item is started where the assigned examiners and responsible decide on the publication.
You can switch to the original catalog view by selecting the option bulk publication again. To prevent unwanted canceling of the bulk publication, you will be asked to confirm this step in a dialog. Click the leave button there.
Note
Please note that the bulk publication is only available in the desktop version.
Note
Editorial release can be deactivated so that each publication must pass through the defined approval and release steps. If the checkbox is selected during publication, the application will inform you that editorial publication is not possible. To ensure governance, editorial release cannot be disabled by administrators. Please contact our Customer Support for further information.
Note
Please note the hints when publishing catalog items with Word file attachments.
How can I remove a catalog item from the publication?
If you want to remove a catalog item from the publication, you can use the “Depublication” function. The integrated workflow engine ensures a confirmation step. Users of the roles Author, Editor or Administrator can start this workflow.
Initiation
Open the catalog in the “Publication” stage and navigate to the catalog item you want to depublish. Click on the context menu of the item and select Depublish.

Alternatively (if you have opened a catalog item), you can find the equivalent item in the Options in the right sidebar.
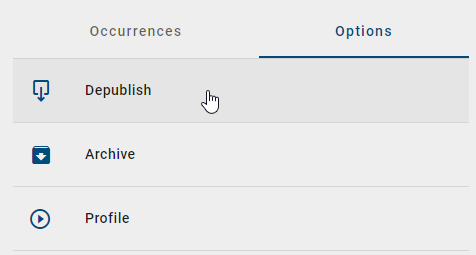
A dialog opens. Enter a reason for the depublication there and click Depublish.
Hint
If a catalog item has no responsible assigned, a depublication cannot take place.
Release step
The user maintained as “Responsible” receives a notification in the system as well as by email. With a click on the notification, users will be navigated to their tasks and can initiate the final depublication.
If the person responsible rejects the depublication, a corresponding comment must be set. The initiator is informed by email and the workflow is canceled.
If the responsible person approves the depublication, the initiator will be informed by email, the catalog item will be removed from the publication and the workflow will be finished.
Note
If the published catalog item is used in a published diagram, the depublication of the item is not possible.
How can I directly depublish a catalog item?
With this editorial change, a catalog item that has already been published is directly removed from the publication without explicit approval by a responsible person. This workflow can be started by users of the role Editor or Administrator.
Open the catalog in the “Publication” stage and navigate to the catalog item you want to depublish. Click on the context menu of the item and select Depublish.
A dialog opens. Enter a reason for the depublication there and activate the checkbox “Editorial change without further approval. Governance participants are automatically notified of the change by email.” below the input field. Confirm with a click on Depublish.
Then the catalog item is removed from the publication.
Note
If the published catalog item is used in a published diagram, depublication is not possible and the workflow will be canceled.
Note
Editorial change can be deactivated so that each depublication must pass through the defined release step. If the checkbox is selected during depublication, the application will inform you that editorial change is not possible. To ensure governance, editorial release cannot be disabled by administrators. Please contact our Customer Support for further information.
What do I have to consider when publishing items with Word file attachments?
If you publish a catalog item with a Word file attachment, unwanted changes might occur due to language-specific configuration in the table of contents. To prevent this, you should not format the TOC (Table of contents) field function using the \t switch. The configuration of the table of contents can be checked (and changed) as follows.
Select the table of contents and then press Alt + F9 to view the definition of the TOC field function. In the definition, you should use \o and \u. You can find more information on the switches and syntax in the TOC field function in this section of the Microsoft documentation.
If you convert the Word file to a pdf file during publication, only certain fonts are supported. The usage of not supported fonts can lead to formatting losses and a change in the total number of pages in your .pdf file. Here you will find a detailed list of the fonts, which are supported by the report engine. Moreover, note the possibility to embed the used fonts in your document.
How do I ensure that attachments in the publication are provided as pdf files?
For catalog items with their own responsible person, you can specify that files attached in the “Attachment (URL)” attribute are only available in pdf format in the publication, even though they were added in a different format in the public workspace.
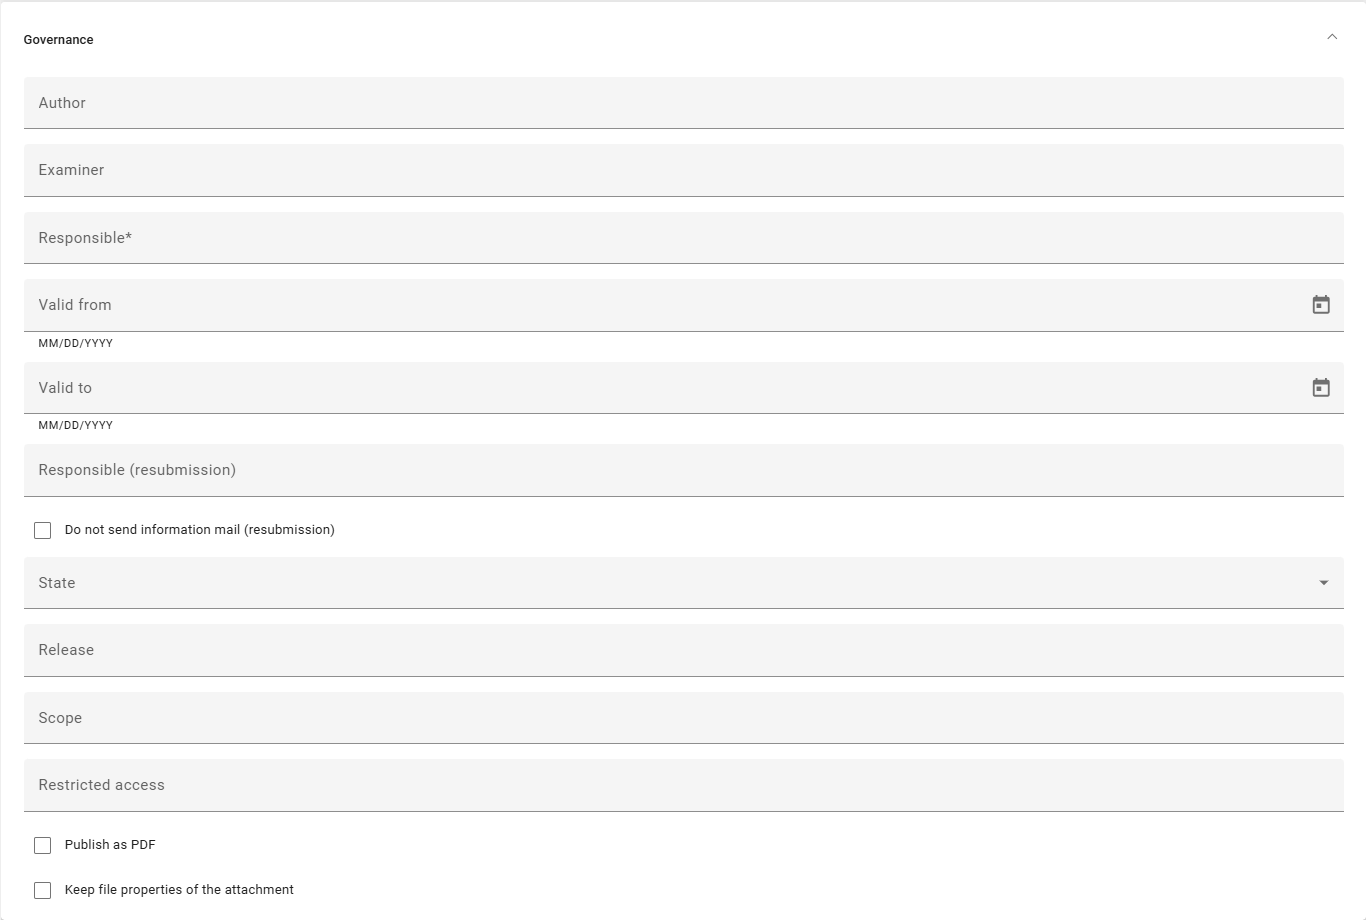
To do this, edit the catalog item and activate the checkbox of the attribute Publish as PDF in the governance attributes.

All attached files that are not in .pdf format in public workspace will be converted to .pdf files during the next object publication of this catalog item. In preview and publication, these replace the original file format, which remains for the respective attachment in the public workspace. The files keep their names in all stages. For example, you get this .docx attachment in the attributes of the catalog item in the public workspace,

while the corresponding .pdf file can be found in preview and publication stage:

In the section about the attribute “Attachment (URL)”, you can find a list of the file formats that are supported by the upload and pdf generation engine. If errors occur during the generation of the pdf file, the publish workflow will fail. This can be caused by invalid documents or protected documents.
Note
Be aware that only certain fonts are supported in the process of converting your file to a .pdf file. The usage of not supported fonts can lead to formatting losses and a change in the total number of pages in your .pdf file. Therefore note the possibility to embed the used fonts in your document.
Hint
Please note that documents with extended rights are not stamped during publication. Thus, the .pdf file in preview and publication stage does not include the details which are usually transferred from the governance attributes.
Note
The pdf conversion engine prints all worksheets from left to right. Each worksheet is printed from top to bottom and then from left to right. The generated pdf roughly corresponds to the defined print area of the Excel file, but page breaks can be slightly offset from the print preview. In principle, the paper format, margins and orientation are taken into account when generating the pdf. However, please note that with larger documents there is an increasing misalignment and the preview does not correspond to the final pdf.
Note
Please note that although it is possible to mirror text along the x or y axis in Excel, the Aspose framework does not support keeping the mirrored text when converting to PDF.
Hint
Please note that the Attachment (URL) attribute can be restricted by an individual method configuration. In this case, it is only possible to store links or URLs, while other file types cannot be maintained.
Warning
Please note that catalog items containing a PDF file in PDF 2.0 format as an attachment cannot be published. PDF 2.0 does not support conventional document properties, but instead uses XMP metadata for user-defined properties, which are generally not displayed in standard PDF programs and therefore require advanced viewing tools.
How can I ensure that all characters are preserved in the pdf conversion?
Only certain fonts are supported in the process of converting your file to a .pdf file. The usage of not supported fonts can lead to formatting losses and a change in the total number of pages in your .pdf file. Here you will find a detailed list of the fonts, which are supported by the report engine. Note that symbols of not supported fonts are usually used automatically for enumerations. We recommend to adapt the following option in Microsoft Word in order to prevent formatting losses.
It is possible to embed the used Microsoft fonts in your Word file. If the fonts are embedded in the document, the corresponding characters and symbols are correctly shown in the pdf file that is generated in the process of publication in GBTEC Process Design.
You can embed the fonts in the Word Options in the menu item Save. In the section “Preserve fidelity when sharing this document”, select the checkbox “Embed fonts in the file” and deselect the two below. Then choose the option “All New Documents” in the drop-down menu.
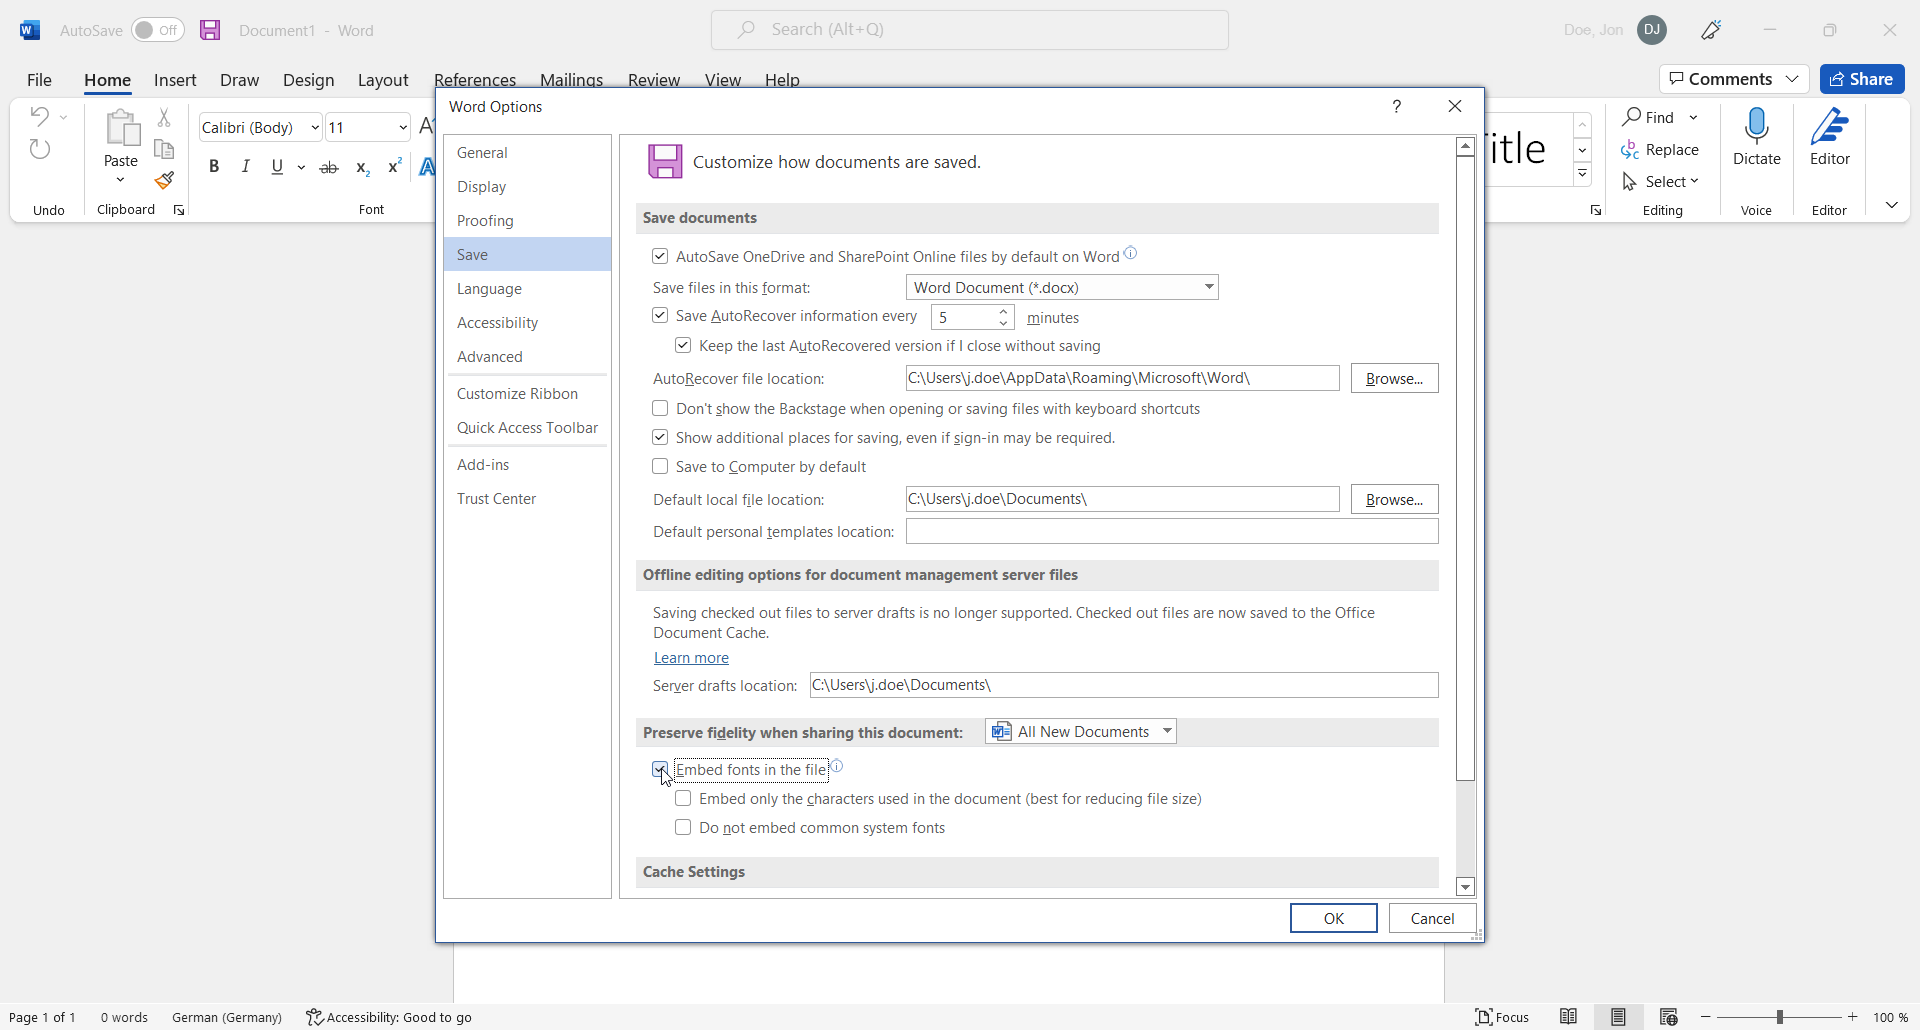 “Used with permission from Microsoft.”
All documents saved afterwards can be converted to pdf during publication in GBTEC Process Design whereas the original characters are used.
How can I transfer attributes to documents during publication?
When you explicitly publish a catalog item of the type Document, certain attributes of the catalog item can be transferred automatically to an attached file. This process is referred to as document stamping. This requires a file to be attached in the Attachment (URL) field.
To transfer attributes of a catalog item to a file, open the Catalog menu item in the left menu bar. Then open a catalog item of the type Document and use the Edit button to switch to edit mode. There, you can adjust the attribute values. During publication, the current attribute values are transferred from the catalog item to the attached file by GBTEC Process Design. Existing values in the matching document properties of the file are overwritten.
Document stamping is enabled by default. It can be disabled at the system level or for individual documents. To disable stamping for a single document, select the Keep file properties of the attachment checkbox.
To use document stamping, the attached file must have a supported format (.pdf, .doc, .docx, .xls, .xlsx, .ppt, or .pptx) and must be prepared for attribute stamping. The document properties of the attached file define which attributes are transferred.
To transfer an attribute to the file, the file must contain a document property that corresponds to the attribute type ID of the desired attribute. For the attribute Responsible, for example, this is AT_RESPONSIBLE.
Frequently used attribute type IDs for stamping include, for example:
Name (AT_NAME)
Author (AT_AUTHOR)
Examiner (AT_EXAMINER, AT_EXAMINER_2, AT_EXAMINER_3)
Responsible (AT_RESPONSIBLE)
Responsible (Resubmission) (AT_RESUBMISSION_RESPONSIBLE)
Valid from (AT_VALID_FROM)
Valid to (AT_VALID_TO)
Release (AT_RELEASE)
Scope (AT_SCOPE)
Restricted access (AT_ACCESS_RESTRICTION)
Identifier (AT_IDENTIFIER)
State (AT_STATE)
For more information on viewing and changing file properties in Microsoft Office, see the Microsoft Office instructions.
For language-dependent attributes, i.e. attributes with different values depending on the content language, you must add the language code of the desired language at the end of the attribute type ID. This defines which language value of the attribute is transferred. For example, to transfer the English name of the corresponding catalog item, use AT_NAME_EN.
During publication, the document properties of the file are filled with the matching attribute values from the catalog item. Existing default values or values from a previous publication are replaced. The file then contains these values in the file details in both the preview and the publication. If a stamped attribute has multiple values, the values are listed comma-separated. Attributes of the data type enumeration are listed with their numerical value. However, if an attribute of this data type is language-dependent, a suffix must be specified in the details as described above.
If the State attribute (AT_STATE) is maintained, the corresponding detail is assigned a numerical value. You can also add a language code, for example AT_STATE_EN, to transfer the corresponding string value in this language instead, for example On Hold instead of 1. The state can be maintained with the following values:
0 - None
1 - On Hold
2 - In Progress
3 - Needs Review
4 - Approved
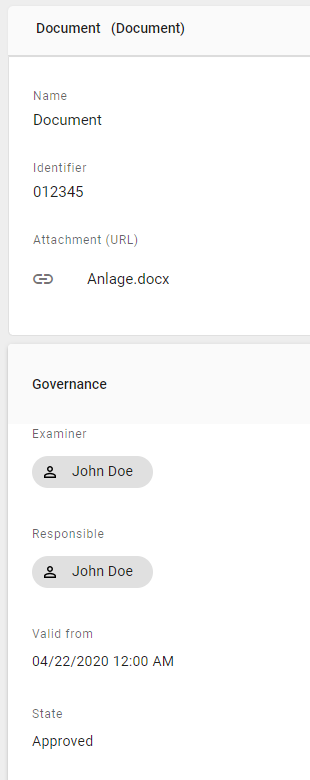
After publication, the attached file contains the transferred values in the file details. In Microsoft Word, these values can be displayed as document properties.
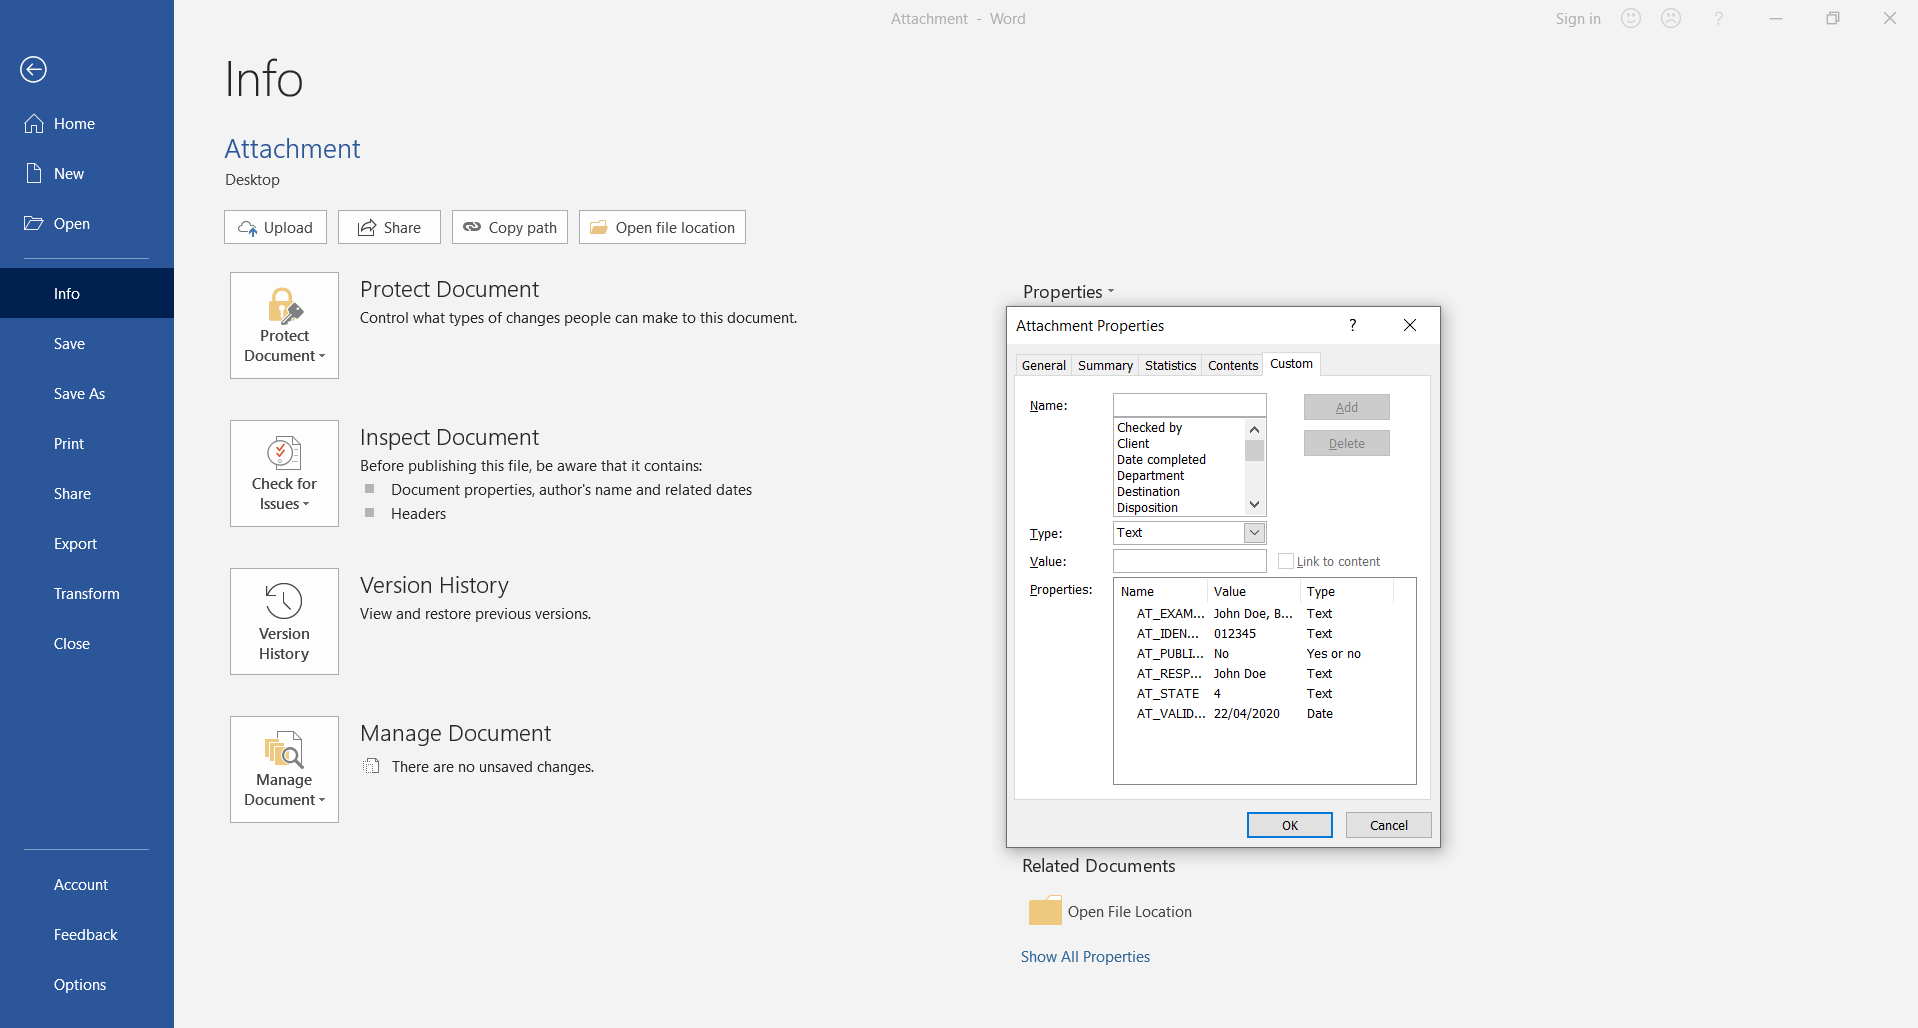 “Used with permission from Microsoft.”
You can also use the document properties in a Microsoft Word document, for example in the header or footer. To do this, use the DocProperty field function. There, you can select the name of a document property as a placeholder. For more information, see Microsoft Word Support.
To use the attributes of the catalog item with the field function, the corresponding document properties must be defined in the file details. With the next publication, the current attribute values from the catalog item are transferred to the document properties of the attached file. This also changes the values of the placeholders used in the Word document.
Hint
If you want to use the values of the document properties in your document, use the path Insert → Quick Parts → Field → DocProperty in Word. Microsoft Office does not support this function in Excel and Powerpoint. You can access the values there using the Visual Basic Editor. For more information, please consult the official Microsoft Support homepage.
If errors occur while adding or updating the file details, the publication workflow fails. This can be caused by invalid or protected documents.
Hint
Please note that your document is not stamped if its extended rights are activated.
Hint
Please note that if a PDF/A document is stamped, the long-term archiving functionality is lost.
Note
Please note that formatted text attribute values are not supported for stamping. If you stamp an attribute with formatted text, the text is added to the document details, but the formatting is lost.
Tip
If a stamped date is displayed in your Word document, for example the Valid to attribute (AT_VALID_TO), the date format can be defined using the field function. Without a custom format, the date format is created based on the language or locale of the server. In most cases, this is English, so the date is displayed with the slash delimiter as MM/dd/yyyy. To define a custom format, open the field function definition in Word, for example using the Field quick part in the Insert tab. Mark the desired attribute under the field name DocProperty and select the Field Codes button. Then add a space and \@ "<YOUR-FORMAT>" directly after the attribute name. You can use the placeholders d for day, M for month, and y for year. For more information on date formats, see this Microsoft Support page. For example, you can display the Valid to date with the month written out, such as 30 September 22, by using the definition AT_VALID_TO \@ "dd MMMM yy".
How do I see how often users have clicked on an object or downloaded an attachment?
As an Administrator, Editor, Author, or Reviewer, you have the ability to view the number of object views and, for attachments, the number of downloads. To do this, navigate to the catalog in the “Publication” section and click on a catalog item.
To view the number of downloads for an attachment, first open a published catalog entry with at least one attachment. There, you will find the attribute group Attachment (URL) Downloads, which you can expand by clicking on it. This will provide you with an overview of all available attachments in alphabetical order, along with the number of downloads for each attachment.
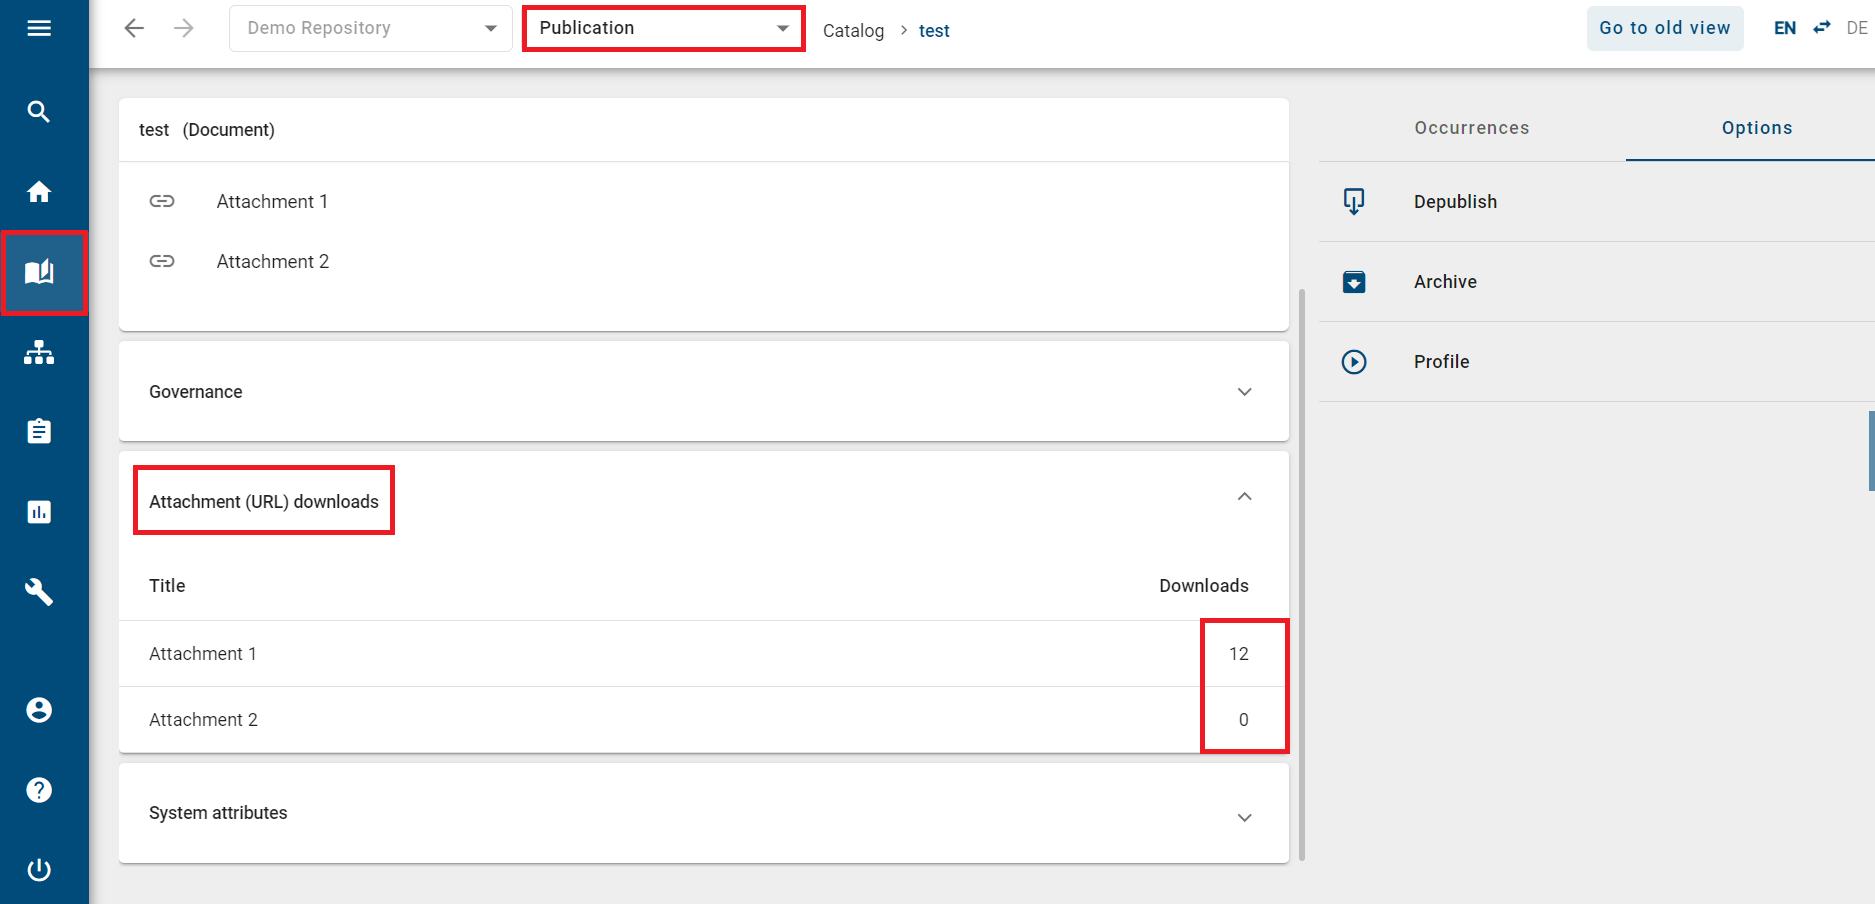
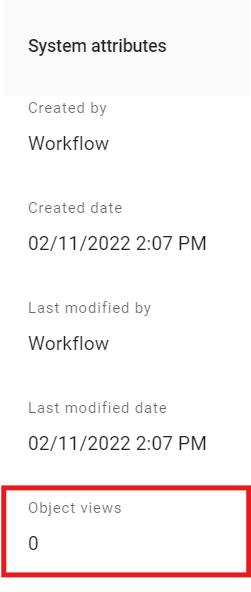
To view the number of object views, you need to expand the System Attributes attribute group. In the Object Views section, you can then check the click rates for the published catalog entry.
Hint
Please note that the number of object views does not update immediately upon access. By default, updates occur once a day (at midnight of your server time zone). Therefore, there may be discrepancies between the actual number of accesses and the number displayed in the system.
Warning
Please note that the number of downloads for an attachment is only tracked for Attachment (URL). In the Details view of a catalog item, you can see how many times the file has been downloaded. Downloads for other link attributes are not tracked and will not be displayed.
Hint
Please note that the Attachment (URL) attribute can be restricted by an individual method configuration. In this case, it is only possible to store links or URLs, while other file types cannot be maintained.
Notifications
In GBTEC Process Design there exists a notification system with which users can be informed about changes that have been made during governance processes. A distinction is made between different cases, depending on which step of the governance process has just been carried out, whether this was successful and the role of the respective user in this process. In the following a few questions were listed with the help of which the different scenarios can be understood better.
Note
In general, every triggered email addresses multiple users (up to 150 recipients per email). All users which have the same language set within their user settings will receive the same email. These notifications are sent via Bcc emails.
Why does the publication or depublication fail?
As the initiator you should have at least the rights of the user role Author. More detailed explanations can be found in the preceding chapters.
In addition to the rejection or termination of the workflow by examiners or the responsible person, the following situations can also prevent publication or depublication. Depending on the reason, you will also be informed about this in the application or by email.
General causes for not publishing or depublishing
no responsible entered in the attributes of the diagram or object
the email address of the responsible person is missing or does not match the address of the respective user in GBTEC Process Design
a publication or depublication workflow is already running for the affected diagram or object
predated publication for which the “Valid from” date has not been reached yet
one or more mandatory attributes of the diagram resp. object are missing
A language localized mandatory attribute has not been maintained in the default language of the tenant. You will receive a notification about the concerning attribute.
Causes for not publishing or depublishing a diagram
the affected diagram is checked out
validation errors in the diagram, such as unaccepted catalog items or missing mandatory attributes
the diagram contains a catalog item that is not published yet and which has its own life cycle (means with its own responsible person). Catalog items with their own life cycle that are in the preview stage but not confirmed yet are an exception. Publishing is possible, but the catalog item is substituted by a draft version until the person responsible confirms it. Afterwards, it is automatically replaced by the final version.
Causes for not publishing a catalog item
the pdf generation of the attachment of the catalog item fails
adding metadata details to attachments of a catalog item fails
When will I be informed about a (de-) publication?
Users who have diagrams or catalog items within their scope will be informed by email when the diagram or catalog item is directly or indirectly published or depublished. In addition users, who have saved a diagram as a favorite diagram in Publication, will also be informed about the respective changes.
In addition, workflow-related users will be notified by email and depending on the release workflow by a task. Users, who have saved a diagram as favorite in Preview, will be informed about workflow changes in this stage.
Who will be notified at a publication and depublication?
Below is shown who is notified by the system in which workflow step via email.
Publication
Notification |
Initiator |
Examiner |
Responsible |
Author |
Scope* |
|---|---|---|---|---|---|
Examine task |
no email |
no email |
no email |
no email |
|
Release task |
no email |
no email |
no email |
no email |
|
Rejection of examine task |
no email |
no email |
no email |
no email |
|
Rejection of release task |
no email |
no email |
no email |
||
Publication |
|||||
Workflow error |
no email |
no email |
no email |
no email |
|
Abort workflow |
email*** |
email*** |
no email |
no email |
Depublication
Notification |
Initiator |
Examiner |
Responsible |
Author |
Scope* |
|---|---|---|---|---|---|
Depublication task**** |
no email |
no email |
no email |
no email |
|
Rejection of depublication task |
no email |
no email |
no email |
no email |
|
Depublication** |
|||||
Workflow error |
no email |
no email |
no email |
no email |
|
Abort workflow |
no email |
email*** |
no email |
no email |
Emails informing about a (de)publication or workflow error are sent as soon as the system can initiate the last workflow step through a user interaction or a system error. Emails about release or examine tasks are not sent individually for each task assignment but gathered in a daily email.
Users can navigate to GBTEC Process Design using a link in the email. If the user has not been logged in before, this must be done first. Then a second click on the link leads to the desired address.
An editorial change notifies the same recipients as the multi-level release or depublication workflow.
*) All organizational units that are entered in the diagram- or catalog item attribute Scope receive a notification at the corresponding steps. In this process, organizational units are assigned to user groups of GBTEC Process Design.
**) The email is also sent to the second examiner, third examiner and the responsible for resubmission.
***) The user is informed if he or she has a pending or already completed workflow task.
****) Depublication tasks may also be called release tasks since they demand the approval of the responsible to depublish the concerning entity.
Note
Users who have saved the diagram as a favorite in Publication or Preview stage will be notified of changes to diagrams in the respective stage. This includes, for example, the publication and depublication.
How can I decide whether the scope is notified of changes by email?
If you have logged in as an authorized user (editor, administrator) in the new user interface and opened the start dialog for a workflow to depublish or publish a catalog item or a diagram, a dialog box opens showing you options for sending scope notifications. You have the option of specifying whether this change is an editorial change that does not require additional review or approval. If you select this option, you will have the opportunity to notify the affected scope of this change by email.
Hint
Please note that without selecting the option Editorial change without further approval. Governance participants are automatically notified of the change by email, the option to inform the scope of the change will not be displayed to you.
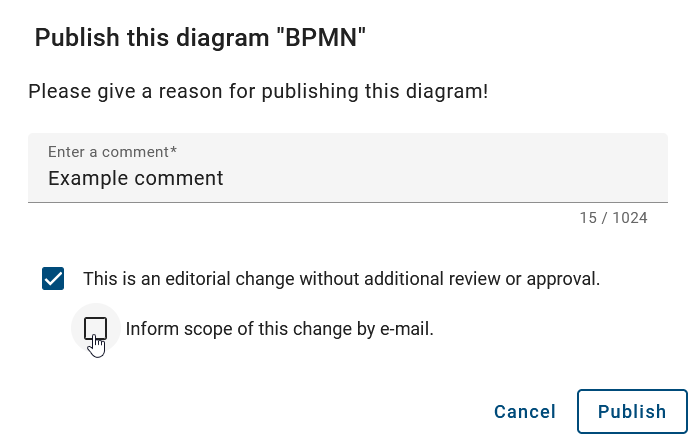
If the option Additionally notify “Scope” by email has not been selected for a publication or depublication, you will receive an email stating that the scope will not be informed about the change.
If the option Additionally notify “Scope” by email has been selected for a publication or depublication, the scope will be informed about the change immediately.
If the editorial change option is removed, the selection to send the notification is also automatically canceled. This will remove the option to send a notification of the change to the scope.
Note
Even if no scope has been specified for a diagram or catalog item, you will still receive a corresponding email notification. This email will still inform you whether the scope is notified of a change or not.
Who will be notified about a resubmission?
If a resubmission is initiated for a published diagram or catalog item, the responsible or (if the corresponding attribute is maintained) responsible for a resubmission receives a resubmission task and a notification.
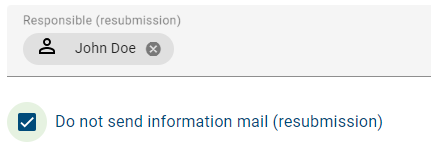
In addition, an email is sent to inform about the resubmission. This information mail is addressed to authors, the examiner (as well as the second and third examiner if they are maintained in the method) and the responsible if the latter is not the owner of the resubmission task. The dispatch of the information mail can be blocked for each diagram or catalog item by selecting the checkbox “Do not send information mail (resubmission)” in the governance attributes.
Note
The email about a scheduled resubmission is sent independently of the task summary notification to the responsible or responsible (resubmission) user.
How does publication behave with and without a date in the “Valid from” attribute?
Users with the Administrator or Editor user role can enter the validity period in the Valid from attribute of the governance attributes of a diagram or catalog item, in addition to the responsibilities.
If you enter a future date in the Valid from attribute, the date remains unchanged. If you approve the publication before this date, the diagram or catalog item is not published immediately. Instead, it is published on the specified date. The exact publication time is based on Coordinated Universal Time (UTC+0). German summer time corresponds to UTC+2. If the entered date is already in the past, the diagram or catalog item is published immediately.
If you do not enter a date in the Valid from attribute during publication, the system automatically sets this attribute to the current date after approval. In the Public Workspace stage and the Preview stage, the attribute remains empty. It is only updated in the Publication stage.
Note
In this case, you cannot adjust the automatically set date via the properties of an attachment of a catalog item.