Cases
Where do I find my cases?
The My cases menu entry allows you to view all cases in which you are involved and view them collectively. This includes cases where you are the creator, the owner or the task owner.
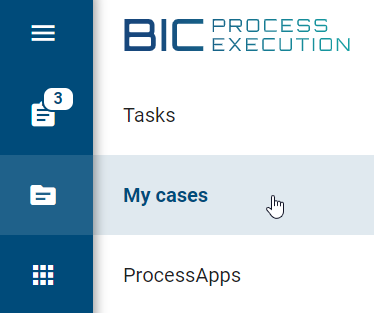
In the main area, you will now see a list of your ongoing, not yet completed cases. For each case, the case name, creation and due dates, owner, case progress, and status are displayed. The list is sorted by creation date in descending order, with the oldest case shown at the top. You can change the sorting by column by clicking on a column name. The arrow indicates whether you have sorted in ascending or descending order.
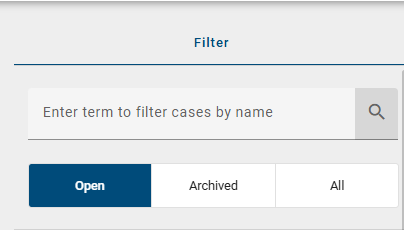
To get a better overview of the current and archived cases, you can filter by current cases (Open) or archived cases (Archived) in the right sidebar below the search bar. To display both current and archived cases in a list, you can select the All option.
You will also find further filter options in the right sidebar. Here, you can search for cases or filter by completion state, creator, owner, overdue state, due date, creation date, or status.
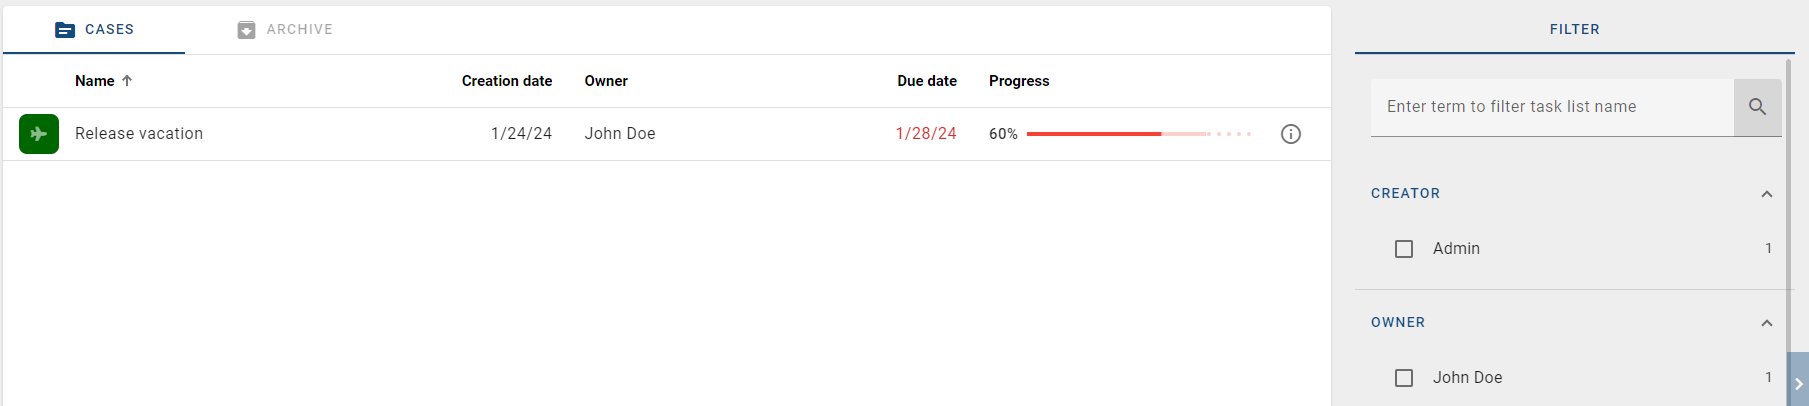
The Progress shows the percentage of the total progress of each case. The percentage is calculated based on the currently selected path in the case and the tasks completed in that path. The progress bar shows how many tasks have been completed, started (color gradient), and not yet started (dotted line).
Clicking on an entry will take you directly to the process flow view of the running or archived case. Furthermore, the Details for each are also available. These can be accessed by clicking on the i to the right of the entry.
The details show the creator, the owner, the due date, the creation date and the name of the case. In the Team section, you can see all the roles that are involved in the process and the assigned users for this case.
Where do I find all cases of a process?
To find all cases for a process, go to the ProcessApps section, navigate to the desired process in a ProcessApp, and click on the corresponding entry. This will take you to the case list for that process.

Hint
If the Analyst attribute is maintained in the process, you will not be able to see all cases in the process.
All running and archived cases in which you are involved are listed here with the corresponding ProcessApp icons. This means that you can see any case if you created it, if you have the “ProcessApp Administrator” user role, if you are assigned to a role or task of the case, or if you are part of a user group that is assigned to a role or task. For each entry in the case list, you can see the following information:
Name: Name of the case
Creation date: Start date of a case
Owner: User to whom the case is assigned. The owner can be changed when you are in the case details.
Due date: Date by which the case should be completed
Progress: The Progress defines the percentage of the total progress of the respective case. The percentage is calculated based on the currently selected path in the case and the tasks completed in that path. The progress bar shows how many tasks have been completed, started (colored gradient) and not yet started (dotted line).
Status: Defined status for the case
The list is sorted by creation date in descending order, with the oldest case at the top.
Click on an entry in the list to open the process flow view of the case. Use the Back arrow to return to the list of cases.

In addition, you can use the circled i icon to access the details view of a case. You can also use the Create a new case function to create a new case for this process.
Note
If there are no cases for a process, selecting the entry will take you to an empty list.
How do I switch from the case list to the corresponding task list?
As a ProcessApp Administrator and ProcessApp Analyst, you can switch between the case list and the task list using the tabs. To do this, click on the Tasks tab, which is located next to the Cases tab.
The Tasks tab appears in a ProcessApp as soon as a case list has been selected.
The tab appears in the following cases:
You select a case list from a ProcessApp in the ProcessApps area.
You click a ProcessApp icon in My cases or Tasks.
You open the process flow view of a case and then use the Back arrow to navigate to the corresponding case list of the ProcessApp.
For more information on working with tasks, see this chapter.

Hint
As a ProcessApp Analyst, you can only see this tab if you are entered in the corresponding process in the Automation attribute group in the Analyst attribute.
Within the Tasks tab, you will find the Filter panel on the right side, which is different from the usual filters in cases and tasks. Only the Assignee and Due Date filters are available here, and the filtering is limited to the tasks of the current case.
How can I filter and sort the case list?
Filter and Search:
On the right side of the case list, you will see the Filter panel where you can search and filter for specific cases. You can do this in your own case list as well as in the case list of a process.
To get a better overview of the current and archived cases, you can filter by current cases (Open) or archived cases (Archived) in the right sidebar below the search bar. To display both current and archived cases in a list, you can select the All option.
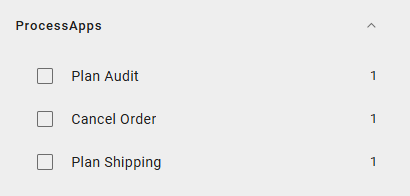
You can filter your case list by ProcessApps. To do so, select the ProcessApps filter in the right sidebar. All ProcessApps with current or archived cases will be displayed. Once you select a ProcessApp, only its corresponding cases are displayed in the list.
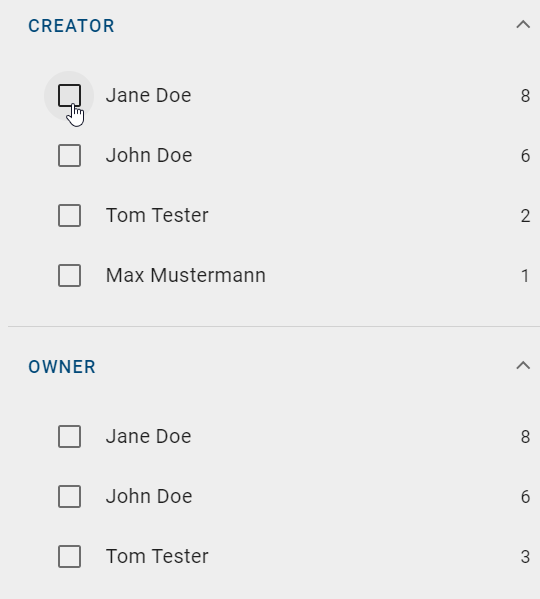
You can filter case list entries by specific case creators and case owners. To do this, select the Creator and/or Owner filter facet and choose the relevant user whose cases you want to view. The case list will update automatically.
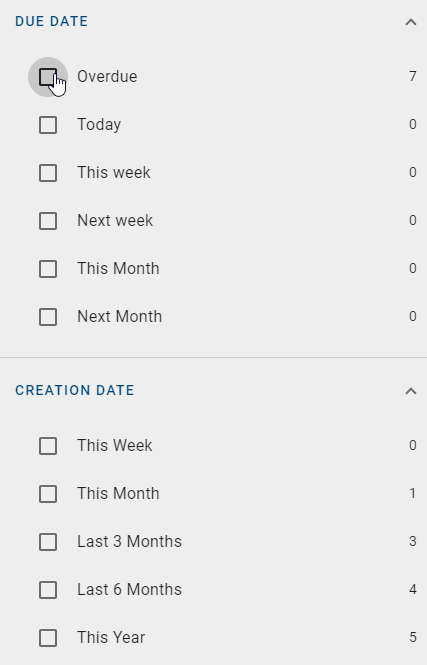
In addition, you can filter the entries by the due date and creation date of the case. When you select the Due Date and/or Creation Date facet on the right, you will see the different date range options. Once you select a predefined date range, your case list will automatically update. You will see only those cases that are due or created within the selected date range. You also have the option of filtering archived cases and Process Apps by end date, among other things. The end date corresponds to the date used in the monitoring view in the Closed cases by status tile.
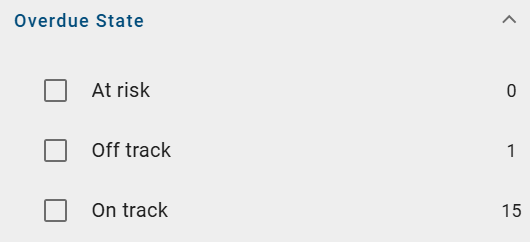
For a better overview of the overdue state of cases, you can use the Overdue State facet to filter by the At risk, Off track, and On track statuses, helping to minimize the risk of delays.
At risk: Open cases that have at least one overdue active task and aren’t already off track.
Off track: Open cases that are already overdue.
On track: Open cases that are not overdue and have no overdue active task.
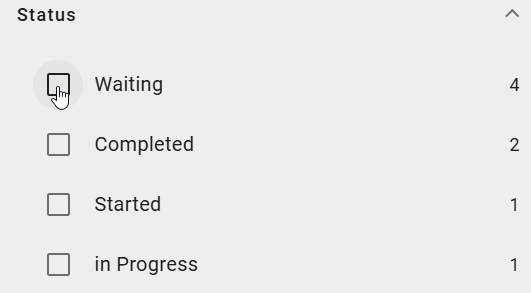
The Status filter facet is also available. Here you can filter according to the defined status values of a case. If no status values have been defined, you will see the entry (Blanks) in the filter facet.
In the Filter panel in the right sidebar, you can also enter a search term in the input field to search for specific cases.
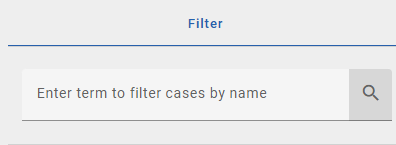
When you search for a case name, the case list will be updated and you will see all the results of this search. In the case list of all cases of a process, you can search for variables of type String/Text in addition to the case name in order to display the corresponding cases. If there are no search results, you will see a corresponding message in the case list. You also have the option to use both “a AND b” and “a OR b” to display all results that contain either “a” and/or “b”.
Note
If you have applied a filter, the search will include the search term and any selected filter options. If you reset the search, you will get results that match the previously selected filter options.
Sort:
When you view the case list of a process or your own cases in My cases, whether you have applied a filter or not, you have the option to sort the cases by a specific column. The list can be sorted by Name, Creation date, Owner, Due date, Progress or Status. To do this, click on the column header.

If no sorting was applied before, the cases are sorted in ascending order based on the selected column. At the same time, you will be scrolled to the top of the case list.
If you have already sorted by a column and the cases are displayed in ascending order, you can change the sorting direction by clicking on the same column heading again. This will reverse the sorting and take you back to the top of the case list.
Hint
Please note that when entering the case list, cases are sorted by default according to their creation date in ascending order. This serves as the starting point if no specific column sorting has been selected.
Note
Sorting is done for one column at a time.
How is the case process flow view organized?
The process flow view of a case is the same as that of the default case. Unlike the default case, you can use the process flow view of one of your cases to design its specific sequence. Therefore, this is the central view, for example, when you want to edit tasks, change decisions, or see the current status of the case.
To access the process flow view of a case, simply select the entry of the desired case in the case list of the corresponding process. If you are the case owner, you will also find the case in your personal case list.
Once you have selected the case, the process flow view of this case will appear in the main area of the application. Similar to the default case, the process flow view here consists of tasks, decisions, and the start and end events. If multiple end events have been modeled, they will all be visible in the process flow view. The process flow view of a running case shows the completed and next up process steps (tasks of the active segment). In addition, there may be more steps coming up and the end event may not be visible yet.
Depending on the fully completed cases of the active process, a forecast is generated for subsequent runs. The forecast is based on the sequence of archived cases. The most frequently completed task among all possible subsequent tasks is identified, and the process flow of the active process is completed accordingly. If a different path is taken in the process that has not been taken by any other completed case of the same process version, or if the process is run for the first time, no forecast can be made. Additionally, forecasts are not applicable across different process versions.
Note
Please note that an updated ProcessApp can calculate forecasts using the process sequences from previous versions only if the updates do not alter the execution sequence or the basic structure of the ProcessApp. Changes can be categorized as non-structural or structural. Non-structural changes, such as renaming diagrams or activities, updating IDs and forms, or rearranging elements in the diagram, do not affect the execution sequence, allowing the history of completed instances to still be used for forecasts. Structural changes, such as adding or removing segments or nodes, alter the process sequence, making it impossible to use the existing execution history for forecasts in the updated version.
When you select one of the elements, the right sidebar gives you more information about the element and allows you to edit or change it. This sidebar is called the task form. In the mobile view, these options will appear as soon as you select one of these elements.
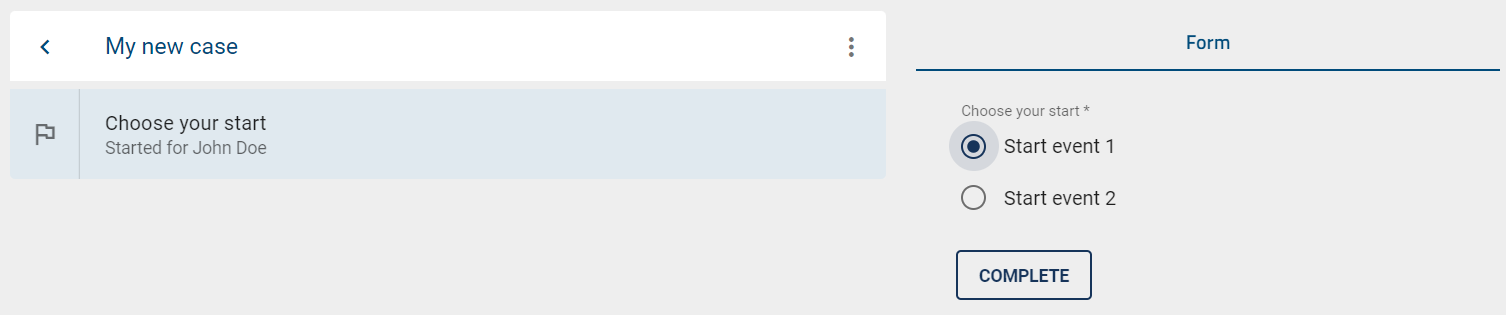
The case owner can select a desired start if there are multiple start events in the corresponding process modeling. The selection can be made from a single choice field in the form of the start event in GBTEC Work Orchestrator. If you are the case owner, select the desired start and confirm by clicking the Complete button.
The path of a case can be changed by decisions (so-called gateways). The gateways Inclusive Or, Exclusive Or and Parallel are taken from the process modeling in GBTEC Process Design and displayed as entries in the process flow view. You can recognize these entries by the diamond-shaped symbol with an arrow in the middle. In this way, the gateways divide the process flow view into segments containing the decisions and resulting tasks. This means that you can always see where in the process flow view a decision needs to be made.
Note
Gateways of the Parallel type can only be recognized by the segmentation in the process flow view, as no decision can be made there.
Ideally, decisions can be made automatically at inclusive or exclusive gateways based on predefined expressions that determine the outcome. If the modeling does not support automated decisions, they have to be made manually. In this case, the case owner receives a decision task once the previous task is completed. His decision will determine the case’s path after the gateway.
GBTEC Work Orchestrator allows multiple users to work on the same process flow at the same time. To ensure this parallel work, your case is automatically updated when a task is changed by another user (e.g. completed or delegated). This allows you to keep track of the current status. If the case is archived while you are viewing it, the application will show you the corresponding case in the archive.
Tip
We recommend to automate decisions using expressions. You may use process variables which are set (for example) in a user task. In the end, this configuration prevents manual decisions from being overlooked and further automates your process flow.
Depending on the decision that was made at the gateways, the path of the process flow changes and can therefore lead to different results. The changed path is automatically displayed. If the path calculation is not resolved immediately, a load indicator is displayed in the gateway step.
Note
When a throwing event occurs, a message is sent with the associated event ID. At the same time, the event with the corresponding identifier is thrown and the step is marked as completed.
Note
Once a task positioned after a decision in the process flow has been started, the decision can no longer be changed.
How is the default case structured?
The default case displays the default process flow, which is the basis for every case that is created for the respective process.
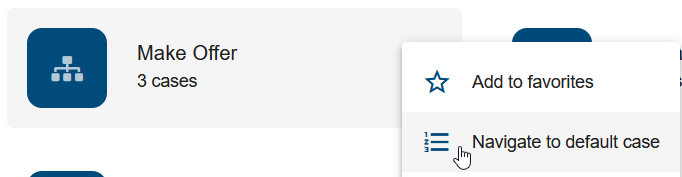
To display a default case, first navigate to the ProcessApps. Open the menu of the desired ProcessApp and select the option Navigate to default case.
This view shows you the process flow from the first task of your process to its end event. Here you can navigate through the process, for example, by making decisions and being shown the corresponding tasks of the process. The chronological sequence of the process flow is displayed from the top to the bottom.
Each process flow consists of tasks, gateways, and the start and end events. You can distinguish between these elements by the chip icon on the left side of each entry. End events are represented by a chip with a flag icon in it. Gateways are represented by a diamond-shaped icon with an arrow in the middle. Tasks, on the other hand, are represented by a number that indicates when a task has to be done in the process.
By selecting individual entries, the right sidebar provides additional information and options for each element. For example, you can display the form of a task to see which role is responsible for that task. Gateways and decisions can also be adapted to show alternative paths of the process.
Since this is the default view, which is not based on a running case, no tasks are assigned to users here, nor can you start or complete tasks here. To do this, you must first create a case for the process.
How can I create a new case for a process?
Cases represent the concrete, executable form of your processes. In GBTEC Work Orchestrator and GBTEC Process Design, you initiate the case creation in different places.
In the public workspace and preview, the ability to initiate a new case is restricted to users with the ProcessApp Creator user role. In the published version, however, this option is available only to users with the ProcessApp User user role.
Create case from a ProcessApp:
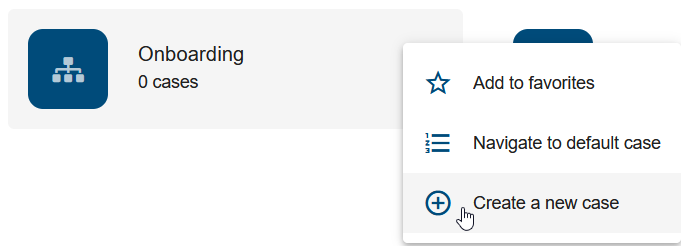
To start a new case directly from a ProcessApp, navigate to the ProcessApps area in the left menu bar and locate the desired ProcessApp (potentially within a collection). Click on the three dots next to the ProcessApp to open its menu and select Create a new case.
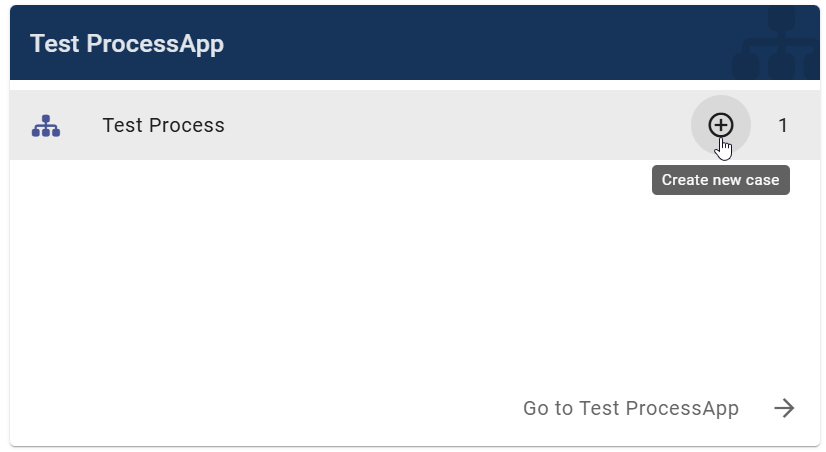
Alternatively, you can find the Create new case option next to a process within a ProcessApp.
Create case from case list:
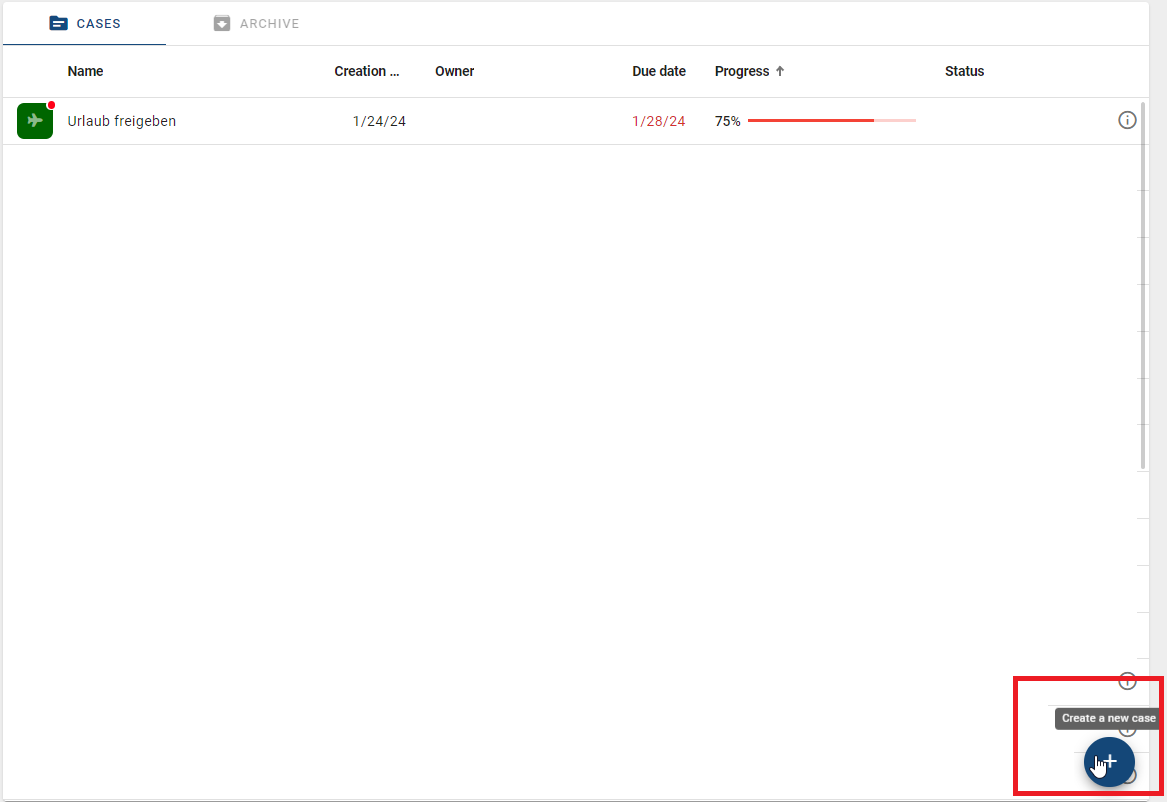
The case creation process can be initiated by using the Create a new case option. You can find this function within the case list of a process.
Create case in GBTEC Process Design:
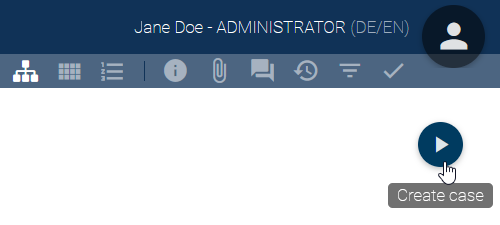
The process of creating a new case can be initiated while viewing the corresponding diagram in GBTEC Process Design. The Create case button is located in the upper right corner of the diagram view but is only visible to users with the necessary permissions to create a case for that process.
Hint
Diagrams with a start timer event cannot be started manually in the publication. If multiple start events are modeled and at least one start event does not have a configured time, the case for that start event can be started manually.
Once you have started the creation process in one of the ways described above, a dialog will appear asking you to assign a name to your new case by default. In the second field you can set a due date for this case. Furthermore, you can select representatives from your users for each role that occurs in the process. This user will then appear as responsible person for each task assigned to the corresponding role. Entire user groups can also be set as responsible persons. In such a case, all users of this user group will be able to see the tasks of the role assigned to them in their personal task list.
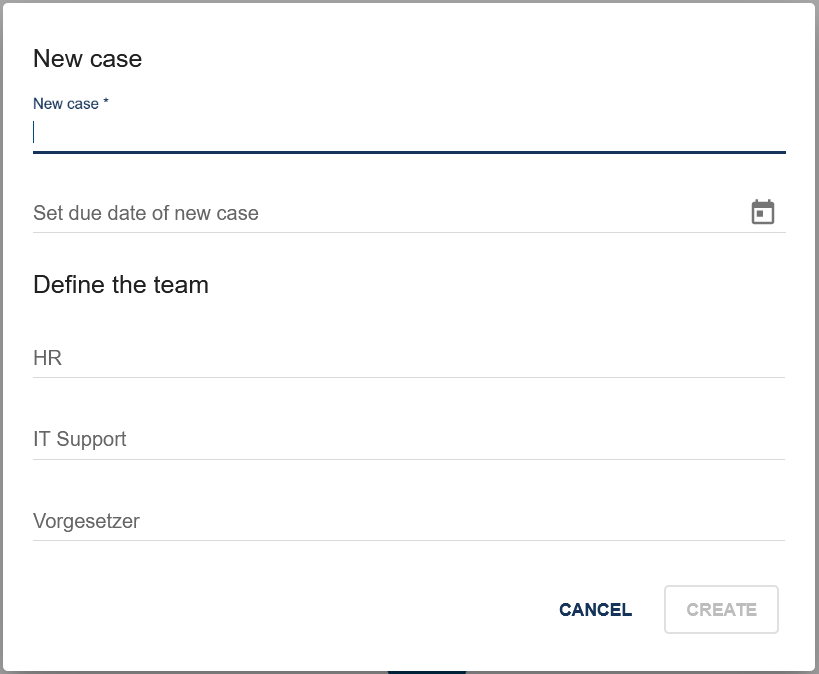
Users and user groups can be set as a default person in charge within GBTEC Process Design. They are automatically set, when a new case of the corresponding process is created. If no user is assigned to a role, the case owner is automatically responsible for the tasks of this role once they are started. You as the case owner are not assigned to the role itself, but any started task of the role will be delegated to you.
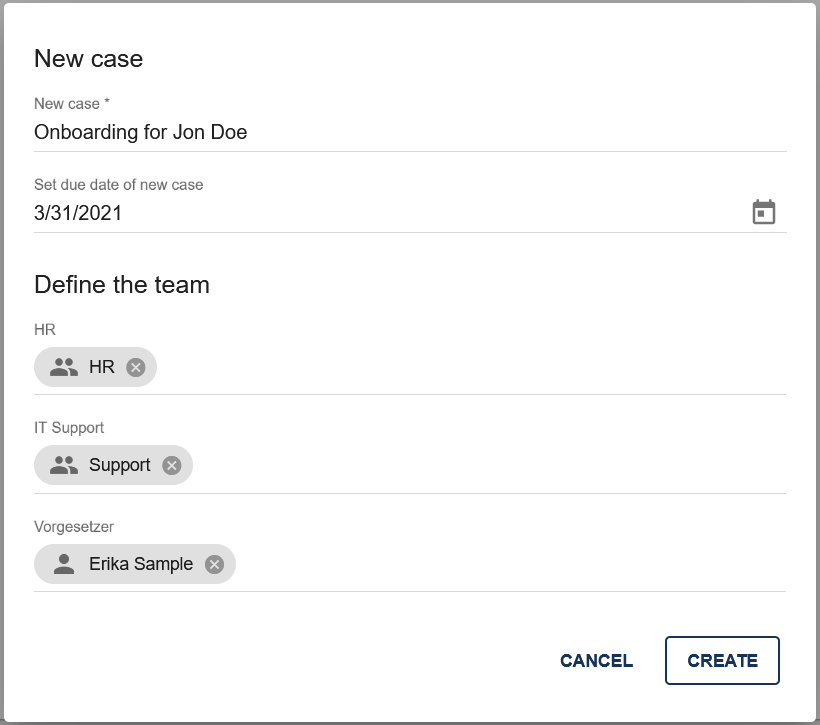
If a custom start form has been defined for a case with a start event, the custom start form will be displayed as a user task instead of the default form when creating a new case. After completing the start form and creating the case, a notification will appear in the lower right corner of the screen with a link to the corresponding case. If you cancel the creation of a new case while using a start form, you will be redirected to the case list of the associated ProcessApp.
If you confirm the entry by clicking Create, a new task is created and the dialog closes. Then, a pop-up window opens automatically with the first user task, provided it is assigned to you. If the task is not assigned to a user, or if no task is available after starting the process, a message with a link to the process flow view will appear at the lower right of the screen.
If you are in the process flow view of the case and the process has only one possible starting point, the first task will start automatically. If there are multiple starting points, you (as the case owner) must select one in the form of the start event and confirm your selection by clicking the Complete button. The first task following the selected starting point will then be started automatically.
Hint
If the Hide Start Form option was selected during modeling, no dialog is displayed. Instead, you are redirected directly to the process flow view of the case. The name of the case is named after the process name and the timestamp.
Note
If the corresponding diagram has been depublished within GBTEC Process Design, you will see a corresponding message when you tap or hover over the plus icon. In this case, you can still edit and complete all existing cases, but you cannot create new cases. If the plus icon is not visible, a case creation restriction has been set.
Tip
In case you want to create cases from other applications, you can either use run links or the GBTEC Work Orchestrator REST API.
How can I create a case with a run link from outside the application?
GBTEC Work Orchestrator provides the opportunity to start the case creation from outside the application. The run link corresponding to your process navigates to the dialog of the case creation. If you use a run link when you are not logged in to GBTEC Work Orchestrator, you will be asked to enter your login data. You will then be navigated to the case creation dialog.
You can simply copy the link of your process from the address bar of your browser when you open all cases of the process. Note that this is possible even if there are no existing cases yet.
https://XXX/process-execution/app/processes/YOUR-PROCESS-ID/instances
In order to generate the run link for the case creation of your process, simply add “/run” after the process ID. You can use this link to navigate directly to the window for case creation.
https://XXX/process-execution/app/processes/YOUR-PROCESS-ID/run
Furthermore, you can create a case directly by adding the case name to the link with ?name=NAME-OF-CASE:
https://XXX/process-execution/app/processes/YOUR-PROCESS-ID/run?name=NAME-OF-CASE
When you use this link, the process flow view of the new case NAME-OF-CASE is displayed directly and you do not have to confirm the dialog.
In addition, you can set process variables by adding &caseVariable=VALUE to the link, where caseVariable is the name of a process variable and VALUE is a valid input for this variable. It is possible to specify any number of process variables for your case:
https://XXX/process-execution/app/processes/YOUR-PROCESS-ID/run?name=NAME-OF-CASE&caseVariable1=VALUE1&caseVariable2=VALUE2
Subsequently, you can add the team members in the details.
Tip
The links mentioned above are executed through the frontend. Alternatively, you can create a case directly through the backend. To do so use the following format: https://XXX/process-execution/api/run/processes/YOUR-PROCESS-ID/instances?name=NAME-OF-CASE. Please be aware that this kind of run link can only be used by external applications that also include an authentication header.
Hint
Please note that you must be in the Public Workspace or Preview in order to create a case with a run link from outside the application. This option is only available to users with the ProcessApp Creator role. In Publication, however, this function is only available to users with the ProcessApp User role.
How can I create a new case using the REST API?
The GBTEC Work Orchestrator REST API allows you to create new cases from external applications. To use this function, you will need the REST endpoint of the desired process for which you want to create a new case and a valid API key which you pass along in the Request Header.
You can use the following link to the Swagger UI to view the available public endpoints and create a new case. At the top right of the screen, under Select a definition, select GBTEC Work Orchestrator API. In the list that appears then, you will find the Create instance endpoint, where you can edit the variables and create a new case.
Tip
Files can be supplied directly when creating a new case, without having to create an additional form. These files can then be referenced as usual throughout the rest of the process.
Tip
If the link to the Swagger UI does not work, please enter the following URL manually: https://{{host}}/public/webjars/swagger-ui/index.html, where {{host}} represents your host.
Hint
The old {{host}}/process-execution/external/tenants/{{tenantId}}/stages/{{stageId}}/processes/{{processAppId}}/instances?apiKey={{apiKey}} REST endpoint is currently still available. However, please use the new endpoint in the future.
Hint
If you have previously worked with the old REST endpoint and are now working with the Swagger UI, you will need to generate a new API key. Please note that the new API key will need to be adjusted accordingly in the REST call.
Hint
Please be aware that the ProcessApp ID depends on your stage. Make sure that you use the ProcessApp ID of the stage you want to address.
Note
Cases generated using the REST API do not have a unique owner. The owner of these cases is set with the value REST API.
How can I create a new case using the public endpoints?
If you want to use the new endpoints (URL), you need a new API key (public API key). This key is not created in Administration, but exclusively in client management. Please contact your responsible contact person, who will create the new API key for you. Once a new API key has been generated in client management, the authentication and functionality of the existing endpoints remain unchanged. This means that the old endpoint originally created in GBTEC Work Orchestrator will continue to work with the old key. At the same time, the new endpoint generated in client management is working and used with the new key.
If you want to convert your integrations step by step, you can replace each old endpoint with a new endpoint one after the other, simply replacing the old API key with the newly created key. This allows you to perform the migration flexibly and sequentially for all your systems, while the remaining old endpoints continue to run with the old key for the time being. Once all endpoints have been completely converted, you can delete the old API key in GBTEC Work Orchestrator. To remove the old key, navigate to the Administration menu item in the menu bar. Once created, the new API key remains visible and manageable in the Administration area.
How can I create a case from a start form as an external user?
As an external user, you can create a case using a form that is either embedded in a website or available as a separate URL. In this case, you do not need to be logged in to GBTEC Work Orchestrator to start the case.
To do this, open GBTEC Process Design and check out a diagram. Then, select the start event and set its event type to Message in the Details panel in the right sidebar. Finally, open the form editor by either right-clicking on the start event or selecting the Process Execution Editor option from the Options panel in the right sidebar.
In the form editor, you can customize the properties of the form fields and define relevant process information. In the top sidebar, you will find the Settings tab. Here, you can configure the start form as a web form. When you enable this option, a URL will be generated that you can copy and send to external users. Additionally, you can specify which environment (Studio - public workspace / Test - preview / Production (App) - publication) should be included.
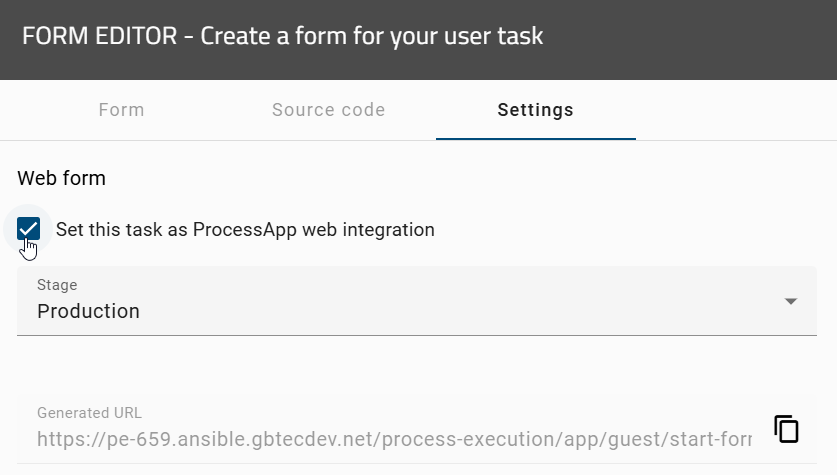
To save your settings, click the Save button. Alternatively, you can exit without saving by clicking Cancel.
Once the start form is saved, external users can fill it out without needing to log in to GBTEC Work Orchestrator. They only require access to the generated web form URL, which can be embedded in a website or used as a separate URL.
After completing the form, external users can click Complete and confirm their input.
Hint
Please note the following limitations for web forms regarding certain form fields:
The File form field is not displayed in repetitive sections. Therefore, external users cannot upload files.
The form field Users/user groups is not supported in start forms for external users and is therefore not functional.
Hint
The title and description of the start event will not be displayed in the web form.
Note
Please note that the date picker icon will not appear if you add another section to the web form that contains a repetitive section with a date picker.
Tip
If your process includes multiple start events and one of them is configured as a web form, you must first choose which start event to start. Therefore, we recommend modeling only one start event when configuring a web form.
How do I access the case details view?
The case details view allows you to view detailed information about a specific case. There are two ways to access the detailed view of a case. The first way is through the case list. To do this, first navigate to the case list of the corresponding process.
Then use the Details function to get to the details view of the desired case. You will find the function in the form of a circled i icon to the right of the list entry.

The second option is via the case itself. You can open the context menu next to the title of your case. Click on View case details and the details of your case will appear.

The details view displays the following information: the creator, the owner, the creation date, the optional due date, and the case name. In addition, under the Team section, you will see all roles involved in the corresponding process and all users assigned to this case.
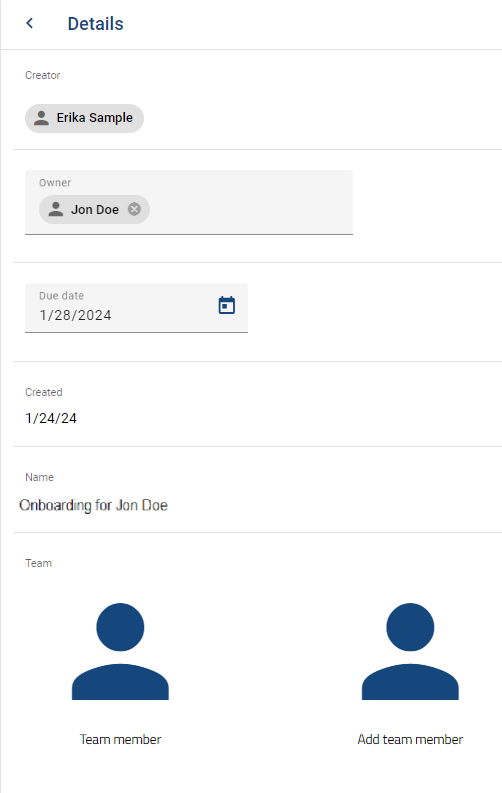
You can also reassign the team members here.
Note
Please note that only ProcessApp Administrators and owners can modify the details of a case.
How can I set or change the due date of a case?
The due date defines when a case should be completed. If the due date has been exceeded but the case has not been completed yet, the progress of the case is highlighted in red color in the personal case list as well as in the case list of the corresponding process. Cases that contain one or more overdue tasks are highlighted in the case list with a red marker on the ProcessApp icon. Cases with overdue tasks that have since been completed appear with a grey marker. You receive more information if you move your mouse over the marker. If all tasks are within their due dates or have been completed on time, the cases appear in the list without a marker.
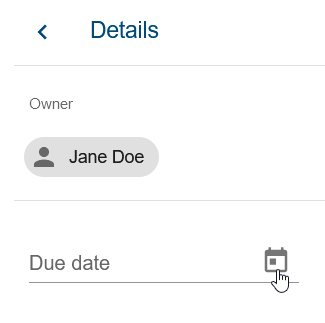
When you create a new case, you can set a due date directly in the corresponding field. This statement is optional. Enter a date in the format MM/DD/YY or click the calendar button and select a date from the calendar that appears.
As a ProcessApp Administrator or case creator, you can set and change the due date of your case later. Navigate to the case details. The Due date is located below the owner. If no date has been set, the field is empty. Click the Due date placeholder to enter a date, or click the calendar to select a date.
In case a due date was previously set, you can change it here. Click the date to enter a new date, or use the calendar as described above.
How can I define status changes for a process?
As a ProcessApp Creator, you can define the status of a process so that the status of a case can be easily read. When you are working on a process diagram and open the Process Execution Editor for an object such as a task, event or gateway, you have the option of entering a status value as text (string) in addition to the due date.
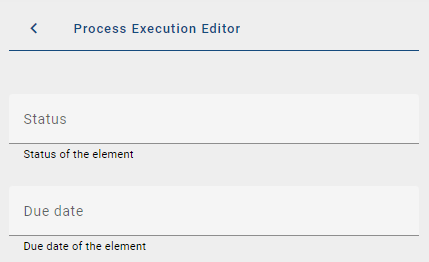
For example, if a node in an object is completed or started and that node has a status change value, the status of the case is set to that value.
The status of a ProcessApp can be viewed at any time in the case list of the ProcessApp in the Status column. This status is also available as a facet. If a case has a status and an active task is completed while the next task has no status, the case retains the last active status. This status is also available as a facet.

Hint
Please note that the due date only applies to tasks.
Hint
The custom status field may contain a maximum of 255 characters.
How can I reassign team members of a case?
As the case owner, you can reassign team members to your case at any time. To do so, first navigate to the case details view.
Here you can see all roles of the corresponding case. Below the role description is the name of the user or user group currently assigned to the role. If no one has been assigned to the role yet, the Add team member button is displayed.
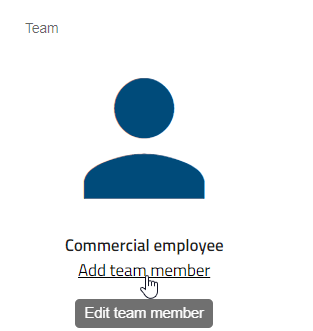
To reassign a role to your team, simply click on the name of the currently assigned user or user group, or if no one has been assigned, click Add team member. A dialog will appear allowing you to reassign the corresponding role.
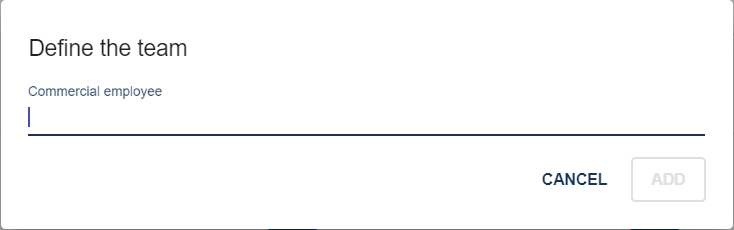
Simply enter the name of the user or user group in the input field and then select the corresponding entry from the drop-down menu.
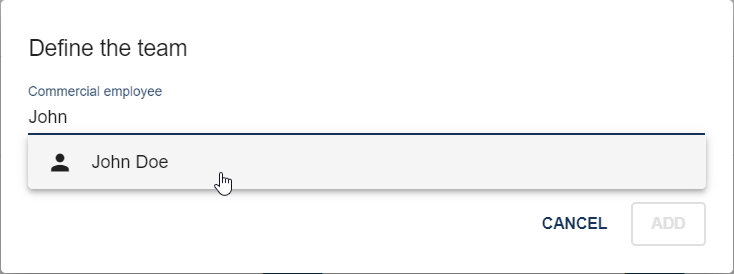
Select the Add button to apply your changes and reassign the role. The name of the assigned user or user group will now appear below the relevant tasks in the process flow of the case and in the case details view.
Note
Tasks that were started before the reassignment are not reassigned. These tasks will still be visible in the personal task list of the corresponding user. If you want them to be processed by the reassigned user or user groups you have to delegate them.
Note
If no user or user group was defined for a role when the case was created, the case creator is responsible for executing the task as soon as the case is started.
How can I export an event log from a ProcessApp?
In the case list of a ProcessApp, you have the option of downloading an event log. To do this, navigate to the case list of the desired ProcessApp and open the options in the right sidebar. If you only want to export the log for certain cases and tasks, you can restrict the list accordingly in advance using the filters.
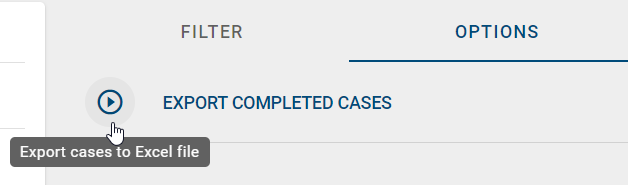
Then select the Export cases option by clicking on the Export cases to Excel file icon. The export takes the currently applied filters into account so that only relevant cases and the associated tasks are included.
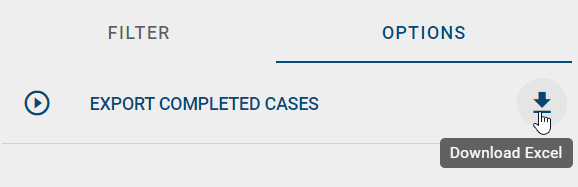
Once the export is available, you will see a Download Excel file button next to the Export cases option. Note that this event log is only available to you. Other users will need to create an event log themselves in order to download it. Select the arrow button to download the created event log.
The file contains two sheets, one sheet lists all cases, the other sheet contains the associated tasks.
The first sheet contains the following data for each case:
Case ID
Case name
Creation date (in ISO format)
Owner
Due date (in ISO format)
Progress
Status (defined in the process in GBTEC Process Design)
Case status
The second sheet contains the following data for each task:
Case ID
Case name
Task ID
Task name (in your content language)
Task start date (in ISO format)
Task end date (in ISO format)
Task due date (in ISO format)
Task performer role (in your content language)
In addition to the role of the task, the email address and name of the user who performed the task are also exported.
Hint
If your UI language is not maintained, the default template is English.
Note
The export function is not available in the mobile version of GBTEC Work Orchestrator.
Tip
If your user role allows, you will find additional tabs in the case list of your ProcessApp. The monitoring view provides an overview of the status of active cases.
When is a case completed?
A case is completed when all tasks within the process flow have been completed. From that moment on, no elements of the case can be changed. For each completed case, the end event at which the case was completed is recorded.
Hint
Please note that a process will be successfully completed immediately upon reaching an end event with the event type Terminate, even if other sequence flows are still active.
Once the case is completed, it is archived and the sequence of events is stored in the system. These are used for predicting subsequent flows of new cases for the same process.
Note
The completion time or end time of a task is displayed when a step is completed in a given case.
Note
In a given case, the start time is displayed if the step is considered as an activity in progress. The start time is also displayed if the step has an error.
How can I archive cases?
By default, all cases are archived as soon as they are completed. However, you have the option to archive cases that are not yet completed.
If you are logged in with the user role Administrator or are listed as the case owner or case creator, you can access the process flow view of a case by opening the case under ProcessApp or My Cases.

There, click on the context menu with the three dots to the right of the entry and select the option Archive.
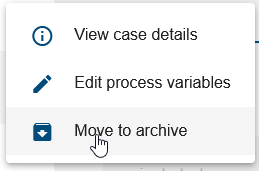
A dialog will appear informing you that some tasks have not yet been completed. If you want to archive the case anyway, select the Do it anyway option. All uncompleted tasks will be canceled and the case will be archived.
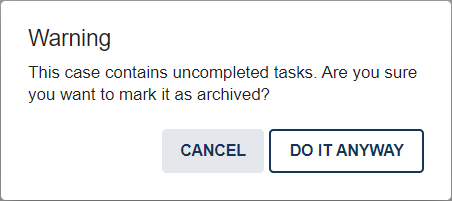
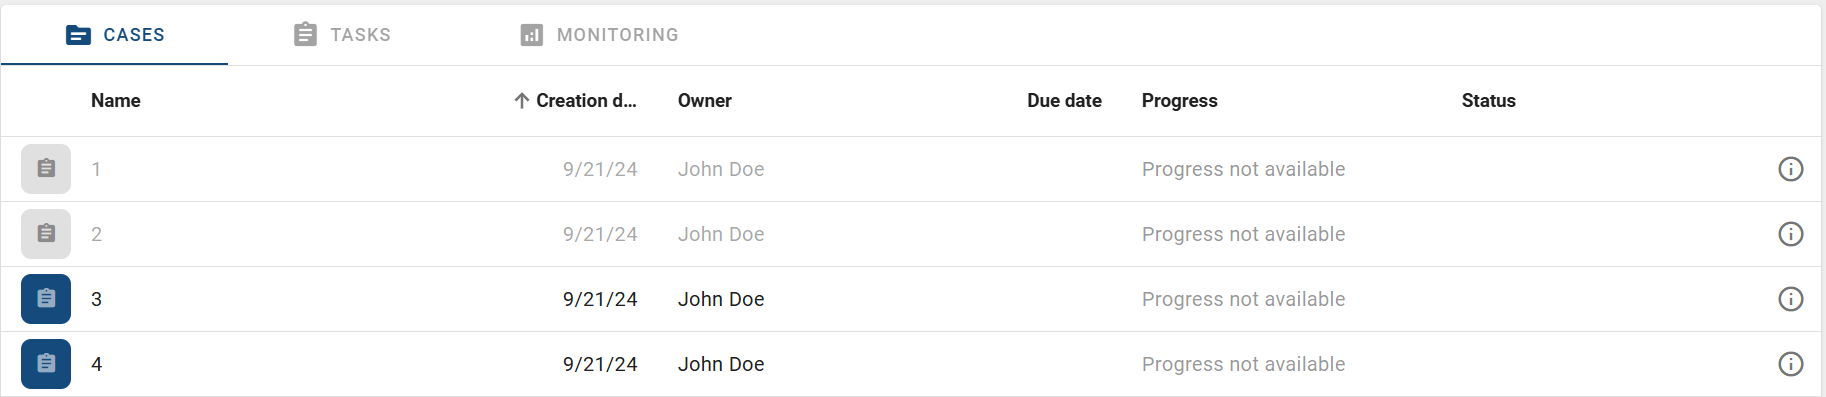
After the case is archived, a message informs you that the case has been successfully archived. The case will now be greyed out in the case lists.
Warning
If you cancel a synchronized call activity early and archive the case, its sub cases are also archived.
Note
If the case was the last unarchived case of a diagram depublished in GBTEC Process Design, the corresponding process will also disappear from the process overview.
Where do I find archived cases?
Archived cases are displayed in your personal case list and in the case list of a process along with the ongoing cases. They are displayed in gray and can be filtered by the completion status Archived in the Filter panel to the right of the case list.
To do this, open your personal case list or the case list of a process. In the list, archived cases are grayed out.
To display only archived cases in the case list, filter for archived cases by clicking on the Archived option in the right sidebar below the search bar. The case list will update immediately.

As with ongoing cases, you can view the details of a case by clicking the i button. You can also view the history of a case by clicking on it.
What are process variables used for in my cases?
In GBTEC Work Orchestrator, you have the option to use process variables in your cases in order to dynamically process data during the process flow. Some process variables are created by default, while others are generated by executing REST calls or using decision tables of rule-based tasks.
These process variables can be used during the process flow to provide users with data that they can use to successfully complete their tasks. Process variables can be used in task forms. In addition, the data provided can also be used in other automated tasks, such as new REST calls or script tasks.
Note
Note that the values of process variables change locally in the task until the task is completed.
Which process variables are created by default?
In GBTEC Work Orchestrator, a set of process variables is provided by default for each case. The following process variables and associated values are therefore available for each case:
Name of the variable |
Default value |
|---|---|
createdDate |
Date when the case was created |
creatorEmail |
Email of the user who created the case |
creatorName |
Name of the user who created the case |
caseName |
Case name |
Additionally, a process variable is created for each role used that has an Identifier. The name of the variable is the Identifier used and the value is the corresponding email of the assigned role.
Within the process flow view of a case, you can view the values of all process variables. ProcessApp Administrators can also change the case name there (value of caseName).
How can the default process variables be grouped as smart variables in a case object?
When a case of a new process is created, a case object is automatically created that contains all the required process variables.
The following variables are available in the _case object:
“name” (changeable)
“url” (not changeable)
“dueDate” (changeable)
“owner” object (changeable)
“case” (not changeable)
“creationDate” (not changeable)
“creator” object (not changeable)
“progress” (not changeable - automatically)
“customStatus” (not changeable - automatically)
“id” (not changeable)
“processAppID” (not changeable)
Note
In this context it should be noted that the .name and .email variables belong to the owner and creator objects.
Note
Please note that while the owner variable can be changed, its properties are unchangeable. Changing the properties (e.g. _case.owner.name) is not supported. Instead, the entire owner object must be replaced, as it represents a user or a user group.
The variables are accessible in the following way:
_case.name
_case.url
_case.dueDate
_case.creationDate
_case.owner.type / _case.creator.type
_case.owner.id / _case.creator.id
_case.creator.ATTRIBUTE
_case.progress
_case.customStatus
_case.id
_case.processApp.id
You can set a new value for a process variable. If the variable is modifiable, the changes will be reflected throughout the application. If the process variable is not modifiable, the changes are not saved and the process variable remains unchanged.
When viewing the process variables of a case, both the attributes of the case variable and the “old” default variables are visible. If you open an older case where the case object did not exist, only the “old” default variables will be displayed when reviewing the process variables.
Hint
Please note that the new object only applies to newly created cases. Existing cases do not have this updated element. While the previous method of accessing these variables is still supported, it is deprecated.
How can I see process variables for archived cases?
When a case is archived, there are different permissions to access the process variable dialog:
As a ProcessApp Administrator, you have the option to open the process variable dialog and view the process variables in all stages.
As a ProcessApp Creator, on the other hand, you can open the process variable dialog to read the process variables only in the public workspace and the preview stage.
How can I find and edit process variables within the process flow view?
Within the process flow of a case, users with the ProcessApp Administrator user role and case owners have the possibility to view and change the value of your process variables. This enables you to adapt the data of your process variables to your needs in case something changes during the case completion.
To do this, first navigate to the process flow view of the corresponding case. There, open the context menu in the upper right corner of the main area.

You can then click on the Edit process variables option.

A dialog will appear listing all available process variables, their data type and their values for this case. In this dialog you can edit the values of the process variables. When you have edited the value of a process variable, you can confirm the changes by clicking the Save button.
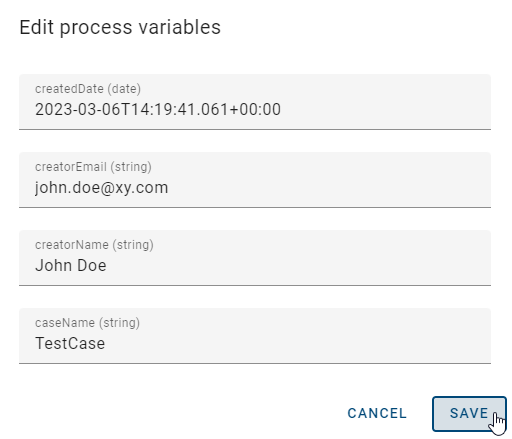
If you just want to exit the dialog or if you do not want to save your changes, click the Cancel button.
Note
By default, each case has a set of default process variables.
How do the values of process variables change when working on a task?
When a task is started, the current values of the process variables are loaded into a local scope. If you work with the task and change the variables, for example, by editing or adding values in the form, the variables are updated locally. The list of process variables still shows the values set before the task was started. When the task is completed, the local variables are transferred to the process variables of the case. They are then available for use in subsequent tasks.
How can I link a role to a process variable?
When modeling a process in GBTEC Process Design, you can maintain the identifier attribute of a role and use it as a process variable. This can allow process participants to select the person responsible for subsequent tasks in a user form, or the person responsible can be determined by a previous REST call. In addition, you can use this process variable as a parameter to create a new case via a REST call against GBTEC Work Orchestrator or via a run link.
If a value (i.e. a name or email address) is set for the identifier in a case, the identifier is transferred to the process variable. When a task of the identified role is started, the user (or user group) set in the variable is entered as the person responsible for the task, provided a GBTEC Work Orchestrator user or user group can be found for the value. If no user or user group was defined for a role when the case was created, the case creator is responsible for executing the task as soon as the case is started. Please note, however, that the user (or user group) is only responsible for started tasks and not for all tasks in the role. It is therefore possible to change the responsibility during the course of the case by editing the process variable of the identifier. If another task of the relevant role is then started, the latest value determines the responsibility.
For example, the role “Executive Manager” is part of the “Selection process” and the Identifier is set as executive-manager. In this process, the HR employee should enter the name of the responsible executive manager in a user task to assign him to the task of the role. Therefore, a user form is modeled with a text field where the ID of the field is equal to the Identifier.
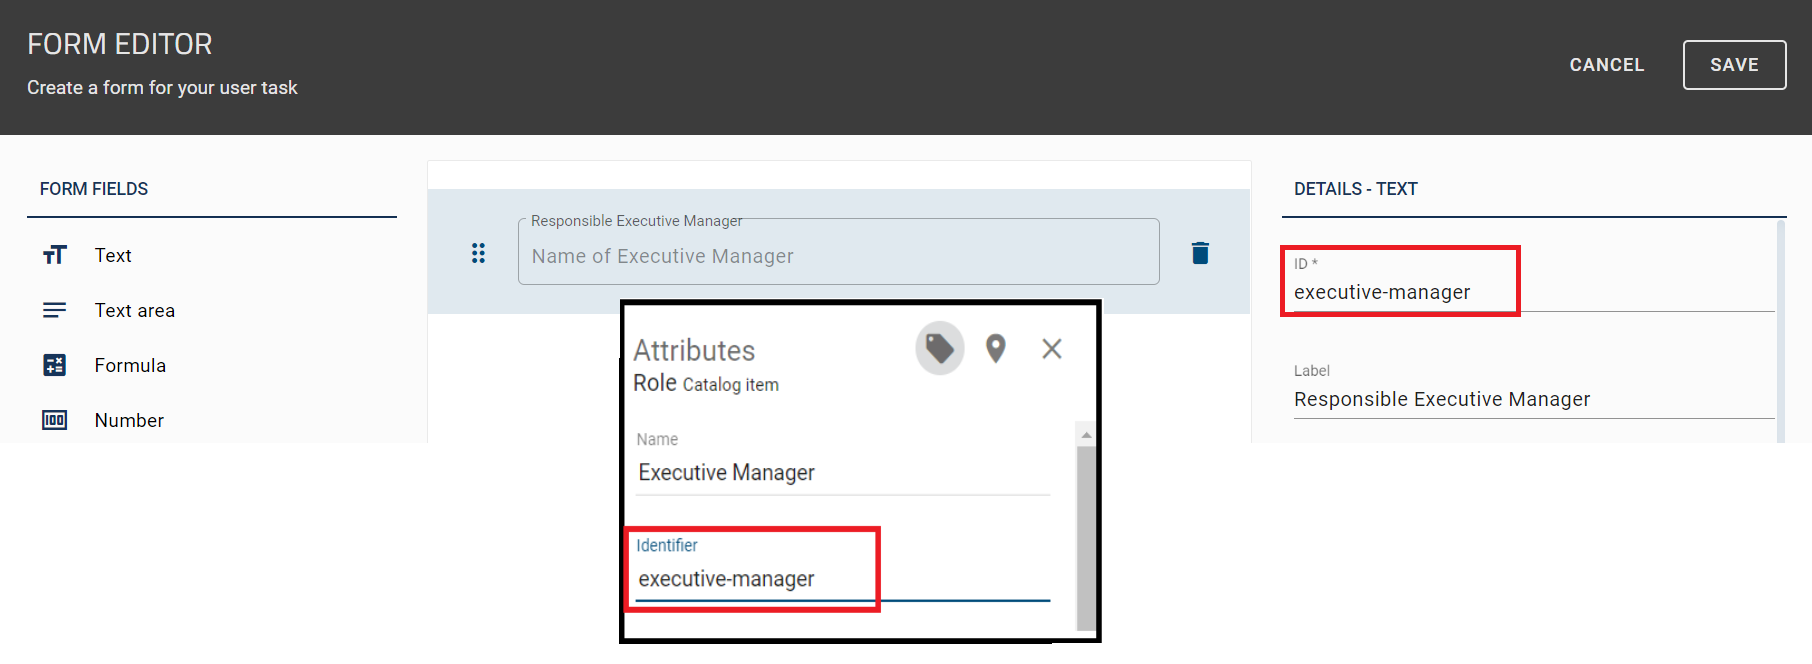
In a concrete case, this results in the user task “Examine application formally”. The role “Executive Manager” (responsible for the last task) is not yet assigned to a user.
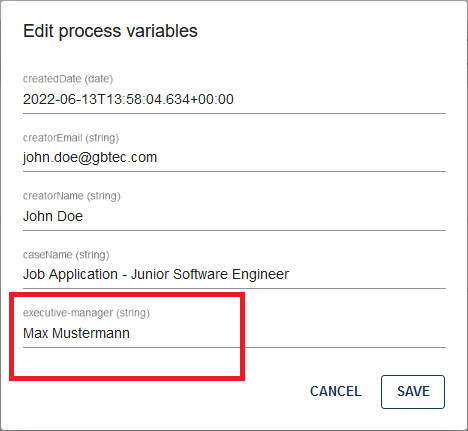
After the user task is completed, the identifier can be viewed and edited in the process variables.
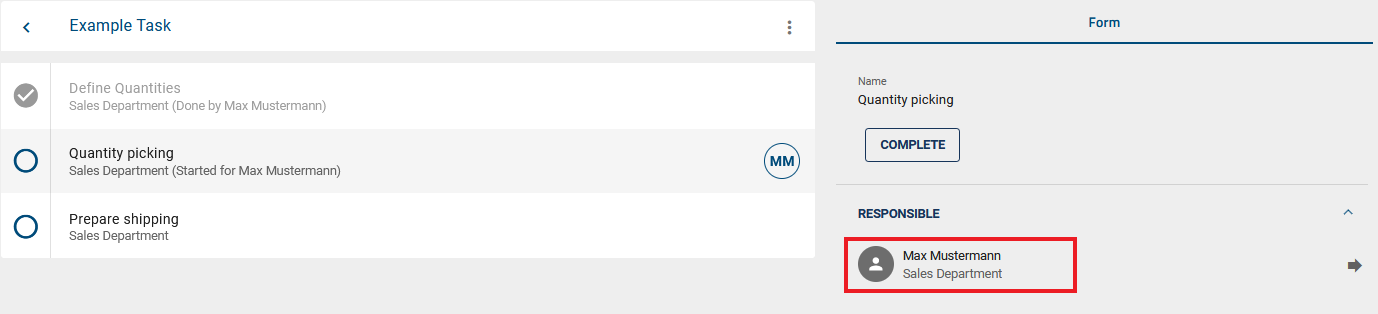
When the task of the “Executive Manager” role is started, the corresponding user is assigned as responsible.
