Administration
You can reach the administration using the Administration menu item in the left menu bar.
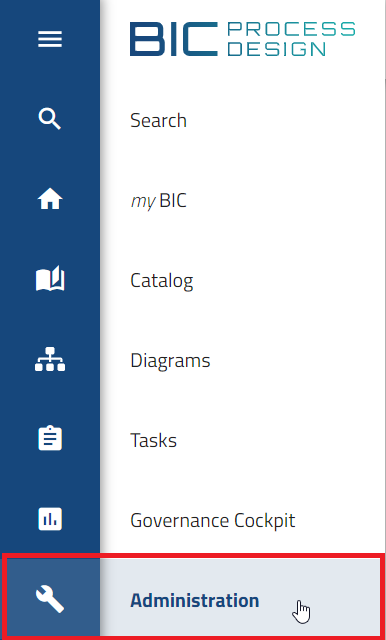
In the administration, the breadcrumb navigation is available. If you open a tile, you can use the header bar to return to the start page of the administration.
Users
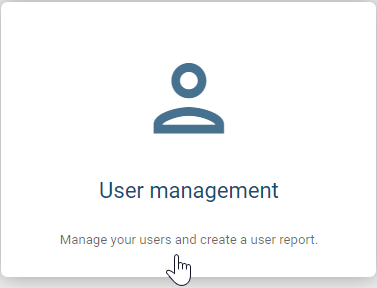
If you have the Administrator user role and open the Administration menu item in the left menu bar, you will see a collection of predefined tiles. If you click the first tile, Users, you will see an overview of all existing users.
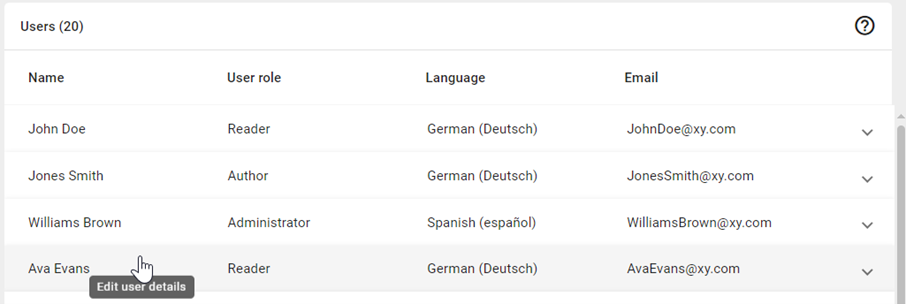
This overview shows the user name, the GBTEC Process Design user role, the set user language, and the email of the user. If needed, you can also edit the user details, delete a user, or reset the password of a user.
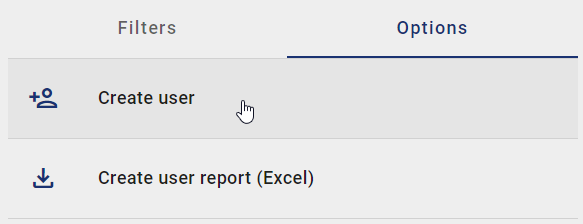
In the right sidebar, you will find the Filters and Options panels. In the Filters panel, you can search for users and filter the users by their GBTEC Process Design user role. In the Options panel, you can create a user and create a user and license report.
More information about these functions is in the linked sections.
Hint
Please note that the functions of the Users tile are not available in the mobile view.
How can I create a user?
If you have the Administrator user role and open the Administration menu item in the left menu bar, you will see a collection of predefined tiles. In the Users tile, you can create new users.
To create a new user, go to the Options panel in the right sidebar and click the Create user button.
A dialog will open where you need to enter the user’s name and email address. You can also choose the user’s language and assign the GBTEC Process Design user role. You can also create the user using SSO.
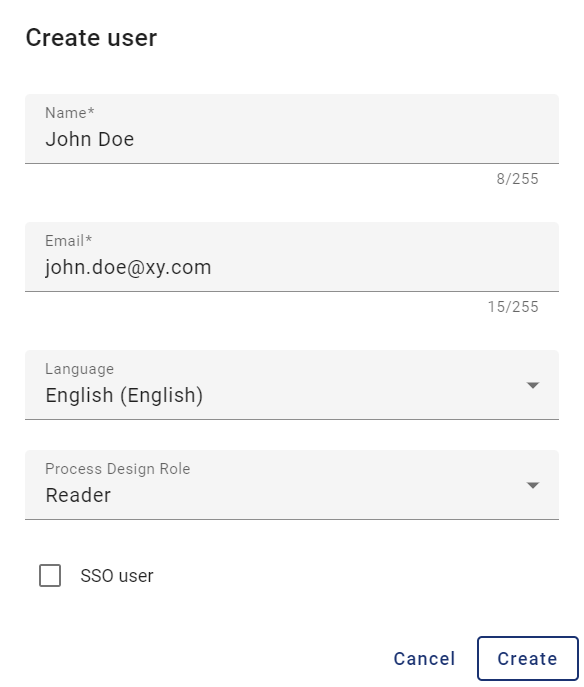
To create the user, click the Create button. To discard the entry, click the Cancel button.
The new user will now appear as the first entry in the list. After reloading the page, the users are shown in alphabetical order.
How can I create an SSO user?
If you open the Administration menu in the left menu bar with the Administrator user role, you will see a collection of predefined tiles. In the Users tile, you can create a user as an SSO user. An SSO user is an account managed via Single Sign-On (SSO). Login is handled through a central authentication service rather than through the application itself. SSO users do not need a separate password in the application.
To create an SSO user, go to the Options panel in the right sidebar and click the Create user button.
A dialog will open. There you must enter the user’s name and email address. Additionally, you can set the user’s language and assign the GBTEC Process Design role. At the bottom of the dialog, you have the option to create the user as an SSO user. To do this, check the box SSO user.
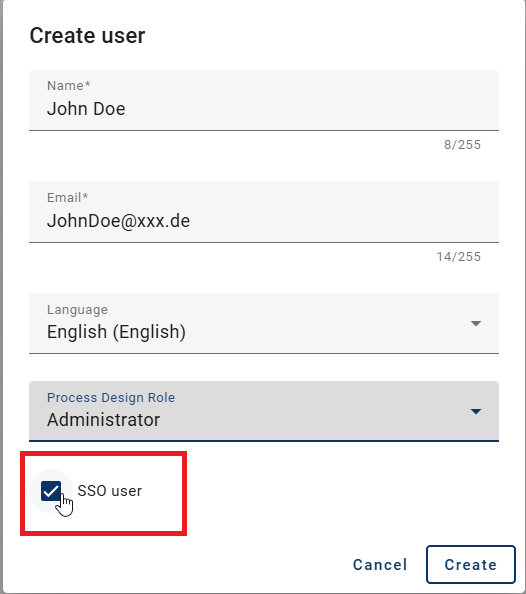
To create the SSO user, click the Create button. If you want to discard the entries, click the Cancel button.
Note
Please note that a user’s SSO assignment cannot be changed in the Administration menu item.
How do I edit a user’s details?
If you have the Administrator user role and open the Administration menu item in the left menu bar, you will see a collection of predefined tiles. In the Users tile, you can edit the user details of a user.
To edit a user, click on the user in the list view. You can view, define, or change the user details. This includes Name, Email, Language, GBTEC Process Design role, Work Orchestrator role and the Assigned user groups. You can find the permissions of the GBTEC Process Design and GBTEC Work Orchestrator roles here.
Select the user whose details you want to edit to see their user-specific information.
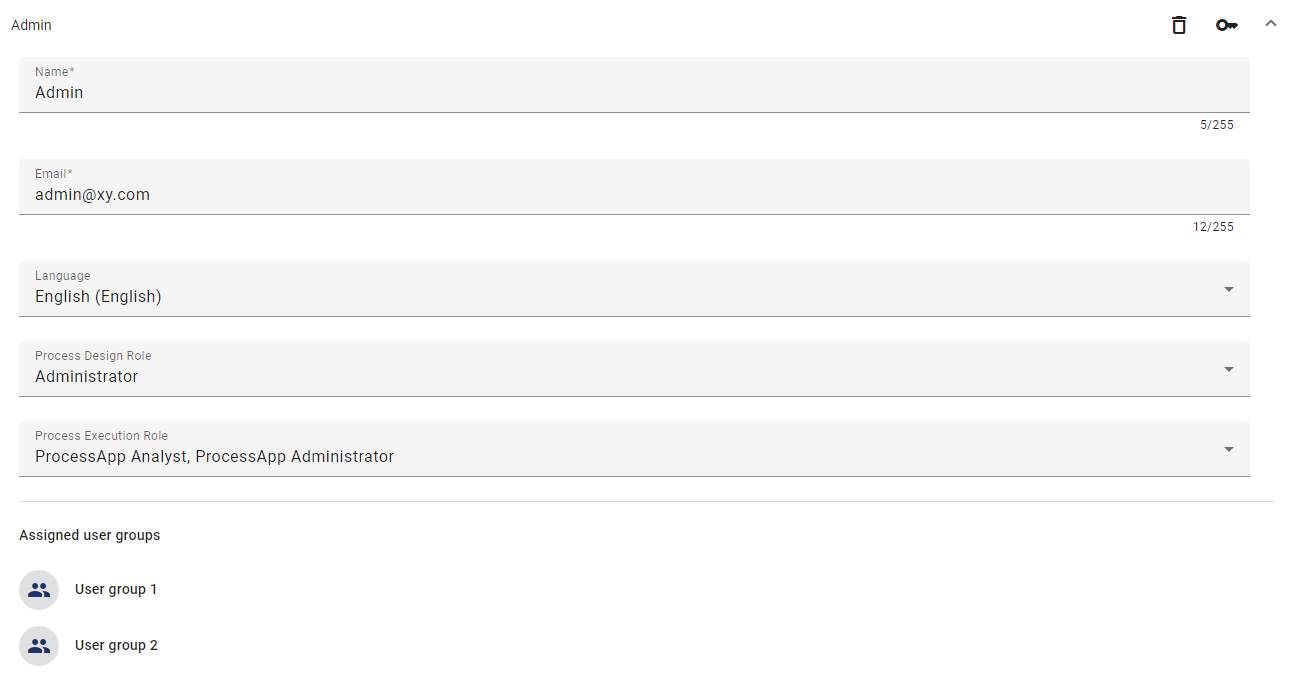
You can edit the user details in the respective input fields. The fields Name and Email are mandatory and must always be filled in.
After making changes, they are saved immediately, and you will see a success message. If saving fails, an error message is displayed.
Note
You cannot edit a user’s assigned user groups here. To add a user to a user group or remove a user from a user group, see the linked sections.
Hint
The language set is the content language in which the application is shown to the user by default. Emails from the application are also sent in this language.
Which user roles are available and which permissions do they have?
In GBTEC Process Design, there are five different user roles. Each role has different permissions, and the permissions build on each other. Your active user role is shown on the MyGBTEC page under your name, or in the profile.
Reader: Readers can only select and search the Publication stage. In this area, they can view published diagrams and the attributes, symbols, catalog entries, and documents associated with these diagrams using the user interface. The Publication stage also provides them with functions for creating comments and reports, as well as a print preview. In addition, they can add diagrams to their favorites.
Reviewer: Reviewers can select and search the Publication stage and have the same functions there as readers. In addition, reviewers can select and browse the preview stage and view and edit governance tasks assigned to them (publication, depublication, resubmission), provided they are designated as the review authority for a specific diagram or catalog item. However, reviewers cannot initiate a governance workflow themselves.
Author: Authors have essentially the same rights as Reviewers. They also have access to the public workspace. This allows them to see all catalog entries and diagrams in the public workspace. This generally allows them to model diagrams and automatically generate catalog entries. To use these features, users with the Author role must be entered as Author in the attributes of the corresponding diagram or object. This allows Authors to be used specifically for modeling individual diagrams or editing individual objects.
Editor: Similar to authors, the role of Editor is used to edit and create diagrams. Unlike authors, Editors do not have to be set within the diagram attributes to model a diagram. Additionally, editors have the ability to make cross-diagram changes. This means users with the role of Editor have the right to manually create, edit, or delete catalog entries and are authorized to accept or decline catalog entries. Furthermore, editors have the ability to assume administrative tasks for governance workflows. They have the authority to view and manage all governance workflows. In the governance cockpit, editors have the same rights as administrators, which means they can delegate or cancel workflows.
Administrator: Administrators have all the rights that other user roles have. In addition, they have special administration rights. These include access to the administration area, the right to create, delete, and rename repositories, as well as the ability to unlock diagrams.
Accessible workspaces |
Administrator |
Editor |
Author |
Reviewer |
Reader |
|---|---|---|---|---|---|
Public workspace |
navigable |
navigable |
navigable |
not navigable(*) |
not navigable(*) |
Preview |
navigable |
navigable |
navigable |
navigable |
not navigable(*) |
Publication |
navigable |
navigable |
navigable |
navigable |
navigable |
(*)Individual diagrams in the public workspace can be accessed in read-only mode via a direct browser link, regardless of defined access restrictions. (view share diagram from public workspace)
If you use GBTEC Work Orchestrator, you have the possibility to set the user’s role for this application as well. A description of the individual GBTEC Work Orchestrator user roles is available in the Quickstart chapter of GBTEC Work Orchestrator.
How can I delete a user?
If you have the Administrator user role and open the Administration menu item in the left menu bar, you will see a collection of predefined tiles. In the Users tile, you can delete existing users.
To delete a user, at least one user must exist. Click on the user in the list to see their details. Then, you will see the Delete user button at the top right.
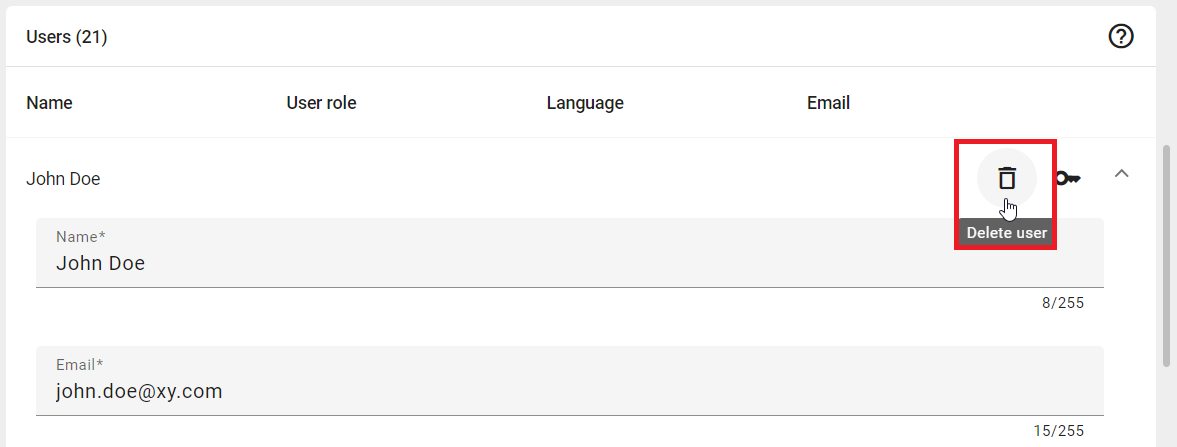
A dialog will open, asking you to confirm the deletion. Click on the Delete button to confirm, or click on Cancel to cancel.
The user will then be permanently deleted and removed from the list.
How can I reset a user’s password?
If you have the Administrator user role and open the Administration menu item in the left menu bar, you will see a collection of predefined tiles. In the Users tile, you can reset a user’s password.
To reset a password, select a user in the list and expand their details by clicking on the user. You will see the Reset password button at the top right.
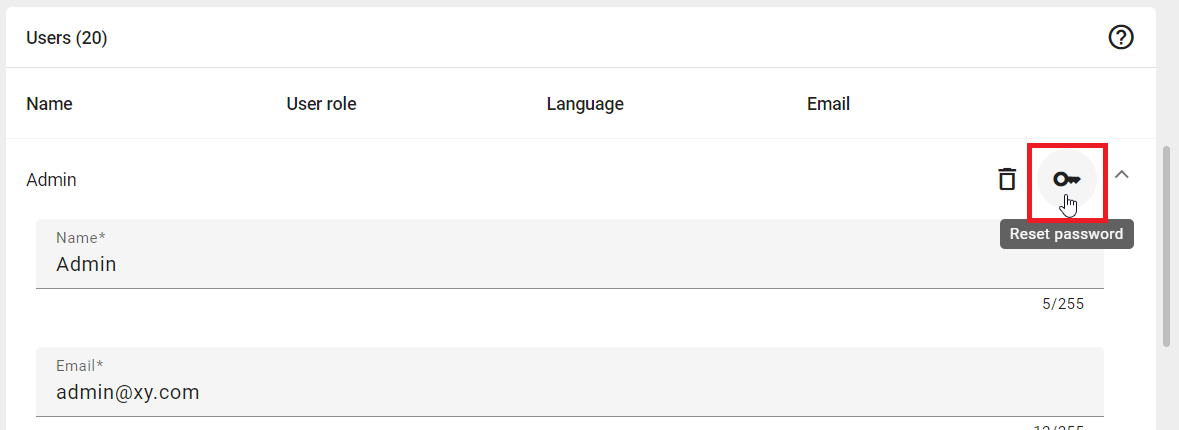
A dialog will appear. Click on the Reset button to send an email to the user with instructions to reset their password. Click Cancel to stop the process.
How can I filter by user roles?
If you have the Administrator user role and open the Administration menu item in the left menu bar, you will see a collection of predefined tiles. In the Users tile, you can filter the list of users by their user roles.
In the right sidebar, you will find the Filters panel. In the Filters panel, the Process Design Role filter is displayed. You can click on one or more user roles to filter the users by these roles. You can also enter text in the search field to search for specific users.
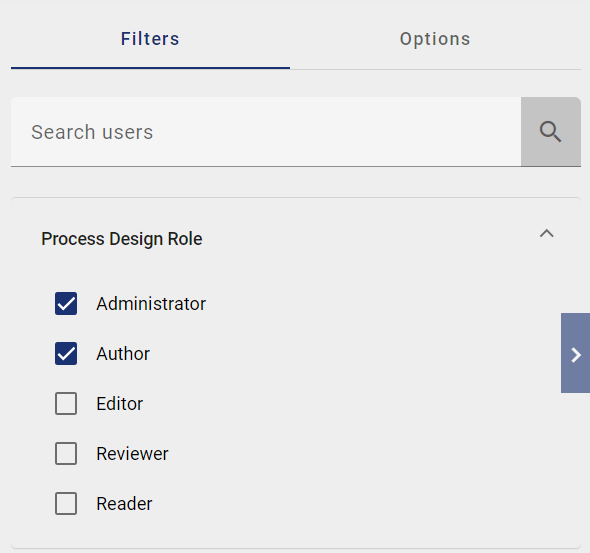
After you select at least one user role in the Process Design Role filter, the user list automatically shows only users with the selected role(s). To return to the full list of users, click again on the selected user role(s) in the filter.
Note
If the user list is already filtered, performing a new search in the search field will further narrow down the list based on the selected filters.
How do I change the role of a user?
If you have the Administrator user role and open the Administration menu item in the left menu bar, you will see a collection of predefined tiles. In the Users tile, you can change the role of a user.
If you click on the first tile Users, you will see a list of all users. The list shows the user name, the GBTEC Process Design user role, the set user language, and the email of each user.
By clicking on a user in the list view, you can see and change their user details. To change the user role for GBTEC Process Design, click on the Process Design Role field. To change the user role for GBTEC Work Orchestrator, click on the Work Orchestrator Role field. This opens a list of available roles for that application.
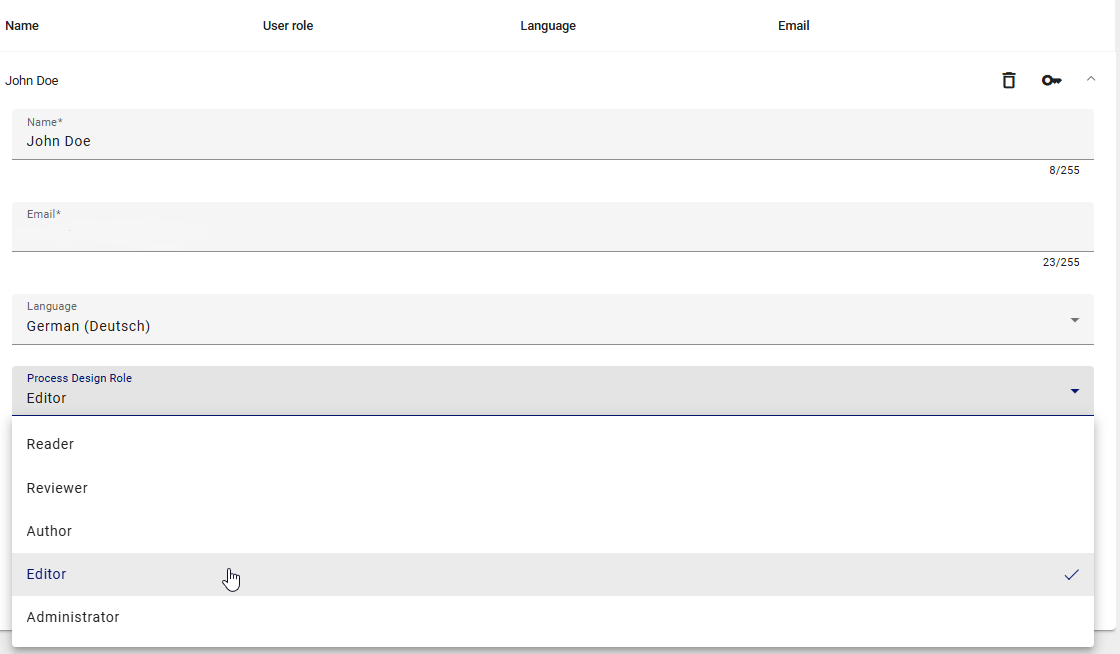
Select the right user role. For GBTEC Process Design, the roles are Reader, Reviewer, Author, Editor, and Administrator. For GBTEC Work Orchestrator, the roles are ProcessApp Participant, ProcessApp User, ProcessApp Creator, ProcessApp Analyst, and ProcessApp Administrator. You can select more than one role for GBTEC Work Orchestrator. The permissions for these roles can be found here.
After choosing a GBTEC Process Design role, a confirmation message appears that your change is saved. The user is automatically informed by email about the change to their role.
If you give a user more rights, they will still have the old GBTEC Process Design role at the next login. This helps users know their rights. If the user wants to use the new rights, they must change their role in the application themselves.
Note
If you reduce the rights of a user, the GBTEC Process Design role changes immediately.
How do I create a user report?
If you have the Administrator user role and open the Administration menu item in the left menu bar, you will see a collection of predefined tiles. In the Users tile, you can create a user report.
To create a user report, go to the Options panel in the right sidebar and click the Create user report (Excel) button.
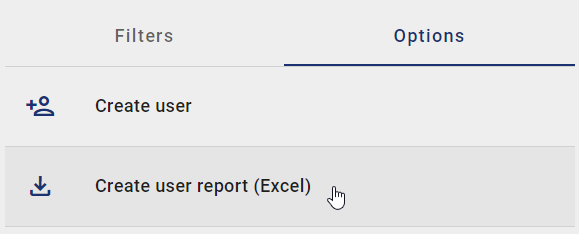
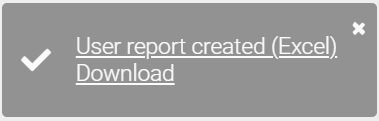
After you click the button, the user report is created. When the report is ready, a message appears at the bottom right of the screen. The message contains a download link. Click the link to download the user report.
The user report is in English and contains several spreadsheets about users and licenses. All the information you see in the user list is also in the user report.
How can I assign a user to a person?
Users need to be linked to a catalog item of type Person to use them later for the corresponding diagram attributes. The link is made using the e-mail address.
Create a Person in the catalog or in a diagram. In the E-mail address attribute, enter the exact address of the user in GBTEC Process Design. Then save your changes.
Alternatively, if the catalog item with the corresponding name and e-mail address does not exist, it is automatically created when you select a user in attributes.
User groups
In addition to role-based authorization, group-based authorization is available to help manage users in different areas of your company.
Group-based authorization allows multiple users in a group to model diagrams or objects, or to restrict access to them. You can also use it to notify user groups about version changes or include them directly in the publishing process.
This authorization works by assigning user groups to specific diagram or object attributes. User groups are assigned via organizational units.
How can I administrate user groups?
If you have the Administrator user role and open the Administration menu item in the left menu bar, you will see a collection of predefined tiles. In the User groups tile, you can create and manage user groups.
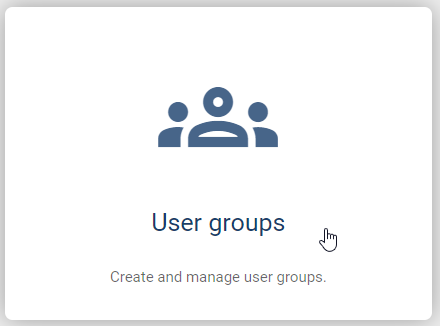
After clicking on the User groups tile, an alphabetically sorted list of all existing user groups is displayed. The list shows the names of all existing user groups. You can also rename a user group, delete a user group, add a user to a user group, or remove a user from a user group.
In the right sidebar, you will find the Options panel. In this panel, you can create a user group. Further information on the respective functions can be found in the linked sections.
Hint
Please note that the functions of the User groups tile are not available in the mobile view.
How can I create a user group?
If you have the Administrator user role and open the Administration menu item in the left menu bar, you will see a collection of predefined tiles. In the User groups tile, you have the option to create a user group.
To create a user group, click the Create user group button in the Options panel in the right sidebar.
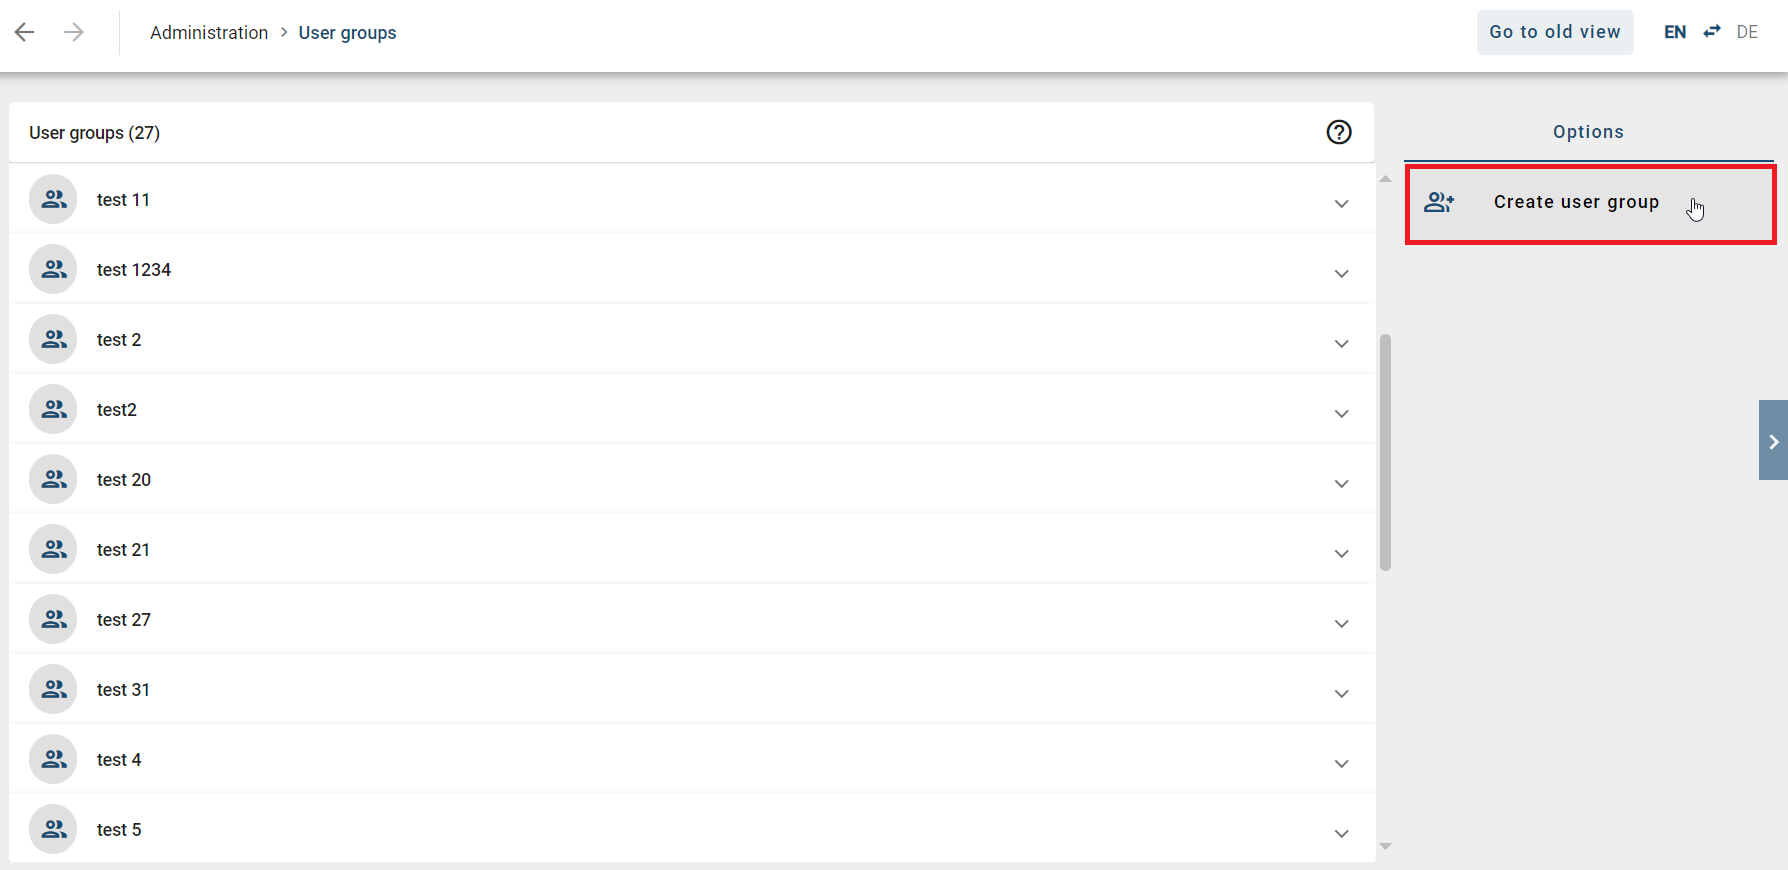
This will open a dialog where you need to enter the name for the new user group.
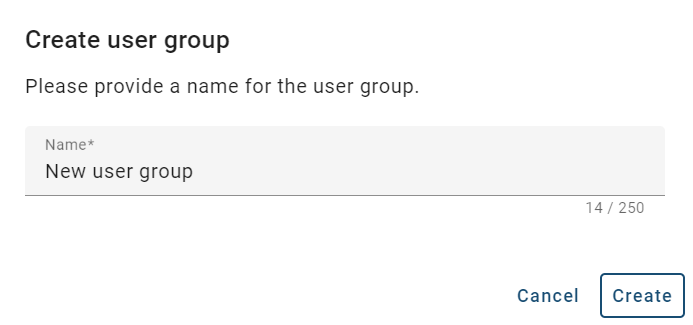
To create a new user group, you must enter at least one letter or number. Then you can click the Create button to create the user group. Alternatively, you can click the Cancel button to discard the entry.
The new user group now appears as the first entry in the list. After reloading the page, the user group will be shown in alphabetical order.
How can I rename a user group?
If you have the Administrator user role and open the Administration menu item in the left menu bar, you will see a collection of predefined tiles. In the User groups tile, you have the option to rename a user group.
To rename a user group, at least one user group must exist. Click on the desired user group to expand its details. You will then see an input field showing the current name of the user group.
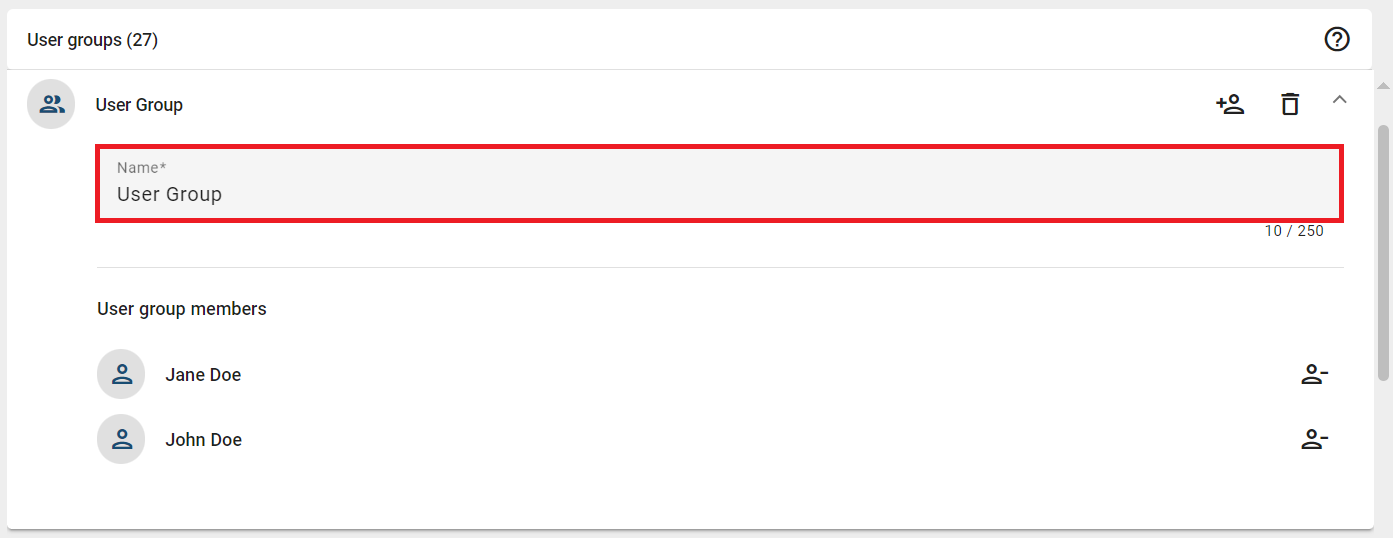
The input field is not read-only. You can change the name as many times as you want, as long as at least one letter or number is present. Once you add, change, or delete at least one letter or number, your changes are saved immediately and visible to other users.
How can I delete a user group?
If you have the Administrator user role and open the Administration menu item in the left menu bar, you will see a collection of predefined tiles. In the User groups tile, you have the option to delete an existing user group.
To delete a user group, click on the desired user group in the list to expand its details. You will then see the Delete user group button at the top right.
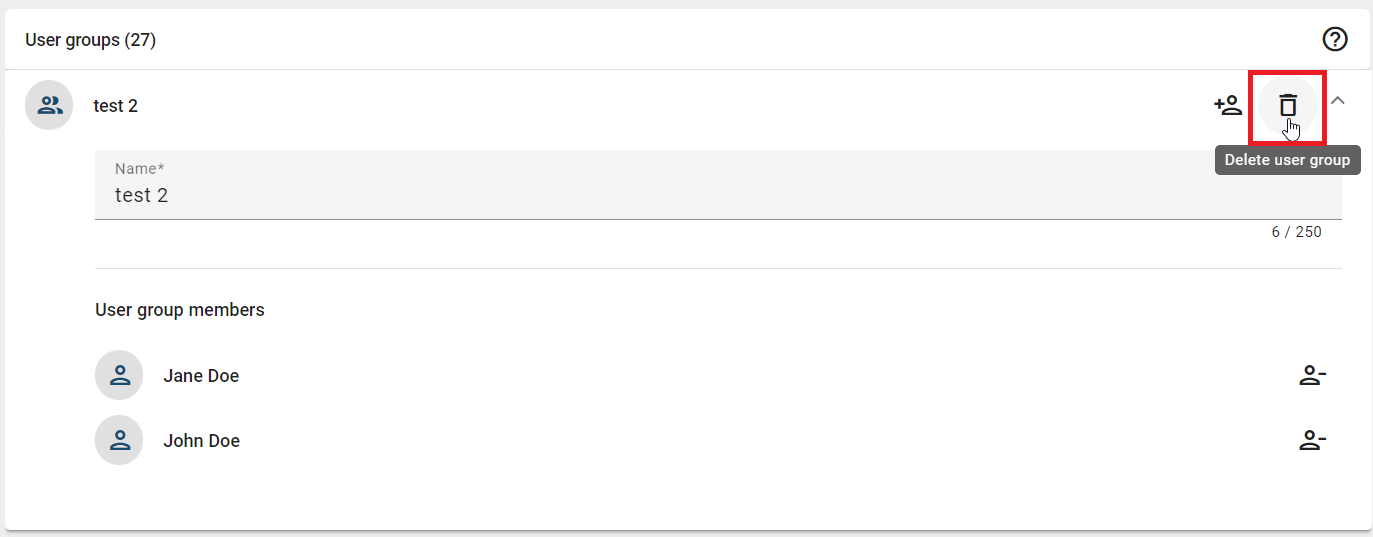
A dialog then opens in which you must confirm the deletion. Click the Delete button to finally confirm the deletion, or click the Cancel button to cancel the deletion.
Afterwards, the user group will be permanently deleted and removed from the list.
How can I add a user to a user group?
If you have the Administrator user role and open the Administration menu item in the left menu bar, you will see a collection of predefined tiles. In the User groups tile, you have the option to add a user to a user group.
If at least one user group exists, you can add users to it. Click on the desired user group in the list to expand its details. You will then see the Add users button at the top right.
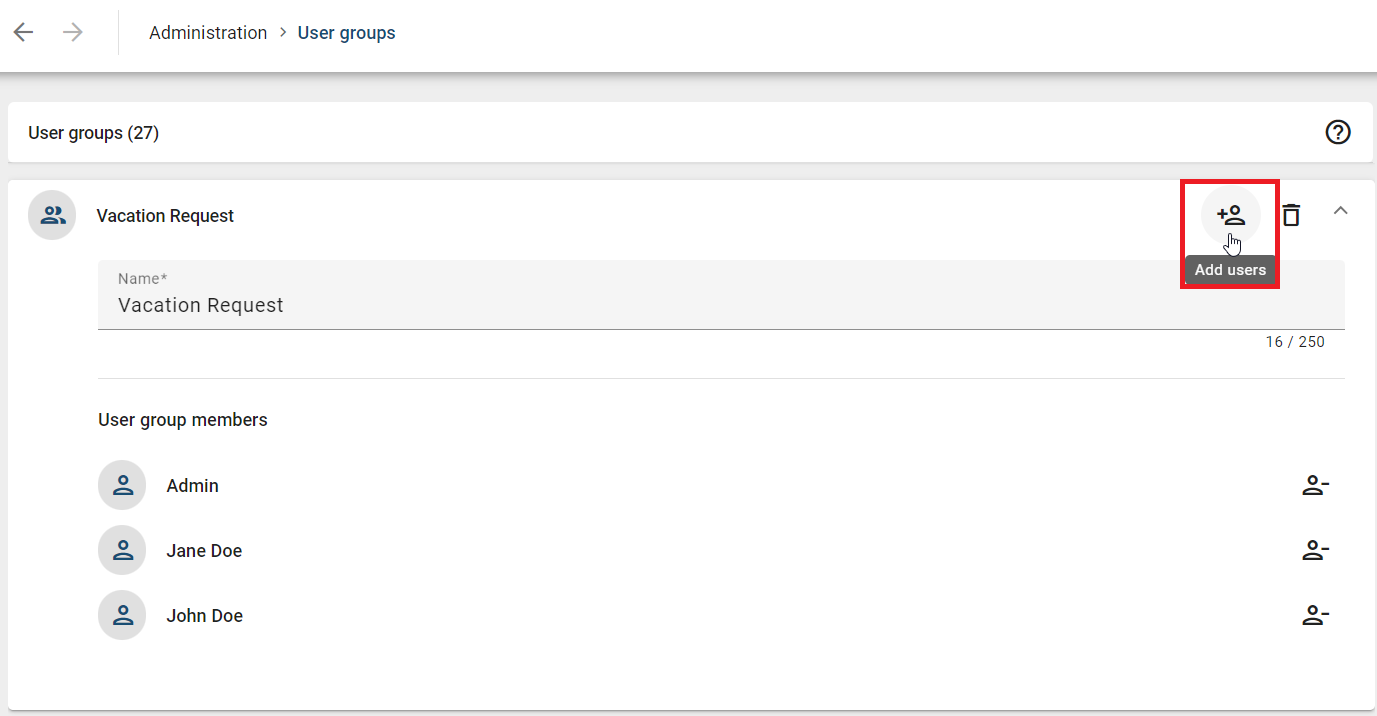
A dialog then opens. It contains a search field and an alphabetically sorted list of users who are not in the user group. You can search for users in the search field above, or select users from the list. The list shows the name, the GBTEC Process Design user role, and the email address of the users.
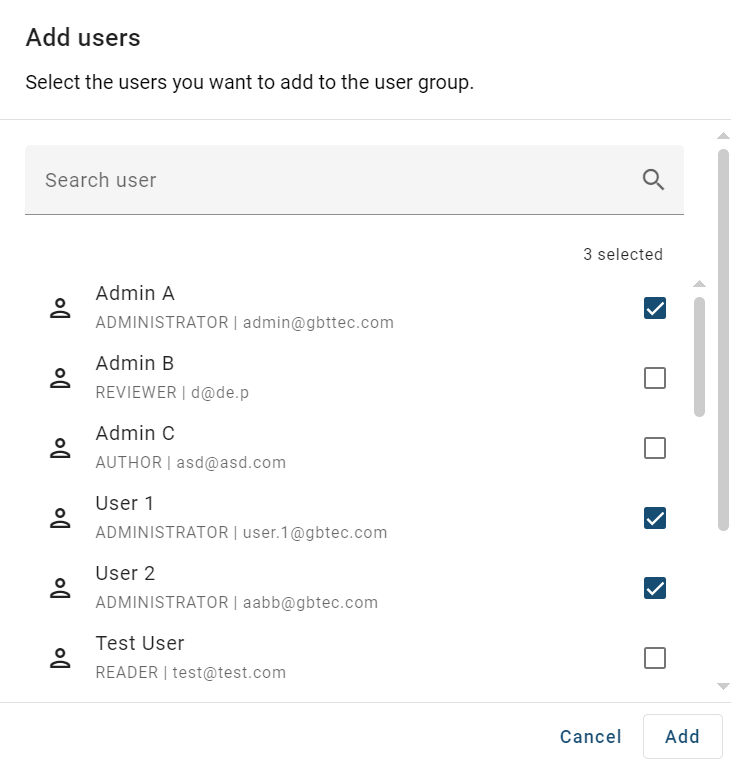
Once you have selected at least one user, click the Add button below to add the users to the user group. To discard your selection, click the Cancel button.
The newly added users are then displayed in the user group.
How can I remove a user from a user group?
If you have the Administrator user role and open the Administration menu item in the left menu bar, you will see a collection of predefined tiles. In the User groups tile, you have the option to remove a user from a user group.
If there is at least one user group with at least one user in it, you can remove a user from the user group. Click on the desired user group in the list to expand its details. You will then see the Remove user button next to the user’s name.
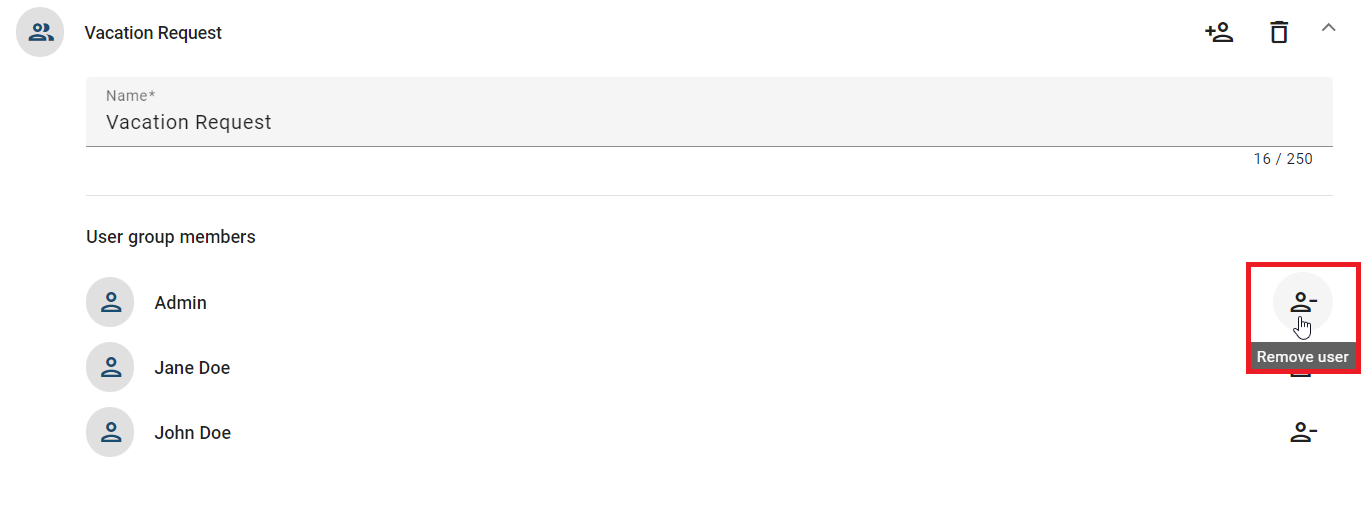
Click the Remove user button to remove the user from the user group. If needed, you can add users back to the user group.
How can I assign a user group to an organizational unit?
The assignment of a user group to different attributes of a diagram is done via organizational units. Create an organizational unit in the catalog and enter the name of the corresponding user group in the attribute Identifier.
Alternatively, this catalog entry with the corresponding Name and Identifier is automatically created by selecting a user group in attributes, if it does not already exist.
Tip
Give the organizational unit the same name as the assigned user group to clearly recognize it.
Tip
The new user group name can simply be updated in the catalog so that you do not have to change the occurrences manually. Alternatively, it is also possible to create a new group and then replace it.
User logins
How can I filter user logins by login type?
If you open the Administration menu item in the left menu bar using the user role Administrator, you will see a collection of predefined tiles. Click on the third tile, User Logins.
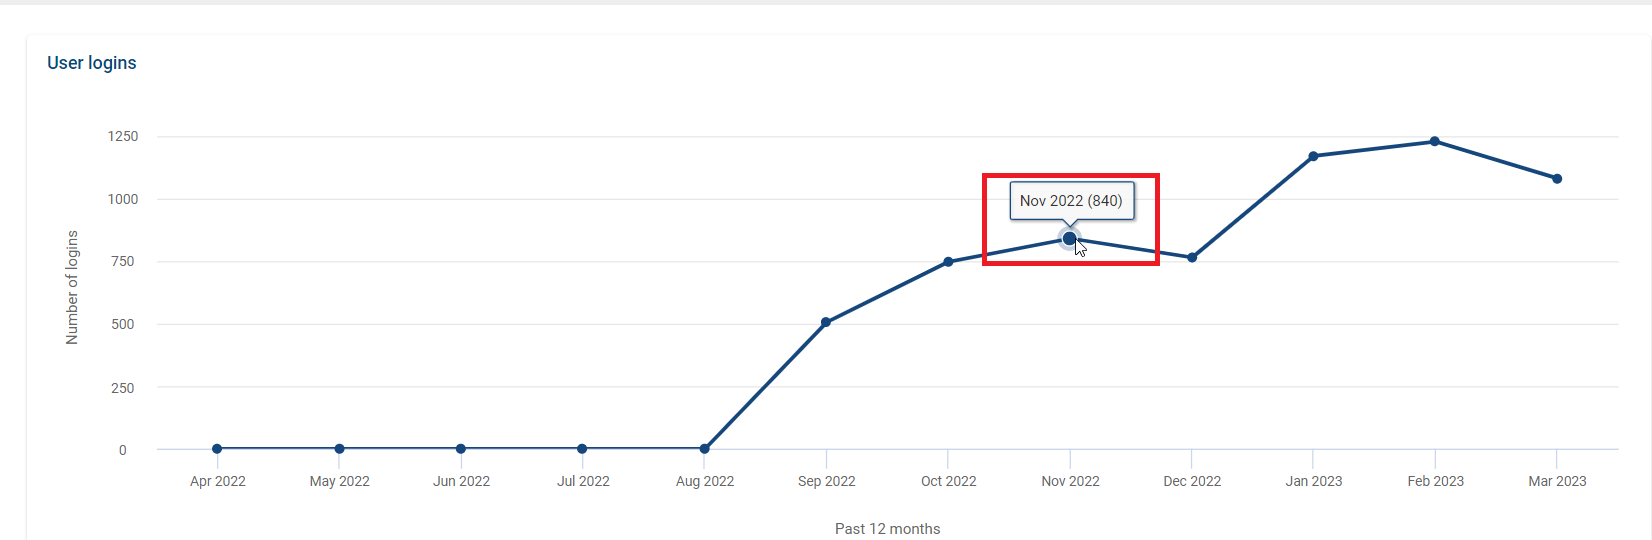
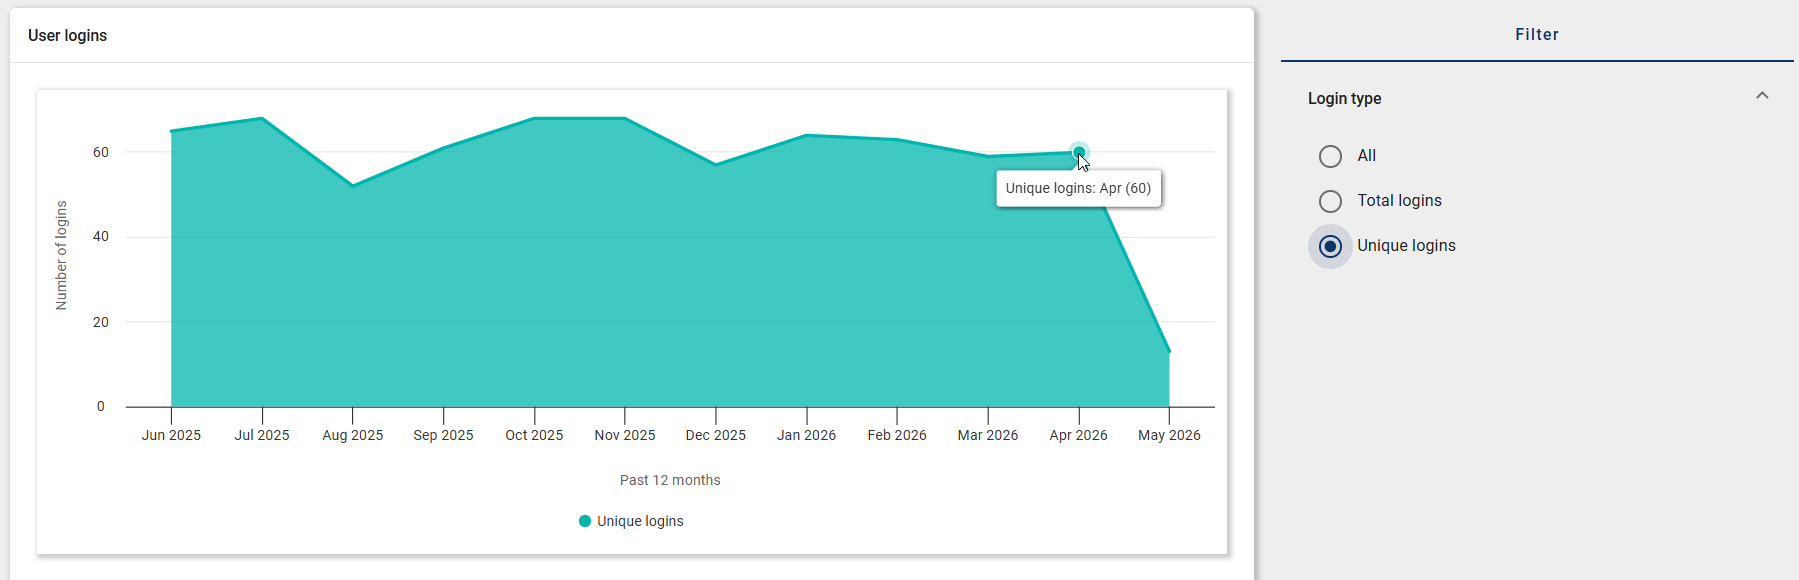
You will then see a graph showing logins from the last 12 months. By default, both Total logins and Unique Logins are shown.
The chart shows the trend of logins over the past 12 months. The y-axis shows the number of logins, while the x-axis shows the respective calendar months. In the Filter panel in the right sidebar, you can adjust the login type and thus decide which login types are shown in the chart. By default, the All option is selected. The following options are available:
All
Here you get an overview of the total number of logins within a calendar month. Both Total logins and Unique logins are displayed in one graph.
Hint
Please note that the number of Total logins can be higher than the number of users in your organization. Each login is counted individually, even if a user logs in multiple times. The Unique logins, on the other hand, show only how many distinct users logged in within a calendar month.
After clicking on the tile, select the All option in the Filter panel in the right sidebar to adjust the login type. This option is selected by default.
The diagram displays total logins and unique logins in different colors. When you hover over the graph with your mouse, the login types, the calendar month, and the exact number of logins are shown.
Hint
The colored icons below the chart indicate which color represents total logins and which represents unique logins.
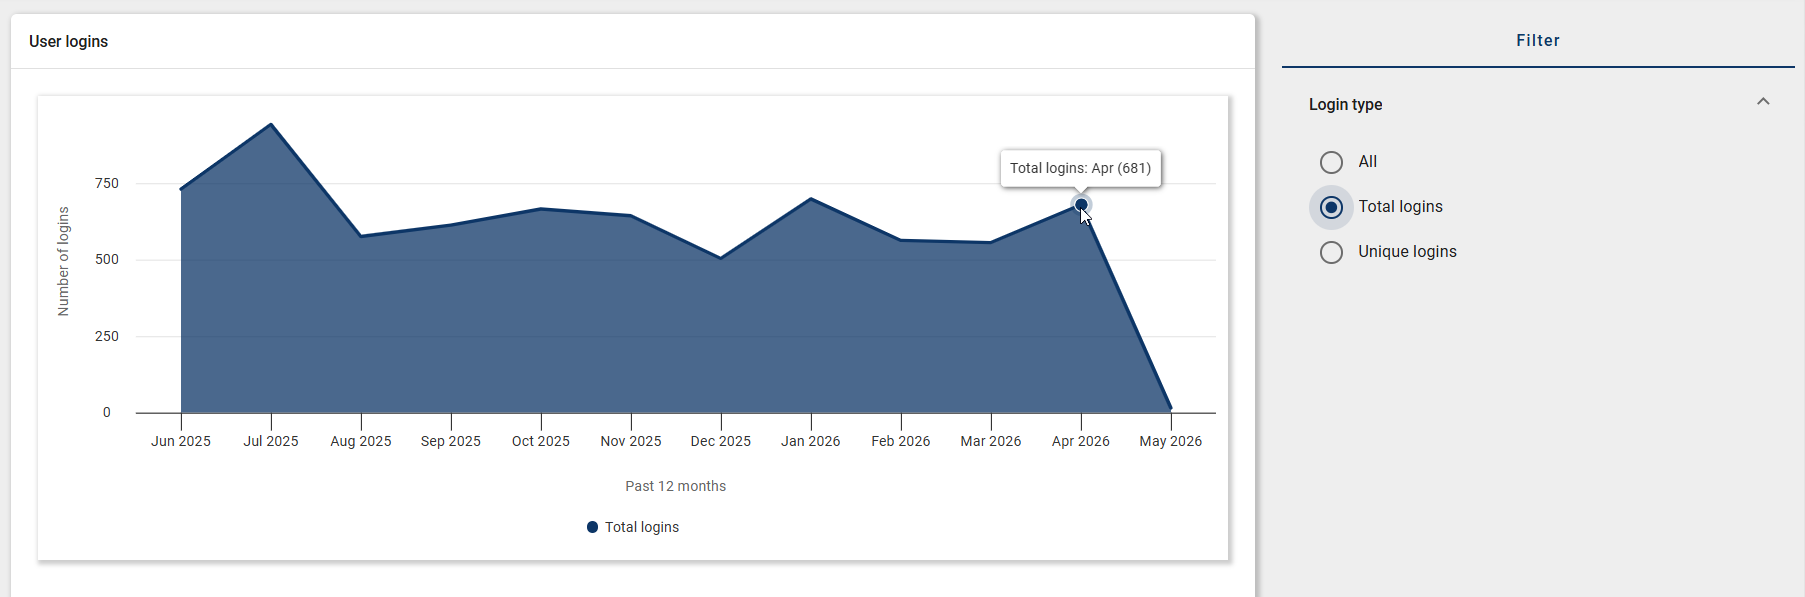
Total logins
Here you will find an overview of the total number of logins within a calendar month. Every login is counted, even if the same user logs in multiple times.
Hint
The total number of logins can be higher than the number of users in a company because every login is counted. If a user logs in multiple times in one day, each login is counted separately.
After clicking on the tile, select the Total logins option in the Filter panel in the right sidebar to adjust the login type. By default, the All option is selected.
The graph displays the Total logins. When you hover over the graph, the calendar month and the exact number of logins is displayed.
Unique logins
Here you can see an overview of how many different users have logged in within a calendar month. Multiple logins by the same user are not counted.
After clicking on the tile, select the Unique logins option in the Filter panel in the right sidebar to adjust the login type. By default, the All option is selected.
The graph displays the Unique logins. When you hover over the graph, the calendar month and the exact number of logins is displayed.
Repository
If you have the Administrator user role and open the Administration menu item in the left menu bar, you will see a collection of predefined tiles. The fourth tile, Repositories, shows an overview of all existing repositories. Here, you can create, edit, delete, publish, and export repositories.
After clicking on the Repositories tile, you will see an alphabetically sorted list of all existing repositories in your active language. The order may change depending on the language selected.
Hint
Please note that access restrictions set for a repository may prevent users from navigating to its contents in the user interfaces. To control access reliably, apply restrictions directly to content elements such as diagrams and catalog items.
How can I create a new repository?
If you have the Administrator user role and open the Administration menu item in the left menu bar, you will see a collection of predefined tiles. The fourth tile, Repositories, shows an overview of all existing repositories. Here, you also have the option to create new repositories.
To create a new repository, click the Create repository button in the bottom right corner. A dialog will open where you must assign a name to the new repository. After entering at least one letter or number, click the Create button to create the repository. To discard the entry, click the Cancel button.
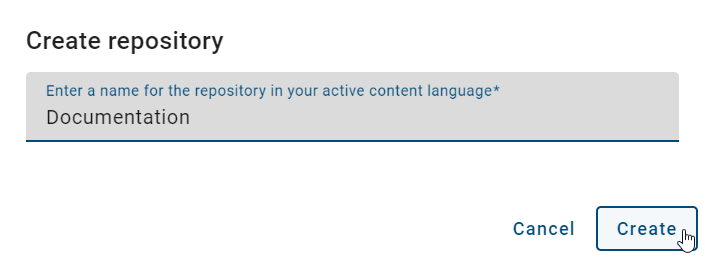
The new repository will appear as the first entry in the list in your current language. After refreshing the page, it will be displayed in alphabetical order.
You can now select the new repository from the drop-down menus under Diagrams and Catalog.
How can I edit a repository?
If you have the Administrator user role and open the Administration menu item in the left menu bar, you will see a collection of predefined tiles. The fourth tile, Repositories, shows an overview of all existing repositories. If at least one repository exists, you can edit its properties. This includes renaming the repository and adjusting access restrictions.
To edit a repository, click on the corresponding list entry. Alternatively, open the context menu (three dots) of the repository and select Edit properties. A dialog opens where you can make the desired changes.
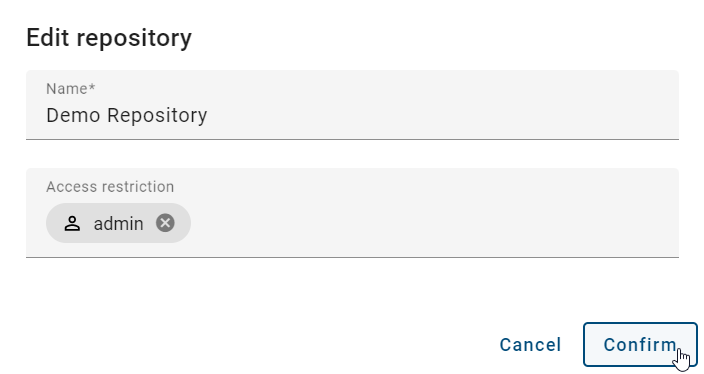
To restrict access to a repository for specific users, user groups, persons, or organizational units, enter the corresponding name in the Access restriction field. This is optional.
Click the Confirm button to save the changes or the Cancel button to discard them.
Hint
Please note that the access restrictions defined for a repository can prevent navigation to the content of a repository within the user interfaces. In order to reliably control access to individual contents of a repository, it is recommended to apply the access restrictions specifically to the content elements such as diagrams and catalog items.
How can I delete a repository?
If you have the Administrator user role and open the Administration menu item in the left menu bar, you will see a collection of predefined tiles. Click on the fourth tile, Repositories, to see an overview of all existing repositories. If at least one repository exists, you have the option to delete a repository.
To delete a repository, open the context menu (three dots) of the corresponding repository on the right and select the Delete button.
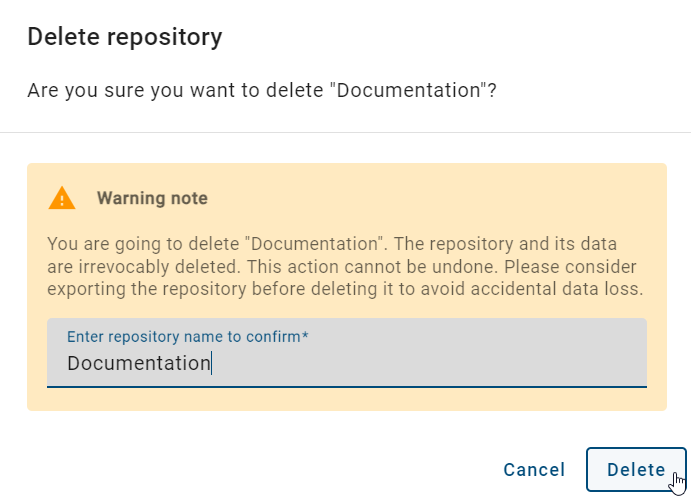
A dialog then opens in which you must enter the name of the repository to confirm the deletion. Once the name is entered correctly, click the Delete button to confirm. To cancel the deletion process, click the Cancel button.
Hint
Please note that the input is case insensitive.
The repository will then be successfully deleted and will no longer be displayed in the list.
Corporate Settings
As a user with the Administrator user role, you can adjust the corporate settings. To do this, open the Administration menu item in the left menu bar. There you see a collection of predefined tiles. Click the Corporate Settings tile.
There you can adjust the UI and print settings. You can also define the allowed file types for uploading and downloading attachments and files, and set a company-wide URL for your GBTEC Academy. Your changes apply to all users in your company.
Hint
Please note that the functions of the Corporate Settings tile are not available in the mobile view.
UI settings
In the UI settings tab, you can adjust the following settings:
the primary color of the application
the corporate logo
the background color of the corporate logo
a company-wide start diagram
The following subchapters explain these functions in more detail.
How can I adjust the color scheme of the application?
As a user with the Administrator user role, you can adjust the color scheme of the application. To do this, open the Administration menu item in the left menu bar and select the Corporate Settings tile. In the UI settings tab, you can select the primary color of the application.
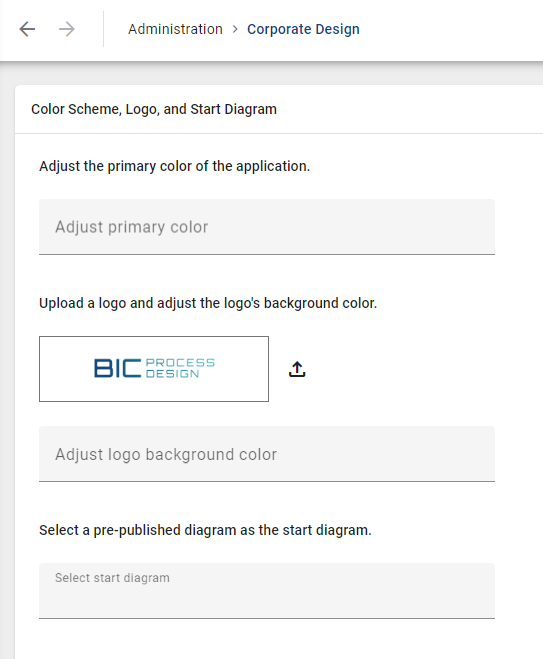
You have two options for selecting a color. You can enter a HEX code in the input field. Or you can select a color from the color palette.
Your changes are saved automatically. All users see the new primary color as soon as they reload GBTEC Process Design.
Note
The selected color scheme is also used for GBTEC Work Orchestrator.
How can I set a corporate logo?
As a user with the Administrator user role, you can set a corporate logo. To do this, open the Administration menu item in the left menu bar and select the Corporate Settings tile. In the UI settings tab, you can upload the desired logo.
Click the upload button. Then select an image file from your computer. The image file is uploaded as the corporate logo and is automatically resized to fit the logo area.
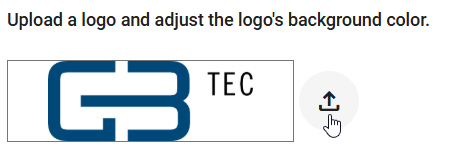
All users see the new logo as soon as they reload GBTEC Process Design. The logo is displayed in the upper left when the left menu bar is expanded.
Note
The corporate logo is also shown as a logo in GBTEC Work Orchestrator.
How can I adjust the background color of the corporate logo?
As a user with the Administrator user role, you can adjust the background color of the corporate logo. This is useful, for example, for a transparent logo. This way, your logo is clearly visible against any background.
To do this, open the Administration menu item in the left menu bar and select the Corporate Settings tile. In the UI settings tab, you can select the background color for your corporate logo.
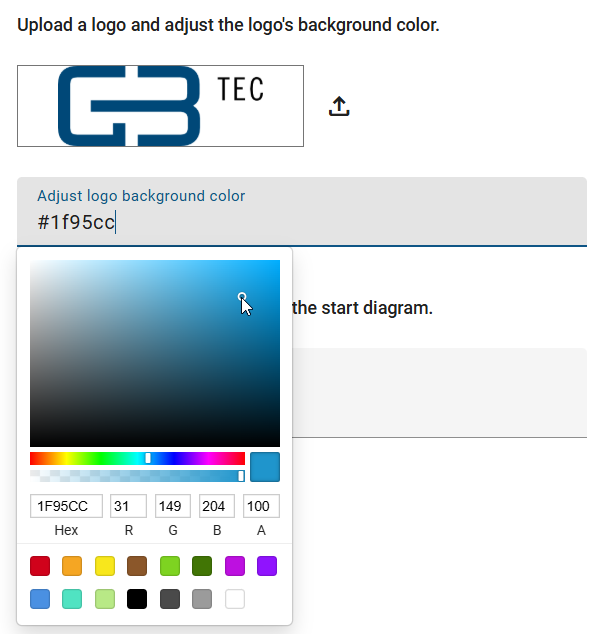
You have two options for selecting a color. You can enter a HEX code in the input field. Or you can select a color from the color palette.
All users see the new background color as soon as they reload GBTEC Process Design. For a transparent logo, the background color is displayed in the upper left when the left menu bar is expanded.
How can I set a company-wide start diagram?
As a user with the Administrator user role, you can set a company-wide start diagram. This diagram is displayed to all users on their MyGBTEC page.
To do this, open the Administration menu item in the left menu bar and select the Corporate Settings tile. In the UI settings tab, you can select the company-wide start diagram.
In the Select start diagram input field, enter the name of a published diagram. Then select the desired diagram from the suggestion list. The selected start diagram is displayed as a chip in the input field.
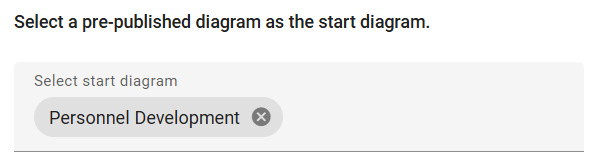
All users see the new start diagram on their MyGBTEC page as soon as they reload GBTEC Process Design.
If you want to remove the start diagram, click the Remove button in the chip. After that, no company-wide start diagram is set.
Hint
You can only set one start diagram. You can change or remove the start diagram at any time if needed.
Print settings
In the Print settings tab, you can define placeholders for headers and footers. These placeholders are used when printing diagrams. The following subchapter explains this function in more detail.
How can I set the default configuration for headers and footers?
If you open the Administration menu item in the left menu bar with the Administrator user role, you will see a collection of predefined tiles. If you select the Corporate Settings tile, you can then switch to the Print Settings tab and define which information is displayed by default in the header and footer of each printout.
After opening this tab, you will see the Header and Footer section. In the Header section, three selection fields are available. Here, you define which information is displayed on the left, center, or right side of the header. In the Footer section, three selection fields are also available. Here, you define which information is displayed on the left, center, or right side of the footer. In each selection field, you can choose information from a drop-down menu or leave the field empty.
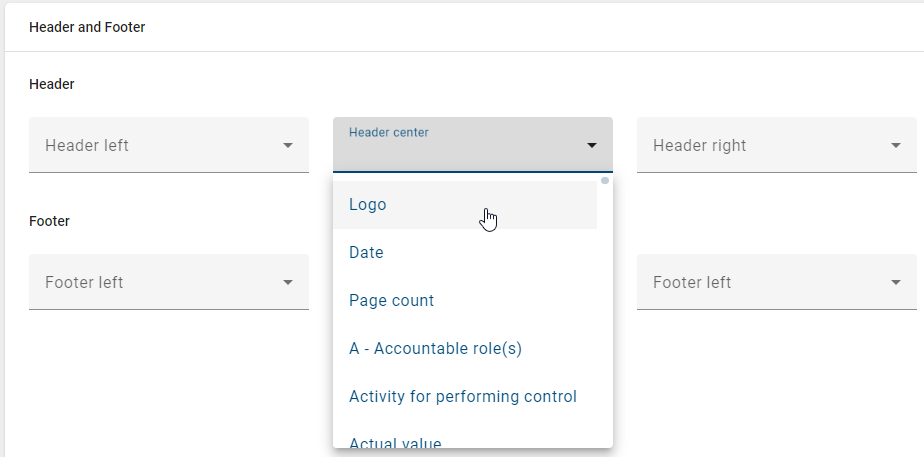
After you have made changes, click the Save button. The settings are applied and used when printing.
Tip
With placeholders such as “{{attributeTypeId}}”, you can display free text together with diagram attributes. A placeholder contains the attribute type ID. Only the first placeholder is evaluated. For example, with “Author {{AT_AUTHOR}}”, you can display the text “Author” together with the people or organizational units from the Author diagram attribute.
Hint
Please note that existing headers and footers continue to be supported and are compatible with the new settings.
Allowed file types
In the Allowed file types tab, you can define the allowed file types. These file types apply to the uploading and downloading of attachments and files. The following subchapters explain these functions in more detail.
How can I define an allowed file type?
As a user with the Administrator user role, you can define allowed file types. If no allowed file types are defined, all file types are allowed for upload. If allowed file types are defined, users can only upload files with these file extensions. Files with other file types are rejected.
To define allowed file types, open the Administration menu item in the left menu bar and select the Corporate Settings tile. Then switch to the Allowed file types tab.

In the Allowed file types input field, you see the already added file types as chips. If no file types have been defined, the input field is empty.
To define an allowed file type, enter the corresponding file extension in the input field. Confirm the entry with the Enter key.
The following rules apply:
The entry is automatically converted to lowercase.
A dot at the beginning is automatically removed.
Whitespace at the beginning and at the end is automatically removed.
Only file extensions are allowed, not the full file name.
The entry must contain at least one letter or number.
After a valid entry, the file type is saved as a chip. You receive a confirmation message in the lower right corner of the screen.
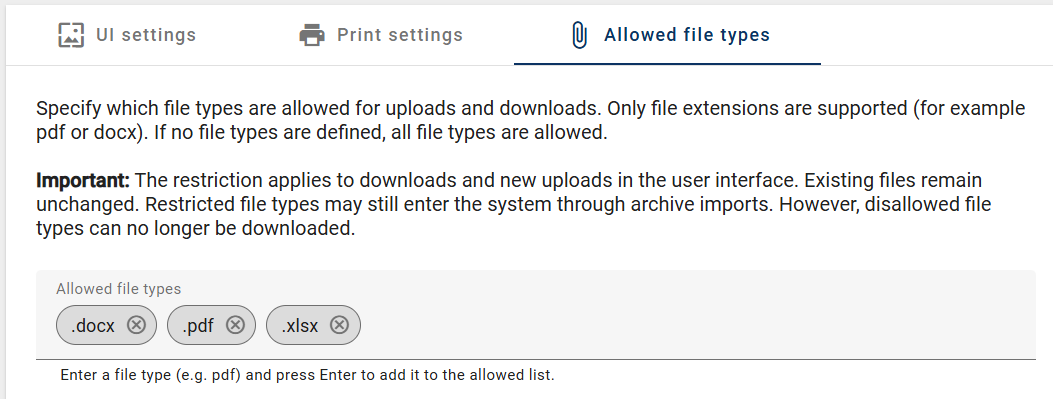
Invalid entries are not accepted. These include, for example:
full file names such as “fileName.pdf”
only a dot such as “.”
combined extensions such as “pdf.exe”
MIME types such as “application/pdf”
multiple values in one entry such as “pdf,docx”
In these cases, a hint appears directly at the input field and the file type is not saved.
If you enter a file type that is already available as a chip, no new chip is created. The existing chip flashes briefly. This way you recognize that the file type is already defined.
If a user wants to upload a file with a file type that is not allowed, they cannot upload the file. They then see an error message. They also cannot download attachments with file types that are not allowed. In this case, an error message appears.
Hint
Please note that the restriction only applies to newly uploaded files. Files that have already been uploaded remain unchanged. However, restricted file types can enter the system via archive imports. You cannot download these files anymore.
Hint
File types that are not allowed are still visible in the UI but can no longer be downloaded.
Warning
Please note that the PDF conversion is still executed even if the PDF file type is not defined as an allowed file type. For example, if you publish a Word file as a PDF, the PDF file is still generated. It is visible in the UI but cannot be downloaded. To enable the download, add pdf as an allowed file type.
How can I remove an allowed file type?
As a user with the Administrator user role, you can remove allowed file types. This way, you can lift the restriction for one or all file types.
To do this, open the Administration menu item in the left menu bar and select the Corporate Settings tile. Then switch to the Allowed file types tab.
In the Allowed file types input field, you see the added file types as chips. To remove an allowed file type, click the Remove button in the respective chip.
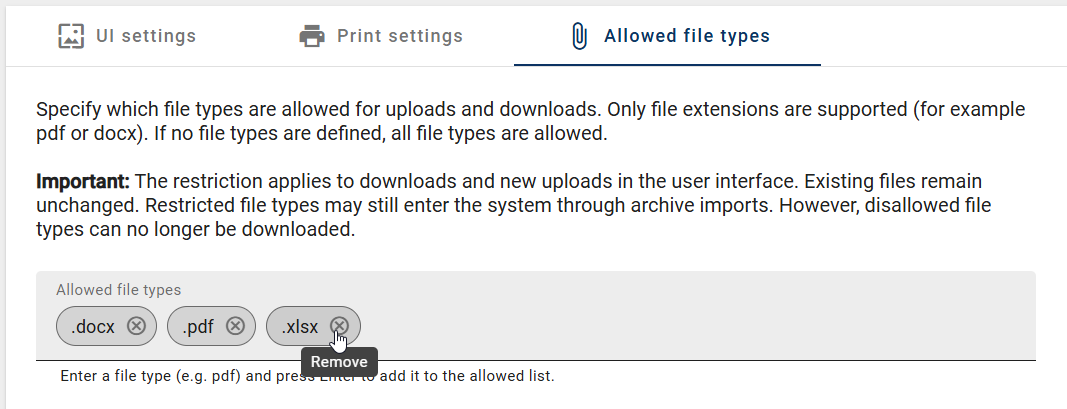
The removed file type is no longer allowed for upload after that. You receive a confirmation message in the lower right corner of the screen.
If the input field is empty, there is no restriction. Then all file types are allowed for uploading and downloading.
GBTEC Academy
In the GBTEC Academy tab, you can set a custom Company Access URL. When your users open the “GBTEC Academy” tile in the “Help” menu item, they are then redirected to this URL instead of the general GBTEC Academy website. The following subchapter explains this function in more detail.
How do I set the Company Access URL for GBTEC Academy?
As a user with the Administrator user role, you can set a custom Company Access URL. This is useful, for example, if you want to provide your users with your own training content.
To do this, open the Administration menu item in the left menu bar and select the Corporate Settings tile. Then switch to the GBTEC Academy tab at the top.

You see the Company Access URL input field. The input field is empty until you set a URL. If a URL has already been saved, it is displayed as a chip in the input field.
To set a URL, enter the desired URL into the Company Access URL input field and confirm the entry with Enter. The URL must start with https. It is then saved as a chip and applied company-wide for all users. You receive a brief confirmation message in the bottom right corner of the screen.
To remove a saved URL, click the X icon or the Remove button on the chip. The URL will then no longer be used for the GBTEC Academy tile in the Help menu item, and the general GBTEC Academy website will open again.

In the Help menu item, selecting the GBTEC Academy tile then opens the saved URL in a new browser tab.
Hint
Please note that an invalid URL is not saved and a corresponding message is displayed directly under the input field.
Note
The saved URL applies company-wide for all users. If no URL is set, the general GBTEC Academy website is used for all users.
Arty
How can I define general information about my company for Arty?
If you have the Administrator user role and open the Administration menu item in the left menu bar, a collection of predefined tiles will be displayed. Click on the Arty tile to provide Company information. This allows Arty to deliver more relevant results when creating diagrams or objects.
To provide general information about your company, open the Arty tile. Several input fields will appear where you can enter data about your company. Enter information regarding Industry/Sector, Number of Employees, Locations/Countries/Regions, Primary Products or Services, Target Customers or Markets, and Strategic Goals or Priorities. Arty can use this information to generate more precise and relevant diagrams or objects.
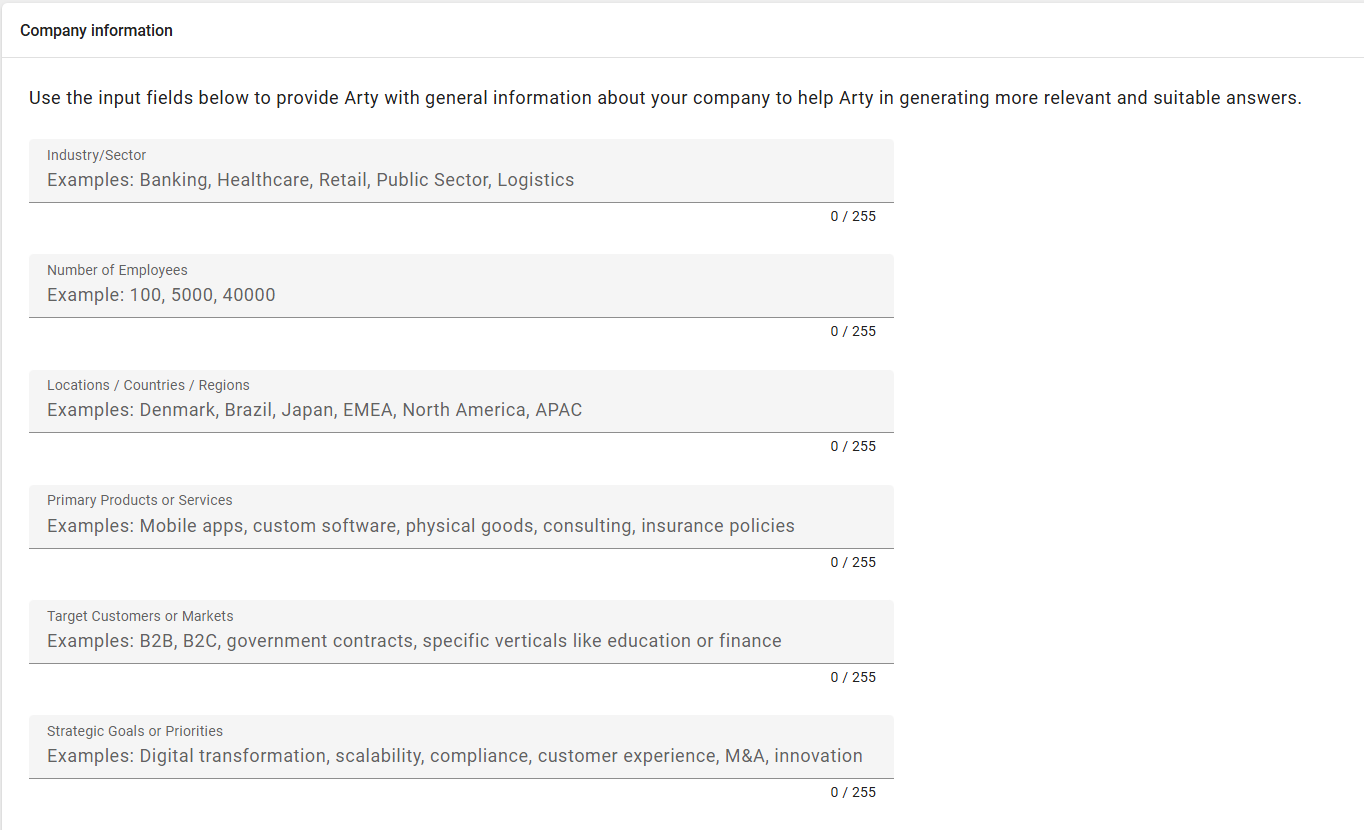
All changes made in an input field are automatically saved as soon as you leave the field. No additional save button or confirmation step is required. Each entry can be modified at any time. After each change, a confirmation notification appears in the lower right corner of the screen when leaving the field, clearly indicating that your changes have been successfully saved.
Once saved, the information provided is immediately available to Arty and can be taken into account when generating diagrams or objects.
Hint
Please note that a separate license is required to use this feature. Please also refer to the Notes on using the AI feature.
Catalog
If you have the Administrator user role and open the Administration menu item in the left menu bar, a collection of predefined tiles will be displayed. Click on the Catalog tile to edit catalog object types and set attributes as filters for them.
Hint
Please note that the functions of the Catalog tile are not available in the mobile view.
How can I edit the details of catalog object types?
If you have the Administrator user role and open the Administration menu item in the left menu bar, a collection of predefined tiles will be displayed. Click on the Catalog tile to edit catalog object types.
Once you have clicked on the tile, you will be directed to the details page by default, where all object types are listed in alphabetical order according to the browser language. Each entry in the list shows the name and symbol of the object type.
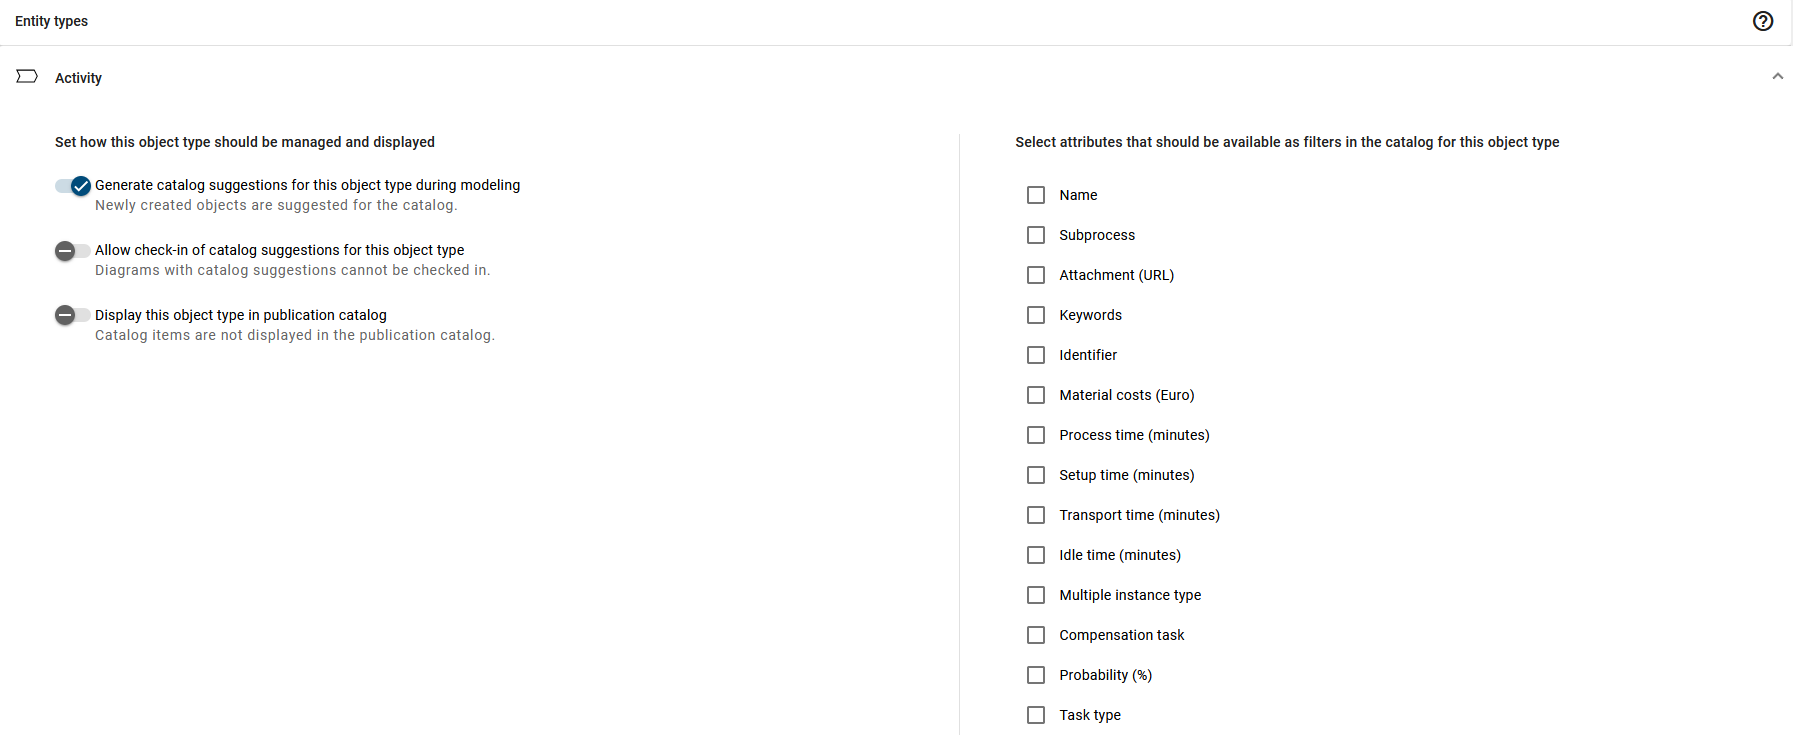
If you click on an entry in the list, you will be taken to the object type settings, where you can make various settings for the respective object type.
Hint
Please note that the functions of the Catalog tile are not available in the mobile view.
How can I define whether catalog suggestions are generated automatically during modeling?
If you have the Administrator user role and open the Administration menu item in the left menu bar, a collection of predefined tiles will be displayed. Click on the Catalog tile to define whether catalog suggestions are generated automatically during modeling.
Once you have clicked on the tile, you will be directed by default to the details page, where all object types are listed alphabetically based on the browser language. Clicking on an entry in the list will take you to the settings for that object type.
Here you can click the toggle switch next to Generate catalog suggestions for this object type during modeling to define whether catalog suggestions should be generated automatically during modeling. The selected behavior only applies to newly created objects and is displayed as a subtitle of the button.

For example, if you deactivate the catalog item of type Application, applications will no longer be displayed as suggestions in the catalog during modeling. However, you can still manually create them in the catalog and reuse them in the diagram.
Hint
Please note that the functions of the Catalog tile are not available in the mobile view.
How can I define that diagrams can only be checked in with existing catalog objects of a type?
If you have the Administrator user role and open the Administration menu item in the left menu bar, a collection of predefined tiles will be displayed. Click on the Catalog tile to define that diagrams can only be checked in with existing catalog objects of a type.
Once you have clicked on the tile, you will be directed to the details page by default, where all object types are listed in alphabetical order according to the browser language. If you click on an entry in the list, you will be taken to the object type settings.
Here, you can use the toggle switch next to Allow check-in of catalog suggestions for this object type to specify whether diagrams can only be checked in with existing catalog objects of that type. The selected setting is displayed as a subtitle below the switch.

If the switch is deactivated, diagrams with non-existing catalog objects cannot be checked in. This ensures that only existing objects are used for modeling, thus preventing redundancies.
Hint
To perform validation, the “Generate catalog suggestions for this object type during modeling” option should be enabled.
Hint
Please note that the functions of the Catalog tile are not available in the mobile view.
How can I define that catalog objects are displayed in the publication?
If you have the Administrator user role and open the Administration menu item in the left menu bar, a collection of predefined tiles will be displayed. Click on the Catalog tile to define that catalog objects are displayed in the Publication stage.
Once you have clicked on the tile, you will be directed to the details page by default, where all object types are listed in alphabetical order according to the browser language. If you click on an entry in the list, you will be taken to the object type settings.
Here, you can click the toggle switch next to Display this object type in publication catalog to define whether the selected catalog object is allowed to be displayed in the publication. The selected behavior is displayed as a subtitle of the button.

Hint
Please note that the functions of the Catalog tile are not available in the mobile view.
How can I set filters for specific catalog object types?
If you have the Administrator user role and open the Administration menu item in the left menu bar, a collection of predefined tiles will be displayed. Click on the Catalog tile to select attributes for specific catalog object types. Once selected, they are available as filters for that object type. To do this, select an object type from the list and click the Filter tab.
You can then select all available attributes from a drop-down list, which are automatically enabled upon selection and are available as filters for that object type. To remove attributes as filters, click the attribute in the drop-down list again.
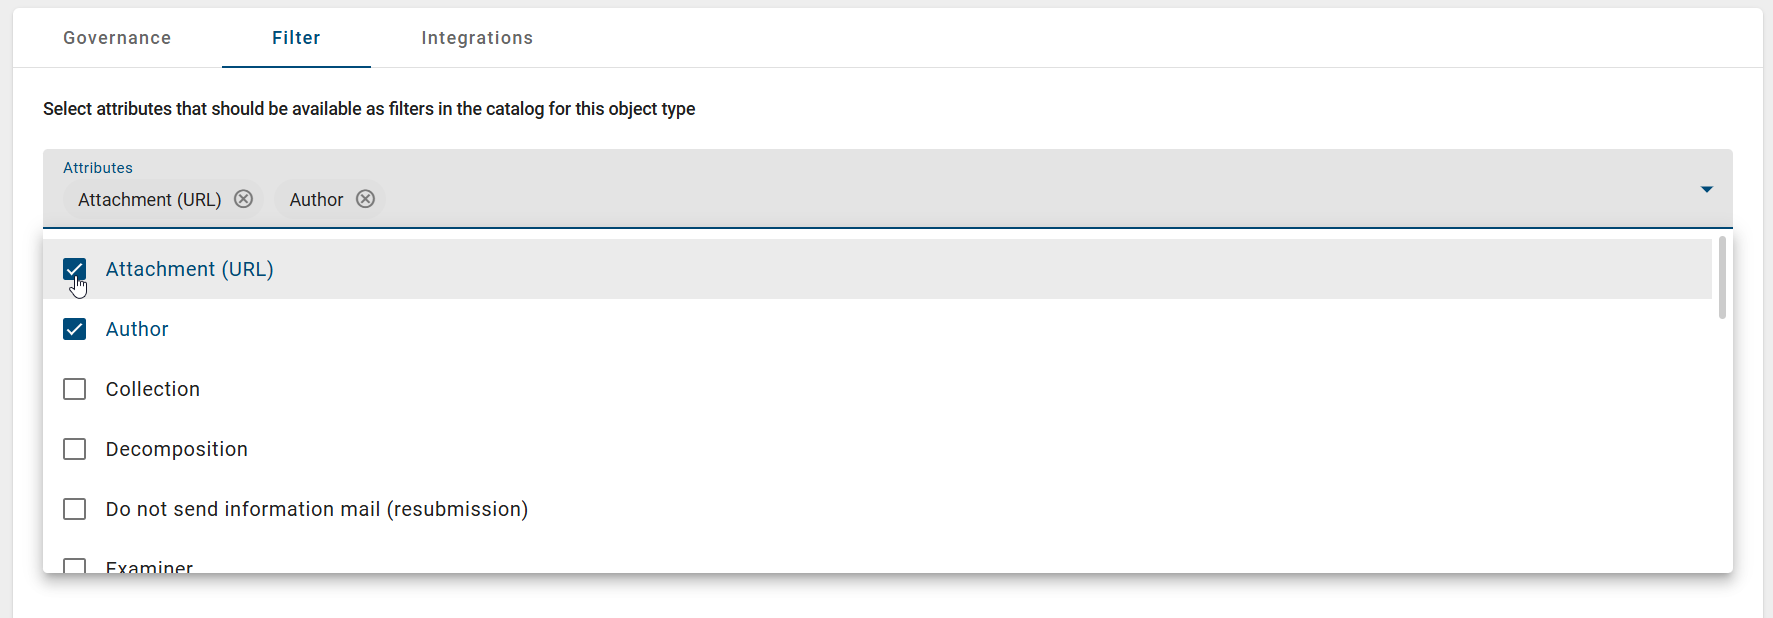
Note
A maximum of 127 facets can be selected for a catalog object type. The facets are displayed according to the selected attributes.
Hint
Please note that the functions of the Catalog tile are not available in the mobile view.
Integrations
How can I integrate websites into a new tab in the catalog for a specific catalog object type?
As an Administrator, you have the option to integrate websites into a new tab in the catalog for specific catalog object types. This allows you to integrate content from other websites into GBTEC Platform without being redirected to another website as a user. Additionally, integrations can be used to reference other content within GBTEC Platform. To do this, go to the Administration menu item in the left menu bar and click on the Catalog tile. You will see a list of all available catalog object types.
After selecting a catalog object type, you will see the Integrations tab next to the Filter tab. Here, you can configure so-called integrations that will be displayed as a separate tab in the catalog for the selected object type. To configure an integration, click the Create integration button at the lower right of the screen.
This opens a dialog where you need to enter a URL and a title for the integration. Entering the title in your default language is mandatory. Providing the title in additional languages is optional. You can also optionally add user groups or repositories that should have access to the integration in the catalog. If you do not add any user groups, all users will have access to the integration.
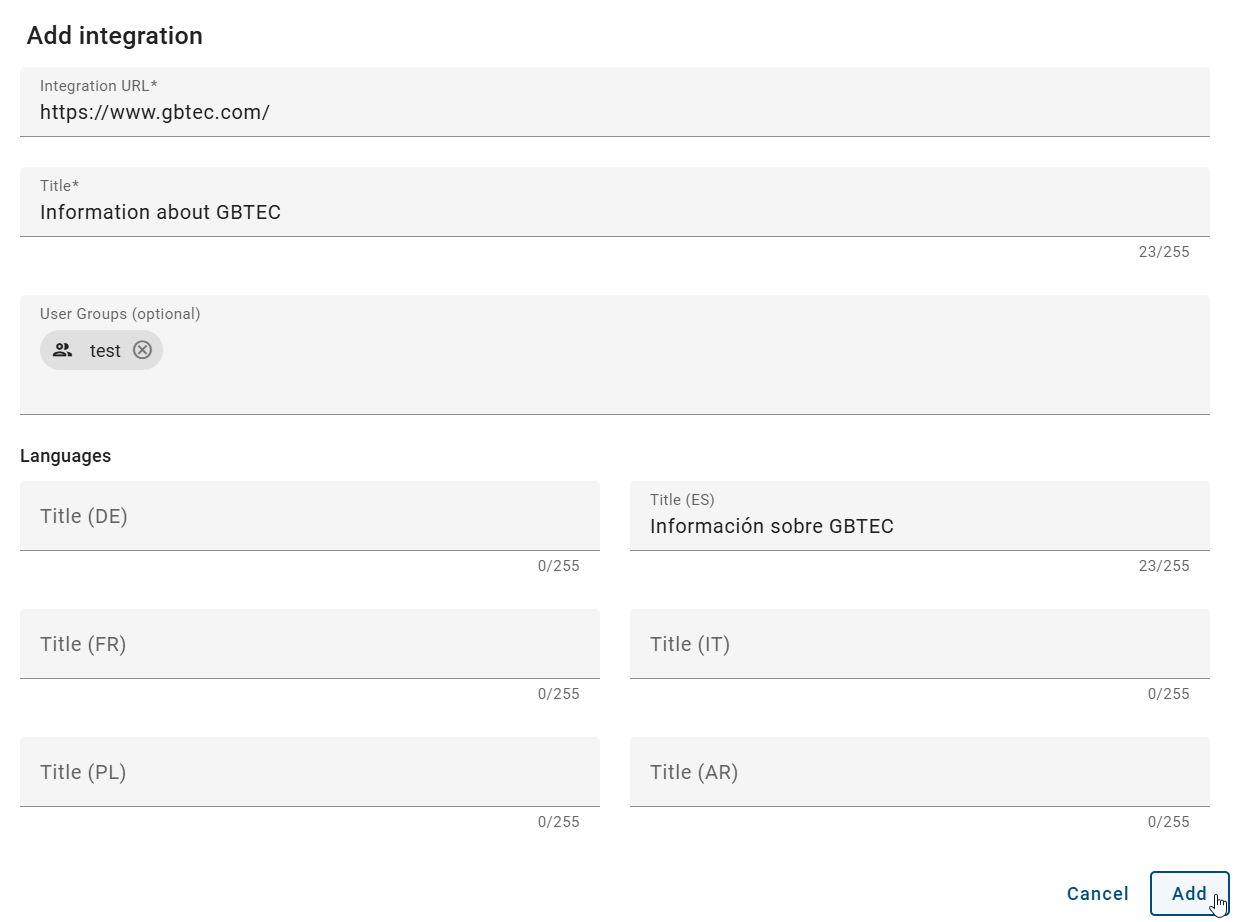
You also have the option of adding one or more repositories in the corresponding dialog when creating or editing an integration. An additional field is displayed in the dialog in which you can select or enter the desired repositories. If exactly one repository is stored, its name is displayed. If several repositories are assigned, the number of repositories is displayed instead. If no repository has been defined, the field remains empty.
As soon as at least one repository has been added, the Integration tab is displayed in the catalog if you are in one of the stored repositories. You can access this tab using the left sidebar in the catalog. The integration is displayed there as a separate tab with the name that you have previously defined in the Administration area.
Note
Please note that the Integration tab is only displayed if you belong to one of the user groups defined for the integration or if no user groups have been defined. You must also be in a repository that has been released for the integration or no repository has been defined. If these requirements are not met, the tab is hidden in the catalog.
Note
The title and foreign language titles are limited to 255 characters. The number of user groups is limited to 100.
If you have the Administrator user role and create or edit an integration, you can use specific placeholders in the URL field. The placeholders {{tenantId}}, {{repositoryId}}, {{stage}}, {{language}} are automatically replaced with the appropriate values when the integration is later executed. For example, if you enter the URL example.com/tenants/{{tenantId}}, the placeholder {{tenantId}} will automatically be replaced with the ID of the currently selected tenant when this integration is opened in the catalog. The placeholder then becomes something like //example.com/tenants/123. This allows you to dynamically link to tenant-specific, language-specific, or other context-sensitive content.
Once you have entered at least the URL and a title for the integration, you can add it by clicking the Add button. The integration will then appear in the Administration in the Integrations tab for the selected catalog object type.
The integration will also appear as a new tab in the catalog, displayed in content language, when you filter by the selected catalog object type. If your content language is not maintained, the integration will be displayed in your default language.

Hint
Please note that the use of integrations requires a separate license, which you must purchase.
Note
If you enter a URL to a published ProcessApp in the “Integration URL” input field, no new tab will be created. Instead, for catalog objects of the selected type, an additional option will be displayed in the Options panel that allows you to start a new case for the linked ProcessApp. Further information can be found here.
How can I edit an existing integration?
If you have the Administrator user role and open the Administration menu item in the left menu bar, and then open the Catalog tile, you will see the Integrations tab after selecting a catalog object type. Here you can see a list of already configured integrations for this catalog object type, if any exist.
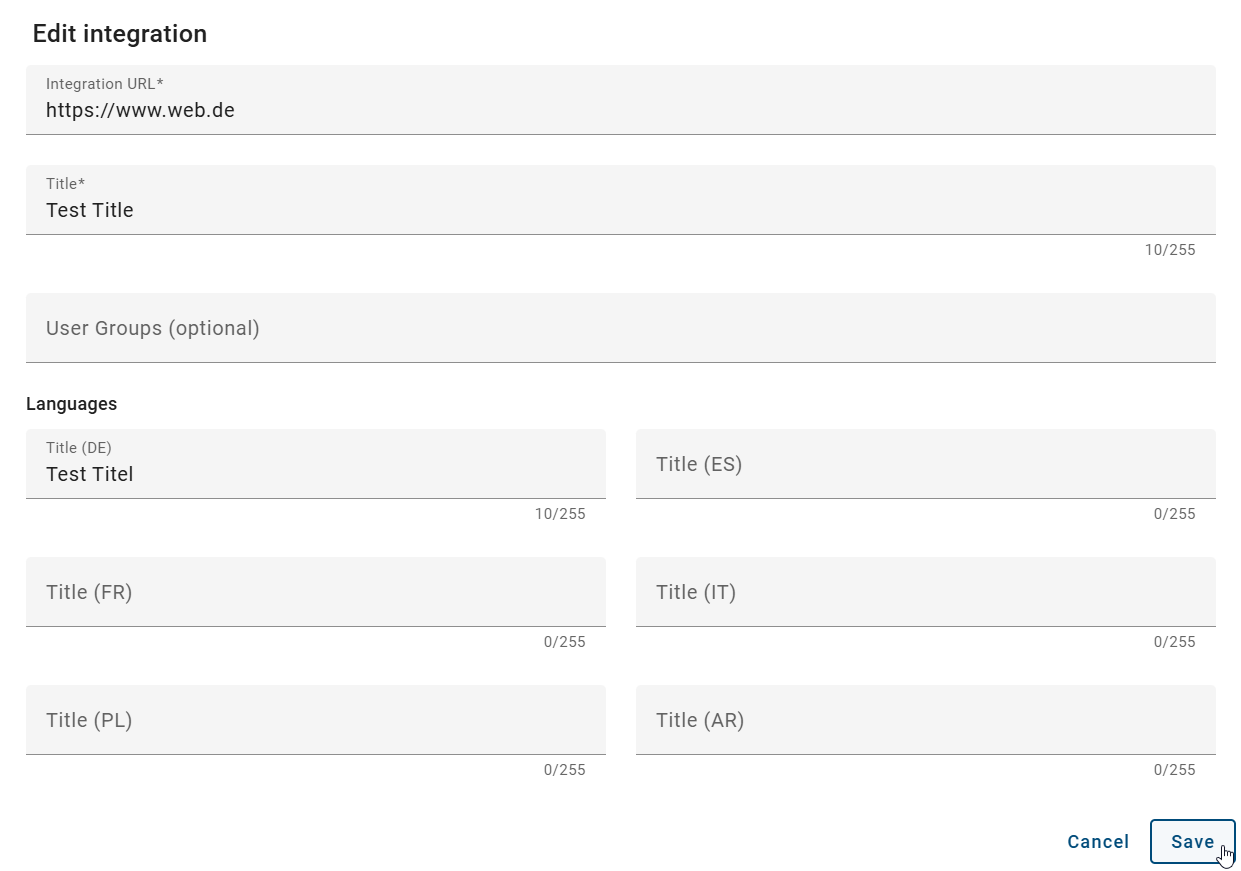
To edit an existing integration, select the integration and open its context menu. Click the Edit button to open a dialog that displays the current data and allows you to make and save changes.
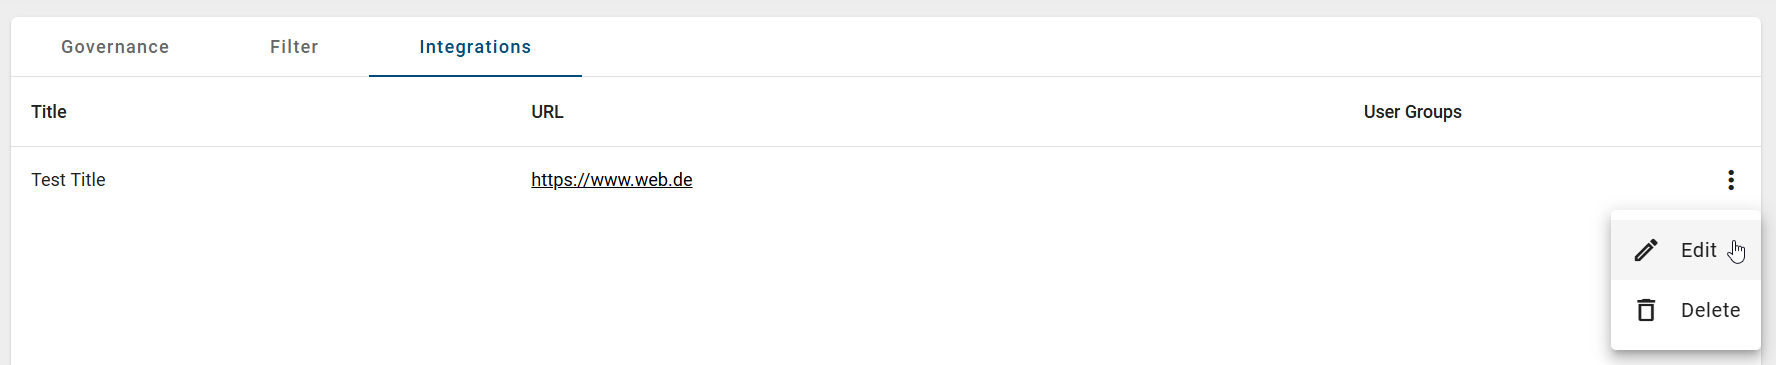
As soon as the dialog for an existing integration is opened, all mandatory fields (Integration URL and Title) must be filled in. Only then can you click the Save button to update the list of integrations. If any mandatory field is missing, the Save button remains deactivated to prevent saving an incomplete integration.
Hint
Please note that the use of integrations requires a separate license and must be purchased by you.
How can I delete an integration?
If you have the Administrator user role and open the Administration menu item in the left menu bar, and then open the Catalog tile, you will see the Integrations tab after selecting a catalog object type. Here, a list of already configured integrations is displayed for this catalog object type, if any exist.
To delete an integration, select the integration and open its context menu. Click the Delete button. A hint appears stating that the deletion is final and cannot be undone. Click the Delete button again to confirm and remove the integration for the selected catalog object type.
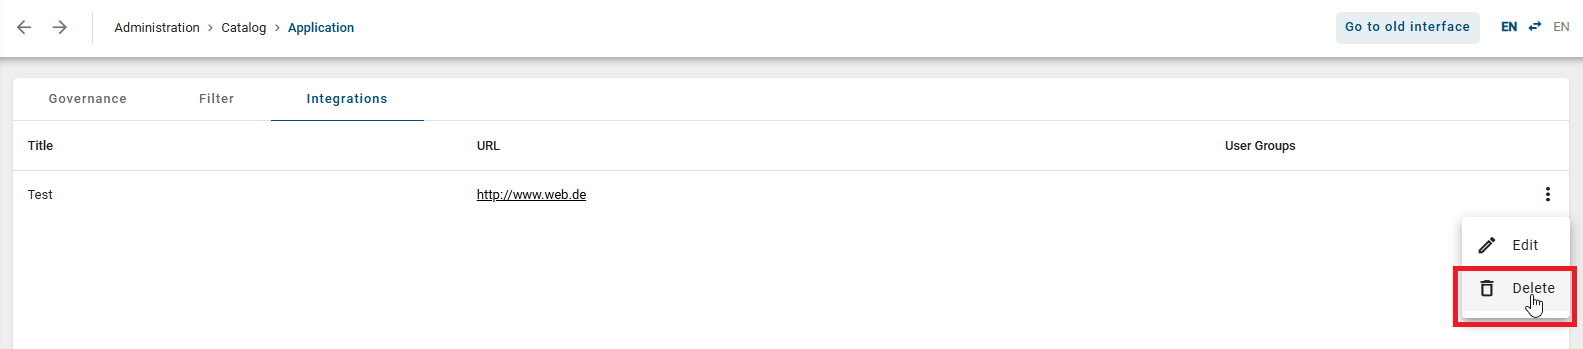
The list of remaining integrations is then updated automatically.
Hint
Please note that the use of integrations requires a separate license, which you must purchase.
Languages
How can I define languages for my users?
If you have the Administrator user role and open the Languages tile in Administration, you can set the default languages as well as additional content and alternate languages for your users.
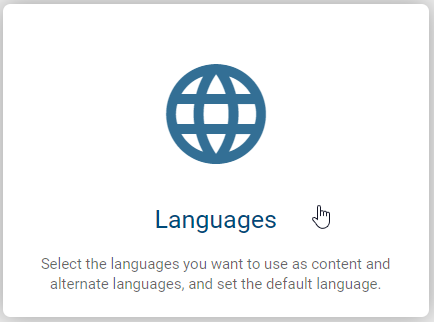
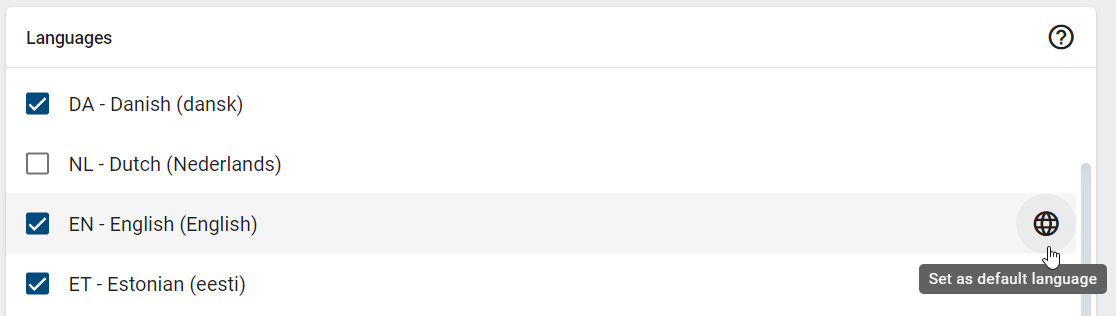
After clicking on the tile, an alphabetically sorted list of all languages supported by GBTEC Platform will appear. By clicking on a selected language, you can define the content and alternate languages. To set a language as the default, click on the Web icon within the language entry. The default language is the language that is automatically displayed after logging in.
Hint
Please note that the functions of the Languages tile are not available in the mobile view.
Hint
Please note that when switching to an alternative language, process names, descriptions, and forms are displayed in this language if a translation is available. Otherwise, the content remains in the original content language. The user interface and system messages remain unchanged and continue to be displayed in your browser language.
How can I enable the browser translation for my users?
As a user with the Administrator user role, you can enable or disable browser translation for your users. To do this, go to the Administration menu item in the left menu bar and select the Languages tile.
After selecting the Languages tile, an alphabetically sorted list of all languages supported by GBTEC Platform will open. In the right sidebar, you can enable the Enable browser translation toggle switch by clicking on the Options panel. The toggle switch is disabled by default.
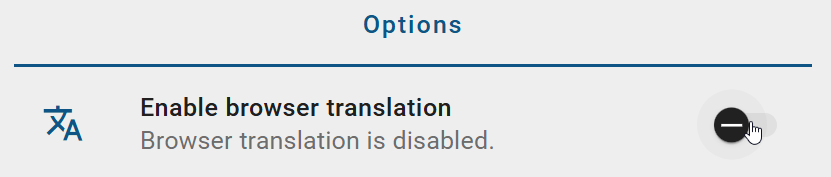
As soon as you toggle the toggle switch, you will receive a confirmation message. Afterwards, browser translation becomes available to your users, allowing the user interface as well as diagram and object content to be displayed automatically and more quickly in their preferred language. Please note that browser translation does not support the translation of diagram graphics (SVG).
Your change will be applied immediately, but it will only be visible to users who are already logged in after they refresh the page. Users who log in after the change will see the setting immediately, provided their browser supports translations and is configured accordingly.
Hint
Please note that some browsers offer the option of automatically translating content into other languages. This function is provided by the respective browser and is beyond our control. If browser translation is activated, data may be transmitted to the browser provider or its translation service. We accept no responsibility for the quality or completeness of automatic translations and are not responsible for the associated data processing.
Archive
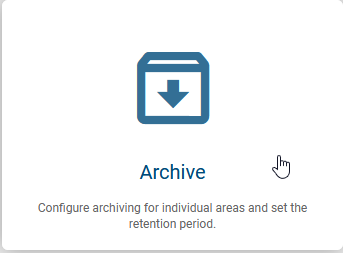
If you have the Administrator user role and open Administration in the left menu bar and select the Archive tile, you can configure archive settings and define access permissions for Readers.
Hint
Please note that the functions of the Archive tile are not available in the mobile view.
How can I change archive settings?
With the Administrator user role, you can define the archiving settings for the Public Workspace, Preview, and Publication areas across all diagrams. You can activate or deactivate the archive and set the retention period individually.
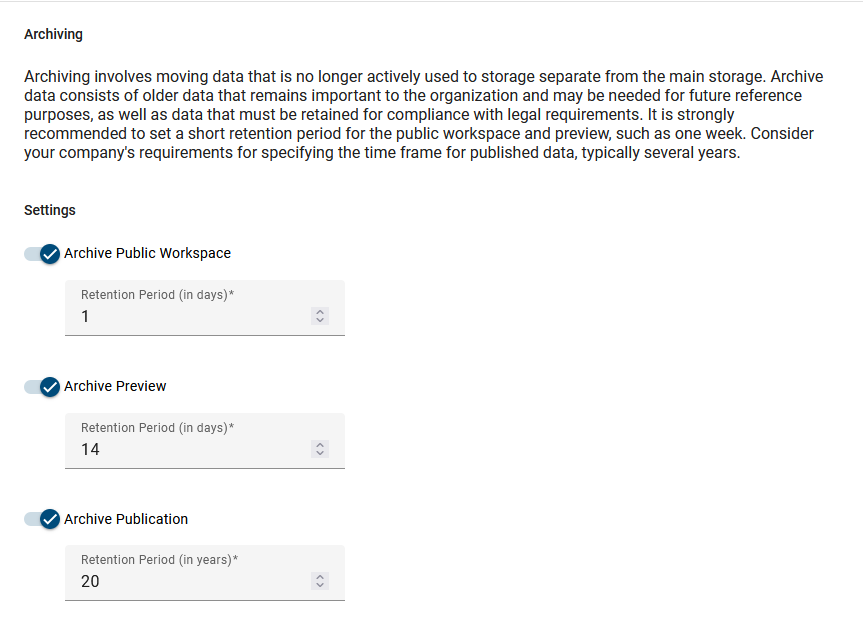
The archiving status can be activated or deactivated using the toggle switch. If you activate archiving, the input field becomes active and can be edited. If archiving is deactivated, the input field remains locked, and the corresponding value is displayed in read mode.
When archiving is enabled, you can adjust the retention period as needed using the Retention Period input field. All changes are saved immediately, and you will receive a notification about the successful adjustments at the lower right of the screen.
How can I set access permissions for Readers?
If you open the Administration menu item in the left menu bar with the Administrator user role and then click on the Archive tile, you can set the access authorization by scrolling all the way down to the bottom of the archiving settings and flipping the switch under Access accordingly.
If you have disabled access authorization, users with the user role Reader cannot access or compare archived versions of diagrams and objects in the Publication.

Method
With the Administrator user role, you can open the Administration menu item in the left menu bar, where you will see a collection of predefined tiles. If you select the Method tile, you can manage your methods, customize the colors of the symbol types, and configure the diagram layout.
Hint
Please note that the functions of the Method tile are not available in the mobile view.
How can I import a method?
If you have the Administrator user role and open the Administration menu item in the left menu bar, a collection of predefined tiles will be displayed. By using the Method tile, you can import a method.
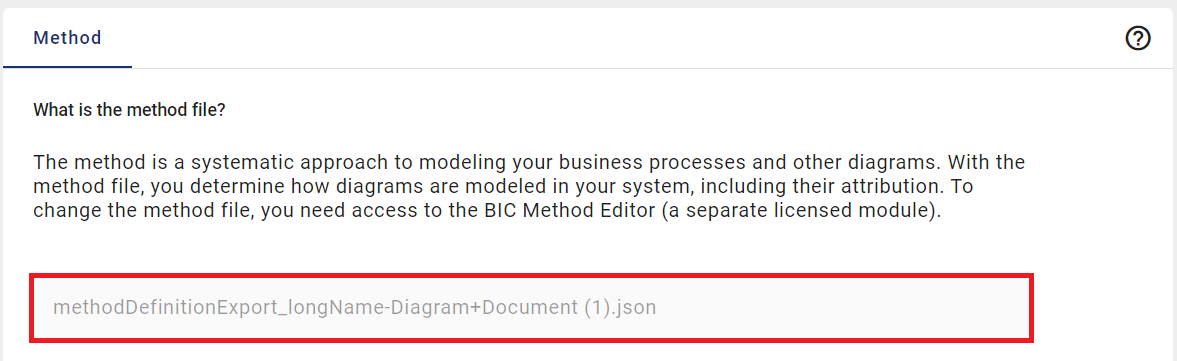
After you click on the Method tile, you see three tabs: Method, Symbol types, and Diagram layout. In the Method tab, you can read a short explanation about the method file and what it does.
In the Options panel on the right, you can import or export a method. Click the Import button to add a new method file to your system.
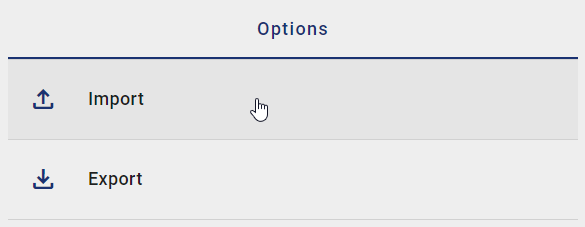
Select a JSON file from your computer and import it.
If the import works, you will get a message. You can see the current method in the read-only field.
How can I export a method?
If you have the Administrator user role and open the Administration menu item in the left menu bar, a collection of predefined tiles will be displayed. By using the Method tile, you can export a method.
After you click on the Method tile, you see three tabs: Method, Symbol types, and Diagram layout. In the Method tab, you can read a short explanation about the method file and what it does.
In the right sidebar under the Options panel, you can import or export a method. Click the Export button to save a copy of the current method file from your system.
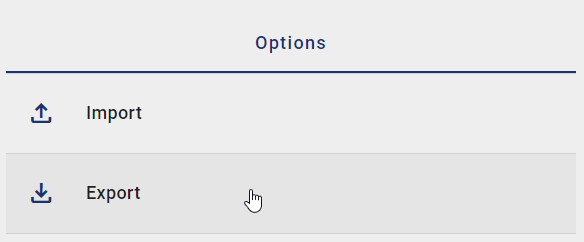
The current method will be exported directly as a JSON file.
How can I configure the standard colors of the symbols?
If you open the Administration menu item in the left menu bar with the Administrator user role, you will find a collection of predefined tiles. If you open the Method tile, you can customize the method file, set the default color of the symbol types, and adjust the layout of diagram types.
After clicking the Method tile, go to the Symbol types tab. You will see a list of all symbol types you can change for your method. In the Default column, you can see which symbols are set as default for each object type. A checked box means it is the default symbol. To change the color of a symbol, click its button.
You can set a color scheme for a symbol type for all areas of GBTEC Process Design. Diagrams from the archive always show the current colors. You can set the border, background, and font color for each symbol type.
Warning
Please note that the colors selected here affect all areas, including the color configuration in published diagrams. Please also note the information on Configuring some symbol types.
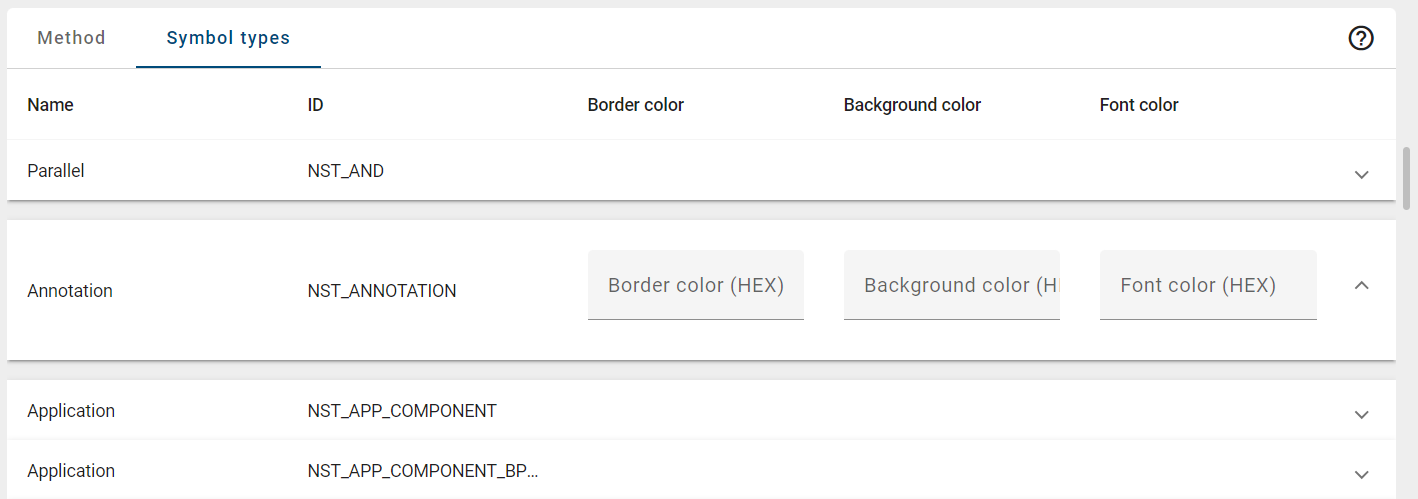
Once you have clicked on a symbol type, click on the corresponding color field that you want to adjust. You can select a color value from the color palette or enter a HEX code.
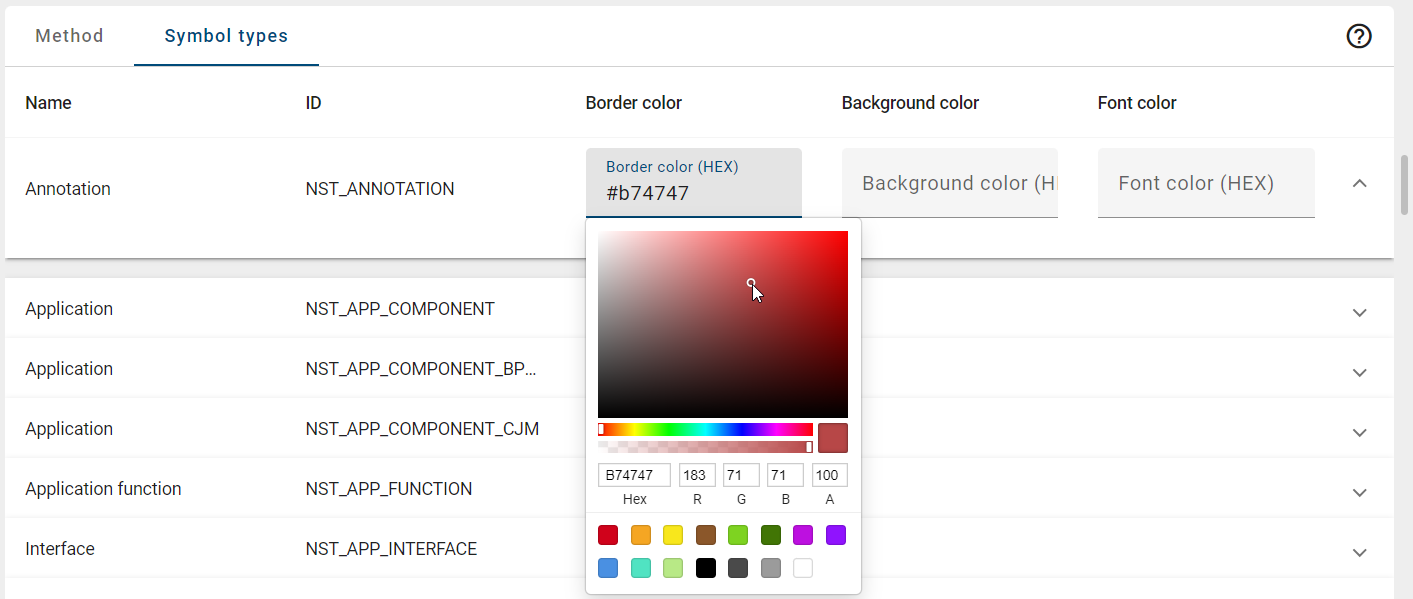
Note
Please note that the color specified in the Border color column is also used for coloring the corresponding object type in various areas of the application, including the catalog list, search, and attributes.
Note
Please note that if no color is set, the symbol will be displayed in GBTEC Process Design’s default color. If you have set a color value and want to return to the default color, please clear the input field.
After configuring the icon type colors, navigate to the Options panel in the right sidebar and then select Mass application. A dialog will open in which you must confirm your changes.
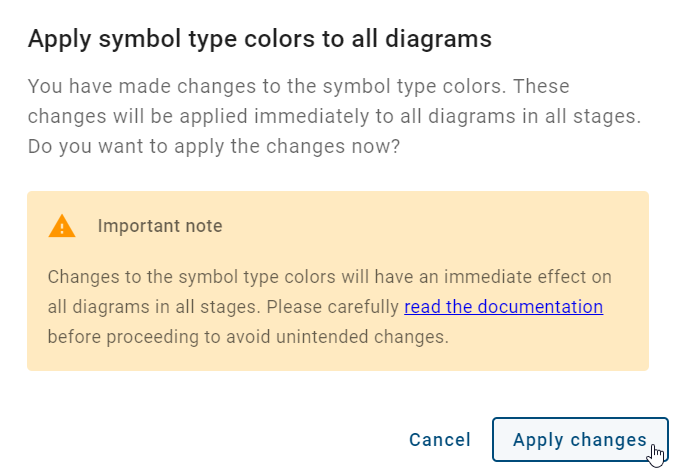
To apply your color changes to all diagrams in all stages, click the Apply changes button. To stop without applying, click the Cancel button.
After a refresh, your changes will be visible in all diagrams.
Note
You can also format individual symbols using the symbol palette. Colors set there will be used in all stages and will not be changed by later changes to the general color settings.
How can I import or export symbol colors?
If you open the Administration menu item in the left menu bar with the Administrator user role, you will see several predefined tiles. When you open the Method tile, you can import or export your color settings for symbol types. This helps you easily switch between different symbol color settings.
Hint
Please note that changing symbol colors will affect all diagrams in all stages.
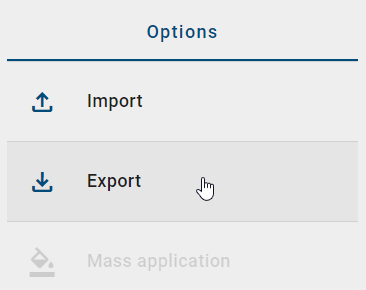
To import or export symbol type colors, open the Method tile and go to the Symbol types tab. In the right sidebar, you will see the Options for Importing and Exporting symbol types.
Import:
If you have edited your color settings for symbol types externally or want to re-upload and use previous versions, select the Import option in the right sidebar.
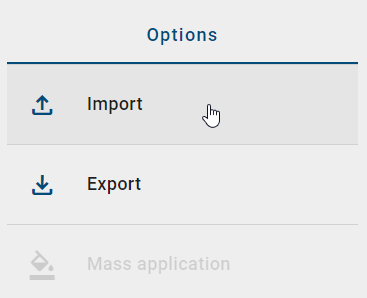
Select a JSON file and click on the Mass application option to apply the color settings.
Warning
Please note that if you upload your own JSON file, all symbol IDs you use in it must be correct and present in your method. If you use symbol types that are not present in the currently used method, this may result in unexpected behavior.
Export:
To export your current color settings as a JSON file, click on the Export option in the right sidebar under the Options panel.
How can I set the layout of a diagram type?
If you open the Administration menu item in the left menu bar with the Administrator user role, you will see several predefined tiles. When you open the Method tile, you can change the layout of your diagram types. The layout wizard helps you organize the process flow. It focuses on the sequence and the activities. By default, you can use the diagram types EPK, WKD, and BPMN and adjust them as needed.
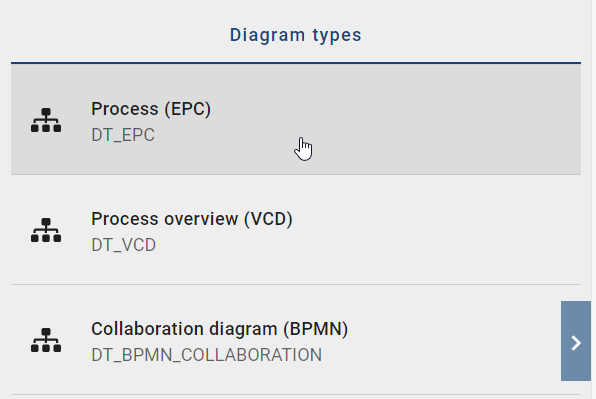
After opening the Method tile, go to the Diagram layout tab. The available diagram types and their IDs are listed in the right sidebar. Click a diagram type to edit it.
In the main section, you will find the settings for the selected diagram type, which are described in detail below:
Modeling orientation: Here, you can choose between Horizontal and Vertical to determine the alignment of the layout assistant. The direction refers to the process flow, represented by, for example, sequence and message edges between activities.
Horizontal/Vertical distance (cm): This defines the distance in the process flow by entering numbers. It represents the horizontal and vertical distance in centimeters between two symbols connected by a sequence or message edge.
Horizontal/Vertical satellite distance (cm): This input defines the horizontal and vertical distance between satellites in centimeters.
Satellite positioning: To set the position of satellites, click on the corresponding quadrant and edit the input field. Specify which object type with which relationship to the activity should be automatically placed here during layouting. You can also set the maximum number of symbols arranged vertically above each other. If this number is exceeded during layouting, a new column for the vertical arrangement will be created. Once you’ve saved your input by pressing the Enter key, it will be displayed as a chip in the quadrant. If needed, you can remove the chip by clicking on the quadrant.
Quadrant Ports: Quadrant ports correspond to the edge ports of the satellites of an activity. By clicking on a quadrant, you can choose between two selectable ports - Horizontal and Vertical. Your selection is saved immediately.
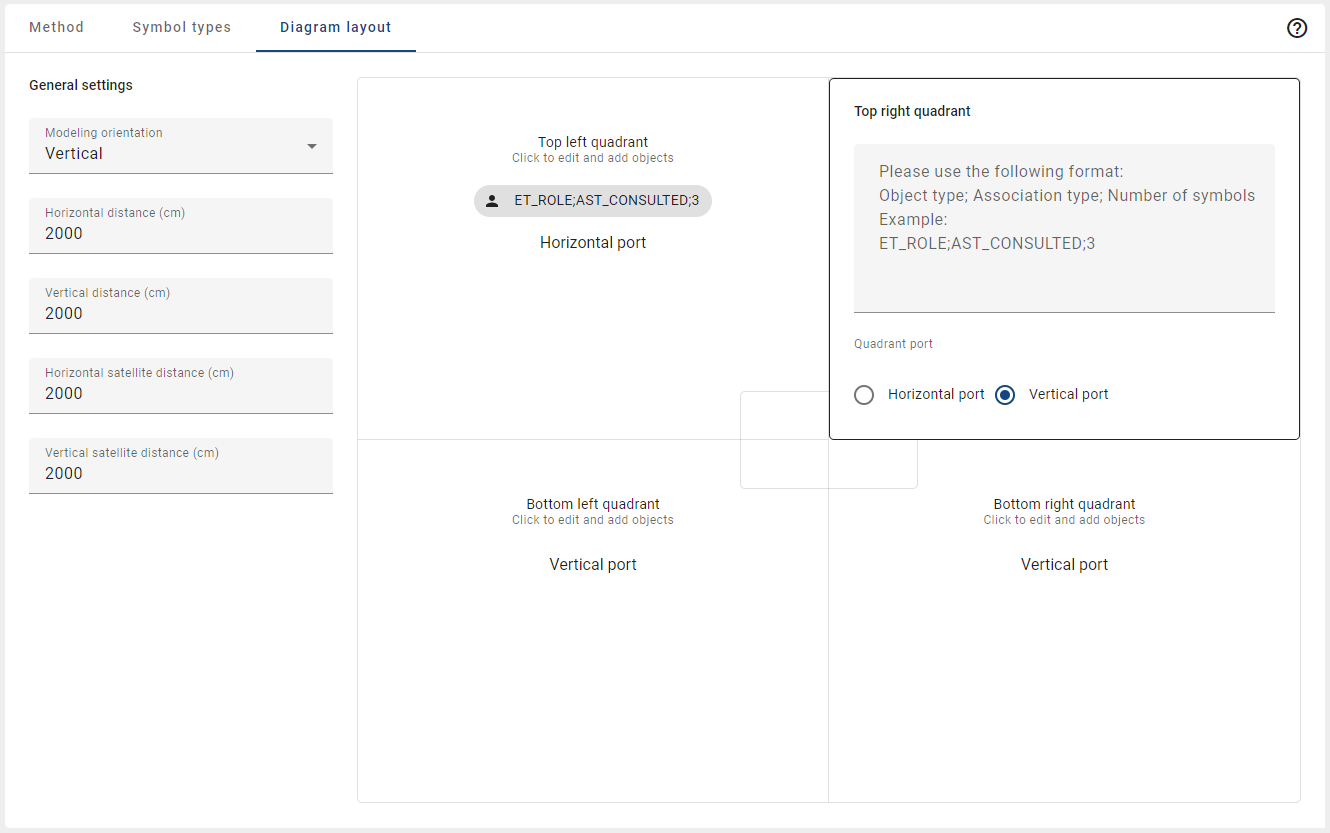
The default settings defined for the layout assistant will be overridden with this configuration. If no individual behavior is defined, the layout assistant uses the default.
Note
Chips can only be generated for object types that exist in the method. There is no further validation of your input. Note the existing object types and association types.
Search
If you open the Administration menu item in the left menu bar with the Administrator user role, you will see a collection of predefined tiles. If you select the Search tile, you can configure filters for the central search and the diagram list.
How can I select attributes as search facets?
If you open the Administration menu item in the left menu bar with the user role Administrator, you will see a collection of predefined tiles. If you select the Search tile, you can select attributes as search facets to set filters for the central search and the diagram list.
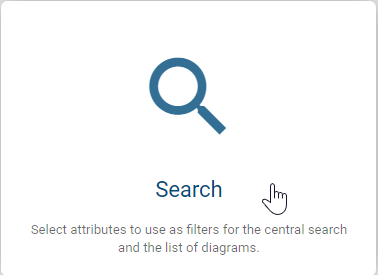
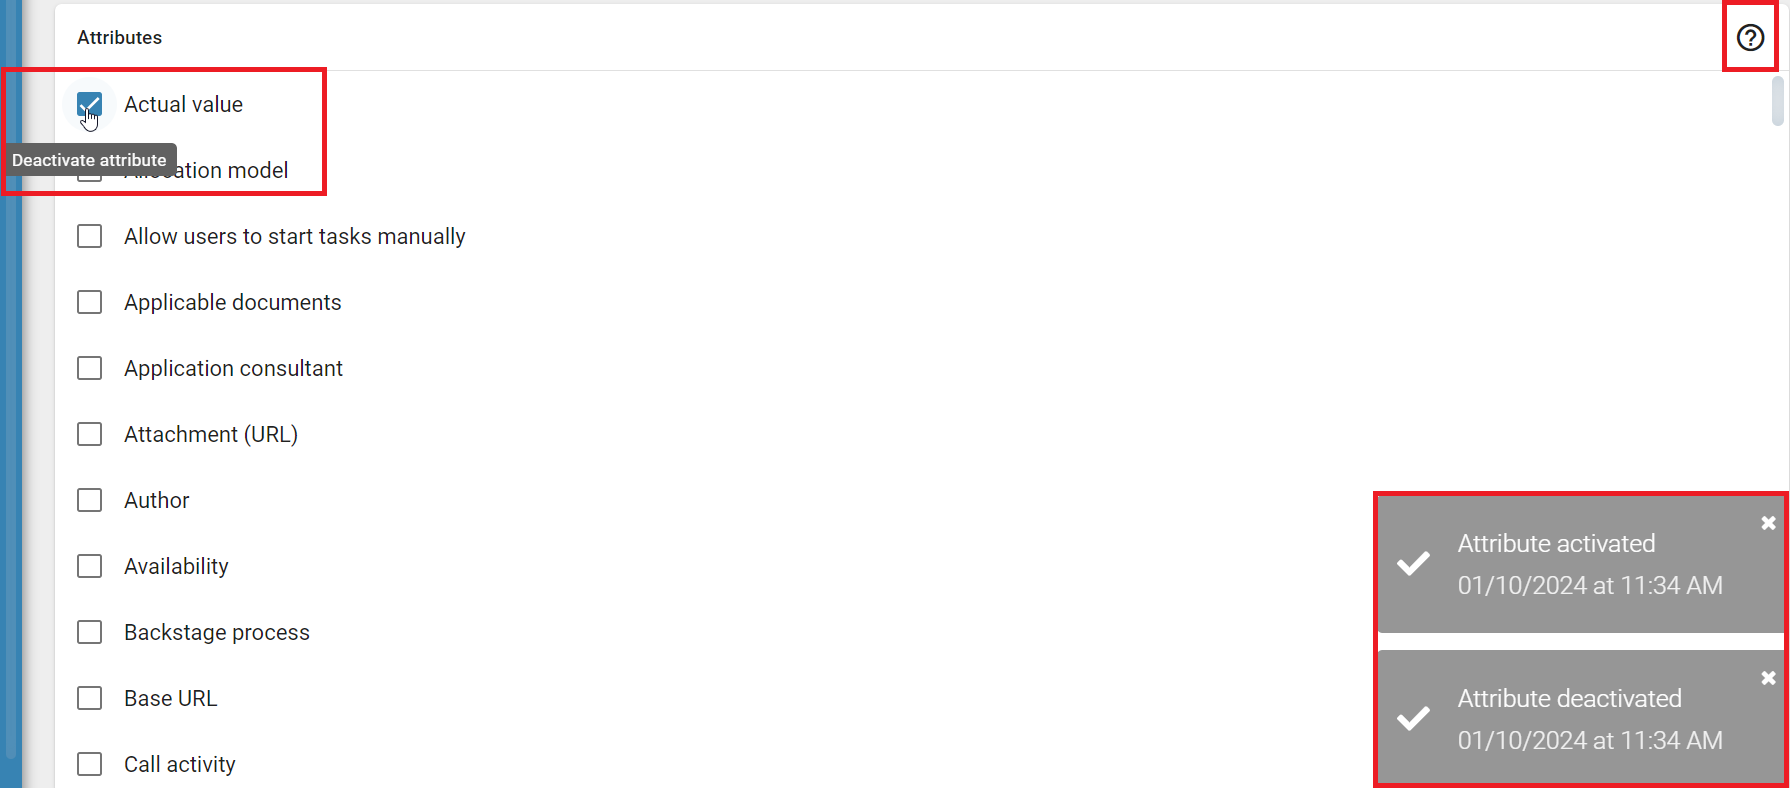
After clicking on the Search tile, you will be taken to the details page. The alphabetically sorted list shows all attribute types from the current method.
You can activate or deactivate an attribute by clicking on the checkbox for that attribute. With the user role Administrator, you can remove an attribute type as a search filter or save an unselected attribute type as a search filter.
Hint
Please note that the functions of the Search tile are not available in the mobile view.
Workflows
How can I define the validation scope for language-dependent mandatory attributes?
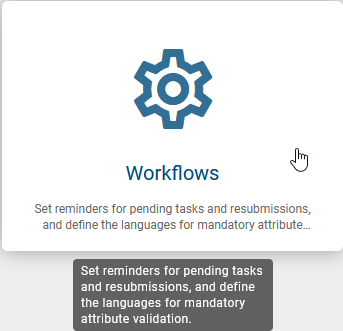
If you have the user role Administrator, open the Administration menu item in the left menu bar. You will see a collection of predefined tiles. Select the Workflows tile. There you can define the validation scope for language-dependent mandatory attributes. This setting defines in which languages mandatory attributes are checked.
After you open the Workflows tile, go to the Mandatory Attributes tab. There you can choose one of the following validation scopes:
Arbitrary content language: The mandatory attribute must be filled in at least one content language.
Example: If the mandatory attribute is filled in at least one available content language, for example English or Spanish, the publication can continue. If the English value is missing but a Spanish value exists, publication is still possible. If the mandatory attribute is not filled in any language, the field is treated as empty and the publication cannot continue.
Only enabled default content language: The mandatory attribute must be filled in the active default content language, even if it is already filled in other languages.
Example: If English is defined as the default content language, publication is only possible when a value in English exists. If the English value is missing, the field is treated as empty and the publication cannot continue. Even if a Spanish value exists, this is not enough when English is the default language. If the mandatory attribute is not filled in any language, the field is also treated as empty and the publication cannot continue.
All active content languages (default setting): The mandatory attribute must be filled in all active content languages.
Example: If the mandatory attribute is filled in all active content languages, for example English, Spanish, and German, publication can continue. If the value is missing in one active language, for example German, the field is treated as empty and the publication cannot continue. If the mandatory attribute is not filled in any language, the field is also treated as empty and the publication cannot continue.
Note
You can define the default and content languages in the Administration menu item.
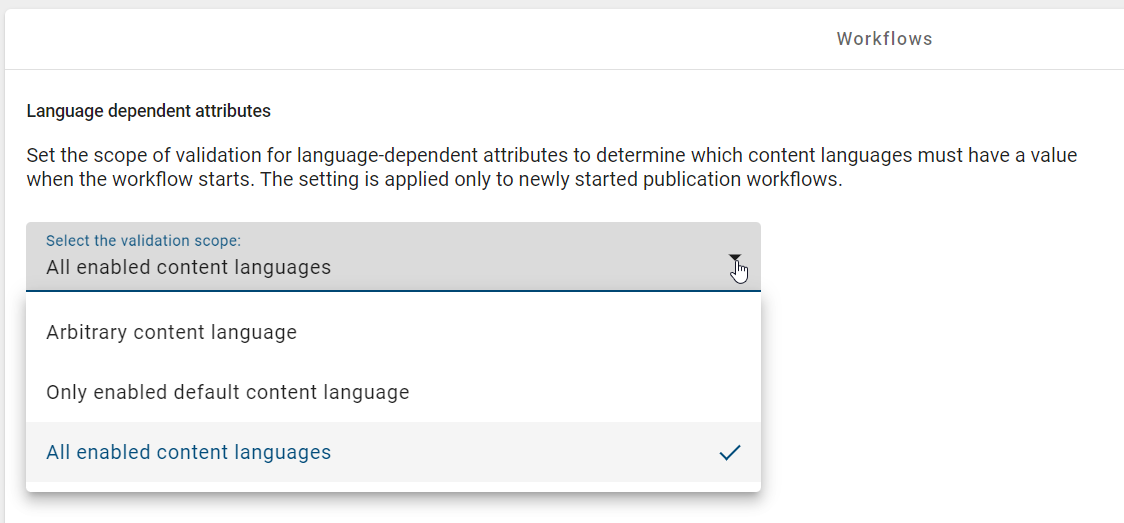
When you select a new validation scope, the publication workflow checks the language-dependent mandatory attributes of entities and diagrams according to this setting.
Note
Please note that the new validation scope is only applied to publication workflows that are started after the change.
Hint
Please note that the functions of the Workflows tile are not available in the mobile view.
How can I set the workflow task reminder?
If you have the user role Administrator, open the Administration menu item in the left menu bar. You will see a collection of predefined tiles. Select the Workflows tile. There you can define a reminder interval for open tasks.
Open the Reminders tab. There you can configure Task reminders.
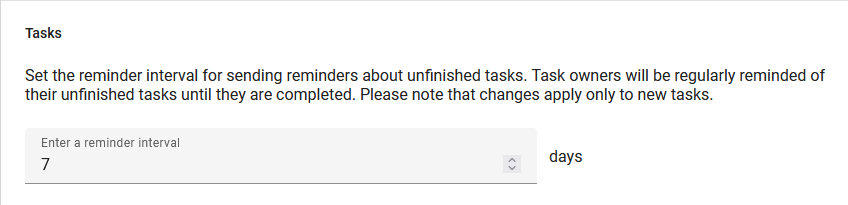
Here you define the reminder interval in days. The default interval is 7 days. This means that users are reminded once within 7 days about an open task. You can change the number of days by entering a new value in the field. The changes are saved immediately. A confirmation message appears at the lower right of the screen. The setting applies to all new tasks.
Hint
Please note that the functions of the Workflows tile are not available in the mobile view.
How can I set the resubmission reminder?
If you have the user role Administrator, open the Administration menu item in the left menu bar. You will see a collection of predefined tiles. Select the Workflows tile. There you can define when reminders for resubmissions are sent.
Open the Reminders tab. There you can define the default resubmission interval. This interval applies to all diagrams at first. You can also define whether modelers are allowed to change this interval on diagram level. This is only possible if the attribute Resubmission Interval is set to visible in the Method.
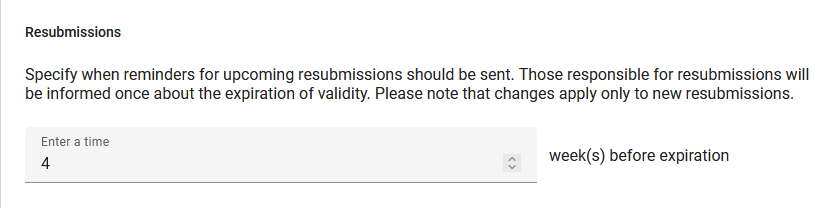
Here you define the time in weeks after which a resubmission reminder is sent. The responsible persons are informed once at the selected time. You can change the number of weeks by entering a new value in the field. The changes are saved immediately. A confirmation message appears at the lower right of the screen. The setting applies to all new resubmissions.
Hint
Please note that changes to the method are only possible if you have access to the method editor.
Hint
Please note that the functions of the Workflows tile are not available in the mobile view.
MyGBTEC
If you are an Administrator and open the Administration menu item in the left menu bar, you will see a collection of predefined tiles. In the MyGBTEC tile, you can create standard favorites and make them available to your users on the MyGBTEC page.

After clicking on the tile, a list will appear sorted in descending order based on the creation date. This list displays the names of the standard favorites and the assigned user groups. If the name is not available in your browser language, a corresponding hint will be provided.
Hint
Please note that the functions of the MyGBTEC tile are not available in the mobile view.
How can I create a new standard favorite?
When you open the Administration menu item in the left menu bar as an Administrator, a collection of predefined tiles is displayed. In the MyGBTEC tile, you can create standard favorites and make them available to users on the focus-specific MyGBTEC page.
After clicking on the MyGBTEC tile, a list of existing standard favorites will be displayed in descending order by creation date, if available. You can create a new standard favorite using the Create favorite button at the bottom right.

This will open a dialog in which you must select a focus, enter the URL of the search result or diagram for the standard favorite, and enter a name. Use the Select focus selection field to specify on which focus-specific MyGBTEC page the standard favorite should be displayed. The name you enter must be maintained in the application’s default language. Optionally, you can also enter user groups and, under Title in other languages, maintain the name in up to 6 further fixed languages.

Once you have filled in at least all the mandatory fields, you can create a new standard favorite by clicking the Create button. The newly created standard favorite will then appear as the first entry in the list. To discard your input, click the Cancel button.
Note
Please note that the name displayed does not depend on your content or alternative language, but on your browser language. If the name has been maintained in your browser language, it is displayed in that language. Otherwise, the name is displayed in the default language.
How can I delete a standard favorite?
If you are an Administrator and open the Administration menu item in the left menu bar, a collection of predefined tiles will be displayed. In the MyGBTEC tile, you can delete existing standard favorites.
To delete a standard favorite, there must be at least one standard favorite. Click on the standard favorite you want to delete in the list to expand it.
You will then see the option to delete the standard favorite at the top right of the entry.

After clicking on the Delete favorite option, the standard favorite will be deleted immediately and removed from the list.
Reports
If you open the menu item Administration in the left menu bar with the user role Administrator, you will see a collection of predefined tiles. If you select the Reports tile, you can create reports and configure existing reports.
After you click the tile, a list of all available reports will be shown.
Hint
Please note that in mobile view, the functions of the Reports tile are not available.
How can I view my available reports?
In GBTEC Process Design, different reports for diagrams, categories, and catalog entries are available, which you can export if needed. If you are logged in with the user role Administrator, you can create these reports, configure existing reports, and manage them using the report descriptors.
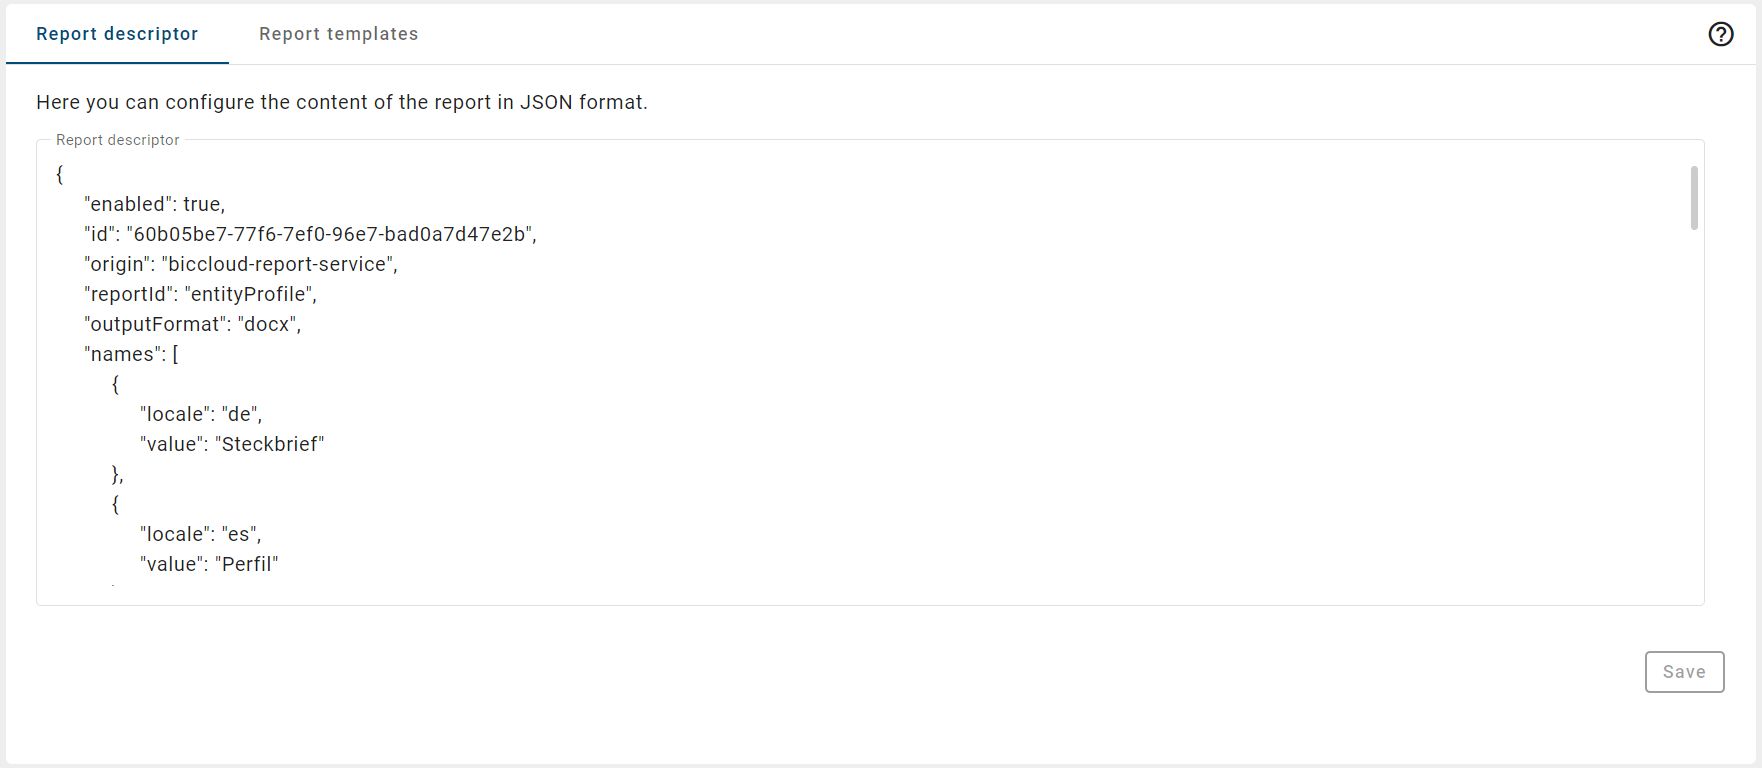
To do this, go to the menu item Administration in the left menu bar and select the Reports tile. You will then see an overview of all currently available report descriptors. If a descriptor only allows certain diagram or object types for this report, the IDs of these types will be displayed under the name of the respective report.

As soon as you select an entry, you will go to the editing area. There you can adjust the report as needed or create new report templates.
Hint
Please note that in mobile view, the functions of the Reports tile are not available.
How can I create a new report?
If you open the menu item Administration in the left menu bar with the user role Administrator, you will see a collection of predefined tiles. If you select the Reports tile, you can create reports and configure existing reports.
After you click the Reports tile, you will find the button Create New Report at the bottom right. Click the button to create a new report.
A dialog will open where you can configure the content of the report in JSON format.
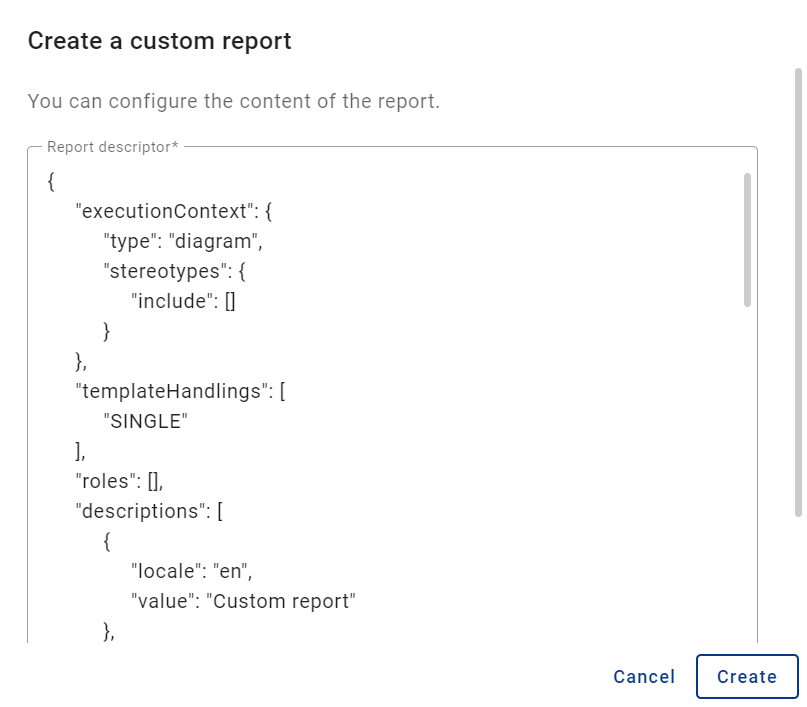
Click the button Create to create your own report. To cancel, click the button Cancel.
After the report is created, you will go to the details page of the new report. There you can further configure the report if needed.
How can I configure an existing report?
If you open the menu item Administration in the left menu bar with the user role Administrator, you will see a collection of predefined tiles. If you select the Reports tile, you can configure existing reports.
To configure an existing report, at least one report must be in the list. Click on a report to go to the report descriptor where you can adjust the report in JSON format.
Hint
Please note that you can also configure standardized reports and Excel exports, as well as enable or disable them.
In the editing area, you can make the following changes:
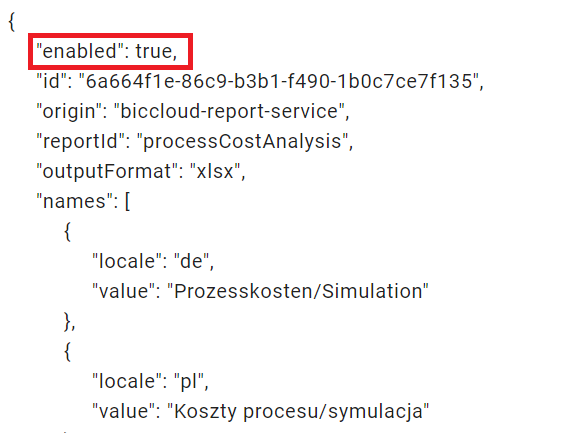
Availability: You can enable or disable reports or Excel exports for diagrams or categories in GBTEC Process Design using the variable enabled. If the value is set to “true”, the report or export is active. To disable it, set the value to “false”.
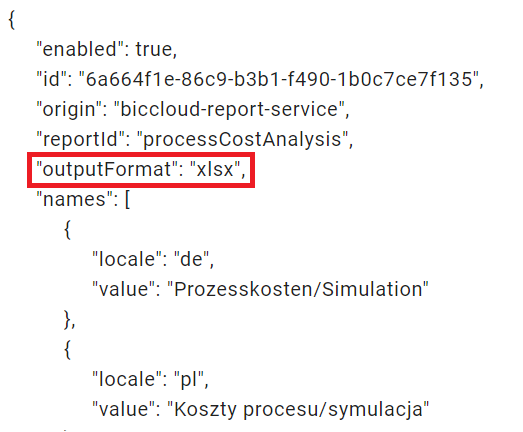
Format: Use the variable outputFormat to set the format of the report. The following formats are supported for the respective reports:
Profile (diagram): docx, pdf, pdfa, pdfa2b
Profile (catalog item): docx, pdf, pdfa, pdfa2b
Manual: docx, pdf, pdfa, pdfa2b, html, mhtml, txt, odt, rtf
Manual with assignments: docx, pdf, pdfa, pdfa2b
Matrix Report: xlsx, pdf, pdfa, pdfa2b
Process costs/Simulation: xlsx, pdf, pdfa, pdfa2b
Here, pdfa corresponds to the “PDF/A-1b” format and pdfa2b corresponds to the “PDF/A-2b” format.
Note
The format pdfa does not support images with transparency. Therefore, it is recommended to use pdfa2b if images and icons should be displayed in reports.
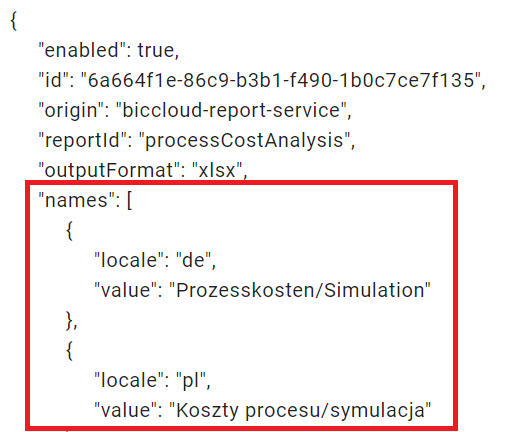
Names: Use the variable names to set the name of the report as it appears in the GBTEC Process Design interface. You can set a value for each language supported by GBTEC Process Design. The difference becomes visible when you switch the browser language.
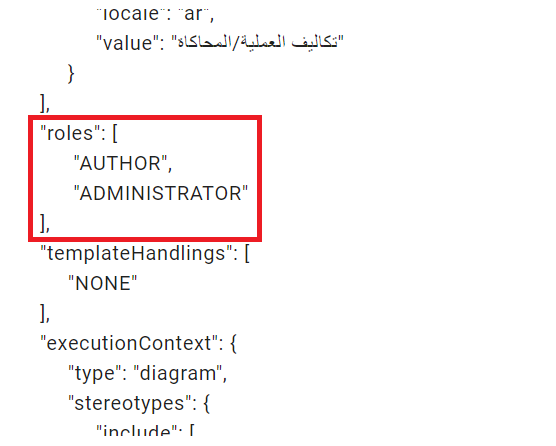
User roles: The variable roles defines the user roles that have permission to export the respective reports.
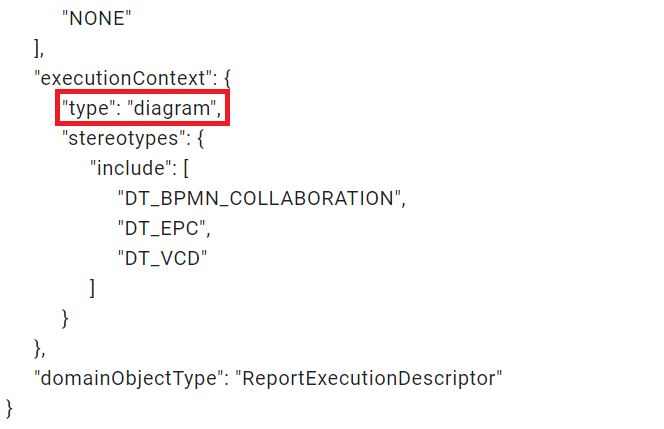
Context: Here you can define whether the report should be available in the context of a diagram or an entire category. Set the variable type with one of the values “diagram” or “category”. Only one value can be set per descriptor. For reports that can be created in both contexts, there are two separate descriptors. They can be edited separately.
Hint
Please note that the entire report template for “category” must be adapted. Otherwise, the report template will fail.
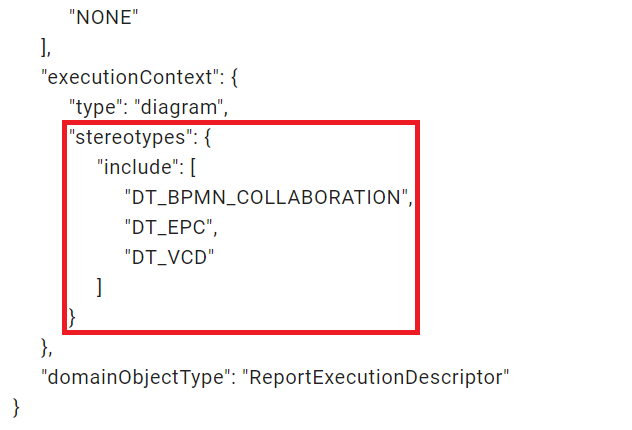
Stereotypes: For reports available in the context of a diagram or catalog entry, you can set which diagram or object types can use this report. Enter the IDs of these diagram/object types in the variable include under stereotypes. If no value is set or the value “all” is present, the report is available for all types.
If you have made changes and the JSON format is correct, click the button Save. Your changes will be applied immediately.
If you leave the report descriptor without saving, you will get a corresponding warning.
How can I upload a new report template?
If you open the menu item Administration in the left menu bar with the user role Administrator, you will see a collection of predefined tiles. If you select the Reports tile, you can upload a new report template.
To upload a new report template, at least one report must be in the list. Click on a report on the right to go to the Details, then switch to the Report Templates tab at the top. There you will find the button Upload Report Template at the bottom right.
After you click the button, you can select a file from your local storage and open it. Then a dialog will open where you can select the diagram type and the language for the uploaded file. All diagram types of the current method and all content and alternative languages set in Administration are available.
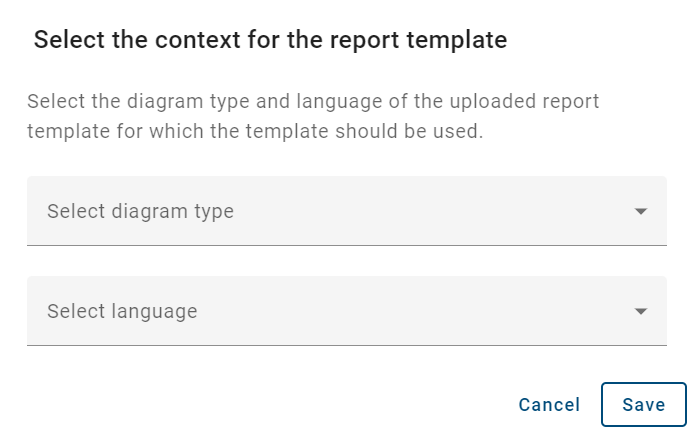
Click the button Save to upload the report template. The uploaded template will appear in the list, sorted alphabetically by file name. To cancel, click the button Cancel.
How can I update an existing report template?
If you open the menu item Administration in the left menu bar with the user role Administrator, you will see a collection of predefined tiles. If you select the Reports tile, you can update an existing report template.
To update an existing report template, at least one report must be available. Click on a report on the right to go to the Details, then switch to the Report Templates tab at the top. If at least one report template exists, click the context menu (three dots) of the template you want to update and select Upload.
Then you can select a new file from your local storage to update your report template. The file name will be adjusted according to the new file. The diagram type and language remain unchanged.
How can I download a report template?
If you open the menu item Administration in the left menu bar with the user role Administrator, you will see a collection of predefined tiles. If you select the Reports tile, you can download an existing report template.
To download an existing report template, at least one report must be available. Click on a report on the right to go to the Details, then switch to the Report Templates tab at the top. If at least one report template exists, click the context menu (three dots) of the template you want to download and select Download.
The report template will be downloaded immediately.
How can I delete a report template?
If you open the menu item Administration in the left menu bar with the user role Administrator, you will see a collection of predefined tiles. If you select the Reports tile, you can delete an existing report template.
To delete an existing report template, at least one report must be available. Click on a report on the right to go to the Details, then switch to the Report Templates tab at the top. If at least one report template exists, click the context menu (three dots) of the template you want to delete and select Delete.
The report template will be deleted immediately and cannot be restored.
Note
Please note that only custom report templates can be deleted. If you delete a standard template that you have updated, the report template will be reset to the standard template.
Which fonts are supported by the Report Engine?
Please note that the Report Engine only supports certain fonts when creating .pdf files. If an unsupported font is used, the system automatically replaces it with a predefined font. This may change the layout and page count of the .pdf file. This is important for the configuration of report templates or for the delivery of attachments as .pdf files.
The following fonts are supported:
Arial Black
Arial (Bold, Italic, Bold Italic)
Comic Sans MS (Bold)
Courier New (Bold, Italic, Bold Italic)
Georgia (Bold, Italic, Bold Italic)
Impact
Times New Roman (Bold, Italic, Bold Italic)
Trebuchet (Bold, Italic, Bold Italic)
Verdana (Bold, Italic, Bold Italic)
Webdings
Hint
To use fonts not listed here in your documents, consider embedding the fonts in your documents.
Details
When you open the Administration menu item in the left menu bar with the user role Administrator, you will see a collection of predefined tiles. If you select the Details tile, you can configure the profile for diagram and object types and set the visibility of the Profile in the diagram view.
Hint
Please note that in the mobile view, the functions of the Details tile are not available.
How can I display the attributes in a diagram?
When you open the Administration menu item in the left menu bar with the user role Administrator, you will see a collection of predefined tiles. If you select the Details tile, you can view the attributes displayed in the diagram.
All attributes are shown in the diagram. Displaying them does not depend on the Profile configuration or the setting for the visibility of the profile.
How can I change the visibility of the profile?
If you open the Administration menu item in the left menu bar with the user role Administrator, a collection of predefined tiles is displayed. In the Details tile, you can configure the profile for diagram and object types and set the visibility of the Profile in the diagram view. Click on a list entry for an object or diagram type to open its detailed settings.
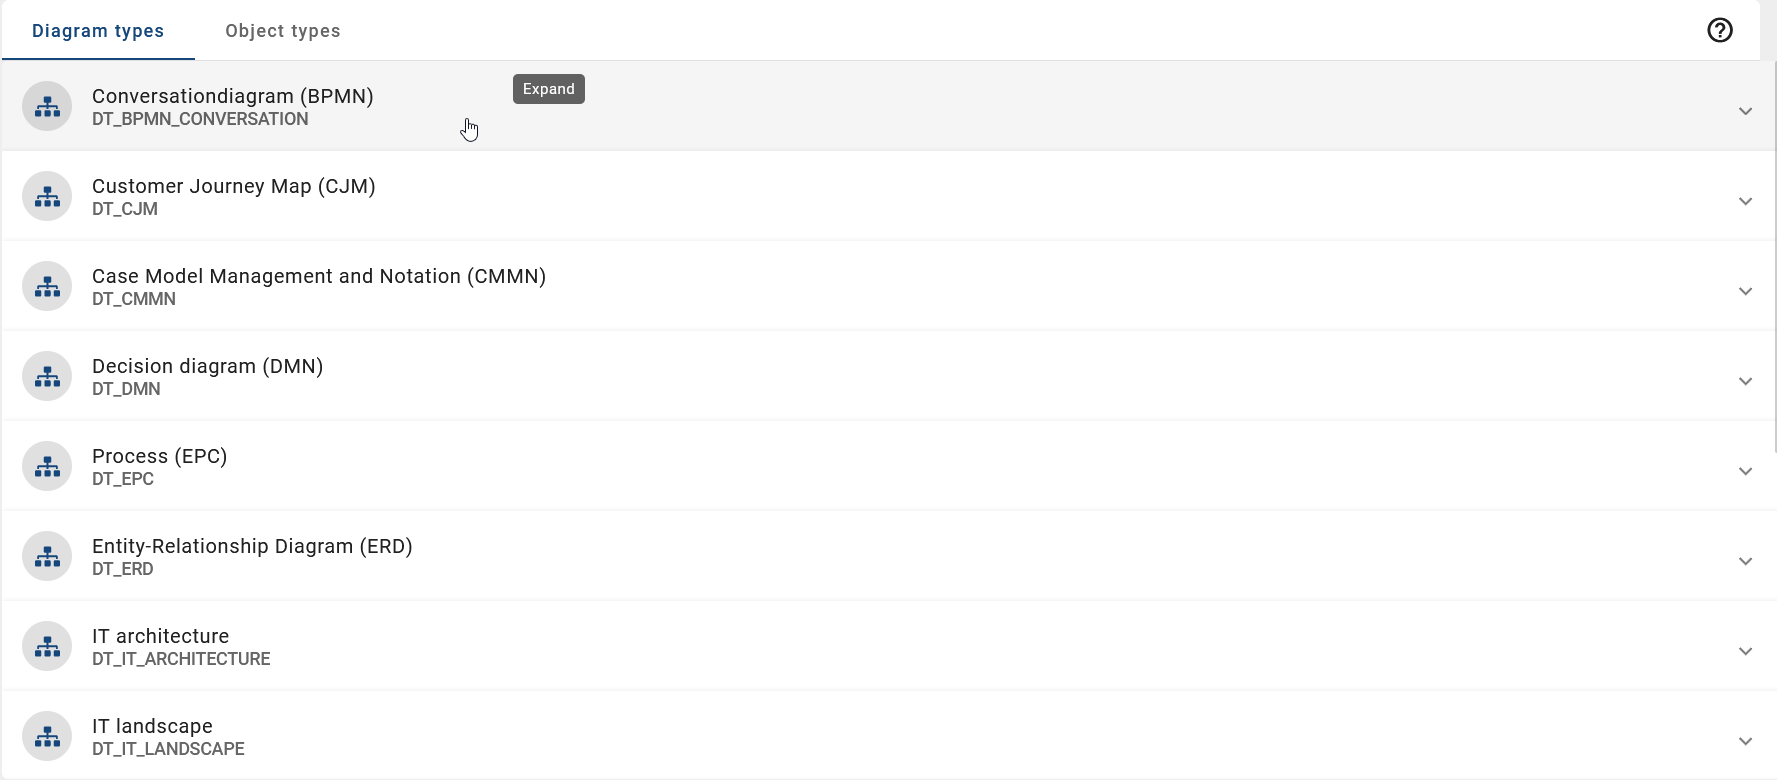
The current visibility status is shown in the Display profile view in the Profile tab. Click the corresponding toggle switch to change the active setting. The change is applied immediately.
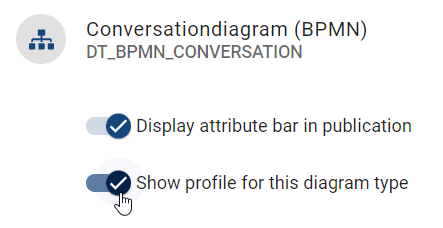
Click the left-pointing arrow in the top-left corner to return to the overview. If the toggle switch is on, all users see the Profile in the diagram view. If the toggle switch is off, no details about the objects or diagram types are shown in the Profile.
To return to the previously edited diagram, click the right-pointing arrow in the top-left corner. This takes you directly back to the last opened view.
How can I configure the profile?
When you open the Administration menu item in the left menu bar with the user role Administrator, you will see a collection of predefined tiles. If you select the Details tile, you can configure the profile for diagram and object types.
First, you see the default settings. You can change them if needed. This includes attributes like description and relationships to other object types, for example responsible and contributing roles, as well as input and output.
Click on an entry in the list to open its detail settings. There you can also adjust the visibility of the profile if needed. In the editing field, you can see the current configuration and make changes.
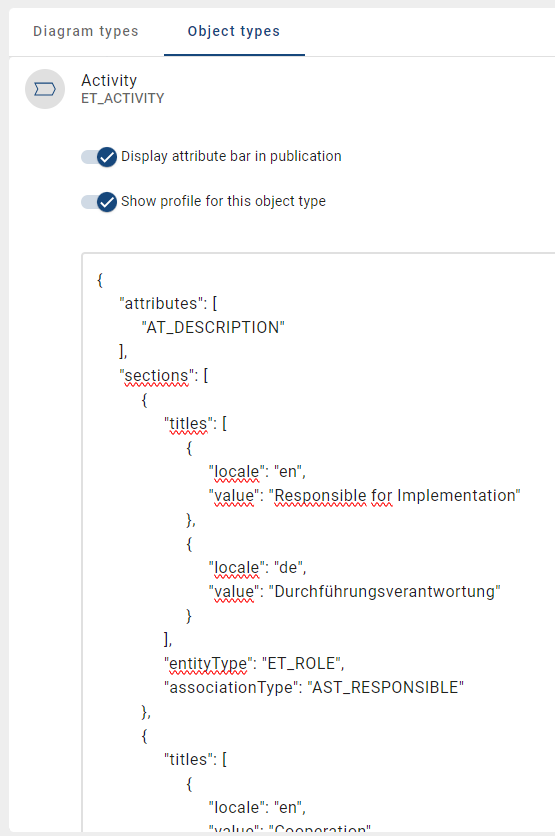
Attributes: You can add or remove diagram or object attributes using the attribute type ID. In the following example, the object attribute “Name” is displayed next to the “Description”. To do this, the attribute type ID must be added to the
"attributes"section:
"attributes": [
             "AT_DESCRIPTION",
             "AT_NAME"
     ],
Associations and entities: In
"sections", specific relationships to object types, selected association types or specific object types can be output individually. Its representation takes place in various subsections named"titles", in which the issues and designations in the profile are defined. The following subsection example looks for “roles” contained in the diagram with “C - Consulted” the relationship to another entity. For this, the ID of the"entityType", in this case"ET_ROLE", and the"associationType", here"AST_CONSULTED", must be specified. These roles are then listed in the profile section named"Cooperation"in English browser language and"Mitwirkung"in German browser language.
{
                     "titles": [
                             {
                                     "locale": "en",
                                     "value": "Cooperation"
                             },
                             {
                                     "locale": "de",
                                     "value": "Mitwirkung"
                             }
                     ],
                     "entityType": "ET_ROLE",
                     "associationType": "AST_CONSULTED"
 },
If you only choose one relationship type or one entity type, leave the other type empty by using "".
To save your changes, click the Save button at the bottom right of the detail settings. You might need to scroll down to see it. After clicking Save, the system will check the configuration to make sure the JSON syntax is correct. If everything is correct, it will be saved.
Clicking on the diagram or object type will take you back to the overview.
The Profile is also shown in the diagram view in the Details panel on the right sidebar. All user roles can see the Profile.
Hint
Please note that if the editing field of the diagram or object type is empty but the Display profile view button is activated, no details are displayed in the Profile in the diagram view for the diagram or object type.
Tip
For a list of existing stereotypes and related IDs, see this section.
Integrations
How can I add a ProcessApp to a diagram type to configure it as an integration?
As a user with the user role Administrator, you can add a published ProcessApp to specific diagram types and configure it as an integration in the Options panel. To do this, select the menu item Administration in the left menu bar and click the Details tile. A list of all available diagram types is then displayed.
After selecting a diagram type, you will see the Integrations tab next to the Profile tab. Here, you can configure integrations that are later displayed in the Options panel in the right sidebar. To create a new integration, click the Add integration button in the lower right corner.
A dialog opens in which you must enter the run link of the published ProcessApp in the Integration URL field and a title for the integration. Entering the title in your default language is mandatory, while maintaining the title under Languages in up to 6 further fixed languages is optional. You can also add user groups or repositories that are allowed to see the integration in the diagram. If no user group or repository is added, all users have access to the integration.
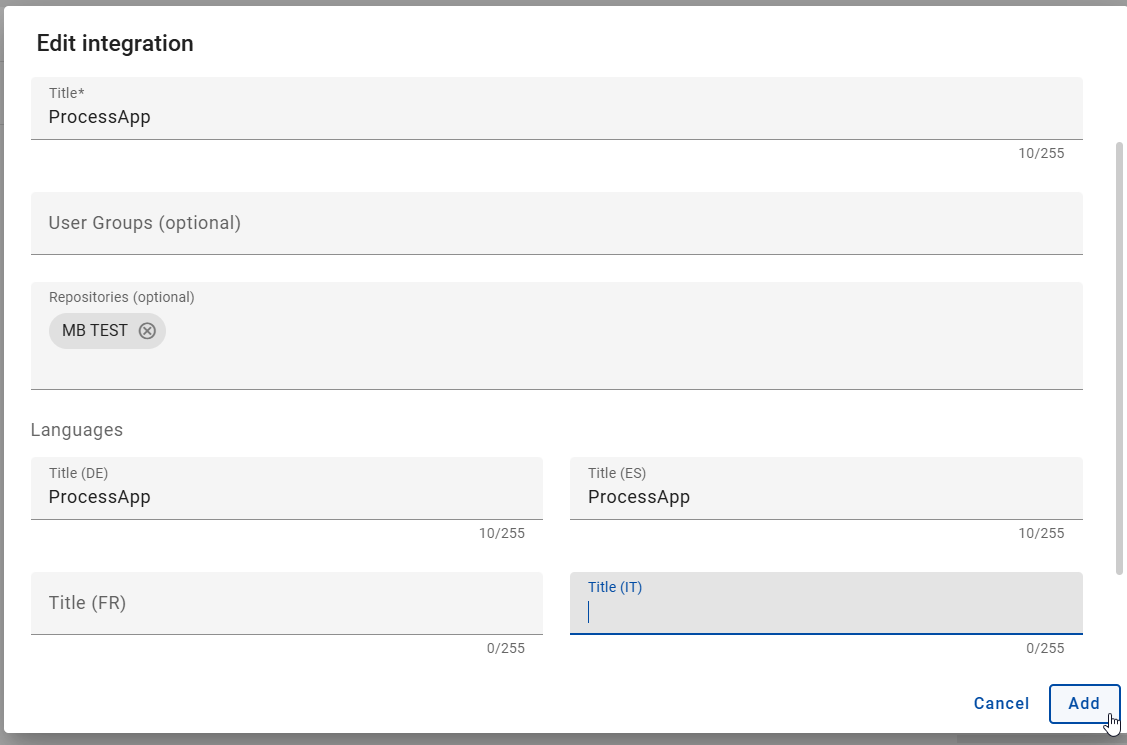
Note
Please note that the name of the integration displayed does not depend on your content or alternative language, but on your browser language. If the name has been maintained in your browser language, it is displayed in that language. Otherwise, the name is displayed in your default language.
Warning
Please note that for a successful integration, the run link of the published ProcessApp must follow the format https://xxxx/process-execution/xxxx/processes/xxxx/run and must refer to an already published ProcessApp. For more information, see here.
When creating or editing an integration, you can add one or more repositories in the dialog. In the field, you can select or enter the repositories you want. If only one repository is assigned, its name is shown. If more than one repository is assigned, the number of repositories is shown. If no repository is assigned, the field stays empty. The integration is visible only to users working in one of the assigned repositories, or if no repository is defined.
Note
Please note that the integration is shown only if you belong to one of the user groups assigned to it, or if no user groups are defined. Also, you must work in a repository that is enabled for the integration, or no repository must be set. You must also provide a URL in the correct format. If these rules are not met, the integration will not be shown in the diagram.
As soon as you have entered at least the run link of the published ProcessApp and a title for the integration, you can create it using the Add button. The integration will then appear for diagrams of the selected diagram types in the Options panel in the right sidebar, in your browser language. To cancel, click the Cancel button.
Select the menu item Diagrams in the left menu bar. There, you can either create a new diagram or check out an existing diagram. Then, click the Options panel in the right sidebar and select the integration you want. For example, if you click the Example Integration button, you are sent to GBTEC Work Orchestrator, where a new case is started for the linked ProcessApp.
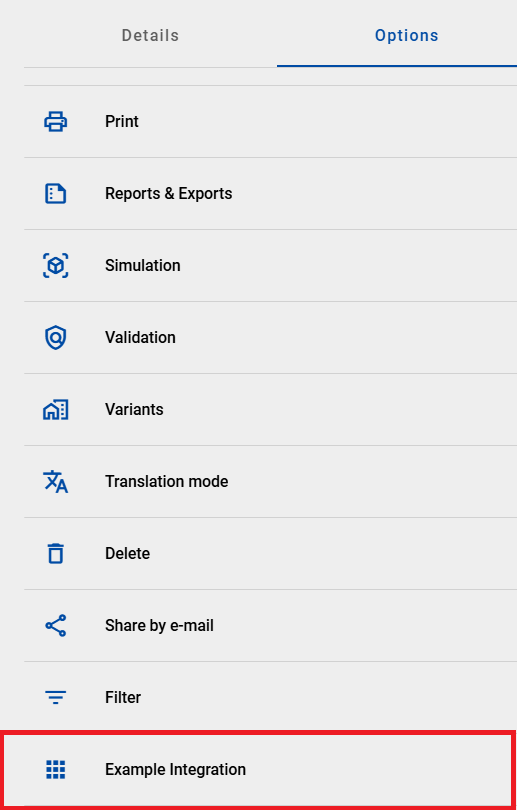
Hint
Please note that the use of integrations requires a separate license and must be purchased by you.
Hint
Please note that if integrations are deactivated for all diagram types, the button with the name of your integration is no longer displayed in the Options panel in the right sidebar. Previously configured integrations are not deleted. They remain stored in the system and become available again once the feature is reactivated.
How can I edit an existing integration?
As a user with the role Administrator, select the menu item Administration in the left menu bar and then open the Details tile. After selecting a diagram type, you will see the Integrations tab. There you will find a list of the already configured integrations, provided that integrations have been configured for this diagram type.
To edit an integration, select the desired integration and open the context menu. When you click the Edit button, a dialog opens. This dialog displays the current data of the selected integration and allows you to make changes and save them.
Warning
Please note that for a successful integration, the run link of the published ProcessApp must follow the format https://xxxx/process-execution/xxxx/processes/xxxx/run and must refer to an already published ProcessApp. For more information, see here.

Once the dialog for an existing integration is open, all mandatory fields (Integration URL and Title) must be completed during editing. Only then can you click Save, which applies the entered data and updates the list of integrations. If not all mandatory fields are filled in, the Save button remains disabled to prevent an incomplete integration from being saved.
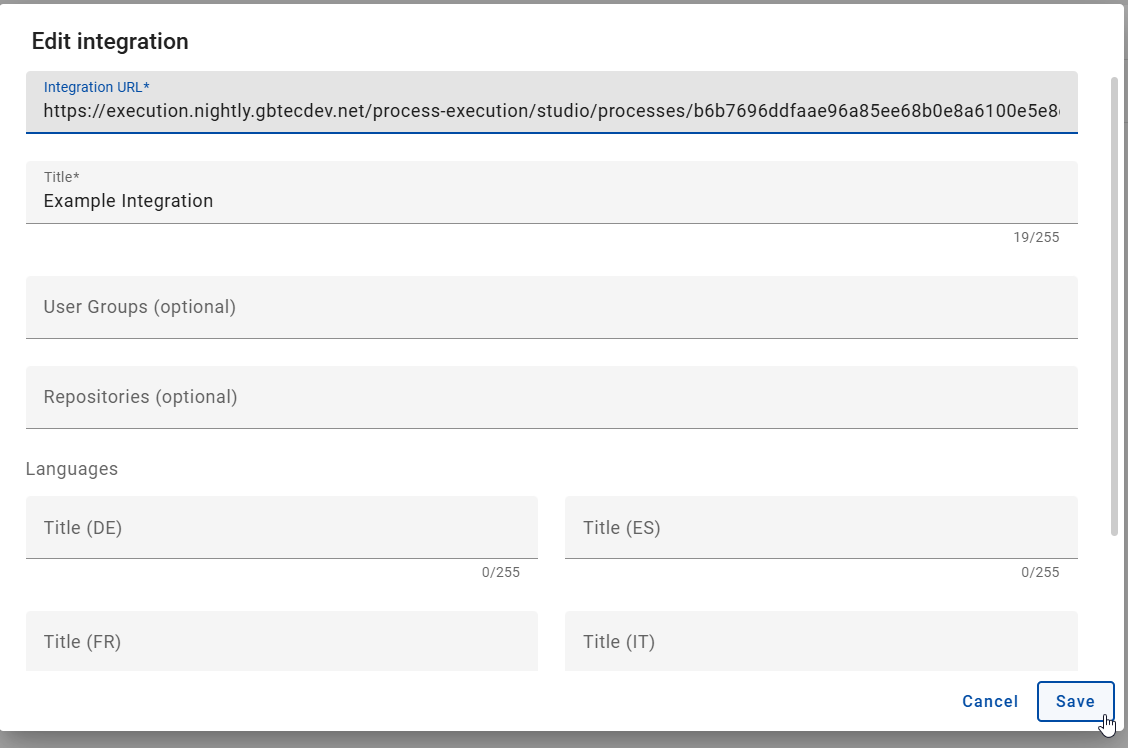
Hint
Please note that the use of integrations requires a separate license and must be purchased by you.
How can I delete an integration?
As a user with the role Administrator, select the Administration menu item in the left menu bar. After selecting a diagram type, you will see the Integrations tab. There you will find a list of the already configured integrations, if integrations exist for this diagram type.
To delete an integration, select the integration you want and open the context menu. Click the Delete button. A message will appear saying that the deletion is permanent and cannot be undone. Click Delete again to remove the integration for the selected diagram type.

The list of remaining integrations will update automatically.
Hint
Please note that using integrations needs a separate license, which must be purchased.
Marketplace
If you open the Administration menu item in the left menu bar with the user role Administrator, you will see a collection of predefined tiles. Select the Marketplace tile.

Here, you can browse templates, ProcessApps, and reference process architectures in the GBTEC Marketplace.
Note
You can also open the Marketplace directly at https://marketplace.gbtec.com. This URL is publicly accessible, but you need to log in as a GBTEC Platform user to view and use the content.
Note
The Marketplace is currently only available in English.
How can I open the Marketplace?
With the user role Administrator, you can access the GBTEC Marketplace from within the Administration area. Open the Administration menu item in the left menu bar and select the Marketplace tile.
The Marketplace opens in an embedded view. You are logged in automatically with your existing account.

Note
The Marketplace tile is only displayed if the GBTEC Marketplace is available for your environment.
How can I browse the content in the Marketplace?
With the user role Administrator, you can browse the content offered in the GBTEC Marketplace. Open the Administration menu item in the left menu bar and select the Marketplace tile. The Marketplace opens directly.
The Marketplace shows the available content as cards in the main content area. Each card shows a preview image, the version, the last update, and the language of the content.
Use the Sort by drop-down list to order the results by newest content, most downloaded content, or alphabetically. If more results are available than currently shown, scroll the content area to load more cards. Select a card to open its detail view.
Each card also shows a Download button. If you need to request access instead, the card shows a Contact button.

How can I search and filter content in the Marketplace?
With the user role Administrator, you can use the Filters panel to narrow down the content shown in the Marketplace. You do not have to leave the page to do this. Open the Administration menu item in the left menu bar and select the Marketplace tile. The Marketplace opens directly.
Next to the Filters panel, the right sidebar also has an Options panel. There, you can open the Marketplace help page and view information about the Marketplace.
Enter a search term in the Search marketplace content field to search across all content. Use the GBTEC Certified toggle to show only certified content.
To narrow the results further, expand a facet group, for example Category, Tags, or Regulations. Then select one or more filter values. Within an expanded facet group, you can use its search field to find a specific filter value faster.

Hint
If no content matches your search or filters, click the X-symbol in the Filters panel to reset it.
Which information is shown for a Marketplace entry?
With the user role Administrator, you can open the detail view of a Marketplace entry to see more information about it. Open the Administration menu item in the left menu bar and select the Marketplace tile. The Marketplace opens directly. Select a card to open its detail view.
The detail view shows the same tags as the card, a preview image, and a Description of the content. A close icon lets you close the view again.
Version and Last Updated show the currently published release. Language and Author show the content language and its owner. Badges show the certifications and regulations associated with the content.
The Download button is shown when the content is available to you. Otherwise, the Contact button is shown. Use it to request access.
The Related Workflows section shows further content with similar metadata.

Note
If a content entry has no description, the Description section is not shown in the detail view.
How can I download content?
With the user role Administrator, you can download content from the GBTEC Marketplace. Open the Administration menu item in the left menu bar and select the Marketplace tile. The Marketplace opens directly.
Click the Download button on a card in the main content area to download its content directly. You can also open the detail view of a card first and click the Download button there. Downloading a content gives you a ZIP file. This ZIP file is saved to your downloads folder.

How can I use downloaded content?
With the user role Administrator, you can use content you downloaded from the Marketplace in your repository.
Import the downloaded ZIP file into your repository. Follow the steps in How can I import an archive or diagram?.
Integrations
As a user with the Administrator user role, you can configure your translation service and define which websites (domains) are allowed to embed diagram views. To do this, open the Administration menu item in the left menu bar. You will see a collection of tiles. Click the Integrations tile.

The Integrations tile contains the Translation Service and Embedded views tabs.

Hint
The Integrations tile is always available and clickable, regardless of your license. If one of the two features is not included in your license, the corresponding tab still remains visible. It is then marked with a padlock icon and a banner, and the related settings are disabled.
Translation Service
As a user with the Administrator user role, you can manage the translation service for your users. To do this, open the Administration menu item in the left menu bar and select the Integrations tile. Then switch to the Translation Service tab.
In the Translation Service tab, you can give your users access to the translation service in the public workspace by connecting your DeepL account. You must create the account first at DeepL.
How can I test my DeepL API configuration?
As a user with the Administrator user role, you can enable or disable the Translation Service Connector for your users. To do this, open the Administration menu item in the left menu bar and select the Integrations tile. Then switch to the Translation Service tab.
In the Translation Service tab, you can enter the API key from your DeepL account and test the access. If no API key is entered, the option to test the configuration will be disabled.
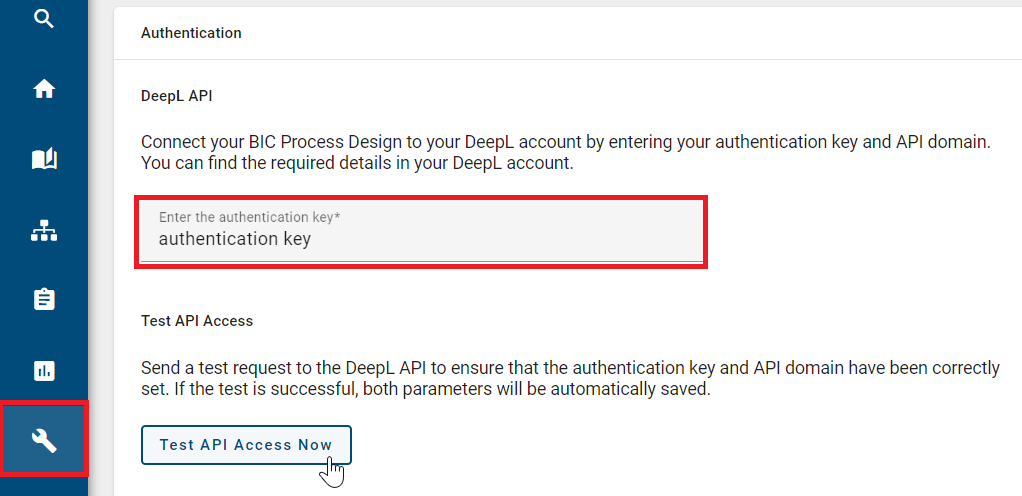
Note
With the test option enabled, you will send a test request to the DeepL translation endpoint. The entered API key will be used for authorization. If the authorization fails, you will receive an error message.
Note
DeepL is an external third-party provider. Translations are performed automatically by DeepL. We do not take responsibility for the accuracy or completeness of the translations or for the related data processing by DeepL.
How can I remove my DeepL API configuration to delete my login data?
As a user with the Administrator user role, you can remove your DeepL API configuration to delete your login data. To do this, open the Administration menu item in the left menu bar and select the Integrations tile. Then switch to the Translation Service tab.
If your DeepL credentials are linked, open the Options panel in the right sidebar and click the Remove API token option.

Your credentials will then be deleted from the database. Afterwards, you will receive a success message or an error message if something went wrong.
Note
The Remove API token option is disabled if no login credentials are saved.
How can I configure the DeepL glossary?
As a user with the Administrator user role, you can set up the DeepL Translation Service for your users, manage glossaries, and enable translation with a glossary. To do this, open the Administration menu item in the left menu bar and select the Integrations tile. Then switch to the Translation Service tab.
After you switch to the tab, the DeepL Authentication section opens. Here, you can enter and save a valid DeepL authentication key. As soon as the key is saved, the input field for the Glossary ID and the Update button are activated. If no API key is stored, both fields remain disabled.
Once the input field is active, you can enter a Glossary ID. When you click the Update button, the available language pairs from your DeepL account are loaded and stored in the application. The glossary is then used for your users.
A Glossary ID contains fixed language pairs with a defined direction, for example DE → EN. When a Glossary ID is saved, the application retrieves the available language pairs and stores them. There is no automatic synchronization with DeepL. If you add or remove language pairs in your DeepL account, these changes are not applied automatically. In this case, you must click the Update button again so that the language pairs are loaded and saved again.
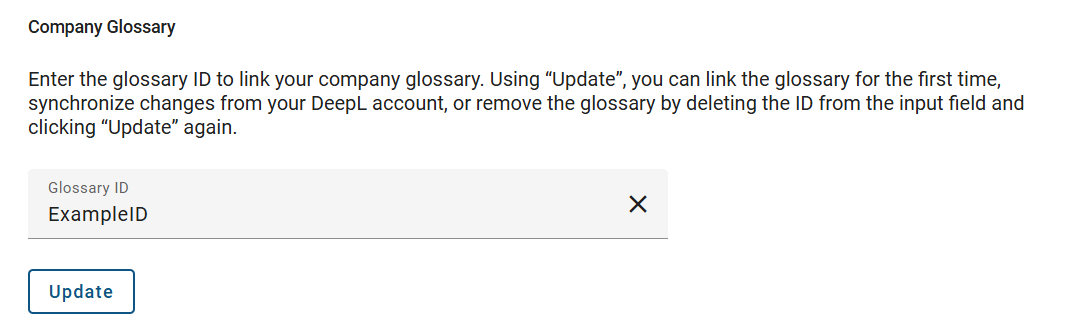
A stored glossary is automatically used for translations. Glossary terms are applied when they are available for the selected language pair. If no glossary is stored, the application uses the standard translations from DeepL. This applies to diagrams and catalog entries, depending on the defined directional language pairs.
Changes to the Authentication key or the Glossary ID are saved immediately. Users who are already logged in will see the changes only after they reload the view. Users who log in after the change will see the updated settings immediately.
Note
Please note that if you delete the Glossary ID and then click the Update button, the glossary and all stored language pairs are removed.
Note
DeepL is an external third-party provider. Translations are performed automatically by DeepL. We do not take responsibility for the accuracy or completeness of the translations or for the related data processing by DeepL.
Hint
Please note that if an error occurs while retrieving the glossary or the API key, the application displays a clear error message. The translation dialog remains open and your previous settings are kept. In case of a temporary error, you can click the Update button again.
Embedded views
As a user with the Administrator user role, you can specify on which websites (domains) published diagram views may be embedded. To learn how to embed a diagram, see here.
To do this, open the Administration menu item in the left menu bar and select the Integrations tile. Then switch to the Embedded views tab.

The following subchapters explain what embedded views are used for and how you can manage allowed domains.
Why do I need embedded views?
Embedded views allow you to display diagrams in external systems such as portals or partner applications. This configuration applies to the embedded views of all diagrams in your system.
In the Allowed domains section, you see all domains that have already been added, shown as chips. Chips for domains that use an asterisk as a placeholder for subdomains are displayed in a different color than chips for exact domains. This lets you recognize the type of a stored domain at a glance.
Note
When you open the Allowed domains section for the first time, default domains provided by the system may already be displayed as chips.
Warning
Please note the following security notes:
Users who access embedded views must be signed in to GBTEC Platform.
Only add domains that you trust.
If a domain is not listed here, embedded views cannot be loaded for that domain.
How can I add an allowed domain?
As a user with the Administrator user role, you can add an allowed domain. To do this, open the Administration menu item in the left menu bar and select the Integrations tile. Then switch to the Embedded views tab.
Enter the desired URL in the Allowed domains input field and confirm your entry by pressing Enter. You can use an asterisk as a placeholder for subdomains, for example https://*.example.com.

Your entry is automatically adjusted. The domain is converted to lowercase and a trailing slash is removed. The adjusted domain is then displayed as a new chip and saved automatically.
Entry |
Stored domain |
|---|---|
|
|
|
|
|
|
The following rules apply to a valid domain:
The protocol must be https.
The domain must be complete.
Paths, query parameters, and fragments are not allowed.
An asterisk for subdomains is only allowed in the first position.
If your entry does not meet one of these rules, no chip is created. An error message tells you which rule is not met.
Note
If the entered domain already exists as a chip, no new chip is created. Instead, the existing chip briefly flashes. Your entry is kept so that you can correct it.
After saving, you will see a success message. If the domain could not be saved, you will receive an error message instead. In this case, the existing configuration remains unchanged.
How can I remove an allowed domain?
As a user with the Administrator user role, you can remove an allowed domain. To do this, open the Administration menu item in the left menu bar and select the Integrations tile. Then switch to the Embedded views tab.
Every domain chip in the Allowed domains section shows a removal icon. Click on it to delete the domain.

The domain is removed immediately and the change is saved automatically. You will see a success message if the removal was successful, or an error message if an error occurred.
Dashboards
As a user with the Administrator user role, you can manage configurable dashboards for your users. To do this, open the Administration menu item in the left menu bar and select the Dashboards tile.

A page opens with a list of the existing dashboards. There you can view, configure, or delete dashboards. You can also create new dashboards. If no dashboards exist yet, the list is empty.

You can manage the data for the chart tiles of a dashboard via a REST API. You can find out more about this in the Dashboards API chapter.
Note
Please note that configurable dashboards are not included in the standard license. Please contact your sales representative for more information.
Hint
If the feature has not been activated, the Dashboards tile remains visible in the Administration but is not clickable. If a user opens the configuration area anyway via a direct link, an error page is displayed instead.
How can I create a dashboard?
As a user with the Administrator user role, you can create dashboards. To do this, open the Administration menu item in the left menu bar and select the Dashboards tile.
A page opens with a list of the existing dashboards. To create a new dashboard, click the Create dashboard button in the lower right corner. If no dashboards exist yet, the page is empty and you see a corresponding notification.

A dialog then opens. Enter a name for the new dashboard in the input field. Click the Add button to create the dashboard. If you want to cancel the process, click the Cancel button.

After you have created the new dashboard, you are taken directly to the configuration area. There you can configure the dashboard according to your needs.
How can I configure a dashboard?
As a user with the Administrator user role, you can configure dashboards. To do this, open the Administration menu item in the left menu bar and select the Dashboards tile.
A page opens with a list of the existing dashboards. To configure a dashboard, click the desired dashboard in the list. You are then taken to the configuration area of the selected dashboard.

In the configuration area, different configuration options are available to you. You can find these options in the main area and in the Settings panel in the right sidebar. This way, you can customize the dashboard individually.
In the Settings panel in the right sidebar, you can rename the dashboard and add a description. The name in the Name field must be maintained in the application’s default language. Under Translations, you can optionally maintain the name in up to 6 further fixed languages.

Note
Please note that the name displayed does not depend on your content or alternative language, but on your browser language. If the name has been maintained in your browser language, it is displayed in that language. Otherwise, the name is displayed in the default language.
In the main area, you can add different tiles to the dashboard via the Add field button. The following tiles are available:
Text
Chart
Embedding

Depending on which tile you add to the dashboard, further configuration options are available. These options are described in more detail below.
“Text” tile
If you select the Text tile in the main area, you find the configuration options for this tile in the Settings panel in the right sidebar. These options include the content in the Text input field, the font size, the font color, the alignment, and the font style.

Your settings appear immediately in the main area.

“Chart” tile
If you select the Chart tile in the main area, you find the configuration options for this tile in the Settings panel in the right sidebar. These options include the chart name, the data source, and the chart type. If you select Bar or Line as the chart type, the coloring is also available.

If you want to select a data source, you must first create one. You can find out how to create a data source in the What is a schema? chapter. If a data source already exists, select it. Further configuration options then appear. For a bar or line chart, the X-Axis and Y-Axis attribute groups are available. For a donut chart, the Category and Value attribute groups are available instead.
For a bar chart or a line chart, you can set an axis label as well as a dimension column or a timestamp column from the selected data source in the X-Axis attribute group. In the Y-Axis attribute group, you set an axis label as well as a suitable value column.
For a donut chart, you can select the column for the segments in the Category attribute group. In the Value attribute group, you select the column for the displayed values.

Additionally, you can select an aggregation function in the Y-Axis or Value attribute group. This function calculates the values. You can choose from Count, Minimum, Maximum, Average, and Sum. Count counts the existing records. Minimum and maximum show the smallest or largest value. Average calculates the mean value. Sum adds up all values.
The chart groups the data by the selected column in the X-Axis or Category attribute group. For each group, it calculates the value based on the selected value column and aggregation function.
Your settings are applied immediately. However, in the configuration area, the Chart tile only shows a placeholder. You can only see what the finished chart looks like with the actual data once you view the dashboard.

“Embedding” tile
If you select the Embedding tile in the main area, you find the configuration options for this tile in the Settings panel in the right sidebar. These options include the name of the embedding and the URL.

Your settings are applied immediately. However, only a placeholder is shown in the Embedding tile in the configuration area. You can only see what the finished embedding looks like with the actual content when you view the dashboard.

Remove a tile
If you want to remove a tile from the dashboard, you find the Delete button in the upper right corner of the respective tile.

If you click this button, the tile is removed from the dashboard immediately. You can undo the deletion via the Undo button in the upper right corner of the main area.
Move a tile
If you want to move a tile to a different position in the dashboard, click the tile with the left mouse button and hold the mouse button down. Drag the tile to the desired position. In the background, you see a grid. You can use this grid to find the new position.

When you have reached the desired position, release the left mouse button. The tile is placed in the new position. You can move the tile further or move other tiles if needed. You can move the tile back to the previous position via the Undo button in the upper right corner of the main area.
Change tile size
If you want to change the size of a tile, move the mouse pointer to the edge of the tile. Click with the left mouse button and hold the mouse button down. Drag the tile to the desired size. In the background, you see a grid. You can use this grid to find the new tile size.

When you have reached the desired tile size, release the left mouse button. The tile is adjusted to the new size. You can change the tile size again if needed. You can return to the previous tile size via the Undo button in the upper right corner of the main area.
When you have finished configuring your dashboard or want to continue editing it later, save your changes. To do this, click the Save changes button.

Then leave the configuration area via the Go to dashboard list button. You return to the overview of the existing dashboards.

If you leave the configuration area without saving, you receive a corresponding notification.
How can I view a dashboard?
As a user with the Administrator user role, you can view dashboards in read mode. To do this, open the Administration menu item in the left menu bar and select the Dashboards tile.
A page opens with a list of the existing dashboards. To view a dashboard in read mode, open the context menu of the desired dashboard. Select the View option there.

The dashboard then opens in read mode. There you see how the dashboard looks for your users. Only in this view, the actual content of the Chart and Embedding tiles is loaded and displayed.

If you have configured chart fields beforehand, the chart loads the data from the selected data source when you view the dashboard, and groups it by the selected column in the X-Axis or Category attribute group. It then calculates the values using the selected column and aggregation function in the Y-Axis or Value attribute group.
Hint
Please note that records without a value in the column of the X-Axis or Category attribute group are not taken into account when the chart is displayed.
How can I embed a dashboard as an integration in GBTEC?
As a user with the Administrator user role, you can copy a dashboard’s embed link. This lets you display the dashboard as an Integration within GBTEC, for example in the catalog. This displays the read-only view of the dashboard.
To do this, open the Administration menu item in the left menu bar in GBTEC Process Design and select the Dashboards tile. Next to the desired dashboard, click the context menu (three dots) and select the Copy embed link (URL) option.

The embed link is then automatically copied to your clipboard. A success message appears in the bottom right corner.
Then paste the copied link as the URL into an Integration to display the dashboard there. To check the embedded view beforehand, you can also open the link directly in your browser. This opens the read-only view of the dashboard.
Note
To view the embedded dashboard, you must first be signed in to GBTEC Platform. This is possible for every user, regardless of their user role.
How can I delete a dashboard?
As a user with the Administrator user role, you can delete dashboards. To do this, open the Administration menu item in the left menu bar and select the Dashboards tile.
A page opens with a list of the existing dashboards. To delete an existing dashboard, open the context menu of the desired dashboard. Select the Delete option there.

A dialog then opens. You must confirm the deletion there. Click the Delete button to remove the dashboard permanently. If you want to cancel the process, click the Cancel button.

The selected dashboard is then automatically removed from the list. The process cannot be undone.
Dashboards API
A chart tile in a dashboard shows data. You can manage this data via a REST API of GBTEC Process Design.
The following subchapters explain how you can use the API to manage data for dashboards.
Why do I need the dashboard API?
A chart tile always shows data from a data source. You create this data source via the dashboard API. You also fill the data source with data via the API. Only then can you select the data source when configuring a dashboard.
You can do the following things via the dashboard API:
create, find, list, or delete a schema
add one or more data rows to a schema
list all data rows of a schema
find, update, or delete a single data row
You can find out what a schema is in the What is a schema? chapter. You can find out what a data row is in the What is a data row? chapter.
Where can I find technical information about the API?
You can find all endpoints of the dashboard API in the interactive Swagger UI. There, you can also find the exact request and response formats.
The following link to the Swagger UI takes you to the documentation of the REST APIs of GBTEC Process Design. In the upper right corner, under Select a definition, select the definition for GBTEC Process Design. In the Dashboard section, you find the endpoints for schemas and data rows.
Tip
If the link to the Swagger UI does not work, enter the following URL manually instead: https://{{host}}/public/swagger-ui/index.html. Replace {{host}} with your host.
To use the dashboard API, you need valid authentication. This works the same way as for the rest of the public REST API of GBTEC Process Design. You receive the required API key from your GBTEC contact.
For every endpoint, you also need your tenant ID. You provide this as the tenantId parameter. Your request is automatically connected to your tenant via the tenant ID. An endpoint URL looks like this, for example: https://{{host}}/public/process-design/api/tenants/{tenantId}/dashboards/schemas. Replace {tenantId} with your own tenant ID.
Hint
You can find your tenant ID, for example, in the URL of your browser when you have a diagram open.
What is a schema?
A schema corresponds to a table and consists of several columns. Each column has a name and a data type.
The following data types are available for a column:
string for text values
number for numeric values
datetime for date and time values
You define the order of the columns in a schema via the order of the columns in the request body when you create the schema. This order also determines the order of the columns in the configuration of a dashboard.
If you select a schema as the data source for a chart tile, the columns of the schema are available for selection. The data type of a column determines what you can use the column for. You can use a column of the data type string as a dimension column. You can use a column of the data type datetime as a timestamp column. You can use a column of the data type number as a value column.
Note
You can only create a new schema via the dashboard API. No function is available for this in the user interface of GBTEC Process Design.
What is a data row?
A data row corresponds to a row in a table. A data row contains exactly one value for each column of a schema.
You can add several data rows to a schema at the same time via the dashboard API. You can submit up to 1,000 data rows per request. If one of the submitted data rows contains an error, the API rejects the entire request. In this case, the API does not store any of the submitted data rows.
Every stored data row automatically receives a unique ID. You can use this ID to find, update, or delete a single data row later.
You can also list all data rows of a schema. This output is paginated. This means the API shows you the data rows on several pages. Each page contains a fixed number of data rows. The data rows are always sorted by their ID. This keeps the order the same across multiple requests.
A dashboard uses these data rows as a data source. The dashboard groups and calculates the values based on the selected columns. You can find out more about this in the How can I configure a dashboard? chapter.
Example: Create a schema and data rows for a dashboard
The following example shows you the steps from creating the data to the finished chart.
First, create a schema with the name Support requests via the POST endpoint /dashboards/schemas. Also give it a description, for example Number of support requests by department. Create the following columns for this schema:
Department with the data type string
Count with the data type number
Date with the data type datetime
Enter the following content in the request body, for example:
{
  "names": [
    { "language": "en", "value": "Support requests" }
  ],
  "descriptions": [
    { "language": "en", "value": "Number of support requests by department" }
  ],
  "columnDefinitions": [
    { "name": "Department", "dataType": "string" },
    { "name": "Count", "dataType": "number" },
    { "name": "Date", "dataType": "datetime" }
  ]
}

Then click the Execute button. The response does not contain any content, only headers. In the Location header, you find the URL of the newly created schema. The last part of this URL is the ID of the schema, for example 3fa85f64-5717-4562-b3fc-2c963f66afa6. You need this schema ID in the next step.
Then add a few data rows to the schema via the POST endpoint /dashboards/schemas/{schemaId}/rows. Enter both your tenant ID and the schema ID from the previous step there. For example, enter the departments IT and Sales with their respective count of support requests.
Enter the following content in the request body, for example:
{
  "rows": [
    { "Department": "IT", "Count": 12, "Date": "2026-01-01T00:00:00Z" },
    { "Department": "Sales", "Count": 5, "Date": "2026-01-01T00:00:00Z" }
  ]
}

Then click the Execute button. This time, the response contains a list with the IDs of the newly created data rows. The order of the IDs matches the order in which you entered the data rows.
Then open a dashboard. Add a chart tile there. Select the schema Support requests as the data source. Select Bar as the chart type.
In the X-Axis attribute group, select the Department column. In the Y-Axis attribute group, select the Count column. Also select the Sum aggregation function.

Then save your changes via the Save changes button.
Now view the dashboard. The chart shows the sum of support requests for each department.

Access restrictions and scope definitions
How can I set access restrictions for diagrams?
As an Administrator, Editor or Author (if the author is specified in the diagram’s Author governance attribute), you can define access restrictions for diagrams. To do this, click the Diagrams menu item in the left menu bar, select a diagram and check it out. In the Details panel on the right, you will find the Restricted access input field within the Governance attribute group.
Only members of the selected user group, selected users and governance participants have access to the respective diagram. These restrictions apply regardless of user roles, meaning administrators can also be excluded. If the input field is left empty, no access restrictions apply.
Diagrams with access restrictions are displayed in the diagram list. However, if a user without access tries to open a restricted diagram, an error message will appear.
Hint
Please note that if you define an access restriction that excludes you, you will no longer have access to the diagram once it has been checked in.
How can I set access restrictions for repositories?
As an Administrator, you can set access restrictions for repositories. To do so, click the Administration menu item in the left menu bar and select the Repositories tile. A list of all available repositories will then appear.
Open the context menu of an existing repository and select the Edit properties option.

A dialog then opens. There you can select different users and user groups via the suggestion list in the Access restriction input field. The corresponding catalog item person or organizational unit will then be set for the access restriction.
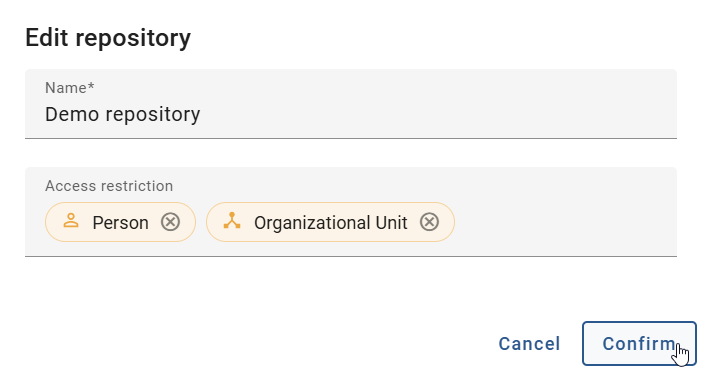
By clicking on Confirm, only the selected persons and organizational units representing users and user groups will have access to this repository. These restrictions apply regardless of user role, meaning administrators can also be excluded.
If the Access restriction field is empty, all users have access to the repository, depending on their respective user role.
Tip
You can also search for the user’s e-mail address. If a user is selected from the list and is not linked to a catalog item of the type “person”, a new catalog item will be generated with the name and the e-mail of the given user.
Hint
Please note that the access restrictions set for a repository can prevent navigation to the contents of a repository within the user interfaces. To reliably control access to individual repository contents, it is recommended to apply access restrictions directly to specific content elements such as diagrams and catalog items.
Note
If you have defined a restriction, which does not include yourself, you cannot access this repository any more as soon as your setting has been saved. Please be aware that such a case can also occur when renaming a user group.
How can I unlock a diagram?
The Administrator user role allows you to manually unlock diagrams. For example, you can use it if a user has not checked in a diagram and will be absent for a long time. However, this procedure may result in data loss because unsaved or checked-in changes by the locking user are not saved on the server but rather locally in the browser. Therefore, try contacting the locking employee first.
To do so, click on the Diagrams menu item in the left menu bar and select a locked diagram. Instead of the Check out button, a lock symbol will be displayed. Click on the symbol to find the Unlock diagram option. Select this option to manually unlock the diagram and make it available for other users to edit again.

Warning
The user who locked the diagram previously can no longer check it in. They must discard their local changes before checking out and editing the diagram again.
How can I define the scope?
With the attribute Scope you can allocate users and user groups of your enterprise to diagrams and catalog items. These units will then be informed as soon as the diagram or the catalog item has been published, a new version is available or if it has been depublished.
The scope also has an impact on modeling in the diagram. The suggestion list of catalog items and their attributes only contains entries, that have the same scope as this diagram or that have no scope at all. For a detailed description please refer to the associated chapter.
To use these functions, you must first connect a user or a user group with the diagram attribute or catalog item attribute Scope.
Tip
You can find the attribute in the section Governance. Depending on the method settings, this attribute exists for objects and therefore catalog items. In general, a scope can be associated with multiple users and user groups.