Administration
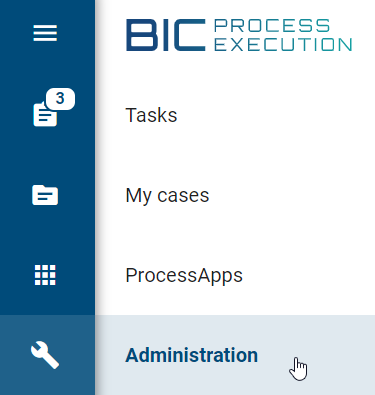
To access the administration area, you need to select the Administration button in the left menu bar.
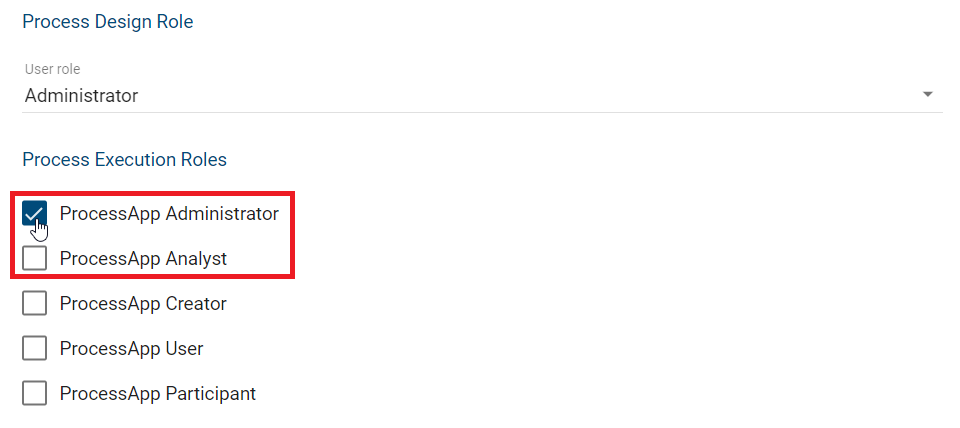
To have full access to the administration, you need to be assigned to the ProcessApp Administrator role. You can edit your user details here. An overview of all GBTEC Work Orchestrator user roles is available in the Quickstart chapter.
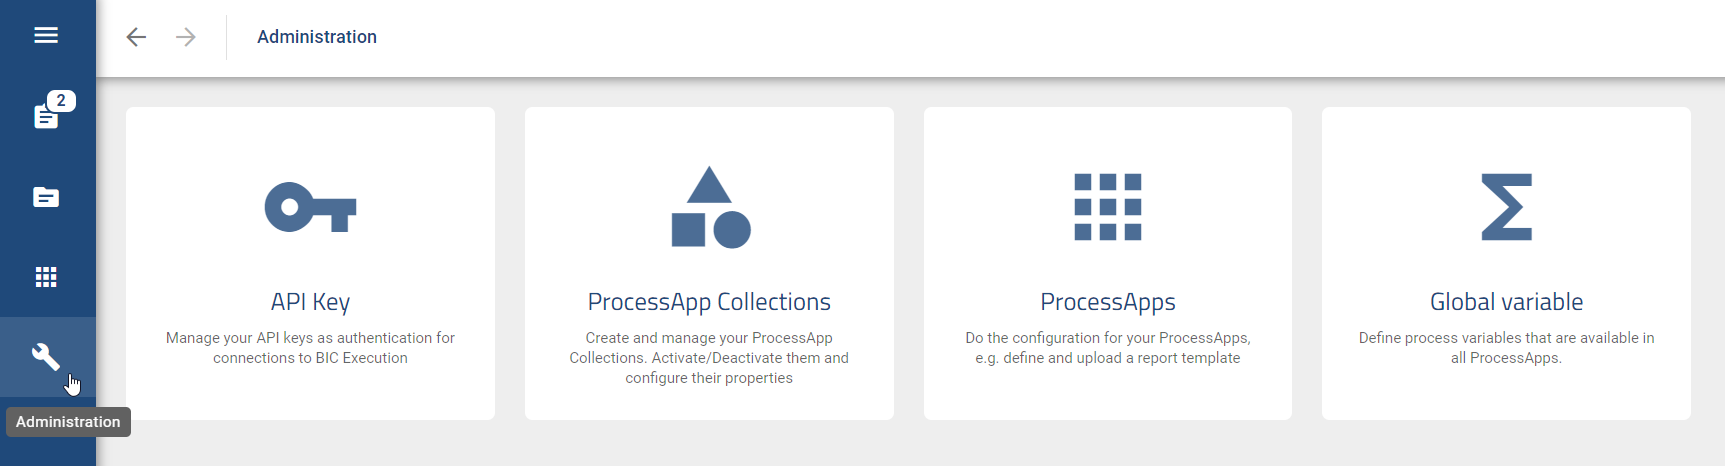
Here you see an overview of all the options you can manage.
Warning
The functions update case details, archive a case, open the case variables dialog and change values of case variables are available only to ProcessApp Administrators.
GBTEC Work Orchestrator API
How can I manage my API key?
To ensure that only authenticated users can access your GBTEC Work Orchestrator API, each ProcessApp Administrator can create an API key. This can then be used in the respective REST calls for authentication.
To create an API key, you must first navigate to the administration area. To do this, select the entry Administration from the menu. Select the API Key option.
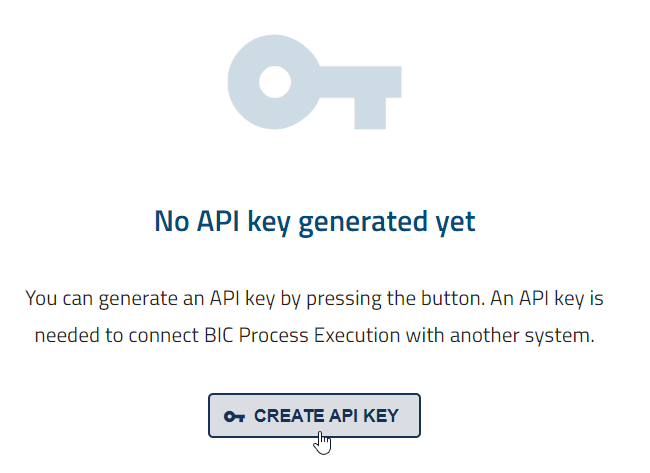
Here you can manage your personal API key. If no API key has been created yet, you can see this information in the main area. There you will also find the Create API Key button. If you click on it, a new key will be created.
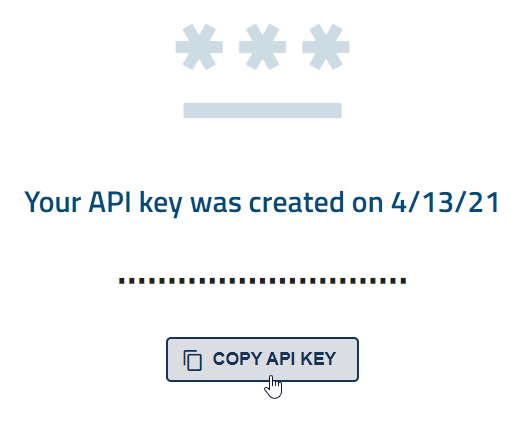
The generated key is now available and valid. The creation date of the key is now displayed in the main area. In addition, the Copy API Key button is displayed, which you can use to copy the key to the clipboard of your device.
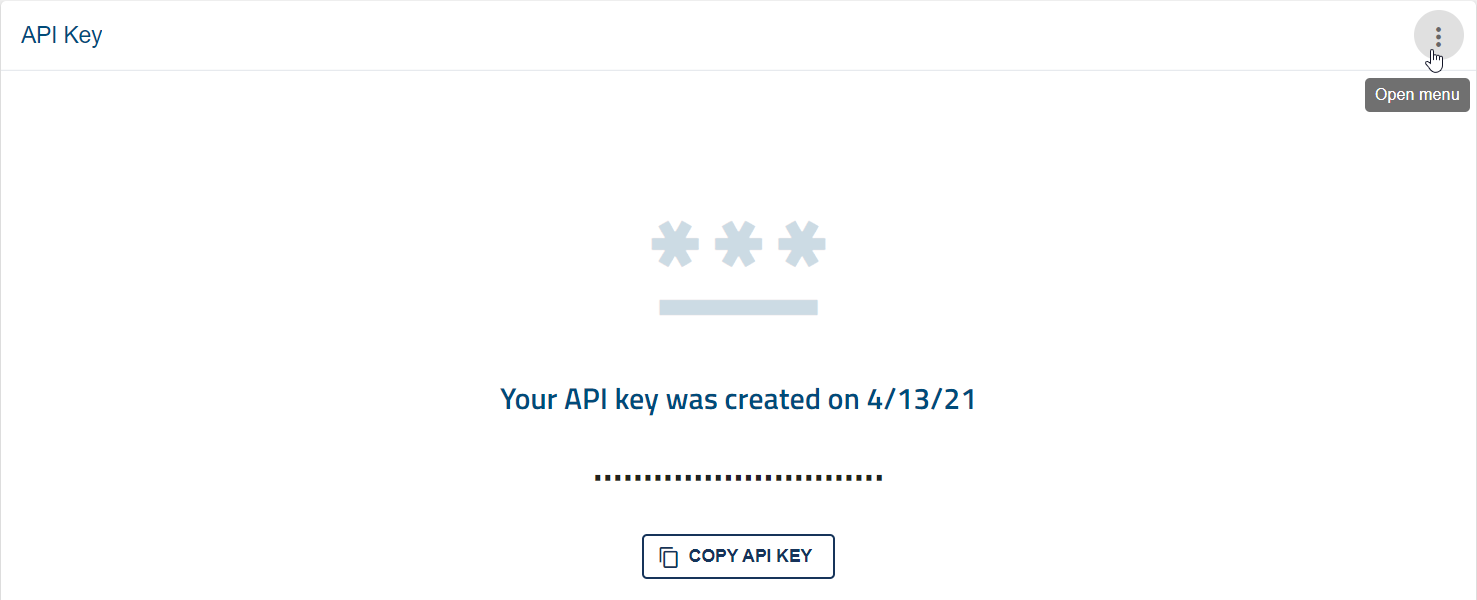
If the API Key is no longer used or is out of date, you can remove it. To do this, open the context menu with the three dots in the upper right corner of the main area.
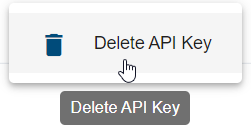
Then select the entry Delete API Key.
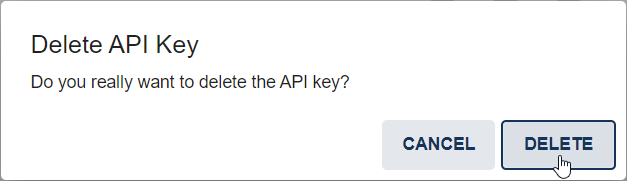
A dialog will appear. The API key is deleted and can no longer be used once you click Delete.
Within the administration area you can then create a new API key.
ProcessApp Collections
You can use ProcessApp Collections to group different ProcessApps together. For example, you might group the ProcessApps for a specific department into a ProcessApp Collection. A ProcessApp can be included in as many ProcessApp Collections as you like. In the administration, you can view a list of all available ProcessApp Collections and create new ones.
Tip
In the upcoming versions of GBTEC Work Orchestrator, the functions of ProcessApp Collections will be extended. You will be able to better structure your ProcessApps so that your users can more quickly identify and execute the cases that are relevant to them.
Where can I find an overview of all ProcessApp Collections?
If you want to get an overview of all ProcessApp Collections, you must first navigate to the Administration. Select the ProcessApp Collections option.
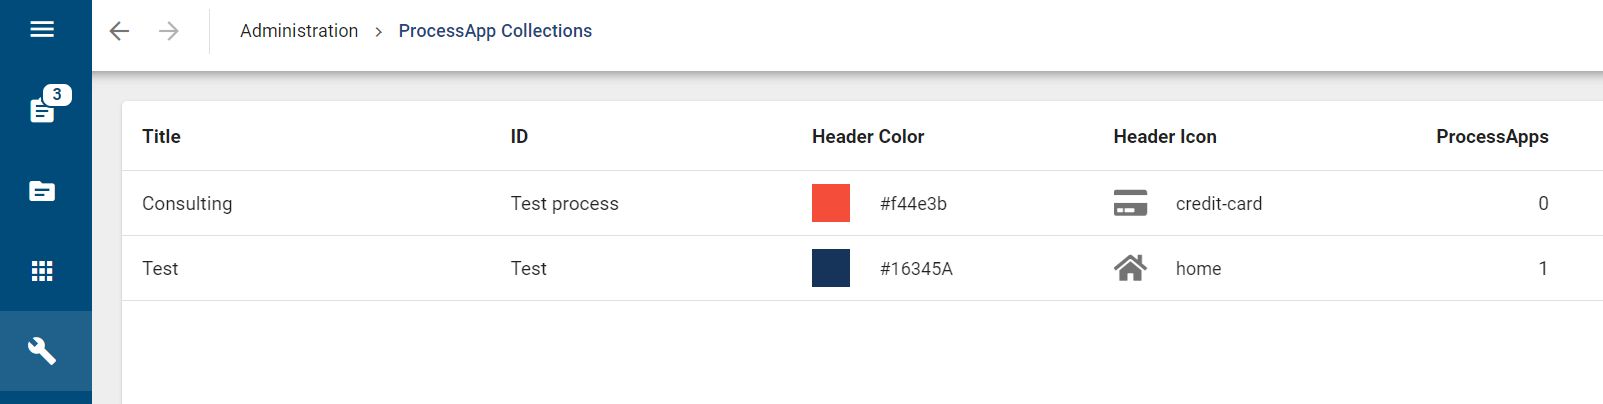
Here you can see an overview of all ProcessApp Collections in alphabetical order.
How can I create a new ProcessApp Collection?
To create a new ProcessApp Collection, navigate to the overview of all ProcessApp Collections. In the lower right corner, you find the Create new ProcessApp Collection button.
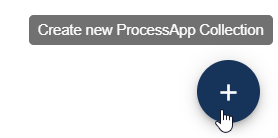
When you click it, a dialog will appear where you can enter the details of the new ProcessApp Collection.
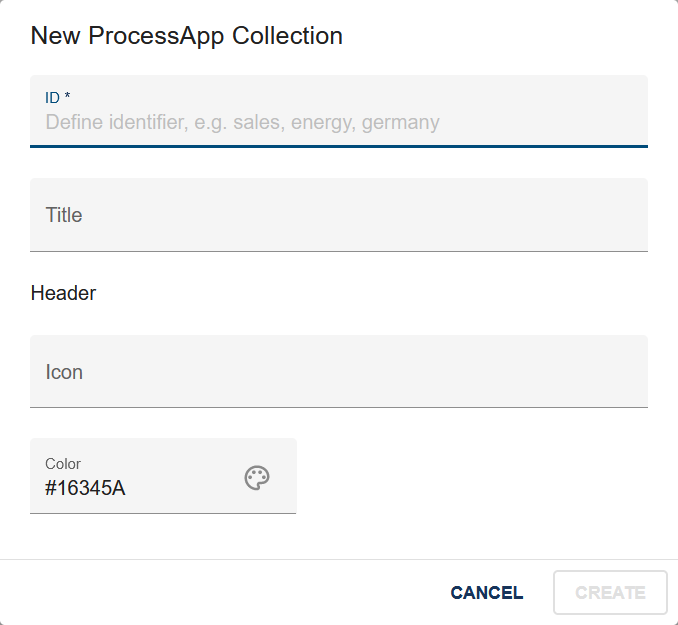
You must assign a unique ID to your ProcessApp Collection. This is used to add a process to your ProcessApp Collection.
The title will be seen by users when they use this ProcessApp Collection. You also have the option to use a free icon from Font Awesome (v5.15.4) and a color of your choice to make your ProcessApp Collection more prominent.
Then choose Create to create your Collection.
Note
You can choose from all Font Awesome v5.15.4 icons except the trademarked ones.
How can I edit a ProcessApp Collection?
To edit a ProcessApp Collection, navigate to the overview of all ProcessApp Collections. When you hover over an entry, a context menu appears on the right. Open the menu of the desired Collection and select Edit collection.

Then, a dialog opens, allowing you to edit the title, icon, and color of your Collection. Note that the ID is read-only. To confirm your changes, press the Save button. Use the Cancel button if you want to discard your changes.
Note
You can choose from all Font Awesome v5.15.4 icons except the trademarked ones.
How can I delete a ProcessApp Collection?
To delete a ProcessApp Collection, navigate to the overview of all ProcessApp Collections. Hover over the entry of the desired Collection. You can then open the context menu that appears to the right of the entry.

Here you will find the option Delete collection. When you select this option, a confirmation window appears. If you select Delete, your ProcessApp Collection will be deleted. The ProcessApps that it contains are not deleted.
ProcessApps
Where can I find a list of all ProcessApps?
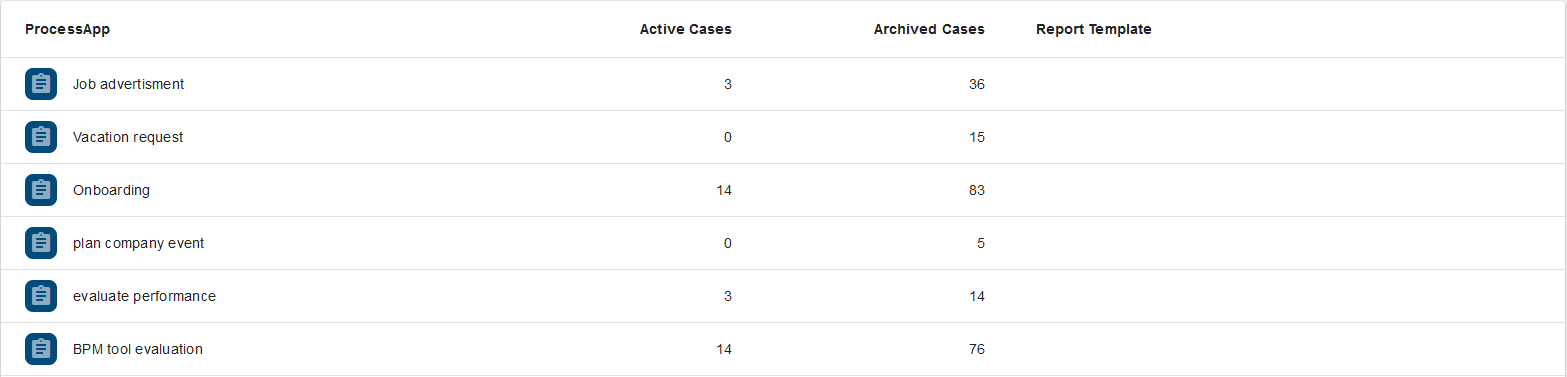
When you open the Administration menu item in the left menu bar with the ProcessApp Administrator user role, you will see predefined tiles. When you open the ProcessApps tile, all existing ProcessApps are listed. You can also see how many cases of each ProcessApp are currently active or archived.
Note
Please note that the Administration can only be used by users with the ProcessApp Administrator user role.
How can I open a ProcessApp directly in the corresponding diagram?
If you open the Administration menu item in the left menu bar with the ProcessApp Administrator user role, predefined tiles will be displayed. If you open the ProcessApps tile, all existing ProcessApps are listed. From this list, you can open a ProcessApp directly in the corresponding diagram in GBTEC Process Design.
To open a ProcessApp directly in the diagram, click the context menu (three dots) on the right side of the corresponding ProcessApp in the ProcessApp list, and then select the Open diagram button.

You will then be automatically redirected to the corresponding diagram in GBTEC Process Design, provided it is available.
How can I delete a ProcessApp?
When you open the Administration menu item in the left menu bar with the ProcessApp Administrator user role, you will see predefined tiles. Open the ProcessApps tile to display all existing ProcessApps.
You can delete a ProcessApp in the Administration if you have tested it in the Studio or in the test environment and no longer need the associated data. When you delete a ProcessApp, all created cases of the ProcessApp as well as the associated started and future tasks are removed.
Afterwards, the ProcessApp no longer appears in the ProcessApps menu area or in the ProcessApp overview in the Administration. The data is deleted only in your current environment, either Studio or test environment. This action cannot be undone.
Scroll to the ProcessApp you want to delete in the list of all ProcessApps and click on the context menu (three dots) on the right side to open the menu.

Select the Delete ProcessApp button in the menu.

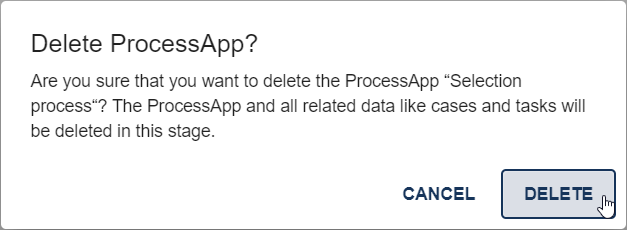
Confirm the process in the dialog that appears by clicking the Delete button. Alternatively, you can cancel the deletion by clicking the Cancel button.
Note
Please note that the Administration can only be used by users with the ProcessApp Administrator user role.
Variables
As a user with the ProcessApp Administrator user role, you can manage process variables via the Variables tile. To do this, open the Administration menu item in the left menu bar. Depending on their scope, you can use a variable in one, several, or all ProcessApps.

Where do I find an overview of all variables?
As a user with the ProcessApp Administrator user role, you can display an overview of all variables. To do this, open the Administration menu item in the left menu bar and select the Variables tile.
Variables are process variables. You create them centrally in the administration area of GBTEC Work Orchestrator. For each variable, you also define a scope. This scope determines in which ProcessApps the variable is available. In addition, you can set a separate value for each stage (Studio, Test and Production).
A list of all created variables will open. You can see the name, the scope, and the values of the variables for the corresponding stages. The variables are sorted alphabetically by name.
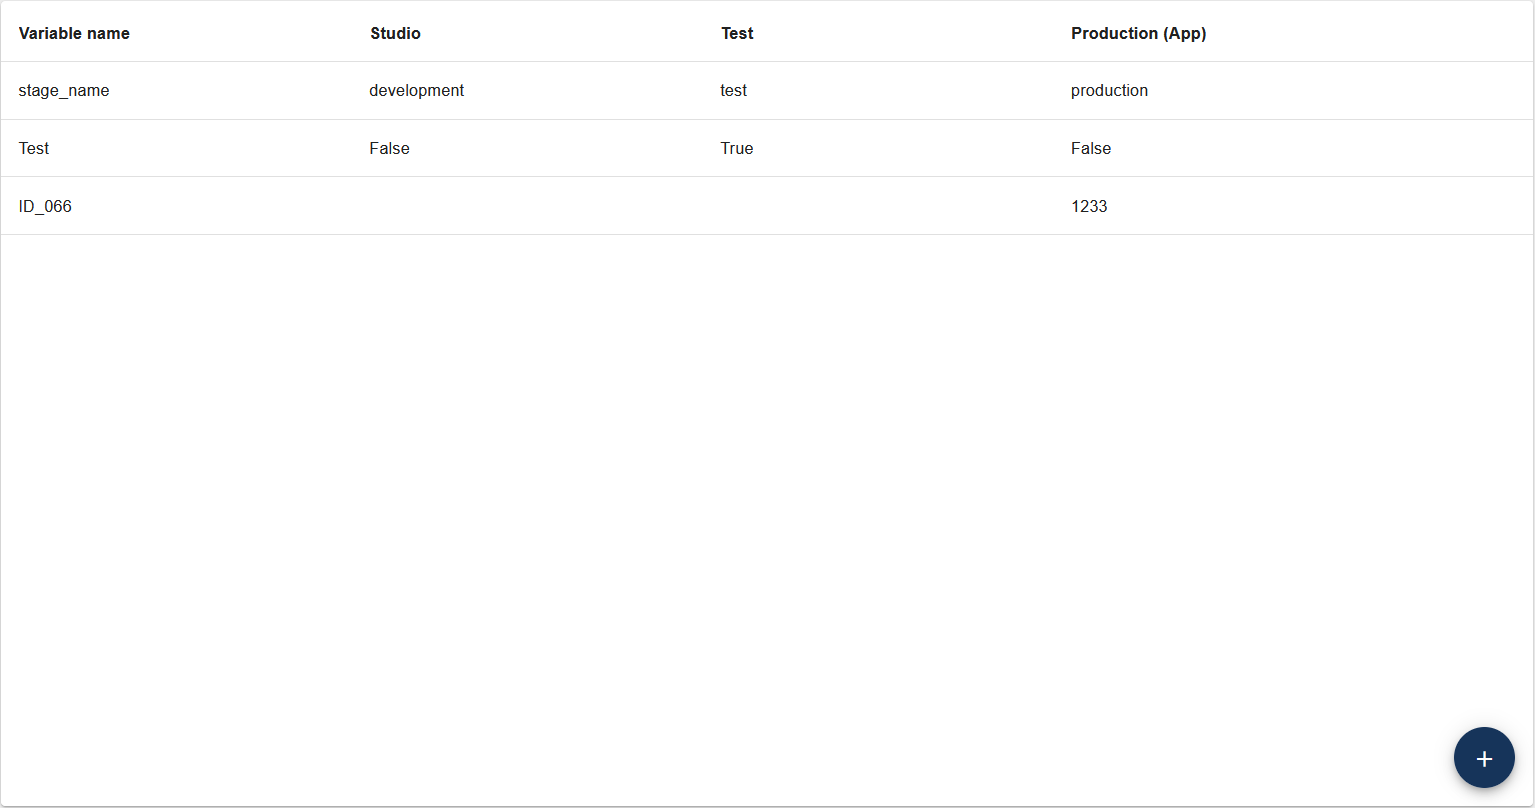
In the Scope column, the scope of a variable is displayed as a chip. Each scope has its own icon and color.
Global: green with a globe icon
Collection: blue with a folder icon
ProcessApp: red with a cube icon
For the Collection and ProcessApp scopes, the chip also displays the name of the Collection or ProcessApp.
Note
A variable can be assigned to a Collection or a ProcessApp. If this Collection or ProcessApp is deleted, the variable still remains in the list. The chip then displays the ID of the deleted Collection or ProcessApp instead of its name. In this case, delete the variable or adjust its scope. Only then does the variable work again.
How can I add a new variable?
As a user with the ProcessApp Administrator user role, you can add a new variable. To do this, open the Administration menu item in the left menu bar and select the Variables tile. In the lower right corner you will see a Plus button Add new variable.
When you select this button, a new dialog appears. There you enter the Variable name and define the Variable Scope.
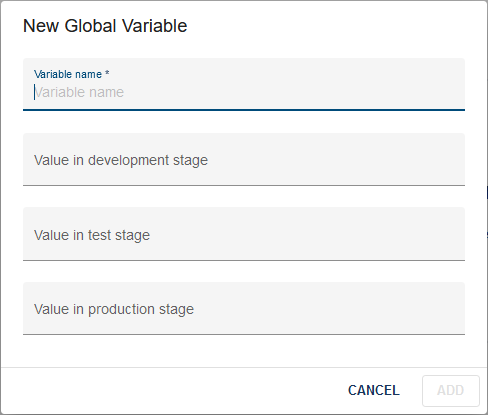
Select one of the following tiles to define the scope of the variable:
Global: the variable is available in all ProcessApps. No further selection is required.
Collection: the variable is only available in the ProcessApps of the selected Collection. An additional input field appears. There you enter the name of the desired ProcessApp Collection.
ProcessApp: the variable is only available in the selected ProcessApp. An additional dropdown list appears. There you select the desired ProcessApp.
Note
No suggestion list is available for the ProcessApp Collection selection. Enter the name of the ProcessApp Collection directly into the input field.
Afterwards, you can optionally enter the Value in Development stage, the Value in Test stage, and the Value in Production stage of the variable. These three fields are not mandatory.
If you want to save the variable, click the Add button. If you want to discard your changes, click the Cancel button instead.
If the name of a variable contains special characters, punctuation marks, or spaces (e.g., +, /, =, >, ?, ., ;), it cannot be saved. In addition, the name of a variable cannot contain accents and specific letters (e.g., á, à, ß, ç, ñ, ö, ü). In these cases, you will receive an error message in the lower right corner of the page.
Hint
You can create several variables with the same name if their scope differs. For example, you can create a variable SAP_URL with the Global scope and another variable SAP_URL with the ProcessApp scope. If the name of an existing variable contains a dot, the dot is replaced by an underscore. If this creates a duplicate with the same name and the same scope, the variable is removed.
Note
If you do not specify a value for one (or more) stage(s), the value is stored as an empty string.
How can I edit a variable?
As a user with the ProcessApp Administrator user role, you can edit existing variables. To do this, open the Administration menu item in the left menu bar and select the Variables tile. In the overview, click the context menu (three dots) of the desired variable and select the Edit variable option.

A dialog will appear. There you can edit the name, the scope, and the values of the various stages of the variable. The current scope is already preselected. If the variable is assigned to the Collection or ProcessApp scope, the dialog also displays the assigned Collection or ProcessApp.
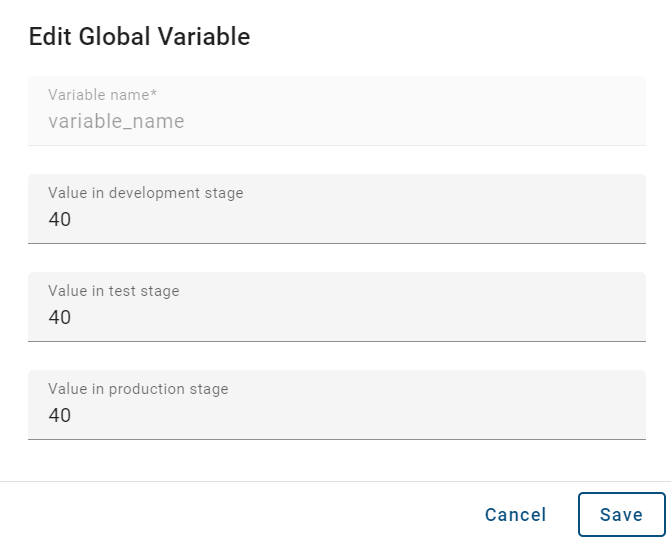
If you change the scope, the dialog automatically adjusts the required input fields.
If you want to save the changes, click the Save button. If you want to discard the changes, click the Cancel button instead.
Hint
Changing the variable name can have an effect on running cases. Processes that are currently accessing the initial name of the variable will no longer recognize it after the change.
Warning
Changing the scope of a variable can have an effect on running processes and existing ProcessApps that are currently accessing this variable.
How can I delete a variable?
As a user with the ProcessApp Administrator user role, you can delete variables. To do this, open the Administration menu item in the left menu bar and select the Variables tile. Open the context menu (three dots) of the desired variable and click on the Delete variable option.

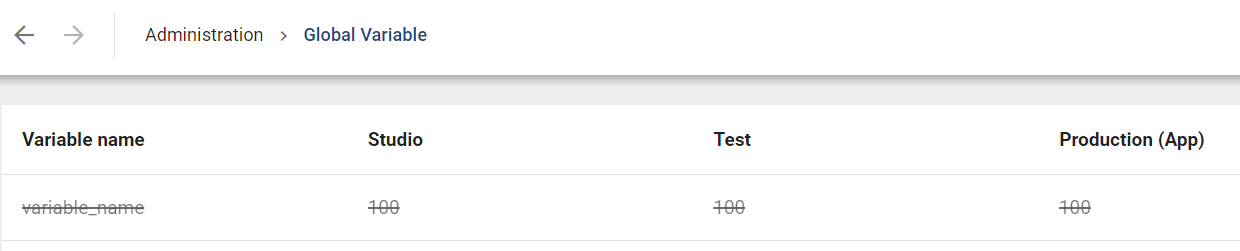
A dialog will appear. There you must confirm the deletion. Once you click the Delete button, the deleted variable will appear in your list with a strikethrough. It will be permanently removed when you reload. If a variable has been deleted by another user, it will also appear with a strikethrough in your list.
How are variables used in the process?
You can use a placeholder in your process that is not defined within the process. The system then checks to see if a variable with the provided name exists. The system searches the following scopes in this order until a value is found:
locally in the current task (instance level)
the ProcessApp scope of the current ProcessApp
the Collection scope of a Collection that the current ProcessApp is assigned to
the Global scope
For the scope found, the system then requests the value for the stage at which the case is being executed.
If no value exists for any of these scopes, the variable cannot be resolved. In this case, the placeholder is replaced with an empty string.
Note
The current ProcessApp can be assigned to several Collections. If more than one of these Collections has a Collection scoped variable for the searched variable, no unambiguous value can be determined. In this case, this scope is treated as if no value exists. The search then continues with the next scope.
If a variable is modified within a task, the value is modified within the context of that task. If a variable is not modified within a task, its value is not transferred to the context of the case.
The value of a variable can be changed within the context of a task. If the task is not yet complete, the change is only valid within that task.
System Monitoring
How can I analyze the number of executed tasks?
When you open the Administration menu item in the left menu bar as a ProcessApp Administrator, you will see a collection of predefined tiles. The System Monitoring tile allows you to see how many tasks have been executed in total to help you keep a better overview of your license plan.
When you click the System Monitoring tile, you will see an overview of the number of tasks executed and their types. A stacked bar chart shows you how many tasks have been executed in the last 12 months. The horizontal axis represents the individual months, while the vertical axis shows the number of tasks. The tasks are grouped by type, including Script tasks, Service tasks, Send tasks, and DMN tasks. The exact number of tasks executed per month and per type can be seen by hovering over the bars.
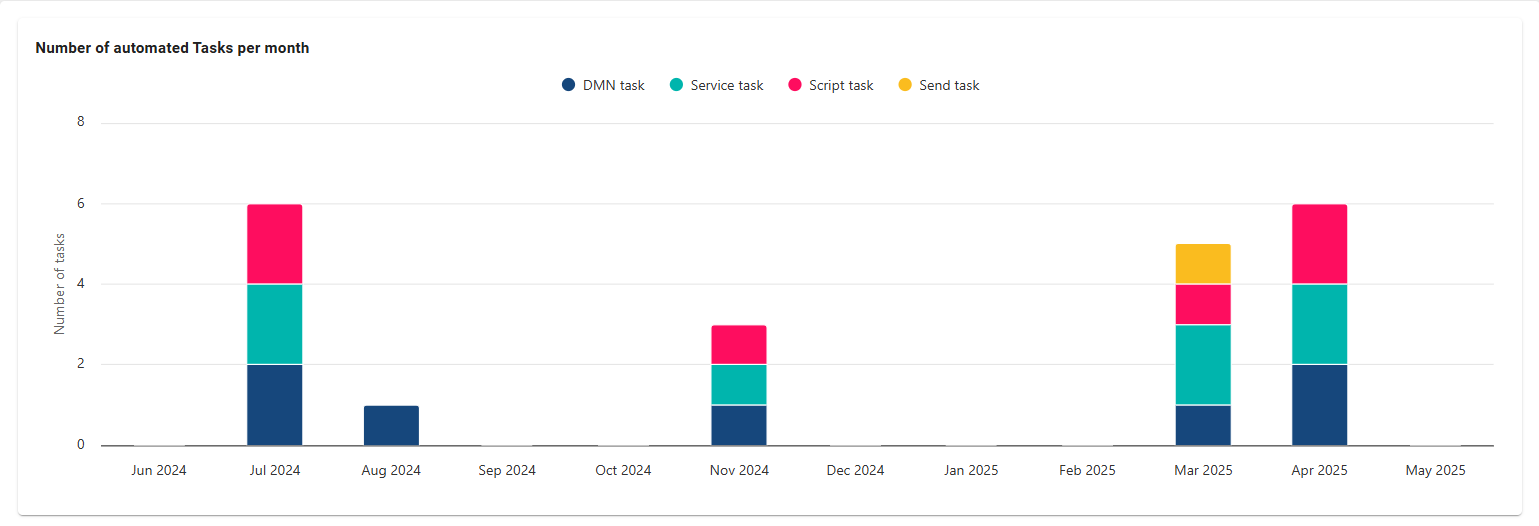
It is also possible to filter the system monitoring. To hide a specific task type from the overview, click on it in the legend above the bar chart. To show the task type again, click on the name in the legend again.
Hint
Please note that only data from version 8.0.0 can be displayed in the system monitoring.
Data Storage
How can I create a data table?
When you open the Administration menu in the left menu bar with the user role ProcessApp Administrator, a set of predefined tiles is shown. In the Data Storage tile, you can upload Excel files to create and store data tables in the system.
After clicking the Data Storage tile, a central workspace opens. This workspace shows a list of all existing data tables. If there are no data tables yet, the list is empty. To create a new data table, click the plus icon in the bottom right. You can also use the Add new data table button to add a new data table.
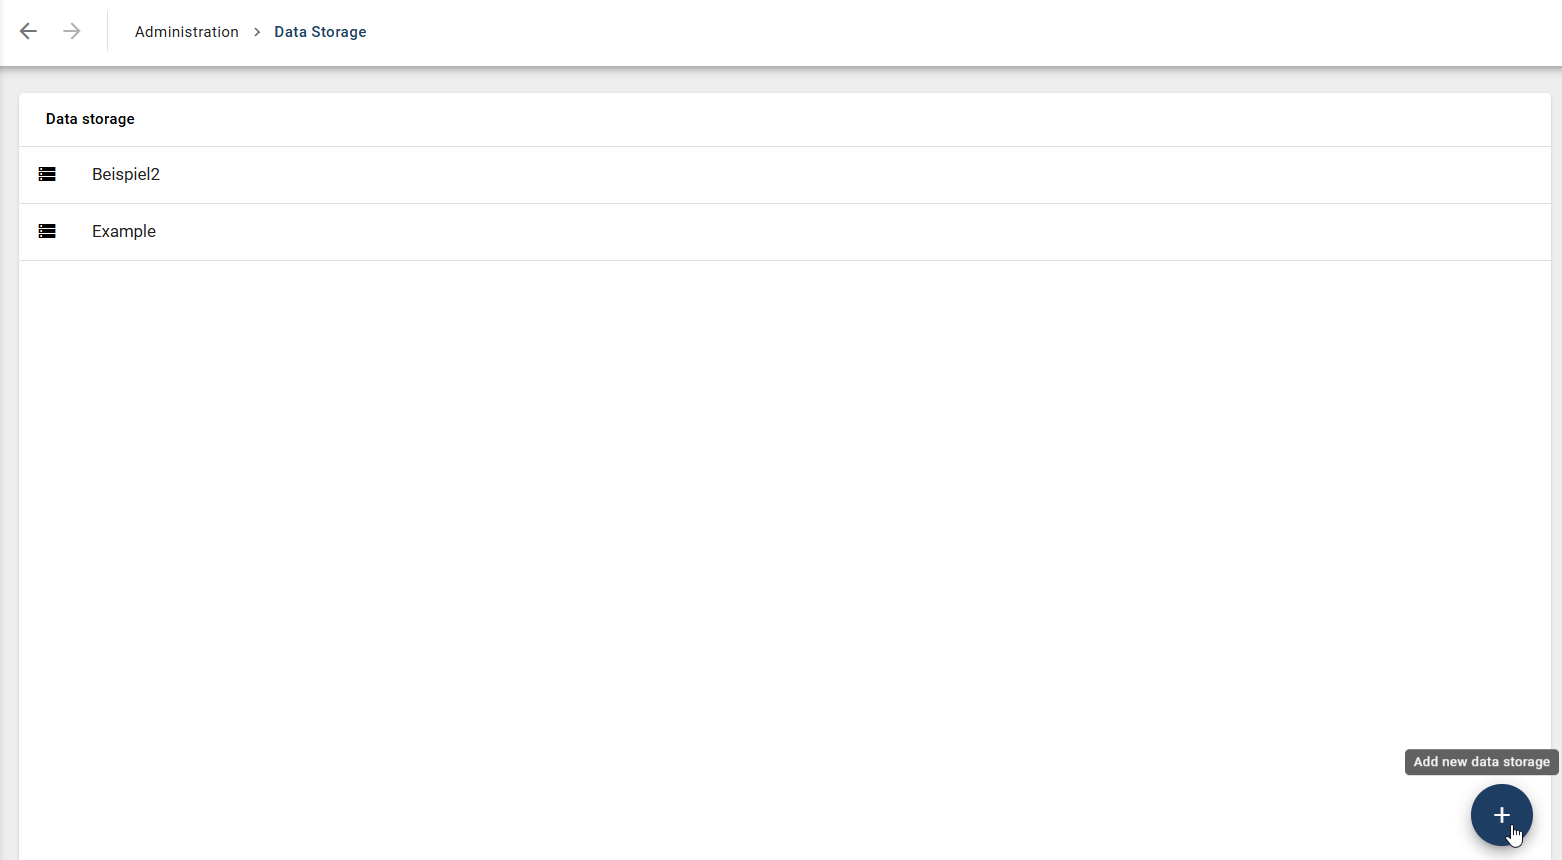
After clicking the button, a dialog opens for creating a new data table in the data storage. In this dialog, you can upload a data table file by using the first input field. Only Excel files are supported. In the lower input field, you can enter a name for the data table.
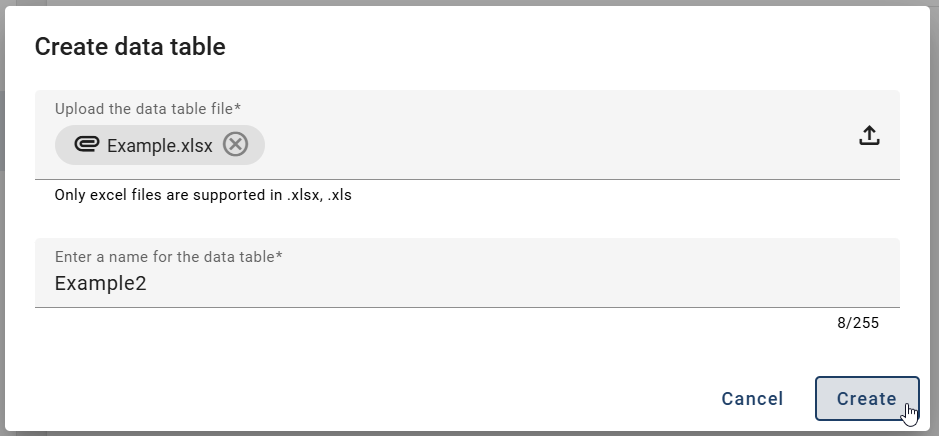
To create the data table, confirm the dialog by clicking Create. To cancel the process, click Cancel. After successful creation, a short confirmation message is displayed at the lower right of the screen. The newly created data table then appears directly in the list of data tables.
Note
Please note that an interrupted import, for example due to a restart of the GBTEC Work Orchestrator Service, may result in the import being only partially completed. Already imported data remains available, and affected data tables are marked with a status indicating the issue.
How can I delete a data table?
When you open the Administration menu item in the left menu bar with the user role ProcessApp Administrator, a collection of predefined tiles is displayed. In the Data Storage tile, you can see all data tables and delete them.
After clicking the Data Storage tile, a central workspace opens. This workspace shows a list of all existing data tables. If there are no data tables, the list stays empty. To delete a data table, move the mouse over the entry and click the three dots.
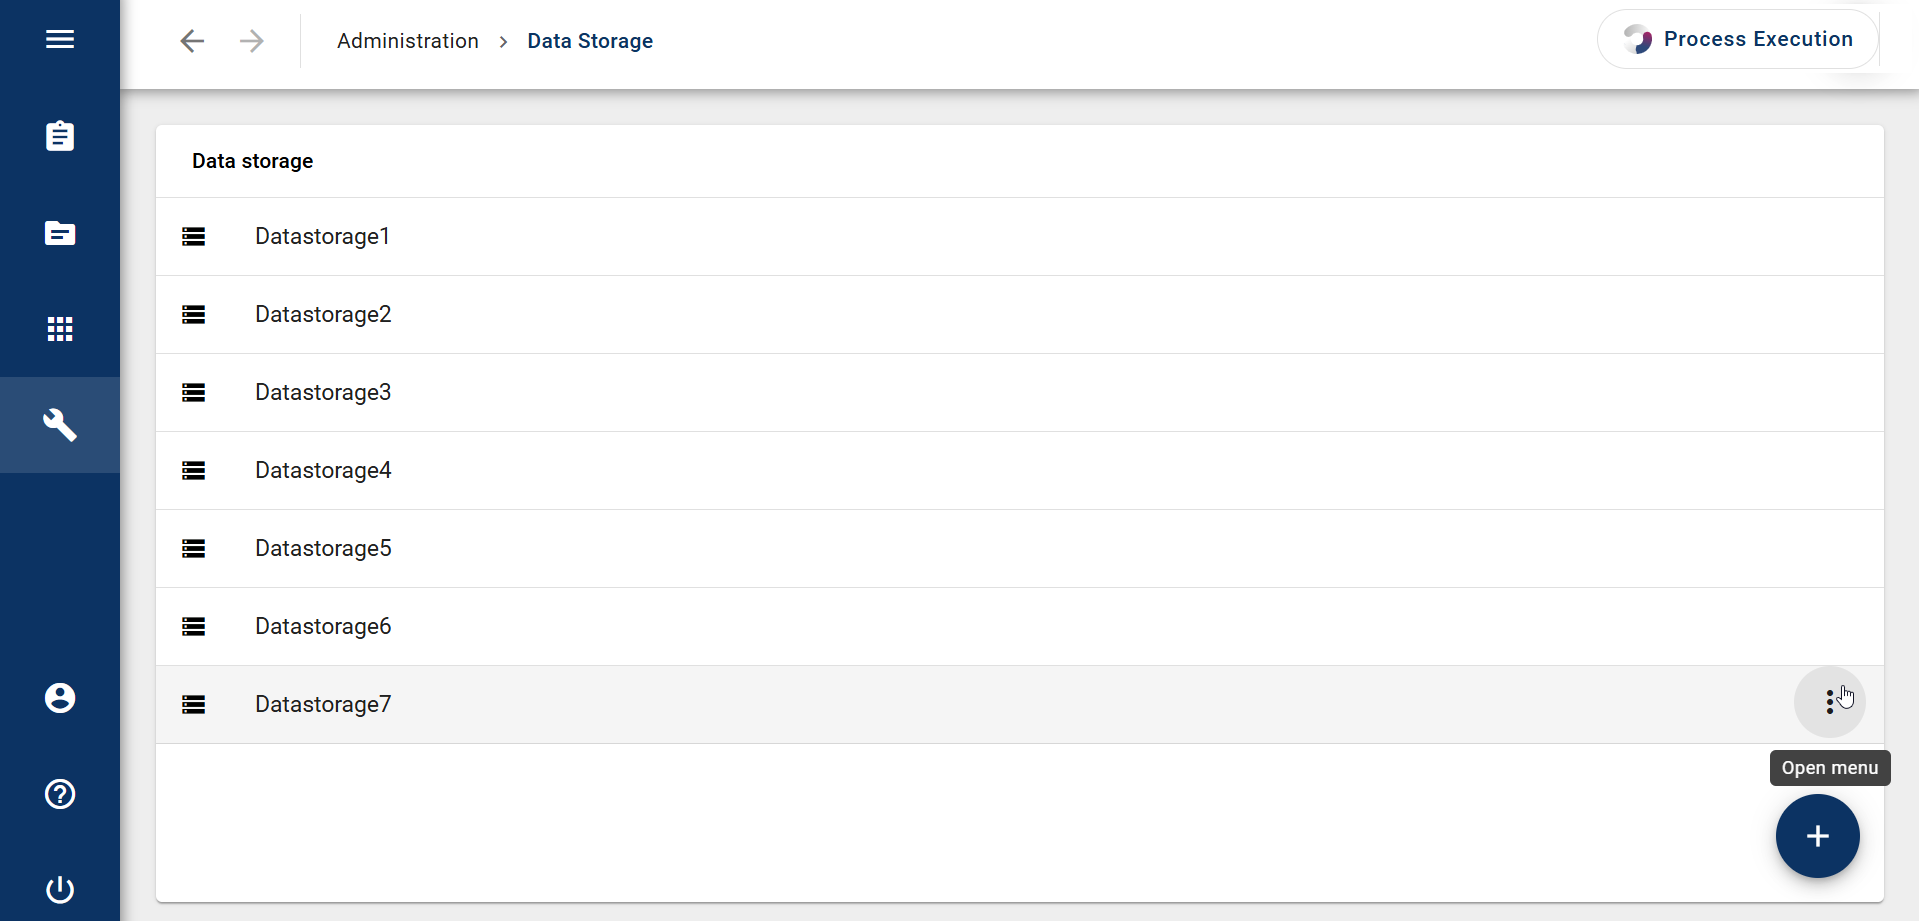
The menu opens and the option Delete is shown. Click Delete. A dialog window opens. To permanently delete the data table, click Delete again. To cancel the process, click Cancel. After the data table is deleted, a confirmation message appears in the lower right corner of the screen, and the data table is removed from the list.
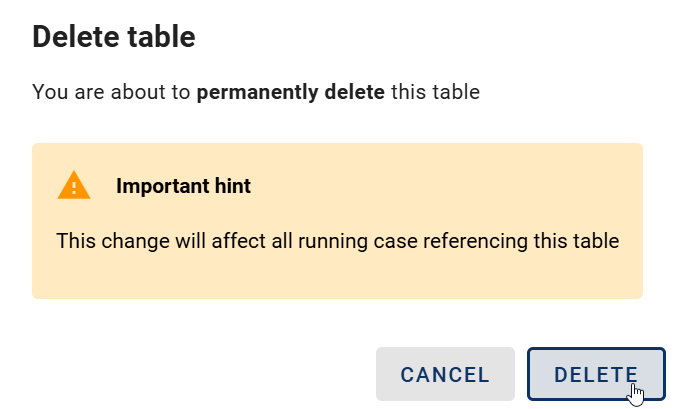
Warning
Please note that this action cannot be undone and will affect all running cases using this data table.
MCP Servers
When you open the Administration menu item in the left menu bar in Work Orchestrator with the ProcessApp Administrator user role, you will see a collection of predefined tiles. When you click the MCP Servers tile, you get an overview of all registered internal MCP servers.

An MCP server provides tools that a user with the ProcessApp Creator user role can call in a service task in GBTEC Process Design without technical knowledge of REST endpoints.
Internal MCP servers are MCP servers provided by GBTEC. They are registered centrally by GBTEC. You can activate or deactivate them, but you cannot add them yourself. Further internal MCP servers provided by GBTEC will be added in upcoming releases.
External MCP servers, which you can register yourself, will be supported in one of the upcoming releases.
In the overview, you can view all registered MCP servers and activate or deactivate an MCP server.
More information about these functions is in the linked sections.
Where can I find an overview of all MCP servers?
When you open the Administration menu item in the left menu bar with the ProcessApp Administrator user role, you will see predefined tiles. When you open the MCP Servers tile, all registered internal MCP servers are listed.

The following information is displayed for each MCP server:
Enabled: Shows whether the MCP server is activated and lets you activate or deactivate it.
Server: The name of the MCP server.
Type: The type of the MCP server. Currently, there are only internal MCP servers provided by GBTEC.
Status: The connection status of the MCP server. Possible values are Connected, Auth. failed, and Unreachable.
Tools: The number of imported tools of the MCP server.
The list of MCP servers is sorted alphabetically by server name.
Note
If no MCP server has been registered yet, the list remains empty and a corresponding message is displayed.
How can I activate or deactivate an MCP server?
When you open the Administration menu item in the left menu bar in Work Orchestrator with the ProcessApp Administrator user role and select the MCP Servers tile, you can activate or deactivate each MCP server using the toggle in the Enabled column. When you hover over the toggle, a tooltip shows Enable or Disable, depending on the current status. Newly registered MCP servers are disabled by default.

When you activate an MCP server, a user with the ProcessApp Creator user role can select it in the service task in GBTEC Process Design and call one of its tools. All tools of the server are immediately available. No additional activation of individual tools is required. When you deactivate an MCP server, it is no longer shown to the ProcessApp Creator in the service task.
Hint
If you deactivate an MCP server whose tool is already used in a service task, this is not indicated in the configuration of the service task.