Tasks
Users who are assigned as “Examiner” or “Responsible” in the governance attributes of a diagram or catalog object can work on different tasks in the Tasks menu item. This includes approving or rejecting a publication or depublication, as well as working on resubmission tasks. For more information about tasks, see the linked sections.
Governance participants can work on their tasks directly in the Tasks menu item. They can also access pending and completed (de-)publication tasks through diagrams or the catalog. All user roles except Reader can view and work on assigned tasks if they are defined as an examination instance for a specific diagram or catalog object.
How can I view my tasks?
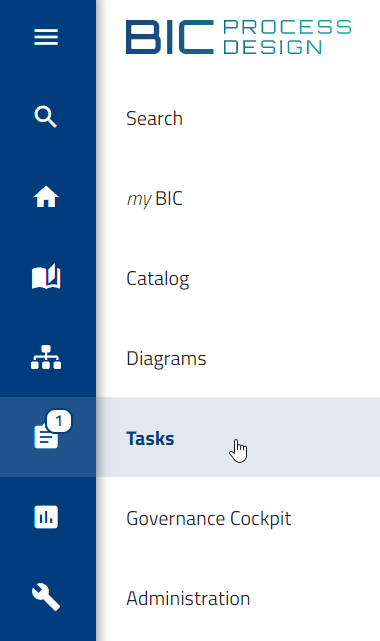
To view your tasks, you need at least the Reviewer user role. Select the Tasks menu item in the left menu bar. There, you get a complete overview of all your pending and completed tasks.
You can use the top bar to switch between different task views. In addition to your own open tasks, you can also see tasks for which you are entered as a deputy, tasks from group assignments, and tasks that have already been completed. The number of your open tasks is also shown directly in the menu bar.

Each of these task lists sorts the entries in descending order by start date. This means that the most recent tasks are always shown at the top. For each task, you can see the name of the diagram or catalog object, the task description, and the start date. In the Done tasks tab, the start date and end date are shown.
To make it easier to see whether a task belongs to a diagram or a catalog object, the matching icon is shown next to the name. You can also click the task to go directly to the corresponding diagram or catalog object.
Note
If you have purchased and activated BIC EAM, tasks related to context diagrams can also be assigned to you. When you click such a task, you are redirected to the matching catalog or diagram view, depending on how the context diagram was created.
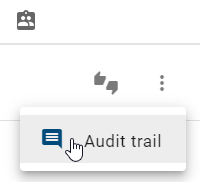
A context menu is shown for each task in the right sidebar. When you click the Audit trail option there, a window opens with more details about the task.
In the audit trail, comments from users in earlier workflow steps are shown next to the name of the diagram or catalog object. The first comment in the history always shows the publishing or depublishing reason that was entered when the workflow was started. Your current task is shown above the history. In addition, the time when the task was received is stored for every task. For completed tasks, the completion time is also stored.
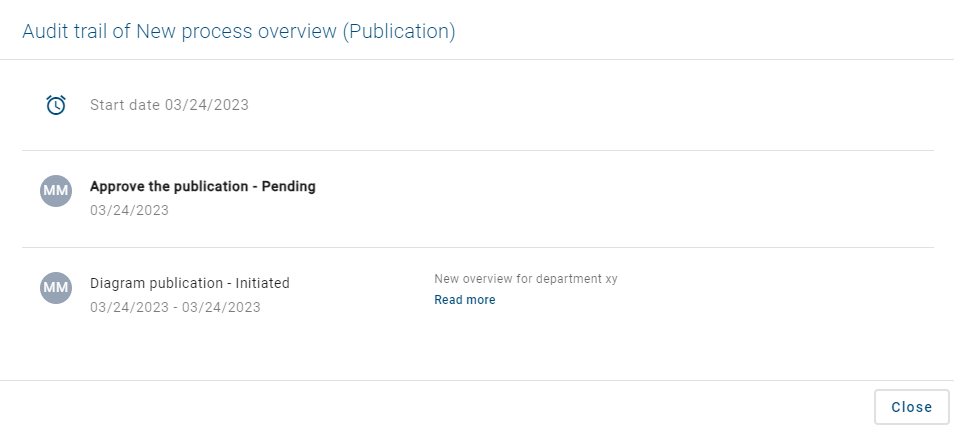
You can leave the audit trail by clicking the Close button.
How do I work with my tasks?
As a user with at least the Reviewer user role, you can work on the tasks assigned to you. You can do this directly in the Tasks menu item in the left menu bar or in the diagram or catalog.
Completing tasks directly:
To complete tasks directly without going to the related diagram or catalog object, first open the Tasks menu item in the left menu bar. You will then see a list of all your pending tasks. In the right sidebar, you will find the Approve or reject task button for each task.

When you click this button, a dialog opens. There, you can approve or reject the task and enter a comment. If you reject the task, the comment field is required. You can then complete the task by clicking the Confirm button. To cancel the task, click the Abort button.
After you complete a task, it is removed from the task list. The governance participants are informed by email, depending on the outcome of the task. For more information, see here.
Completing tasks in the diagram or in the catalog:
To complete tasks in the diagram or catalog, first open the Tasks menu item in the left menu bar. You will then see a list of all your pending tasks. If you click a task, you will be taken directly to the corresponding diagram or catalog object.

For a publishing task, you see the diagram or catalog object in preview. For a resubmission or depublication task, you see the published version of the diagram or catalog object.
In all cases, you can use the Approve or reject task button to approve or reject the further publication or depublication. In the dialog that opens, you can make your choice and optionally leave a comment. If you reject the task, the comment field is required. You can then complete the task by clicking the Confirm button. To cancel the task, click the Abort button.

After you complete a task, it is removed from the task list. The governance participants are informed by email, depending on the outcome of the task. For more information, see here.
Note
Optionally, additional user authentication can be required when processing tasks. In this case, the user must confirm their identity again when, for example, a quality assurance task is processed as part of the process release. You cannot enable additional authentication yourself. Please contact us.
How will I be informed about my tasks?
When you are logged in to BIC Process Design, the Tasks menu item in the left menu bar informs you about your pending tasks.
There, you can see all your open tasks at a glance. A number next to the task icon shows them. If you receive new tasks during your session, the number in the menu bar increases.
If you are entered as the Responsible in the governance attributes of a diagram or catalog object, you will receive an email immediately when a task is finally approved or rejected by you. If you are entered as an Examiner in the governance attributes of a diagram or catalog object, you will only receive an immediate email for approved tasks if the Responsible has also approved them.
You will also receive an email the next day with a summary list of new tasks if one or more tasks have been assigned to you and have not yet been started.
By default, you will also receive a reminder email about pending tasks every seven days. This can be changed by the administrator.
How do I work with my deputy tasks?
To work with deputy tasks, you must be defined as a deputy by another user in their profile. You can then claim and work on deputy tasks.
As a user with at least the Reviewer user role, go to the Tasks menu item in the left menu bar. In the header of the tasks, you will find the Deputy tasks tab in the middle.

When you open this tab, you will see all tasks for which you are assigned as a deputy. Deputy tasks that have already been claimed by another user show that user’s initials. This can happen if your user group has been assigned as a deputy. Move the mouse over the initials to see the full user name. If a task has not yet been claimed, you can select the Claim task option.

The task will then show your initials and will appear in your task list in the My tasks tab on the left. There, you can work on the task like your own task.
How do I work with my group tasks?
In addition to individual users, user groups can also receive a task if they are entered as an Examiner or Responsible in the governance attributes of a diagram or catalog object. In this case, every user who was a member of the group when the workflow started can see the corresponding workflow task in the Group tasks tab on the right.
As a user with at least the Reviewer user role, go to the Tasks menu item in the left menu bar. Open the group task list by switching to the Group tasks tab on the right.

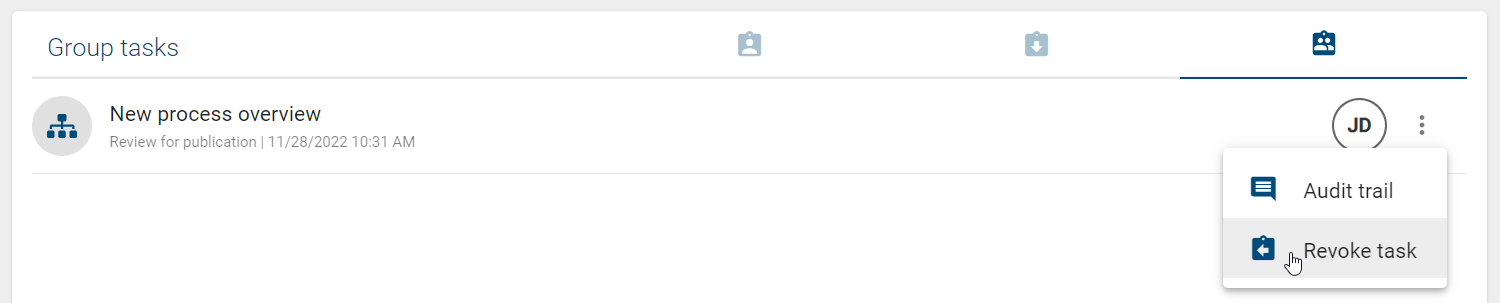
Here, you will see all your pending group tasks. Group members can claim the tasks and then work on them. Group tasks that have already been claimed by a user are marked with that user’s initials. If you move the mouse over the initials, the full user name is shown. If a group task has not yet been claimed, you can choose the Claim task option.

The claimed task will then appear in your task list in the My tasks tab on the left. There, you can work on it. Your initials will also appear on the task in the group task list. This way, the other group members can see that you are working on the task.

If you have claimed a group task, you can undo this again. To do this, choose the Revoke task option in the context menu of the task in the group task list. Then all users of the corresponding user group can claim the task again.
When group tasks are completed, they disappear from the task lists of all group members.
Note
If a user group has only one member, the corresponding workflow tasks do not appear in Group tasks. Instead, they appear in the Tasks of the corresponding user under the My tasks tab.
Hint
Please note that users who are added to a user group later do not get access to group tasks that have already started. Tasks are only shown in the task list for users who were part of the group when the group was created. Users who are added later only see tasks that are generated after they were added. Existing tasks remain invisible to these users.
How do I work with resubmission tasks?
If a diagram or catalog object has a limited validity period, the responsible user or user group receives an examination task for resubmission. The affected users can see this in the task list.
As a user with at least the Reviewer user role, first open the Tasks menu item in the left menu bar. A list of all pending tasks will appear. The resubmission task is marked with the task description Decide resubmission. It is available to users who are entered as Responsible in the governance attributes of a diagram or catalog object. To work on the resubmission task, click the Approve or reject task button in the right sidebar.

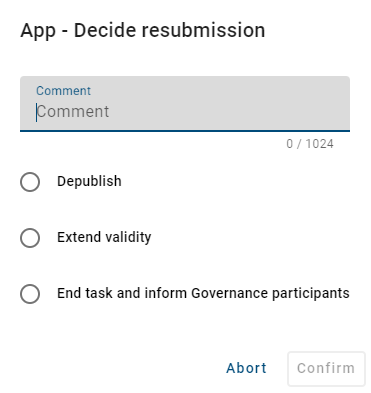
After you click the button, a dialog opens. The following options are available:
Depublish: Select this option to remove the diagram or catalog object from the publication and preview stages. A catalog object is only depublished if it is not used in any other diagram in the publication stage. Unlike a normal depublication, no additional confirmation is required from the responsible user or group, because only they can work on the resubmission. The depublication starts as soon as the “Valid to” date of the diagram or catalog object is reached.
Extend validity: Select this option to extend the validity of the diagram or catalog object. The original “Valid to” date is extended by one year and is updated in publication immediately after confirmation. In addition, archive entries are created.
End task and inform Governance participants: Select this option to end the resubmission task and inform governance participants about your decision by email.
The End task and inform Governance participants option requires a comment. For the other options, a comment is optional. Then click Confirm to finish the examination.
After that, for the Depublish and End task and inform Governance participants options, an email is sent to all recipients maintained in the governance attributes of the diagram or catalog object. The email includes the selected option, the optional comment, and the responsible person.
Alternatively, you can click the resubmission task to navigate to the corresponding diagram or catalog object. There, the Approve or reject task button is also shown. If the validity period of the diagram or catalog object, or of the catalog objects it contains, has already expired, you will see a hint about this.

If you think a revision is necessary, contact the responsible author and extend the validity of the diagram or catalog object. This gives the author time to revise it. Of course, you can also depublish the object in case of a revision, but this can create a process gap until the revision is published.
If the resubmission task is not processed, there is no automatic depublication. A diagram or catalog object can still be published or depublished while a resubmission workflow is active. In this case, the active resubmission process is canceled, including the resulting tasks that are still open and now outdated. This behavior is explained in more detail here.
For a general and detailed description of tasks, see the corresponding section.
Note
As an Administrator, you can also see all resubmission workflows in the list of all workflows in the Governance Cockpit.
What happens if I initiate a publication while a resubmission workflow is active?
When a resubmission workflow for a published object, either a diagram or catalog object, is active, the object can still be published again. In this case, the active resubmission process, including the resulting open and now outdated tasks, will be ended. Users will see the new version in the publication stage as soon as the publication workflow is finished.
Please note that the validity is not updated automatically. So if the “Valid to” attribute of the object has not been updated manually before the new version is published, a new resubmission workflow will be started for the object. The Responsible receives a new resubmission task and the corresponding notifications will be sent. The responsible person can then extend the validity by one year while working on the task.
So, if a resubmission workflow is active for a diagram or catalog object and you update it manually by publishing a new version, make sure to adjust the validity date. This helps you avoid starting a new resubmission workflow directly for the new version.
How can I view completed tasks?
To view completed tasks, you need at least the Reviewer user role. Open the Tasks menu item in the left menu bar. Then switch to the Done tasks tab. There, you can see all tasks that you have already completed.
In the task list, you can see what type of task it was. This includes, for example, resubmission, publication, or depublication tasks. You can also see whether the task belongs to a diagram or a catalog object. This is shown by the corresponding icon next to the name.
For each completed task, the start date and the end date are displayed. This allows you to see when the task started and when it was completed. You can click on a completed task to navigate directly to the related diagram or catalog object.
In addition, you can open the Audit trail from the context menu in the right sidebar. There, you can see more details about the task and its history.
Note
If you have purchased and activated BIC EAM, completed tasks related to context diagrams may also be shown. Depending on whether the context diagram was created in the catalog or modeled, you will be redirected to the corresponding catalog or diagram view when clicking on the task.