Governance Cockpit
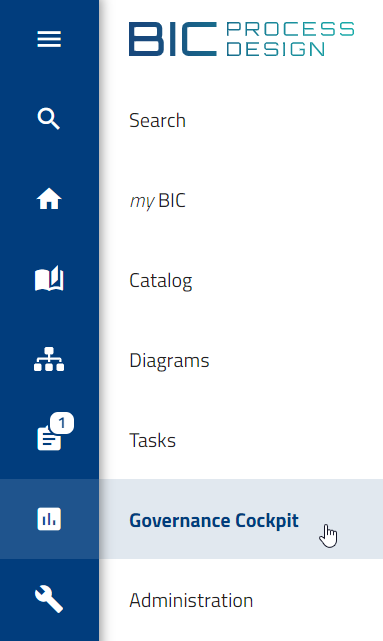
Users with the Reviewer role or higher can access their release workflows (publication and depublication) through the Governance Cockpit menu item in the left menu bar. The release workflows are displayed in a list. You can click an entry to open the details and download the related archive. In the right sidebar, the Filter panel is available. There, you can search for specific workflows or apply filters to narrow down the list based on specific criteria.
If you have the Administrator or Editor role, you have access to all workflows (publication, depublication, and resubmission) as well as the views Analysis and Roadmap. In addition, you can export all workflow tasks, abort workflows, and delegate workflows to other users.
What information can I get from the Governance Cockpit?
The Governance Cockpit shows a list of release workflows for users with the Reviewer role or higher. This list includes all publication and depublication workflows in which you are currently involved or were involved in the past. A workflow is also shown if you were involved before and later delegated the related task to another user.
For users with the Administrator or Editor role, the Governance Cockpit shows all workflows, including resubmission workflows. In addition, change workflows are shown that were carried out as part of the bulk update for diagrams in the Preview or Publication stage.
To open the list of release workflows, go to the Governance Cockpit menu item in the left menu bar.
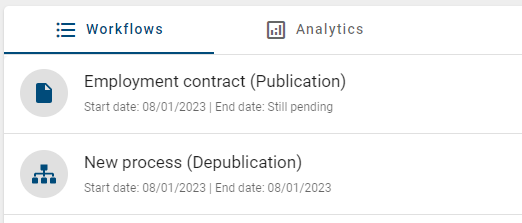
For each entry, you can see the workflow name, workflow type, and the start and end dates. For change workflows created by bulk updates, the number of updated diagrams is shown instead of the workflow name. The icon on the left side of each entry shows whether the workflow is related to a catalog object or a diagram. Diagram workflows are represented by a diagram icon, while catalog object workflows are represented by the corresponding object icon.
The start date of a workflow shows when the workflow was started. Resubmission tasks are started by the system and begin before the Valid to date defined in the attributes of the related diagram or catalog object. The end date refers either to the Valid from date of the diagram or catalog object, or to the date when the workflow was completed, depending on which date is later.
To view more information about a workflow, select an entry from the list of release workflows. You are then taken directly to the audit trail of the selected workflow. The audit trail shows detailed information about the workflow history and allows you, through the Options panel in the right sidebar, to open the related diagram or catalog object and download the archive. Users with the Administrator or Editor role can also delegate a pending workflow task directly from the audit trail or abort the workflow manually.
Tip
In many views, for example in Search, Diagrams, Catalog, or Governance Cockpit, you will see a right sidebar. You can adjust its width by moving the mouse to the left edge until the cursor changes, then holding the left mouse button and dragging the edge to the left or right. You can also close the sidebar using the Collapse button next to the tabs at the top and open it again using the Open button. When reopened, the sidebar automatically restores the width that was set before.
Workflows
Search and filter workflows
How can I search for workflows?
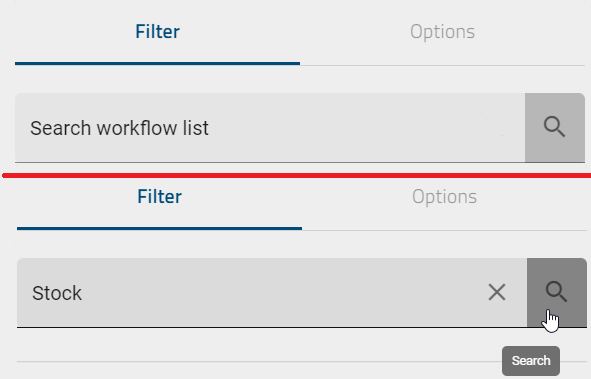
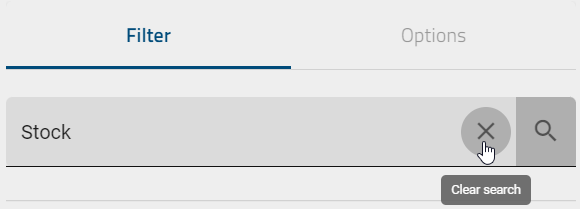
Every user can search for specific workflows in the list of available workflows. To do this, go to the Governance Cockpit menu item in the left menu bar. In the Filter panel in the right sidebar, you will find the Search workflows list input field. Enter your search term and start the search by pressing the Enter key or clicking the Search button. The search term can be the name of a diagram or catalog object. You can also use the username or email address of an initiator or of a user who had or currently has a workflow task.
Note
Here you can find an overview of the available options when using search terms.
After the search starts, a workflow list filtered by your search term is shown. Please note that the list may still be limited by your user role or access restrictions. If no results match your search term, a corresponding message is shown.
If you want to reset your search, click the Reset search and filters button. The full workflow list is then shown again.
Hint
In addition to the search term, you can also apply specific filters. Please note, however, that clicking the Reset search and filters button also removes all applied filters.
How can I filter workflows?
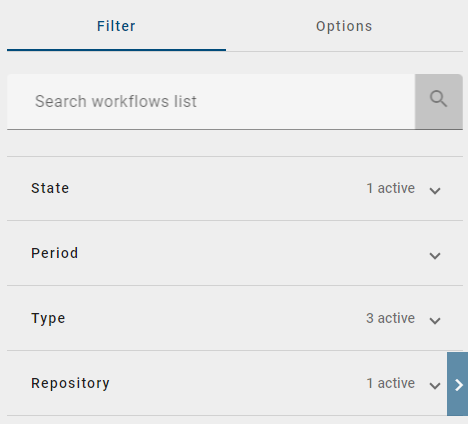
Every user can filter the workflow list to find a specific workflow more quickly. To do this, go to the Governance Cockpit menu item in the left menu bar. In the Filter panel in the right sidebar, you will find different options to filter the workflow list. Please note that the filtered list may still be limited by your user role or access restrictions. The available filters are explained below.
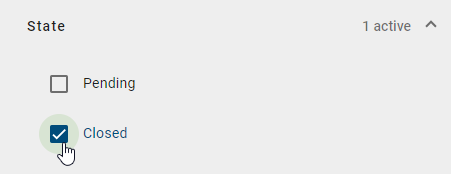
State: You can filter the list by the state of the workflows. By default, both open and closed workflows are shown. A workflow is Open if it has not yet been completed. Workflows that have been finished or aborted are considered Closed. When you select the corresponding option in the right sidebar, the list is filtered accordingly.
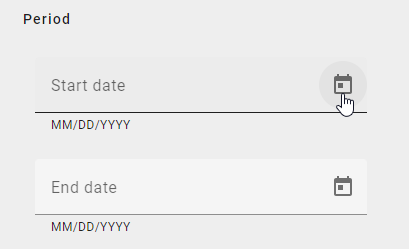
Period: With this filter, you can narrow down the time period by selecting a start and end date. You can either enter the start or end date directly in the input field or select the day in the calendar view. To open the calendar view, click the calendar icon on the right side of the corresponding input field.
Next, select the desired date in the calendar. Clicking on a date inserts it into the corresponding input field.
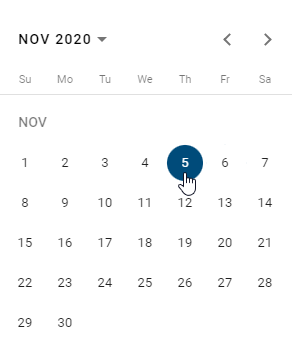
The workflow list is then filtered automatically. The date is displayed in the format of your selected content language. If only the start date is set, all workflows that started after this date are shown. If only the end date is set, all workflows that ended before this date or are still pending are shown. If both start and end dates are set, all workflows that started and ended within this period are listed.
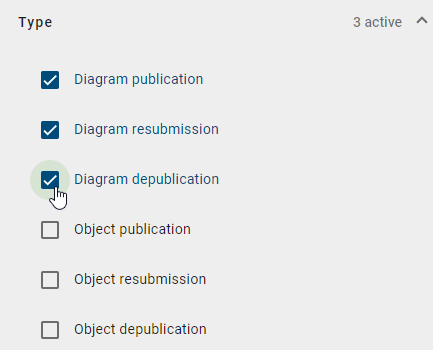
Type: You can filter workflows for both diagrams and catalog objects by the workflow types Publication, Depublication, Resubmission, and Update. You can select one or more types. After you make your selection, only workflows of the selected types are displayed.
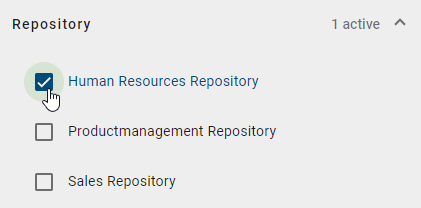
Repository: This filter shows the names of all repositories you can access. If a repository does not have a value in your current content language, the alternative language is used if possible. Once you select a repository, only workflows related to diagrams or catalog objects from this repository are shown. You can also filter by multiple repositories at the same time.
As soon as at least one filter is active in a filter facet, the number of active filters is shown next to the facet. This allows you to see at a glance which and how many filters are currently active, even if the facet is collapsed.
As an alternative to filtering, you can also search directly for individual workflows. You can also narrow down the search further by applying filters.
Audit trail
What information does the audit trail of a workflow provide?
The audit trail of a workflow provides a chronological record of all activities within the process. This allows you to see who performed which action, when, and for what reason. To view the audit trail of a workflow, go to the Governance Cockpit menu item in the left menu bar. Click a workflow in the workflow list to open the audit trail of the selected workflow.
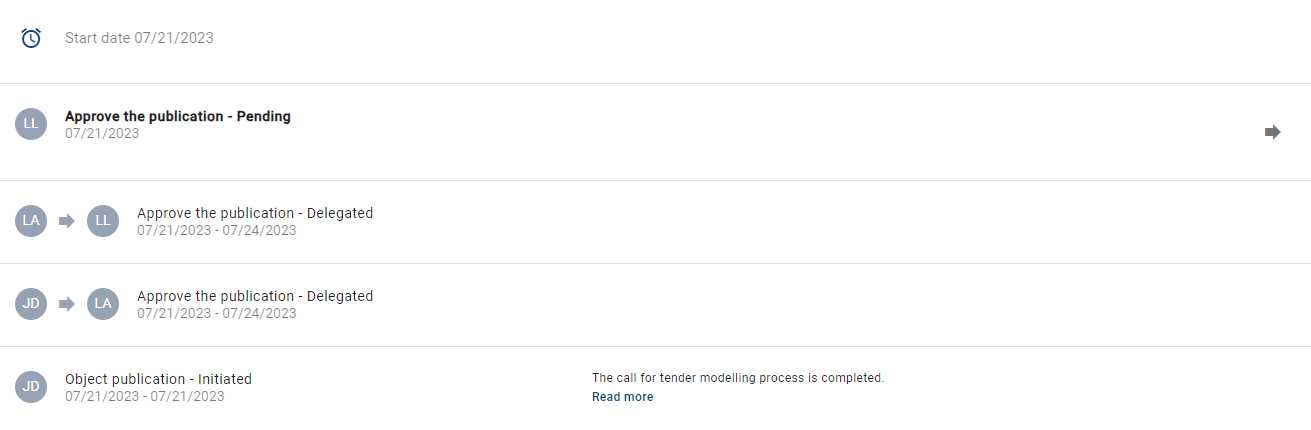
The audit trail displays the start date and the individual workflow steps in chronological order, arranged from bottom to top. The first step is always the initiation of the workflow.
On the left side of each step, a chip shows the initials of the user who performed that step. If you move the mouse over the chip, the full name of the user is displayed. If the workflow is a resubmission, the chip shows an Android symbol. Hovering over it displays the name Resubmission assistant. The related comment is shown on the right side of each step, if a comment was entered.
Hint
If a participating user is marked as inactive in the Governance Cockpit, that user has been deleted. The name of a deleted user is only marked as inactive if the user was deleted in version 7.9.0 or later. Please note that users deleted before version 7.9.0 cannot be displayed.
For change workflows carried out as part of the bulk update of diagrams in the Preview or Publication stages, you can view all update information in the audit trail. If not all diagrams could be updated successfully, the reasons are shown in the Diagram(s) not updated section.

In addition to the information shown in the audit trail, the Options panel is available in the right sidebar. Further details can be found here.
To return to the workflow list, click the Go to Workflow option in the header next to the workflow name, or click the back arrow in the header.

What options do I have in the audit trail of a workflow?
To view the options in the audit trail of a workflow, first go to the Governance Cockpit menu item in the left menu bar. Click a workflow in the workflow list. The audit trail of the selected workflow then opens. After that, the Options panel is available in the right sidebar.
In the Options panel, three options are shown, depending on your user role or the workflow type. First, you can open the related object directly, either a diagram or a catalog item. To do this, select Open diagram or Open catalog item.

The system always shows the related object in the correct stage. The stage depends on the workflow type. Please note that access to the object may be limited by your user role or access restrictions.
For completed publications, and also when opened from an audit trail, a resubmission, or a depublication, you are taken to the related object in the Publication stage of the corresponding repository.
For pending publications, or when a reviewer has requested a revision of a diagram, you are taken to the related object in the Preview stage of the corresponding repository.
Note
If BIC EAM has been purchased and activated, workflows of context diagrams can also be displayed. Depending on whether the context diagram was created through catalog modeling or diagram modeling, you will be redirected to the related catalog item or diagram view.
In addition, two more options are shown in the Options panel, depending on your user role or the workflow type. The explanations are linked below:
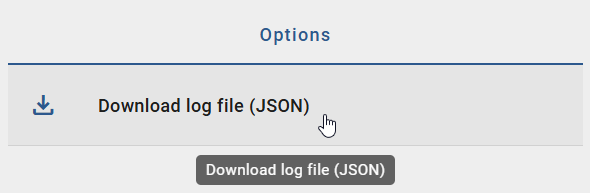
For change workflows created as part of the bulk update, you can download the log file (JSON). In this case, only the Download log file (JSON) option is shown in the Options panel.
Delegate and abort workflows
How can I delegate a workflow task?
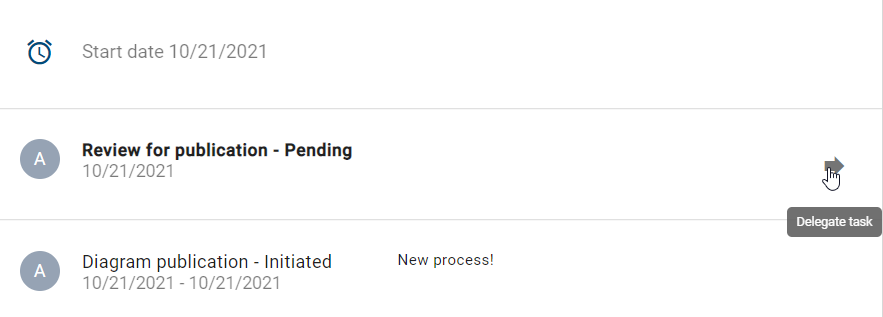
As a user with the Administrator or Editor role, you can delegate pending workflow tasks to other users. To do this, go to the Governance Cockpit menu item in the left menu bar and open a workflow with a pending end date from the workflow list. The audit trail of the selected workflow then opens. The pending task is shown at the top. By clicking the Delegate task button on the right side of the task, you can delegate it to another user.
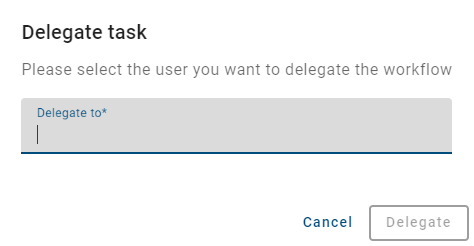
When you click the Delegate task button, a dialog opens. There, you can enter the name of the required user and select that user from the suggestion list. Clicking the Delegate button assigns the task to the selected user. The task then appears in that user’s task list and is removed from the previous task owner’s list. To cancel the delegation, click Cancel.
Hint
Please note that you cannot delegate a task to users with the Reader role, because that role does not have the necessary permissions to work on a task.
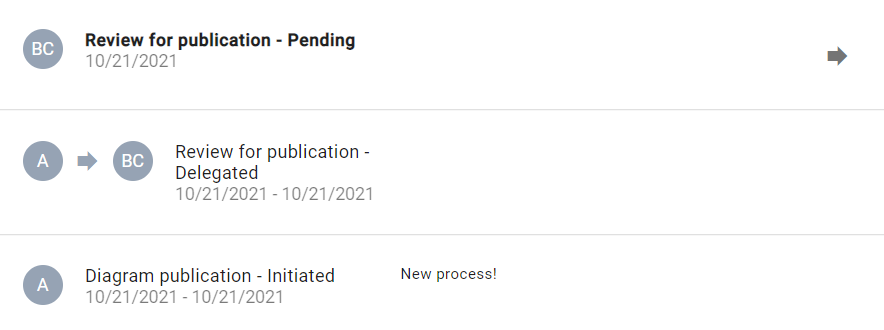
After you delegate the task to another user, this action is documented in the audit trail of the related workflow and is visible to all users.
Note
If a workflow is closed, meaning completed or aborted, tasks can no longer be delegated.
How can I abort a workflow?
Users with the Administrator or Editor role, as well as workflow initiators, can abort workflows before completion. This is only possible while a workflow task is still pending. To do this, go to the Governance Cockpit menu item in the left menu bar and open a workflow with a pending end date from the workflow list. The audit trail of the selected workflow then opens.
In the right sidebar, in the Options panel, the Abort workflow option is available. If you have a different user role or the workflow has already been completed, this option is shown as disabled.

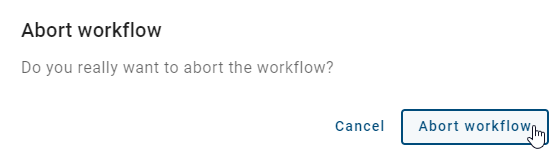
When you click this option, a security prompt appears to confirm the abort of the workflow. Click Abort workflow again to abort the workflow permanently. This action cannot be undone.
The workflow is then aborted, and the normal publication or depublication process is stopped. No further users receive a task. The initiator and any involved users are informed by email about the abort. The version of the diagram or catalog item remains in the stage it was in at the time of the abort. For example, after aborting a publication, the Preview stage still contains the diagram that was originally intended for publication.
Export and download workflows
How can I export all workflow tasks as an Excel file?
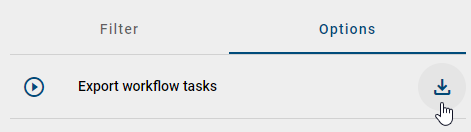
Users with the Administrator or Editor role can export all workflow tasks as an Excel file. The tasks to be exported can first be limited by applying filters in the Filter panel. To do this, go to the Governance Cockpit menu item in the left menu bar and switch to the Options panel in the right sidebar while you are in the Workflows tab. There, you will find the Export workflow tasks option, which you can run by clicking Export to Excel.

After you click the button, a notification appears at the bottom right of the screen saying that the Excel file is being generated. Once the file has been created, another notification appears with a link to download the export. Clicking the link downloads the Excel file.
Alternatively, a new button Download Excel file appears to the right of the Export workflow tasks option. You can also use this button to download the Excel file later.
After downloading the Excel file, the following data is available in the “workflow_export” sheet:
Workflow information
Workflow ID
Workflow type (Publication, Depublication, or Resubmission; each for an object or a diagram)
Name of the related entity and its type
Start date of the workflow
End date of the workflow
Task information
Task ID
Task type ((De-)Publication (initiation), approve publication or removal, review for publication or resubmission)
Task owner (email address for users, user group name for groups)
Date of task assignment
Date of task completion (empty for open tasks)
Hint
The dates in the exports, for example “Valid from”, “Valid to”, “Created date”, and similar values, are converted to the time zone of the active user. This ensures that date information is always shown in the current time zone of that user.
Hint
If a participating user is marked as inactive in the Governance Cockpit, that user has been deleted. The name of a deleted user is only marked as inactive if the deletion happened in version 7.9.0 or later. Please note that users deleted before version 7.9.0 cannot be displayed.
How can I download the archive of a workflow?
Every user can download the archive of a workflow if all required conditions are met. These conditions are:
The workflow must be of the type Depublication and must have been completed with approval, and
there must be no active workflow for the related object (diagram or catalog item).
To download the archive of a workflow, click the Governance Cockpit menu item in the left menu bar and open a completed workflow of the type Depublication from the workflow list. The audit trail of the selected workflow then opens.
In the right sidebar, in the Options panel, the Download archive option is shown. By clicking this option, the archive is downloaded as a .zip file. If the option is shown as disabled, the required conditions are not fulfilled.
Hint
Only the archive of the latest depublication of a workflow is available. For example, if a workflow was depublished several times, you can only access the archive of the most recent depublication.
Analytics
What information is displayed in the “Analytics” view?
Users with the Administrator or Editor role can get a broad overview of unpublished diagrams and catalog items, upcoming resubmissions, and completed publications for a specific repository. To open this view, click the Governance Cockpit menu item in the left menu bar and switch to the Analytics tab in the header of the main area.

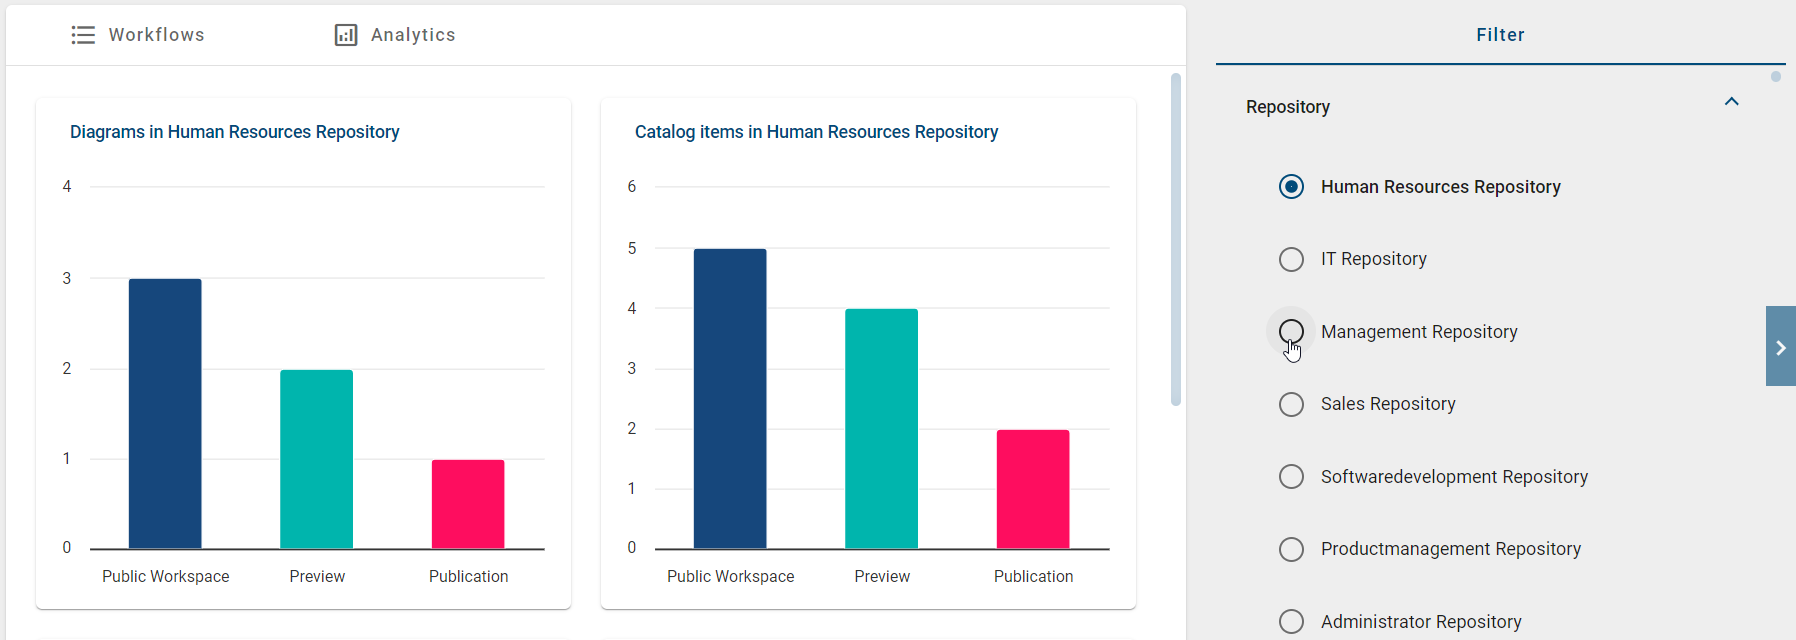
In this view, the diagrams and catalog items contained in the current repository are summarized in different bar charts. If you want to display data from another repository, use the Filter panel in the right sidebar to select the required repository. Only repositories for which you have access and no restrictions are shown.
The Analytics tab provides the following views, which are explained below:
Diagrams (catalog items) in the selected repository
Upcoming diagram (catalog item) resubmissions in the selected repository
Finished publications of diagrams (catalog items) in the selected repository
Diagrams (catalog items) in the selected repository:
These bar charts compare the number of diagrams (catalog items) in the three stages Public Workspace, Preview, and Publication. If you move the mouse over a bar, the number of diagrams (catalog items) in the related stage is shown.
This view shows directly how many diagrams (catalog items) are currently modeled but are not yet available to all users in the published version. If the number of diagrams (catalog items) in the Preview stage is much higher than in the Publication stage, this shows that many release workflows are still open and should be processed.
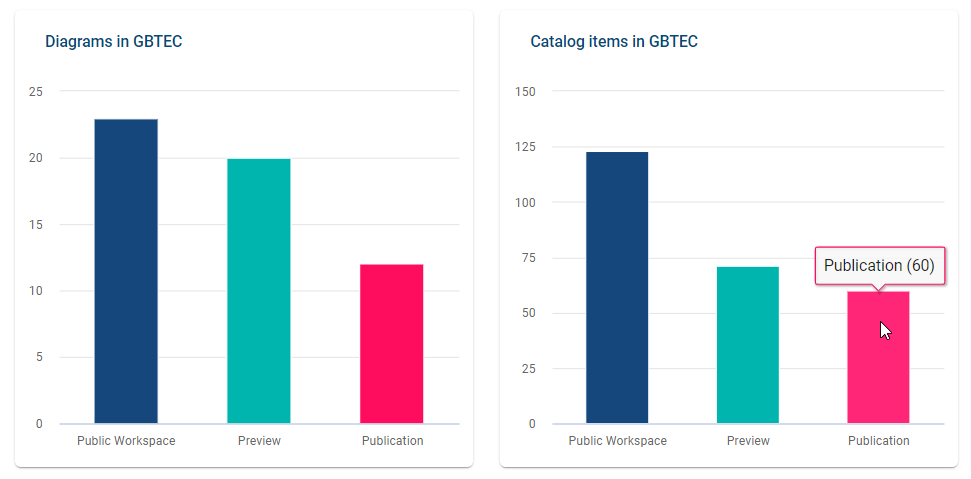
Note
The number of catalog items shown in this bar chart for the Publication stage (red bar) may differ from the number shown in the catalog list. This happens if the visibility of certain catalog object types has been disabled in the Administration. Catalog items of these types no longer appear in the list, but they are still counted as published catalog items in the bar chart. For more information about catalog item visibility, see this section of the documentation.
If you click a bar for diagrams (catalog items), you are redirected to the Dashboard tab of the “Diagrams” menu item or the “Catalog” menu item and placed in the selected stage. Navigation takes place within the selected repository. An explanation of these views can be found in the linked sections.
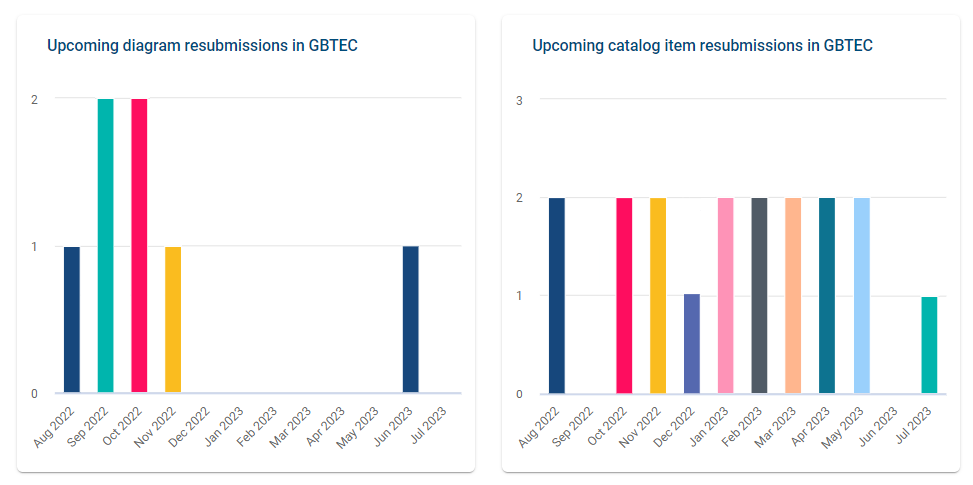
Upcoming diagram (catalog item) resubmissions in the selected repository:
These bar charts show the number of upcoming resubmissions of all diagrams (catalog items) in the selected repository for the next year. The timeline starts with the current month and year. Each bar represents all diagrams (catalog items) whose validity period ends in the related month. This helps you estimate the workload for quality assurance early. If you move the mouse over a bar, the exact number of upcoming resubmissions for that month is shown.
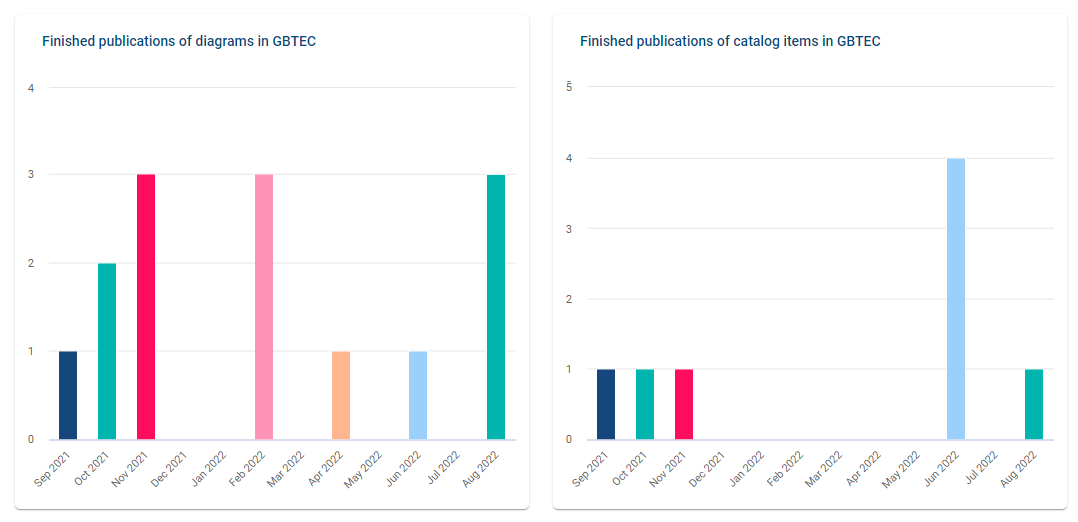
Finished publications of diagrams (catalog items) in the selected repository:
To provide an overview of the finished publications in the selected repository, these bar charts summarize the published diagrams (catalog items). For each month of the past year, a bar shows the number of diagrams (catalog items) for which a release workflow was completed in that month. The last bar shows the number of diagrams (catalog items) already published in the current month. If you move the mouse over a bar, the exact number of completed publications for that month is shown.
Hint
Please note that upcoming resubmissions and finished publications of diagrams and catalog items are based on validity dates. Unlike the workflow list, the data refers to the Valid to/Valid from date and not the Start and End date.
Roadmap
What information is displayed in the “Roadmap” view?
Users with the Administrator or Editor role can get a broad overview of the validity periods of published processes in the current repository. To do this, click the Governance Cockpit menu item in the left menu bar and switch to the Roadmap tab in the header of the main area.

To display the validity periods of published processes, the current repository must contain at least one published diagram with a valid validity period. Then you must select at least one filter in the Settings panel in the right sidebar. As soon as at least one filter is selected, the roadmap appears in the main area.

On the left side of the roadmap, the names of the published diagrams are listed alphabetically according to the current content language of the selected repository and in line with the selected filter criteria. If a diagram access restriction has been defined for you, these diagrams are not shown in the roadmap. Below the roadmap, there is a navigator whose width can be adjusted. This allows you to move through the whole roadmap and adjust the display.
Above the roadmap, there is a legend that shows the phases in the roadmap. By clicking a phase in the legend, you can show or hide that phase in the roadmap. Hidden phases are shown in gray in the roadmap. In addition, the phases are distinguished by color:
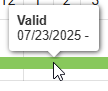
Valid (green): The time period in which the published diagram is valid.
Resubmission (yellow): The time period shortly before the validity date ends. This period matches the configured resubmission reminder in the Administration and can be changed at any time by the administrator.
Overdue (red): The time period in which the published diagram is no longer valid.

For each diagram, the roadmap shows the period with the start and end of validity. If no end date is defined, the roadmap shows a fictitious end date of +3 years. This indicates that the diagram remains valid for a longer period. For more detailed information about the validity period, move the mouse over the related phase.
Tip
For a meaningful roadmap, we recommend defining the validity periods of diagrams during diagram modeling.
Using this roadmap, you can display the validity periods of your current repository more clearly, identify overlaps or gaps, and react early to expiring or upcoming processes.
Note
Please note that the roadmap can display a maximum of 500 published processes.
How can I sort diagrams by name or validity period?
Users with the Administrator or Editor role can sort the diagrams shown in the roadmap by name or by validity period. To do this, click the Governance Cockpit menu item in the left menu bar and switch to the Roadmap tab in the header of the main area.
To display a roadmap of the validity periods of published processes, the current repository must contain at least one published diagram with a valid validity period. Then you must select at least one filter in the Settings panel in the right sidebar. As soon as at least one filter is selected, the roadmap appears in the main area.
On the left side of the roadmap, the published diagrams are listed alphabetically according to the current content language of the selected repository and based on the active filter criteria. To make the display clearer, you can define the order of the shown diagrams yourself. To do this, go to the left side of the roadmap and click the Sort button.

Here, you can choose whether the diagrams should be sorted alphabetically or by validity period. For alphabetical sorting, you can choose A to Z or Z to A. For time-based sorting, you can sort the diagrams by the Valid from or Valid to date, either from oldest to newest or from newest to oldest.
As soon as you select a sorting option, the list of shown diagrams is updated automatically. Diagrams without a Valid to date are still included by using an automatically assigned date so that they can be sorted correctly.
How can I switch directly from the roadmap to the related diagram?
Users with the Administrator or Editor role can switch directly from the roadmap to a diagram. To do this, click the Governance Cockpit menu item in the left menu bar and open the Roadmap tab.
Note
Please note that the roadmap is only shown if the current repository contains at least one published diagram with a defined validity period. In addition, at least one filter must be selected in the Settings panel in the right sidebar.
On the left side of the roadmap, you see an alphabetically sorted list of published diagrams. The list is based on the selected filters. If a diagram access restriction is defined for you, these diagrams are not shown.
To switch to a diagram, click its name in the list.
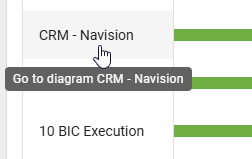
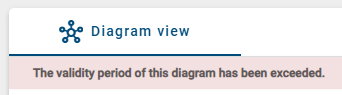
After clicking, the diagram opens in the Publication stage. If the validity period has already expired, a notification is shown.